Changing the headset on a mountain bike is a task that can transform your ride’s feel and safety. Whether your steering feels rough, you want a smoother turn, or you’re upgrading to a better system, this guide will show you how to do it confidently at home.
For many riders, the headset is a mystery part—often ignored until there’s a problem. Learning to change it not only saves money but also gives you control over your bike’s performance.
Many beginners believe headset replacement needs a mechanic, but with the right tools and steps, most people can handle it themselves. This article will walk you through every detail, from understanding headset types to the actual installation. If you’re unsure about tools, mistakes to avoid, or how to pick the best headset for your mountain bike, you’ll find clear answers here.
Let’s start by understanding what a headset does and why it matters.
What Is A Mountain Bike Headset?
A headset is a group of bearings, cups, and related parts. It connects your bike’s fork to the frame, letting the handlebars turn smoothly. If the headset is worn out, steering can feel stiff or loose—sometimes even unsafe.
Main Functions
- Allows steering by letting the fork rotate inside the frame
- Supports weight and absorbs shock from rough terrain
- Keeps the fork and frame aligned
Without a healthy headset, your mountain bike can become difficult to control. That’s why regular checks and replacement are important.
Types Of Headsets
There are several headset designs. Knowing which you have is crucial before buying a replacement.
- Threaded headset: Older bikes often use these. The fork has threads, and the headset screws onto it.
- Threadless headset (Aheadset): Most modern mountain bikes use these. The headset clamps around a smooth fork steerer tube.
- Integrated headset: Bearings sit directly in the frame without pressed cups.
- Semi-integrated (Zero stack): Cups are pressed into the frame, but bearings sit inside the cups.
Here’s a comparison to help you identify your type:
| Headset Type | Common On | Installation Complexity |
|---|---|---|
| Threaded | Older bikes | Medium |
| Threadless | Modern MTBs | Easy |
| Integrated | High-end frames | Easy |
| Semi-integrated | Mid-range bikes | Medium |
Why Change Your Headset?
- Steering feels rough or loose
- Hear creaking or grinding
- Upgrading to better bearings
- Frame or fork replacement
Ignoring headset issues can lead to expensive damage or dangerous riding conditions.
Tools And Parts Needed
Changing a headset requires some tools, but most are easy to find. Investing in the right tools makes the job smoother and safer.
Essential Tools
- Allen wrenches (4, 5, 6mm)
- Headset cup remover (for pressed cups)
- Headset press tool (for installing cups)
- Hammer and soft punch
- Grease
- Crown race setter (for fork)
- Cable ties (for holding cables out of the way)
- Torque wrench (for final adjustments)
You can use DIY alternatives for some tools, like a piece of wood instead of a crown race setter. But purpose-made tools reduce mistakes.
Parts
- New headset (matching your bike’s size and type)
- Optional: New spacers or top cap
- Replacement bearings (if not included)
Identifying Headset Size
Most mountain bikes use 1 1/8 inch (28.6mm) steerer tubes. But some bikes use tapered or oversized tubes. Check your bike’s specs before buying. Using the wrong size can lead to steering failure.
Credit: www.firstcomponents.com
Preparing Your Bike For Headset Replacement
Preparation is key. Taking time to set up your workspace and bike makes the process easier and safer.
Steps To Prepare
- Clean your bike: Dirt and debris can get into the bearings.
- Secure the bike: Use a stand or lean the bike against a wall.
- Remove front wheel: This gives you better access.
- Remove brake cables: If needed, unclip or loosen cables to free the handlebars.
- Take photos: Documenting each stage helps with reassembly.
Many beginners skip cleaning, but leftover grit can ruin new bearings quickly. Always clean around the headset area before starting.
Removing The Old Headset
Taking out the headset can be tricky, but going step by step helps avoid mistakes.
Removing Components
- Loosen stem bolts: Use an Allen wrench to remove the stem from the fork’s steerer tube.
- Remove spacers and top cap: Keep these safe—they may be reused.
- Slide fork out: Carefully pull the fork down and out of the frame.
- Remove headset bearings: Take out any bearings, seals, or cups.
If your bike has a threaded headset, you’ll need to unscrew the locknut and remove washers first.
Removing Pressed Cups
For non-integrated headsets, cups are pressed into the frame.
- Insert headset cup remover into the cup.
- Tap gently with a hammer to knock the cup out.
- Repeat for both upper and lower cups.
Removing The Crown Race
The crown race is a small ring pressed onto the fork’s base.
- Use a crown race remover or a flat screwdriver.
- Tap gently all around the race until it loosens.
Avoid using excessive force—it can damage the fork.
Cleaning After Removal
After all parts are out, clean the frame and fork thoroughly. Old grease, dirt, or rust should be wiped away. Inspect for cracks or damage, especially around the head tube and fork.

Credit: www.youtube.com
Installing The New Headset
This is the main part of the process. Accuracy matters—a poorly installed headset can cause steering problems.
Preparing Parts
- Check that all headset parts are present.
- Grease bearing surfaces and inside headset cups.
- Grease the fork’s crown race area.
Pressing New Cups
If your headset uses pressed cups:
- Place the cup in the frame’s head tube.
- Use a headset press tool to push the cup in evenly.
- Repeat for the other cup.
If you don’t have a headset press, you can use a threaded rod with washers and nuts as a DIY press. Don’t use a hammer alone—uneven force can damage the frame.
Installing Crown Race
- Place the crown race on the fork’s base.
- Use a crown race setter or soft punch to tap it into place.
- Check that it sits flush and level.
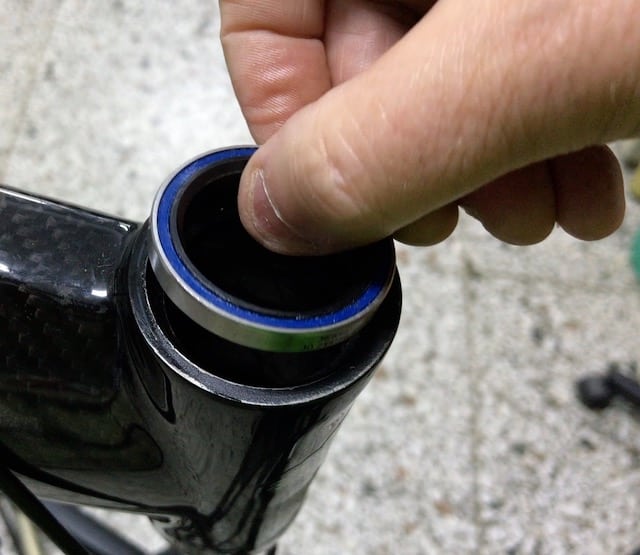
Inserting Bearings
- Place bearings into the cups or directly into the frame (for integrated headsets).
- Grease bearings lightly.
Reassembling Fork And Stem
- Slide fork back up into the frame.
- Add spacers as needed.
- Replace the stem and top cap.
For threadless headsets, the top cap holds everything together. Tighten it gently—too tight can crush bearings.
Aligning Handlebars
- Align handlebars with the front wheel.
- Tighten stem bolts using a torque wrench (usually 5-6 Nm).
Checking For Smoothness
Spin the handlebars left and right. They should move smoothly without resistance or play. If you feel roughness or looseness, check bearing seating and bolt tightness.
Common Mistakes And How To Avoid Them
Many first-timers make errors that affect headset life and bike safety. Here are some to watch out for:
- Using wrong size headset: Always check frame and fork size.
- Not greasing bearings: Dry installation can lead to quick failure.
- Over-tightening top cap: Can crush bearings, leading to rough steering.
- Misaligning stem: Causes steering problems.
- Skipping cleaning: Dirt ruins new bearings.
Even experienced mechanics sometimes miss greasing the crown race. This can cause creaks or extra wear.
Choosing The Right Headset For Your Mountain Bike
Picking the correct headset is vital. There are many brands and models—focus on what matters for your riding style and bike.
Key Factors
- Type: Match headset to frame and fork design.
- Material: Alloy is common, but ceramic bearings offer smoother performance.
- Sealing: Good seals protect against mud and water.
- Weight: Lighter headsets reduce overall bike weight.
- Durability: Higher-end models last longer and require less maintenance.
Here’s a comparison of popular headset materials:
| Material | Weight (grams) | Durability | Cost |
|---|---|---|---|
| Aluminum | 80-120 | Medium | Affordable |
| Steel | 120-180 | High | Low |
| Ceramic | 60-90 | Very High | Expensive |
Most mountain bikers prefer aluminum for its balance between weight and strength.
Popular Headset Brands
- Chris King
- Cane Creek
- FSA
- Hope
These brands are known for reliability and smooth performance. Cheaper headsets may work, but often need replacement sooner.
When To Upgrade
If you ride in wet or muddy conditions, look for headsets with high-quality seals. If weight matters, ceramic bearings can save grams. For casual riders, basic alloy headsets offer good value.
Real-world Examples And Statistics
Headset problems are common. In a survey of mountain bike owners, 42% reported headset issues within three years. Most problems were caused by poor installation or lack of maintenance.
Professional racers often replace headsets every season. For regular riders, a quality headset can last 3–5 years with proper care.
A common non-obvious insight: many riders don’t realize that headset stiffness can be fixed by adjusting the top cap—sometimes, there’s no need to replace the headset at all.

Credit: www.youtube.com
Step-by-step Guide: Changing A Threadless Headset
Let’s walk through a typical threadless headset replacement, which is the most common on mountain bikes.
1. Remove Handlebars And Stem
- Loosen stem bolts with an Allen wrench.
- Slide stem and handlebars off the steerer tube.
2. Remove Spacers And Top Cap
- Unscrew top cap.
- Take off spacers.
3. Slide Out Fork
- Gently pull the fork down and out.
4. Remove Old Bearings And Cups
- Take out bearings.
- Use a cup remover to knock out old cups.
5. Clean Frame And Fork
- Wipe all surfaces with a cloth.
6. Press In New Cups
- Grease cups.
- Use headset press to push cups into frame.
7. Install Crown Race
- Place crown race on fork.
- Tap gently until seated.
8. Insert Bearings
- Place bearings in cups.
9. Reinstall Fork
- Slide fork up into the frame.
10. Add Spacers And Stem
- Put spacers back.
- Slide stem onto steerer tube.
11. Tighten Top Cap
- Screw in top cap gently.
- Do not overtighten.
12. Align Handlebars
- Make sure handlebars are straight.
13. Tighten Stem Bolts
- Use torque wrench to secure stem.
14. Check For Smooth Steering
- Test movement.
- Adjust as needed.
Each step is important. Skipping one can lead to issues. If you get stuck, look for video guides or visit a bike mechanic.
Maintenance Tips After Headset Replacement
A new headset needs proper care. Neglecting maintenance shortens its life.
Regular Checks
- Inspect headset every 3 months for looseness or roughness.
- Check after crashes or hard rides.
Cleaning And Lubrication
- Wipe headset area after muddy rides.
- Re-grease bearings yearly.
Tightening
- Use a torque wrench for stem bolts.
- Check tightness periodically.
Signs Of Trouble
- Creaking or grinding sounds
- Play (movement) in handlebars
- Stiff steering
If you notice these, recheck installation or consult a mechanic.
A non-obvious tip: avoid using high-pressure water near the headset. It can force dirt and water into the bearings.
How Headset Replacement Improves Mountain Bike Performance
A well-installed headset makes steering precise and smooth. Here’s how it affects your ride:
- Better control: Responsive steering, especially on rough trails.
- Reduced fatigue: Smoother turns mean less effort.
- Longer bike life: Prevents frame and fork damage.
- Safer rides: No surprise loosening or steering failure.
Many riders report noticeable improvement after headset replacement. It’s one of the most cost-effective upgrades for mountain bikes.
Troubleshooting Common Problems After Replacement
If your bike feels wrong after changing the headset, here’s what to check:
- Handlebars loose: Stem not tightened enough.
- Steering rough: Bearings misaligned or crushed.
- Creaking: Lack of grease or improper crown race installation.
- Fork play: Top cap not tight or wrong size headset.
If you can’t fix the issue, seek help from a bike shop. Sometimes, frame or fork damage is the real cause.
Cost Breakdown: Headset Replacement
Changing a headset is affordable compared to other bike repairs. Here’s a typical cost breakdown:
| Item | Cost (USD) |
|---|---|
| Basic headset | $25–$50 |
| High-end headset | $80–$200 |
| Headset press tool | $40–$80 |
| Crown race setter | $20–$35 |
| Labor (bike shop) | $40–$70 |
DIY replacement saves on labor. If you ride often, owning headset tools can be a smart investment.
Safety Precautions During Headset Replacement
Safety is important. Here are some key precautions:
- Wear gloves to protect your hands.
- Use eye protection when hammering.
- Work in a well-lit space.
- Avoid rushing—mistakes happen when you hurry.
If you’re unsure about any step, pause and research or ask for help.
When To Seek Professional Help
Some situations are best handled by a mechanic:
- Frame damage: Cracks or dents near the head tube.
- Stuck headset cups: Can be hard to remove without special tools.
- Unusual headset size: Rare or oversized parts.
For most standard mountain bikes, DIY replacement is safe and effective.
Frequently Asked Questions
What Are Signs My Mountain Bike Headset Needs Changing?
Look for rough steering, creaking sounds, or movement in the handlebars. If adjustments don’t help, it’s time to replace the headset.
Can I Change The Headset Without Special Tools?
It’s possible, but not recommended. You can use DIY tools for pressing cups, but purpose-made tools prevent frame damage and make the job easier.
How Often Should I Replace My Mountain Bike Headset?
With regular maintenance, a quality headset lasts 3–5 years. Replace sooner if you ride in wet or muddy conditions.
Is It Safe To Ride With A Worn Headset?
No. A worn headset can cause steering failure or frame damage. Replace or repair as soon as you notice issues.
Where Can I Learn More About Mountain Bike Headsets?
A good resource is the Wikipedia Headset Page, which explains headset types and installation in detail.
Changing your mountain bike headset brings a better ride and peace of mind. With the right tools and careful steps, you can handle the job confidently and safely. The upgrade is not just about smoother steering—it’s about enjoying every trail, knowing your bike is ready for adventure.

Hello Guys! I am John Reese, a professional biker and my hobby is biking! I have been biking for last 12 years and I love using bikes while outing as well. Based on my experiences with the different type of bikes (mountain bikes, road bikes and hybrid bikes); I am sharing my opinion about various bikes so that a beginner can get started right away. Happy reading!