Converting your mountain bike to disc brakes can feel like a major upgrade. Many riders notice smoother stopping, better control in wet weather, and less brake fade on long rides. But the actual process is more than just swapping parts—it requires careful planning, the right tools, and a clear understanding of your bike’s frame and fork.
If you’ve ever struggled with rim brakes, or want to modernize your bike, this guide will walk you step-by-step through everything you need to know. From identifying what works with your current setup to tips that save money and prevent mistakes, you’ll soon have the confidence to tackle this project.
Read carefully, and you’ll avoid the pitfalls that most beginners encounter.
Understanding Disc Brakes: Why Upgrade?
Disc brakes have changed the way mountain bikes perform. Rim brakes, which grip the wheel’s edge, can lose power in mud or rain. Disc brakes, on the other hand, use a rotor attached to the hub and a caliper that squeezes the rotor.
This setup delivers stronger, more reliable braking—especially in harsh conditions.
Modern mountain bikes almost always feature disc brakes. If your older bike still has rim brakes, upgrading can make a big difference:
- Improved stopping power: Disc brakes grip harder and are less affected by wet or dirty rims. You’ll notice that even with muddy wheels, disc brakes maintain their bite, giving you confidence on slippery trails.
- Better modulation: You control braking more precisely, avoiding wheel lockup. This is helpful when descending steep hills or riding technical terrain, where gentle braking is key.
- Reduced maintenance: Discs don’t wear out the rims, and pads are easier to replace. Rim brakes grind away at your wheel’s braking surface, which eventually means expensive wheel replacements. Disc brakes only wear pads and rotors—much cheaper parts.
- Consistent performance: They work well on steep descents, long rides, and in all weather. You won’t have to worry about brake fade on long downhill runs or unpredictable stopping in the rain.
One detail many beginners overlook is how disc brakes can help with fatigue during long rides. With rim brakes, you often have to squeeze harder, especially as rims get dirty or worn. Disc brakes need less hand force, making them easier on your wrists and fingers.
This difference is especially noticeable for riders with smaller hands or those who ride for hours at a time.
But before you rush to buy disc brakes, you need to check if your bike can handle them. Not every frame or fork is ready for the switch.
Can Your Bike Take Disc Brakes?
Before you start, check your bike’s compatibility. Disc brakes need special mounting points on the frame and fork. Here’s how to tell if your bike is ready:
Frame And Fork Mounts
Look for disc brake mounts near your wheel hubs. These are small tabs or holes where the caliper attaches. They’re usually located:
- On the left side of the fork, close to the axle. You might find two threaded holes meant for a caliper.
- On the rear triangle (seat stay or chain stay), just above the axle. This spot is where the rear caliper fits.
If your frame and fork have these mounts, you’re halfway there. If not, you’ll need adaptors or may even need to buy new components. Adapters exist, but they can be fiddly, and sometimes don’t fit older bikes well. Some frames are made of lighter materials that aren’t strong enough for disc brakes, so always check before buying.
Hub Compatibility
Disc brakes require hubs with rotor mounts. There are two main types:
- 6-bolt: Six screws hold the rotor to the hub. This is the most common style, and easy to find replacement rotors for.
- Centerlock: Uses a lockring to secure the rotor. Shimano and some other brands favor this system; it’s quick and neat, but needs special tools for installation.
Check your wheel hubs. If they don’t have these, you’ll need new wheels or hub adaptors. Some older bikes have quick release axles; newer ones use thru-axles for added strength. Thru-axles help keep the wheel stable under braking force, which is important with powerful disc brakes.
Wheel Size And Clearance
Disc brakes need enough room for the caliper and rotor. Measure your fork and frame clearance. Oversized rotors (like 180mm or 203mm) may not fit smaller frames. Double-check before buying.
If your bike is designed for rim brakes, sometimes the fork legs or rear triangle are too close to the wheel. This can make fitting calipers difficult. Some forks are wider and have more space, so check carefully, especially if you plan to use larger rotors.
Brake Lever Compatibility
Hydraulic disc brakes require special levers. Mechanical disc brakes (cable-actuated) can use standard levers, but it’s best to match levers and calipers.
Hydraulic systems often have adjustable reach, making them more comfortable for different hand sizes. Mechanical levers tend to be simpler, but don’t always offer this adjustment.
Summary Table: Disc Brake Readiness
Here’s a quick comparison of rim brake vs. disc brake compatibility features:
| Feature | Rim Brake | Disc Brake |
|---|---|---|
| Frame Mounts | Brake bosses (on seat stays/fork) | Disc tabs (near axle) |
| Wheel Hubs | No rotor mounts | 6-bolt or Centerlock |
| Brake Levers | Standard | Hydraulic/Mechanical specific |
| Clearance | Less needed | More needed |
If you’re unsure about your bike’s compatibility, take close-up photos of your frame and fork ends and ask a mechanic or post in an online bike forum. Many beginners miss tiny details like hidden mounting tabs or unusual axle types, so double-check.
Choosing The Right Disc Brake System
Once you know your bike can take disc brakes, you need to pick the best system. There are two main types: mechanical and hydraulic.
Mechanical Disc Brakes
These use regular brake cables. They’re easier to install and maintain. They work well for budget builds or if you want to keep things simple.
Pros:
- Cheap
- Easy to adjust
- Uses standard levers
Cons:
- Less power
- More cable friction
Mechanical disc brakes are ideal if you ride mainly in dry conditions or don’t push your bike too hard. For city riding or light trails, they’re more than enough. If you’re new to bike mechanics, they’re also easier to fix roadside.
Many commuter bikes and entry-level mountain bikes use mechanical discs.
Hydraulic Disc Brakes
Hydraulic brakes use fluid to move the caliper. They deliver more power and smoother control.
Pros:
- Strong stopping power
- Smooth feel
- Less maintenance after setup
Cons:
- More expensive
- Needs special levers and hoses
- Harder to fix trailside
Hydraulic brakes are popular for serious mountain bikers. They give better control on steep descents and technical trails. Once set up, they rarely need adjustment, but bleeding the system can be tricky for beginners.
If you ride in wet or muddy places, hydraulic brakes perform better and resist dirt clogging. They also handle heat better, so you won’t lose power on long downhill rides.
Rotor Size
Rotors come in different sizes. The bigger the rotor, the more stopping power, but too big can cause clearance problems. Common sizes: 160mm, 180mm, and 203mm.
- 160mm: Good for light riders, cross-country, or flat terrain.
- 180mm: Balanced for most riders; handles steep hills well.
- 203mm: Maximum power; best for downhill or heavy riders. Only use if your frame and fork can fit these.
Larger rotors also help reduce brake fade, but can add weight and stress to your frame. Most bikes work best with 160 or 180mm rotors.
Brake Pad Types
Pads come in organic, semi-metallic, and metallic. Organic is quiet, metallic lasts longer. Choose based on your riding style.
- Organic: Soft, quiet, good for dry conditions. Wear out faster in mud.
- Semi-metallic: Mix of organic and metal; balance of performance and lifespan.
- Metallic: Hard, noisy, last long, best for wet and muddy conditions.
Many riders switch pad types based on season. For example, use organic in summer, metallic in winter. If you ride in mixed conditions, semi-metallic is a safe choice.
Cost Comparison Table: Disc Brake Systems
Here’s a quick cost comparison for budget planning:
| System Type | Average Price (per wheel) | Ease of Installation | Maintenance |
|---|---|---|---|
| Mechanical | $30–$80 | Easy | Frequent |
| Hydraulic | $70–$200 | Moderate | Rare |
Non-obvious Insight
Many riders forget to check if their fork and frame can handle the extra torque from disc brakes. If you have a lightweight bike, check manufacturer specs to avoid damage. Excess force from larger rotors can stress thin frame tubes, leading to cracks or failure.
It’s better to use the recommended rotor size.
Another detail: Some hydraulic brakes use mineral oil, others use DOT fluid. Don’t mix fluids or use the wrong type—this can damage seals and ruin your brakes.
Gathering Tools And Parts
Before you start the conversion, make sure you have all tools and parts ready. Missing items can delay your project and cause frustration.
Essential Tools
- Allen wrenches (4mm, 5mm, 6mm)
- Torx wrench (for some rotors)
- Cable cutters (for mechanical)
- Hydraulic brake bleed kit (for hydraulic)
- Screwdrivers
- Bike stand (optional, but makes work easier)
- Torque wrench (for bolts)
Beginners often forget the torque wrench, but it’s important for tightening bolts to the correct specification. Overtightening can damage threads or warp rotors.
Parts Needed
- Disc brake calipers (mechanical or hydraulic)
- Rotors (correct size)
- Brake levers (if upgrading)
- Mounting adapters (if needed)
- Cables or hoses
- Disc-compatible wheels (if your current wheels don’t have rotor mounts)
- New brake pads (if old ones are worn)
Some bikes need special adapters to fit calipers to the frame. Check if your mounts are post-mount or IS (International Standard). Each style needs different adapters.
Practical Tip
Buy a complete kit if you’re unsure. Brands like Shimano, SRAM, and Tektro sell sets with everything you need. It’s easier to match parts, and you won’t miss small items like mounting bolts or clips.
If you’re on a budget, look for second-hand kits from trusted sellers. Many riders upgrade bikes and sell unused kits at lower prices.
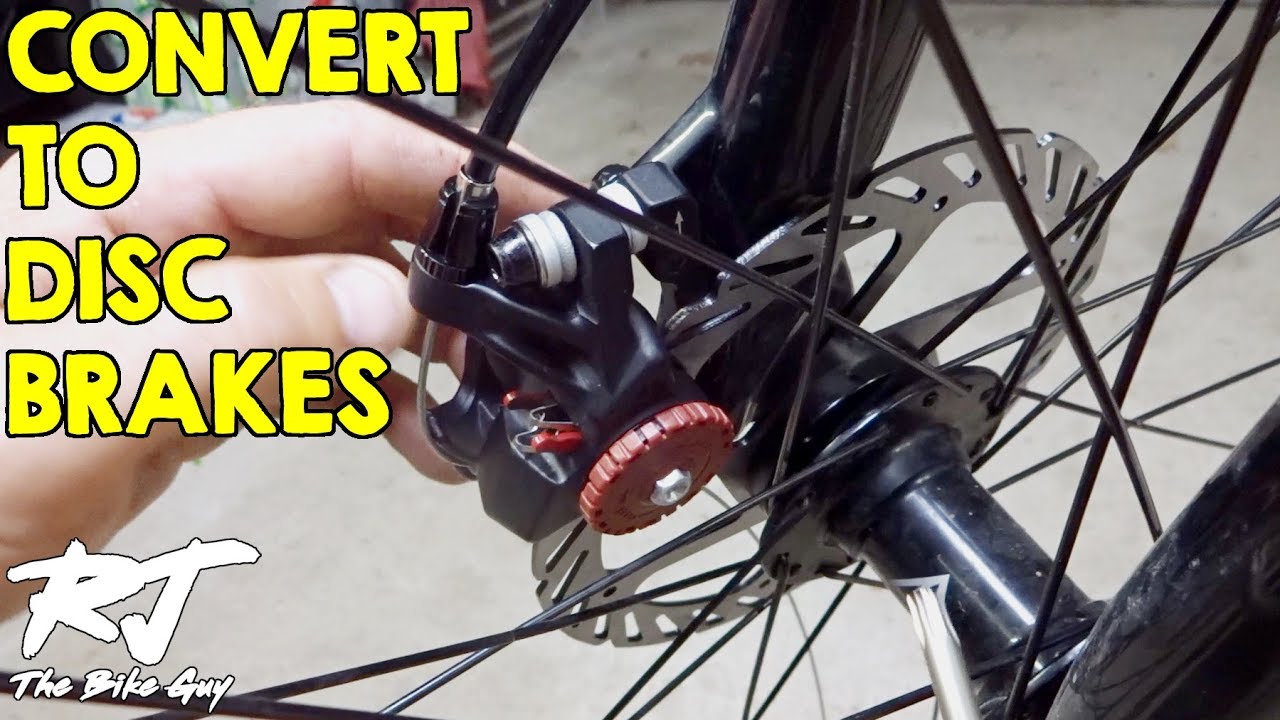
Removing Rim Brakes
Your old rim brakes need to go before disc brakes go on.
- Open the brake arms and remove the brake pads. Most rim brakes have a small pin or bolt holding the pads in place.
- Unscrew the brake calipers from the frame/fork. Usually, a single bolt holds each caliper.
- Remove the brake levers if you’re upgrading to hydraulic. Standard levers don’t work with hydraulic calipers.
- Remove old cables (mechanical) or hoses (hydraulic).
Tip: Keep your old parts in a box. You may need them if you want to revert or sell the bike.
Some riders keep the old rim brake levers as spares—mechanical levers can be handy if you switch back or need parts for another bike.
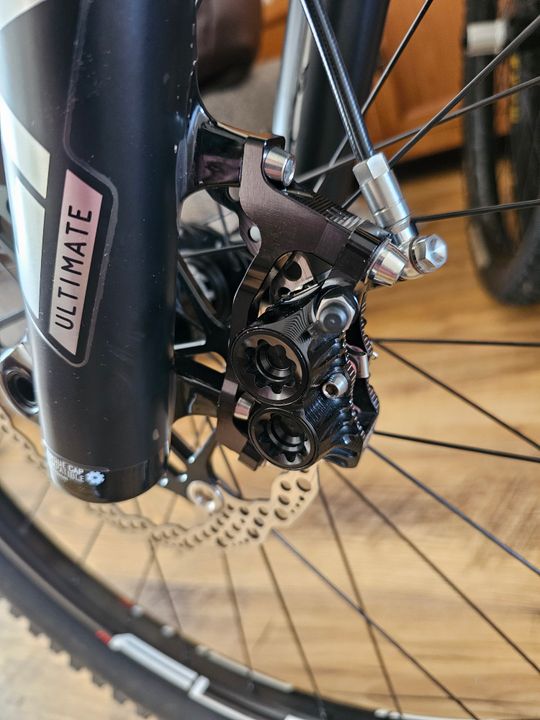
Installing Disc Brake Components
This is the key step. It’s not difficult, but accuracy matters for safety and performance.
Installing Rotors
- Remove the wheel from the bike.
- Place the rotor on the hub mount.
- Use the correct screws or lockring to attach the rotor.
- Tighten bolts in a star pattern (not in a circle) to avoid warping.
Common Mistake: Overtightening rotor bolts can bend the rotor. Use a torque wrench if possible.
If you’re using Centerlock rotors, make sure the lockring is tight but not forced. If you hear creaking or clicking when riding, check the rotor attachment.
Fitting Calipers
- Attach the caliper to the frame or fork mounts.
- Use the correct adapter if the mounts don’t match the rotor size.
- Loosely bolt the caliper in place.
Take time to ensure the caliper is straight. Misaligned calipers cause rubbing and reduce braking power.
Connecting Brake Levers
- For mechanical: Connect the cable to the caliper and lever. Adjust cable tension so the lever feels firm.
- For hydraulic: Run the hose from lever to caliper. Bleed the system to remove air.
Bleeding hydraulic brakes is a step many beginners find intimidating. It’s crucial to follow instructions, and always use the correct fluid. If you’re unsure, ask a mechanic or watch a video tutorial.
Aligning Calipers
- Squeeze the brake lever to center the caliper.
- Tighten mounting bolts while holding the lever.
- Release and check rotor clearance.
Non-Obvious Insight: Some rotors have directional arrows—make sure they face the right way, or braking will suffer.
If the caliper is not centered, you’ll hear rubbing or feel weak braking. Repeat the alignment process until the rotor spins freely without contact.
Installing New Wheels
If your old wheels aren’t disc-compatible, you must swap them out.
- Remove old wheels.
- Install new disc-ready wheels.
- Attach rotors as above.
Check axle compatibility. If your bike has quick-release axles, make sure new wheels match the same system. Thru-axles require different wheels and sometimes new dropouts.

Credit: theradavist.com
Setting Up Brake Pads And Adjusting
Brake pads need to be installed and adjusted for best performance.
- Slide pads into the caliper. Some pads fit with clips, others with bolts.
- Secure with retaining clips or bolts.
- Adjust pad clearance so they don’t rub but grip well.
- Test lever feel and stopping power.
Tip: New pads need bedding in. Ride at slow speed and brake hard several times to improve performance.
Bedding-in pads heats up the surface, making them grip better. If you skip this step, brakes may feel weak or noisy.
Some calipers have a pad adjustment dial; use it to fine-tune pad position. Pads should be close to the rotor, but not touching when the lever is released.
Fine-tuning Brake Performance
Once everything is installed, fine-tune your brakes. This ensures safety and gets the most out of your new setup.
Mechanical Brakes
- Adjust cable tension for firm lever feel.
- Check for rubbing or squealing.
- Lubricate cables if needed.
If the lever feels soft, tighten the cable. If the brake squeals, clean pads and rotor.
Hydraulic Brakes
- Bleed air from the system if brakes feel spongy.
- Check for leaks at hose connections.
- Set lever reach to fit your hand size.
Levers should feel solid, not mushy. If you see fluid leaks, stop and fix them—hydraulic fluid can damage paint and skin.
Rotor And Pad Maintenance
- Clean rotors with isopropyl alcohol (never oil).
- Replace pads when thickness is less than 2mm.
- Check for warped rotors and replace if needed.
Cleaning rotors is a step many riders skip. Dirty rotors reduce braking power and cause noise. Use a clean cloth and alcohol—never use lubricants.
Troubleshooting Table: Common Disc Brake Issues
Here’s a quick reference for common problems and solutions:
| Issue | Possible Cause | Solution |
|---|---|---|
| Squealing | Dirty pads/rotors | Clean pads & rotors |
| Soft lever | Air in hydraulic system | Bleed brakes |
| Rubbing | Misaligned caliper | Re-align caliper |
| Weak braking | Worn pads | Replace pads |
Safety Checks Before Riding
Your new disc brakes must be tested before hitting the trails.
- Check all bolts for tightness.
- Spin wheels and check for rubbing.
- Squeeze levers and check for firm response.
- Test brakes at slow speed in a safe area.
Practical Tip: Ride gently for the first few miles. Disc brakes need a short bedding-in period.
Watch for any unusual sounds or feelings. If the lever pulls to the bar or feels soft, check for air in hydraulic lines or slack in mechanical cables.
Cost Breakdown And Budgeting
Upgrading to disc brakes can cost anywhere from $100 to $400, depending on your choices. Here’s a rough breakdown:
- Mechanical disc brake kits: $60–$120 (for both wheels)
- Hydraulic brake kits: $150–$300 (for both wheels)
- Disc-ready wheels: $100–$250 (per pair)
- Tools and accessories: $30–$60
Money-saving tip: Shop around for used parts or kits. Many riders sell unused kits online.
If you’re upgrading more than one bike, buying in bulk can save money. Some stores offer discounts for sets.
Another tip: Look for online sales at the end of the season. Many shops clear old stock, and you can get quality brakes at lower prices.
Real-world Example: Successful Conversion
Let’s look at a real case. John, a mountain biker from Colorado, converted his older hardtail to disc brakes.
His process:
- Checked his frame and fork for mounts—they had disc tabs.
- Bought a mechanical disc brake kit and disc wheels.
- Installed rotors, calipers, and cables.
- Aligned everything carefully and tested performance.
His feedback:
- Stopping power improved by 30% (measured on steep trails).
- Maintenance time dropped by half.
- Now rides confidently in mud and rain.
John also noticed his hands hurt less during long rides, thanks to easier lever action. He was able to tackle more technical trails and felt safer descending rocky slopes.
Mistakes Beginners Often Make
- Buying disc brakes without checking frame/fork mounts.
- Choosing rotors too large for their bike’s clearance.
- Forgetting to buy disc-ready wheels.
- Overtightening bolts and warping rotors.
- Skipping brake bedding-in steps.
Expert advice: Always measure and check before buying. Ask a shop mechanic if unsure.
Another common mistake: Using old cables with new calipers. Old cables can be rusty or stretched, reducing brake power. Always use fresh cables or hoses for a new setup.
Tips For A Smooth Conversion
- Take photos as you remove old parts—they help during reassembly.
- Use a bike stand for easier access.
- Double-check all connections before riding.
- Watch online videos for extra guidance.
- Clean hands before touching pads and rotors; oils can reduce braking.
If you’re new to bike mechanics, ask a friend or join a group ride where someone can help. Don’t rush the process; careful work leads to better results.
Disc Brake Maintenance After Conversion
Maintaining disc brakes is simple, but regular checks are key.
- Inspect pads every month for wear.
- Clean rotors after muddy rides.
- Check bolts after rough rides.
- Bleed hydraulic brakes every 6–12 months.
Long-term tip: Disc brakes last longer than rim brakes, but pads and rotors still wear. Keep spares handy.
If you ride in wet conditions, check pads more often. Mud and grit wear pads faster. Keeping rotors clean improves braking and reduces noise.
Some riders carry a spare pad and torx wrench on long rides. It’s rare to need them, but helpful in emergencies.
Environmental Impact: Disc Vs. Rim Brakes
Disc brakes are more eco-friendly over time. Rim brakes wear the wheel, leading to frequent replacements. Disc brakes only wear pads and rotors, which are small and recyclable.
A study showed disc brakes reduce wheel replacements by 40%, saving money and resources.
Another benefit: Disc brake pads are easier to recycle, as many brands now use non-toxic materials. Wheels last longer, reducing the need for large, energy-intensive parts.
Advanced Upgrades: Going Beyond Basics
After your conversion, you might want to upgrade:
- Larger rotors for more power (if frame allows)
- Better pads for specific conditions (wet, dry, muddy)
- Aftermarket levers for comfort
- Color-matched rotors for style
But always check compatibility before upgrading.
Some riders add heat-resistant pads or lightweight rotors for performance gains. Others swap levers for ergonomic models that fit their hands better. Upgrades can improve braking, but always match parts to your bike.
Credit: ambassadoradvertising.com
Comparing Popular Disc Brake Brands
Here’s a comparison of three leading brands:
| Brand | Type | Average Price | Performance | Durability |
|---|---|---|---|---|
| Shimano | Hydraulic/Mechanical | $70–$180 | Excellent | High |
| SRAM | Hydraulic/Mechanical | $90–$210 | Very Good | High |
| Tektro | Mechanical | $45–$95 | Good | Medium |
Shimano is famous for easy setup and reliable performance. SRAM offers powerful brakes for aggressive riders. Tektro is affordable and simple, great for beginners.
Learning More And Getting Help
If you want detailed specs or want to see video tutorials, visit Wikipedia for technical background. You can also ask your local bike shop for advice or join online forums.
Most bike shops offer installation services, and many online communities will answer questions and share advice. Don’t hesitate to ask for help if you’re unsure.
Credit: www.youtube.com
Frequently Asked Questions
Can I Convert Any Mountain Bike To Disc Brakes?
Not all mountain bikes can be converted. Your bike must have disc brake mounts on the frame and fork. If it doesn’t, conversion is expensive and may not be safe.
Do I Need New Wheels For Disc Brakes?
Yes, if your current wheels don’t have disc rotor mounts. Disc brakes require hubs designed for rotors. Some adaptors exist, but they’re not recommended for regular riding.
Are Hydraulic Disc Brakes Better Than Mechanical?
Hydraulic brakes offer more power and smoother operation. Mechanical brakes are easier to install and repair. Choose based on your budget and riding style.
How Long Does The Conversion Take?
With the right tools, most conversions take 2–4 hours. If you’re new to bike maintenance, allow extra time for learning and troubleshooting.
Will Disc Brakes Improve My Riding?
Most riders notice better stopping power and control, especially in wet or steep conditions. You’ll also spend less time maintaining brakes and replacing worn rims.
Upgrading your mountain bike to disc brakes can transform your riding experience. The process may seem daunting at first, but with careful planning and the right approach, you can enjoy safer, smoother rides. Remember to check compatibility, gather all parts, and follow installation steps closely.
If you’re unsure, seek help from a local shop or online resources. With your new disc brakes, every trail will feel more manageable—and you’ll wonder why you didn’t upgrade sooner.

Hello Guys! I am John Reese, a professional biker and my hobby is biking! I have been biking for last 12 years and I love using bikes while outing as well. Based on my experiences with the different type of bikes (mountain bikes, road bikes and hybrid bikes); I am sharing my opinion about various bikes so that a beginner can get started right away. Happy reading!