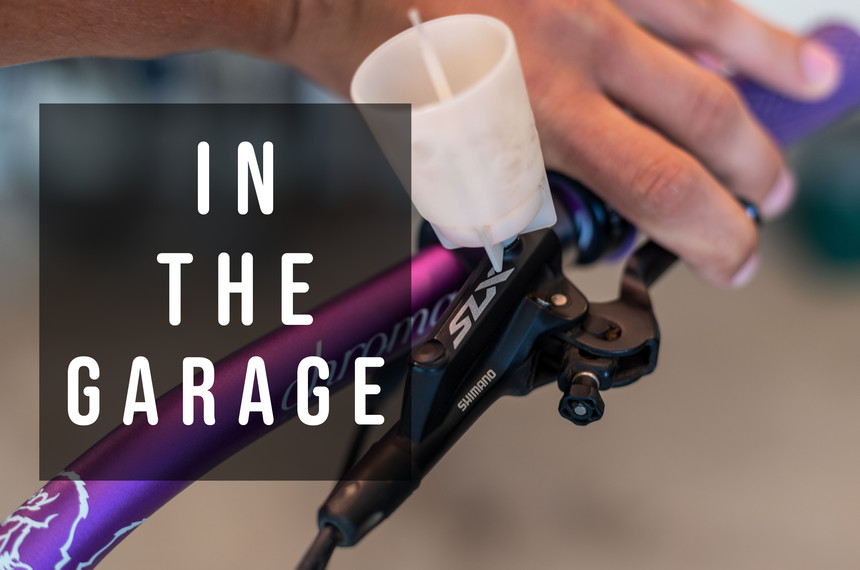
Bleeding brakes on a mountain bike is one of those jobs that sounds complicated until you try it. But if you ride often, knowing how to bleed your brakes can save you from sudden failures and expensive shop visits. Hydraulic disc brakes are common on modern mountain bikes, and keeping them properly bled is key to safe, reliable stopping.
In this guide, I’ll walk you through the process, step by step, with clear explanations and tips to help you avoid mistakes. Whether you’re new to bike maintenance or just want to improve your skills, this article will give you the confidence to handle brake bleeding like a pro.
Why Bleeding Your Brakes Matters
Hydraulic brakes use fluid to transfer force from your lever to the caliper. Over time, air can get trapped inside the system. When air enters, your brakes feel spongy or weak, and your stopping power drops. This is dangerous, especially on steep or technical trails.
Bleeding removes the air and old fluid, restoring the firm feel and strong stopping power. It also helps prevent corrosion and keeps your brakes working smoothly. Most bike mechanics recommend bleeding brakes at least once a year, or whenever you notice a drop in performance.
Tools And Materials Needed
Before starting, gather the right tools. Using proper tools prevents damage and makes the job easier.
- Bleed kit: Usually includes syringes, tubing, adapters, and catch bottles. Buy a kit that fits your brake brand (Shimano, SRAM, etc. ).
- Brake fluid: Use the fluid recommended by your manufacturer. Most mountain bikes use DOT fluid (like DOT 4 or DOT 5.1) or mineral oil. Never mix them.
- Allen keys: Typically 2mm to 5mm, for opening bleed ports.
- Torx wrench: Needed for some brake brands.
- Rubber gloves: Protects your skin from brake fluid.
- Paper towels/rags: For cleanup.
- Isopropyl alcohol: For cleaning spilled fluid.
- Zip ties: Optional, for securing hoses.
- Small container: To hold used fluid.
Some brands require unique adapters or tools. Always check your brake manual before starting.
Safety Precautions
Brake fluid can harm skin and eyes, and it damages paint and plastic. DOT fluid is especially harsh. Work in a well-ventilated area, wear gloves, and keep fluid away from children and pets. If you spill fluid, clean it immediately with isopropyl alcohol.
Never use DOT fluid in mineral oil brakes (or vice versa). Mixing fluids can ruin seals and cause leaks. If unsure, check your brake lever or caliper—most list the correct fluid.
Understanding Hydraulic Brake Systems
Before you bleed, it helps to know how hydraulic brakes work. The system has:
- Brake lever: Pumps fluid when squeezed.
- Brake hose: Carries fluid from lever to caliper.
- Caliper: Houses pistons that press pads against the rotor.
- Bleed port: Small screw or valve where fluid and air exit.
When you squeeze the lever, fluid pushes the pistons, creating braking force. If air is present, it compresses and softens the force, making your brakes less effective.
Dot Fluid Vs Mineral Oil
The choice of fluid affects how you bleed your brakes. DOT fluid absorbs moisture, so it needs changing more often. Mineral oil lasts longer but is less tolerant to heat. Never mix the two; even a few drops of the wrong fluid can damage seals.
| Fluid Type | Common Brands | Maintenance Interval | Hazard Level |
|---|---|---|---|
| DOT Fluid | SRAM, Avid | Annually | High |
| Mineral Oil | Shimano, Magura | 2 Years | Moderate |
Preparing Your Bike
Set up your workspace before starting. This prevents accidents and makes the process smoother.
- Place your bike on a stable stand. The rear wheel should be off the ground.
- Remove the wheel if recommended (especially for rear brakes).
- Clean the caliper and lever area with isopropyl alcohol.
- Cover painted surfaces with rags to protect from spills.
- If your brakes have a pad spacer, insert it to keep pistons apart.
Some bikes require the lever to be higher than the caliper for easier bleeding. Check your brake manual for the best position.
Step-by-step Brake Bleeding Process
The exact steps can vary depending on your brake model, but the general process is similar for most hydraulic brakes. Here’s a clear walk-through.
1. Open Bleed Ports
Find the bleed port on your brake lever or caliper. Most use a small screw or plug.
- Use the correct tool (Allen or Torx) to loosen the port.
- Attach the syringe or tubing from your bleed kit to the port.
2. Remove Old Fluid
Draw out old fluid with a syringe. If the fluid is dark, contaminated, or cloudy, it’s time for a bleed.
- Attach a catch bottle or second syringe to the caliper bleed port.
- Push the lever to force old fluid out.
3. Add New Fluid
Fill the syringe with fresh brake fluid. Always use new fluid—never reuse old or contaminated fluid.
- Push fluid slowly through the system, from the caliper to the lever (or vice versa, depending on brand).
- Watch for bubbles. Air will appear as tiny bubbles in the fluid.
4. Eliminate Air Bubbles
Tap the hose and caliper gently to loosen trapped air. Some mechanics rotate the lever or caliper to help bubbles rise.
- Continue pushing fluid until no bubbles appear in the catch bottle.
- If bubbles persist, repeat the process.
5. Close Ports And Clean Up
Once all air is gone and fresh fluid is in the system:
- Remove syringes and tubing.
- Tighten bleed ports securely (but don’t over-tighten).
- Wipe away any spilled fluid with alcohol.
- Reinstall wheel and check for leaks.
6. Test Brake Lever
Squeeze the lever several times. It should feel firm and responsive. If it still feels spongy, repeat the bleed.
Common Mistakes To Avoid
Beginners often miss these points:
- Using the wrong fluid type.
- Over-tightening bleed ports, causing leaks.
- Forgetting to clean spilled fluid, which damages paint.
- Not removing air fully, leading to spongy brakes.
- Reusing old fluid, which contains moisture and dirt.
Pay attention to these details for best results.
Credit: www.tetongravity.com
Brand-specific Bleeding Tips
Different brands have unique steps and tools. Here are some key differences.
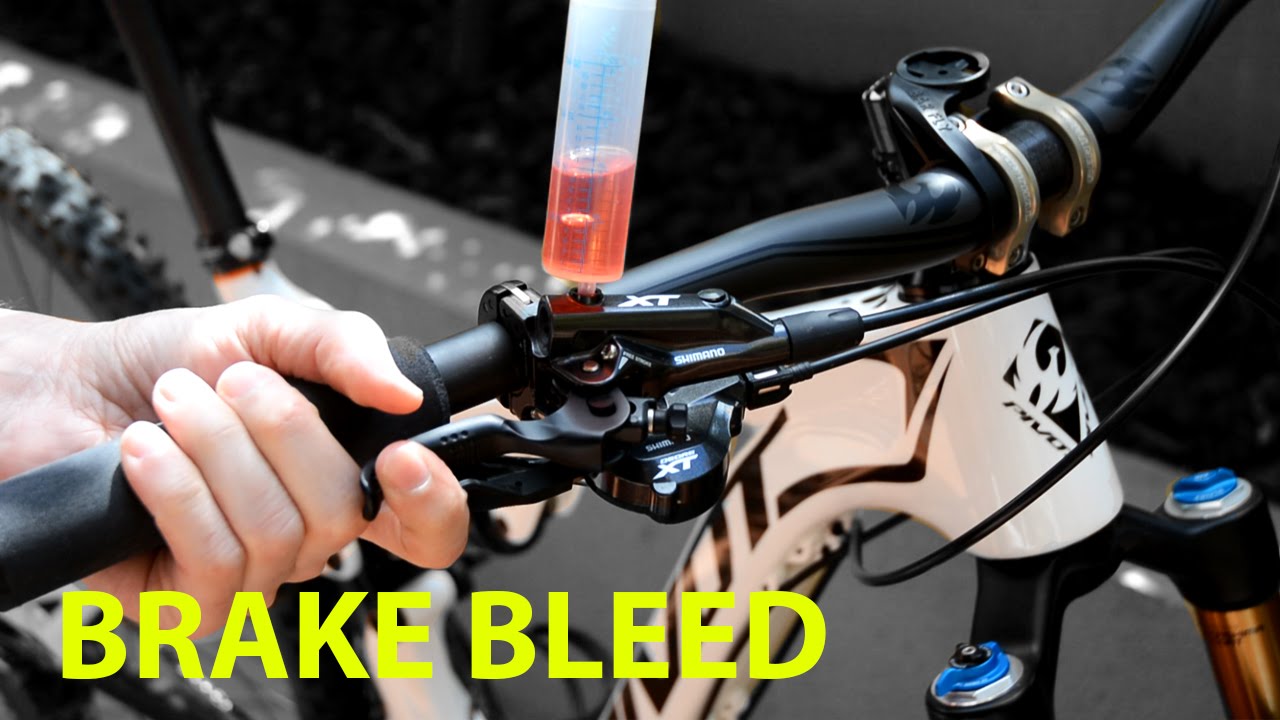
Shimano Brakes
Shimano uses mineral oil and a funnel system for bleeding.
- Attach funnel to lever bleed port.
- Fill funnel with mineral oil.
- Open caliper bleed port, push fluid through.
- Shimano recommends a “gravity bleed”—let oil flow down naturally.
Sram Brakes
SRAM uses DOT fluid and a two-syringe method.
- Attach one syringe to lever, one to caliper.
- Push fluid back and forth to remove air.
- DOT fluid absorbs moisture, so change it more often.
Magura Brakes
Magura also uses mineral oil but often requires special adapters.
- Use adapter for lever port.
- Push fluid from caliper to lever.
- Watch for unique bleed port designs.
| Brand | Fluid Type | Bleed Method | Unique Tool |
|---|---|---|---|
| Shimano | Mineral Oil | Gravity Funnel | Bleed Funnel |
| SRAM | DOT Fluid | Two Syringes | Syringe Kit |
| Magura | Mineral Oil | Push from Caliper | Lever Adapter |
Signs Your Brakes Need Bleeding
Watch for these signs:
- Spongy lever feel: Lever moves easily, lacks resistance.
- Reduced stopping power: Takes longer to stop, especially on descents.
- Lever travel: Lever nearly touches handlebar before brakes engage.
- Noisy brakes: Air in system causes squealing or grinding.
- Fluid leaks: Fluid around lever or caliper means seals may be compromised.
If you notice any of these, bleed your brakes as soon as possible.
Practical Tips For Success
Some tips make the process easier and safer:
- Always use new brake fluid; old fluid absorbs moisture and can cause corrosion.
- Work slowly—rushing can force air into the system.
- Keep everything clean. Dirt can block ports or cause leaks.
- If you have multiple bikes, label your bleed kits. Using the wrong kit can cause contamination.
- After bleeding, check your pads and rotors for contamination. If fluid gets on them, clean with isopropyl alcohol.
Non-obvious Insights
- Temperature matters: If you bleed brakes in a cold garage, fluid can move slowly and air can stay trapped. Warm fluid flows better and releases bubbles more easily.
- Pad wear affects bleeding: Worn pads change piston position. If you bleed with old pads, new pads may cause the pistons to sit differently, making brakes feel odd. Use a pad spacer or bleed with new pads installed.
How Often Should You Bleed Your Brakes?
Frequency depends on fluid type, riding style, and conditions.
- DOT fluid: Bleed at least once a year, or after 100 hours of riding.
- Mineral oil: Bleed every 2 years, or when performance drops.
- If you ride in wet or muddy conditions, bleed more often.
- After big crashes or hard rides, check for leaks or air.
Many riders ignore maintenance until problems appear. Regular bleeding prevents costly repairs and keeps you safe.

Credit: www.amazon.com
Troubleshooting Common Problems
If your brakes still don’t feel right after bleeding, here’s what to check:
- Persistent spongy feel: Air remains. Repeat the bleed, tap caliper and hose to release trapped bubbles.
- Leaking fluid: Inspect seals, hoses, and bleed ports. Replace damaged parts.
- Brake lever won’t firm up: Check for kinked hoses or blocked ports.
- Brake pads contaminated: Clean with alcohol, replace if necessary.
- Rotor not clean: Wipe with alcohol before testing brakes.
Sometimes, deep air bubbles hide inside the caliper. If repeated bleeding fails, take your bike to a professional mechanic.
Comparing Diy Vs Professional Bleeding
Some riders prefer to let a mechanic handle brake bleeding. Here’s how the two compare:
| Aspect | DIY Bleeding | Professional Service |
|---|---|---|
| Cost | Low (just tools/fluid) | High ($40–$80 per brake) |
| Time | 30–60 minutes | Drop-off, 1–2 days |
| Skill Needed | Moderate | None |
| Quality Control | Variable | Consistent |
| Learning | Yes | No |
If you ride often and want to learn more about your bike, DIY bleeding is cost-effective and empowering. For complex problems or lack of time, professional service is reliable.
Credit: www.youtube.com
Environmental Impact Of Brake Fluid
Used brake fluid, especially DOT, is hazardous. Never pour fluid down the drain or throw it in the trash. Collect used fluid in a sealed container and take it to a hazardous waste facility. Mineral oil is less toxic but still needs proper disposal.
Keeping brake fluid out of the environment protects waterways and wildlife.
For more details, check the EPA’s guidelines on hazardous waste: EPA Household Hazardous Waste.
Frequently Asked Questions
How Do I Know If I Used The Wrong Brake Fluid?
If you use the wrong fluid, seals can swell or leak. You might see fluid leaking from the lever or caliper, or brakes may fail suddenly. If you suspect you used the wrong fluid, flush the system completely and replace seals if needed.
Can I Bleed Brakes Without A Bleed Kit?
It’s possible, but not recommended. Bleed kits provide proper tools, prevent spills, and allow you to push fluid safely. Without a kit, you may introduce air or damage ports. Invest in a kit for best results.
How Long Does It Take To Bleed Mountain Bike Brakes?
Most DIY bleeds take 30 to 60 minutes per brake, including setup and cleanup. First-timers may need longer. Professionals can do it faster, but you pay for labor.
What Happens If Air Stays In The System?
Air in the system causes spongy brakes and poor stopping power. In extreme cases, brakes may fail completely. Always bleed until all air is gone for safe riding.
Do I Need To Bleed Both Front And Rear Brakes?
Yes. Both brakes should be bled regularly. Front brakes handle most stopping power on descents, while rear brakes help control speed. Bleeding both ensures balanced performance.
Bleeding your mountain bike brakes is a skill worth learning. It keeps your ride safe, improves confidence, and saves money. With the right tools, fluid, and attention to detail, anyone can do it at home. Remember to check your brake manual, follow safety steps, and dispose of fluid responsibly.
If you ever feel unsure, ask a professional mechanic for help. Happy trails and safe stopping!

Hello Guys! I am John Reese, a professional biker and my hobby is biking! I have been biking for last 12 years and I love using bikes while outing as well. Based on my experiences with the different type of bikes (mountain bikes, road bikes and hybrid bikes); I am sharing my opinion about various bikes so that a beginner can get started right away. Happy reading!