Removing the rear wheel from a mountain bike can feel intimidating if you’ve never done it before. You might worry about damaging the chain, gears, or disc brakes, or you may simply not know where to start. Yet, with the right guidance, this task becomes quick and manageable—even for beginners.
Whether you need to fix a flat tire, clean your drivetrain, or pack your bike for travel, learning to remove your rear wheel is a skill that saves time and stress. This guide explains each step in clear language, highlights common mistakes, and compares different rear wheel setups, so you can handle your mountain bike with confidence.
Understanding Your Mountain Bike Rear Wheel
Before you start, it helps to know a bit about the rear wheel’s parts and how they interact. The rear wheel connects to your bike through the axle, which can be either a quick release or a thru-axle. It holds the cassette (the cluster of gears), which connects to the chain and derailleur (the gear-shifting mechanism). Some bikes have disc brakes, while others use rim brakes. Knowing these terms makes the process easier.
Quick Release Vs. Thru-axle
Most modern mountain bikes use one of two systems to hold the rear wheel in place. Here’s a comparison:
| Feature | Quick Release | Thru-Axle |
|---|---|---|
| Ease of Removal | Very easy, no tools needed | Needs an Allen key or special tool |
| Security | Less secure | More secure, prevents flex |
| Common on | Older or entry-level bikes | Mid-range and high-end bikes |
| Time to Remove | 10–30 seconds | 30–60 seconds |
Key Parts Involved
- Axle: The rod holding the wheel to the bike frame.
- Cassette: The set of gears on the rear wheel.
- Derailleur: The mechanism that shifts gears and moves the chain.
- Chain: Transfers power from pedals to the wheel.
- Brakes: Either disc or rim.
Non-obvious Insight
Many beginners don’t realize that the derailleur is spring-loaded. This means it can move out of the way, making removal easier. Also, if your bike has disc brakes, you must avoid squeezing the brake lever when the wheel is off, or you risk damaging the pads.
Preparing To Remove The Rear Wheel
Preparation is important. It prevents mistakes and makes the process smoother.
What You Need
- Bike stand (optional): Keeps the bike upright.
- Gloves: Protects your hands from grease.
- Allen key (usually 5mm or 6mm): Needed for thru-axle bikes.
- Clean rag: For wiping parts.
Positioning The Bike
- Shift gears so the chain is on the smallest cog of the cassette. This reduces tension on the derailleur and chain.
- Place your bike upright. If you don’t have a stand, turn it upside down or lean it against a wall.
Why Gear Position Matters
Shifting to the smallest cog makes the chain slack, which helps when removing the wheel. If you skip this step, the chain may be tight and harder to handle.
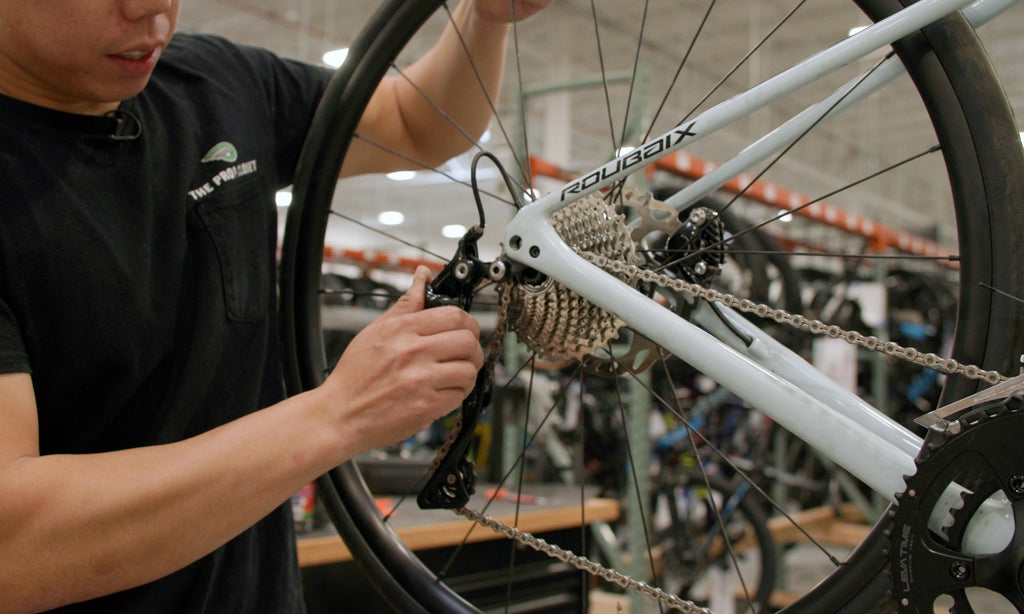
Credit: www.theproscloset.com
Step-by-step Guide: Removing The Rear Wheel
Now, let’s walk through the process. The steps differ slightly depending on whether you have a quick release or thru-axle.
For Quick Release Rear Wheels
- Open the quick release lever.
- Find the lever on the axle, usually on the left side.
- Pull the lever outward to open it.
- Loosen the tension.
- If the wheel feels stuck, turn the lever counterclockwise a few times to loosen it.
- Move the derailleur out of the way.
- Gently push the derailleur backward (towards the rear of the bike). This gives you space to remove the wheel.
- Lift the wheel out.
- Hold the wheel and lift it straight up and out. The chain should slip off the smallest cog.
For Thru-axle Rear Wheels
- Locate the thru-axle bolt.
- Find the bolt, usually on the non-drive (left) side.
- Unscrew the axle.
- Use an Allen key to turn the bolt counterclockwise until it comes out.
- Move the derailleur out of the way.
- Push the derailleur backward gently.
- Remove the wheel.
- Pull the wheel straight up and out.
Dealing With Disc Brakes
If your bike has disc brakes:
- Avoid squeezing the brake lever while the wheel is off.
- If you do, the pads may close and make it hard to reinstall the wheel.
Common Mistakes
- Forgetting to shift to the smallest cog.
- Forcing the wheel out without moving the derailleur.
- Squeezing the brake lever with the wheel removed (disc brakes only).
Example: Flat Tire Repair
Imagine you’re on a trail and get a flat. You shift to the smallest cog, open the quick release, move the derailleur, and lift the wheel out. You fix the flat, then reinstall the wheel (covered in a later section).
This saves time and lets you get back to riding.
Removing The Rear Wheel: Troubleshooting
Sometimes, the wheel won’t come out easily. Here are common issues and solutions.
Wheel Stuck In Dropouts
- Check if the quick release or axle is fully loosened.
- Wiggle the wheel gently while pushing the derailleur back.
Chain Won’t Come Off
- Make sure you’re on the smallest cog.
- Gently lift the chain off the cog with your fingers if needed.
Axle Won’t Unscrew
- Try a different Allen key (sometimes keys wear out).
- Add a small drop of lubricant if the axle is stuck.
Disc Brakes Blocking Removal
- Check if the rotor is caught on the pads.
- Move the wheel slowly and adjust the angle.
Derailleur Jammed
- Don’t force it. Check for debris or damage.
- Push the derailleur body—not the cage—backwards.
Comparing Mountain Bike Rear Wheel Setups
Different bikes have different rear wheel setups. Here’s a comparison of three common types:
| Setup | Main Feature | Removal Difficulty | Common Issue |
|---|---|---|---|
| Quick Release | Lever action | Easy | Loose after long rides |
| Thru-Axle | Bolted, needs tool | Moderate | Axle stuck in mud |
| Bolt-On | Nut and wrench | Hard | Needs extra tools |
Bolt-on wheels are rare on modern mountain bikes but common on older or budget bikes. They require a wrench and take longer to remove.
Practical Tips For Smooth Rear Wheel Removal
- Practice at home before riding trails. You’ll be faster and more confident.
- Keep tools handy in your backpack or saddlebag.
- Clean the chain and derailleur regularly. Dirt makes removal harder.
- Lubricate the axle every few months.
- Check quick release tension. Too loose is unsafe, too tight makes removal hard.
Non-obvious Insight
If you ride in muddy conditions, thru-axles can seize due to dirt. Carry a small brush to clean the axle before removal.
Safety Considerations When Removing The Rear Wheel
Safety matters—especially if you’re new to bike maintenance.
- Wear gloves to protect from sharp gears.
- Don’t force anything; forcing can damage the derailleur or frame.
- Keep your face clear of the wheel when removing, as sudden movement can cause injury.
- Inspect the axle and quick release for signs of wear or damage.
Example: What Can Go Wrong
If you force the wheel out without moving the derailleur, you may bend the derailleur hanger. This can cause shifting problems and is expensive to fix.
Reinstalling The Rear Wheel
After you’ve removed the wheel, you’ll need to reinstall it. Here’s how:
- Place the chain on the smallest cog.
- Hold the wheel so the cassette lines up with the chain.
- Move the derailleur back.
- Push it gently to give space.
- Insert the wheel into the dropouts.
- Make sure the axle fits snugly.
- Close the quick release or tighten the thru-axle.
- For quick release: Close the lever. It should be firm but not impossible to close.
- For thru-axle: Screw in the axle and tighten with an Allen key.
- Spin the wheel.
- Check that it spins freely and doesn’t rub on the brakes.
Common Mistakes When Reinstalling
- Forgetting to align the chain with the smallest cog.
- Not tightening the axle enough.
- Not checking brake alignment.

Credit: www.youtube.com
Rear Wheel Removal For Different Bike Types
Mountain bikes vary by style. Here’s how rear wheel removal can differ:
| Bike Type | Axle System | Brake Type | Notes |
|---|---|---|---|
| Hardtail | Quick Release or Thru-Axle | Disc or Rim | Simpler, less crowded |
| Full Suspension | Thru-Axle | Disc | Frame may block access |
| Fat Bike | Bolt-On or Thru-Axle | Disc | Wider dropout, heavier wheel |
Full suspension bikes often have more complex frames, so you may need to move the suspension arm or work in tighter spaces.
Cleaning And Maintenance After Removal
It’s smart to clean your bike parts when the wheel is off.
- Wipe the cassette and chain with a rag.
- Inspect the derailleur for damage or wear.
- Check the axle threads for dirt.
- Clean the disc brake rotor with isopropyl alcohol (if you have disc brakes).
When To Clean More Thoroughly
If you ride in wet or muddy conditions, clean the cassette and chain after every ride. This prevents wear and makes future wheel removal easier.

Credit: www.youtube.com
When To Seek Professional Help
Sometimes, wheel removal is more than a simple task.
- If the axle is stuck or rusted, see a mechanic.
- If you notice bent parts (derailleur hanger, frame), get expert help.
- If the wheel doesn’t spin freely after reinstalling, check alignment or ask a pro.
Example: Avoiding Expensive Repairs
A beginner once forced the wheel out and bent the derailleur. The repair cost was $60. Careful removal and knowing when to ask for help can save money.
Why Learning This Skill Matters
Removing the rear wheel is a basic skill but essential for:
- Fixing flat tires quickly.
- Cleaning your drivetrain for better performance.
- Packing your bike for travel.
- Upgrading parts like cassettes or derailleurs.
It gives you freedom and confidence. You won’t have to rely on others or pay for simple jobs at a bike shop.
Frequently Asked Questions
How Do I Know If My Mountain Bike Uses A Quick Release Or Thru-axle?
Look at your bike’s rear axle. If there’s a lever you can open by hand, it’s a quick release. If there’s a bolt that needs an Allen key or tool, it’s a thru-axle. Some newer bikes list the axle type in the user manual or on the manufacturer’s website.
What Should I Do If My Disc Brake Pads Close When The Wheel Is Off?
If the pads close, you’ll need to gently push them apart with a plastic tire lever or a flat tool. Be careful—using metal can damage the pads. Avoid squeezing the brake lever when the wheel is out.
Can I Remove The Rear Wheel Without Shifting To The Smallest Cog?
It’s possible, but not recommended. The chain will be tight and removal will be harder. Shifting to the smallest cog makes the process smoother and prevents damage.
Is It Safe To Transport My Bike With The Rear Wheel Off?
Yes, but protect the dropouts (where the wheel sits) and the derailleur. Use a plastic spacer or a dummy axle if possible. This prevents bending or damage during transport.
How Often Should I Clean The Axle And Cassette After Wheel Removal?
Clean these parts every few months, or after riding in muddy or wet conditions. Regular cleaning keeps your bike running smoothly and makes wheel removal easier next time.
With practice, removing your mountain bike’s rear wheel becomes a quick routine. Take your time, follow each step, and soon you’ll do it with confidence—whether fixing a flat or just maintaining your bike. If you want more details or visuals, check guides from trusted sources like Park Tool for expert illustrations. Enjoy your rides and the freedom that comes with mastering this simple but vital skill.

Hello Guys! I am John Reese, a professional biker and my hobby is biking! I have been biking for last 12 years and I love using bikes while outing as well. Based on my experiences with the different type of bikes (mountain bikes, road bikes and hybrid bikes); I am sharing my opinion about various bikes so that a beginner can get started right away. Happy reading!