Building your own hardtail mountain bike is a unique journey. It’s not just about assembling parts—it’s about understanding what you want, making smart choices, and ending up with a bike that fits your needs perfectly. Many riders start with a ready-made bike, but building your own lets you select every piece, from the frame to the grips. If you’re thinking about this project, you’ll need patience, some basic tools, and a clear plan. This guide will walk you through every step, from planning to riding, with practical advice and expert insights you won’t find in most beginner articles. Whether you’re building for fun trails or tough climbs, you’ll learn how to make every decision count. You’ll also discover the small details that turn a simple bike into your perfect ride. Let’s dive in and see how to build a hardtail that suits you.
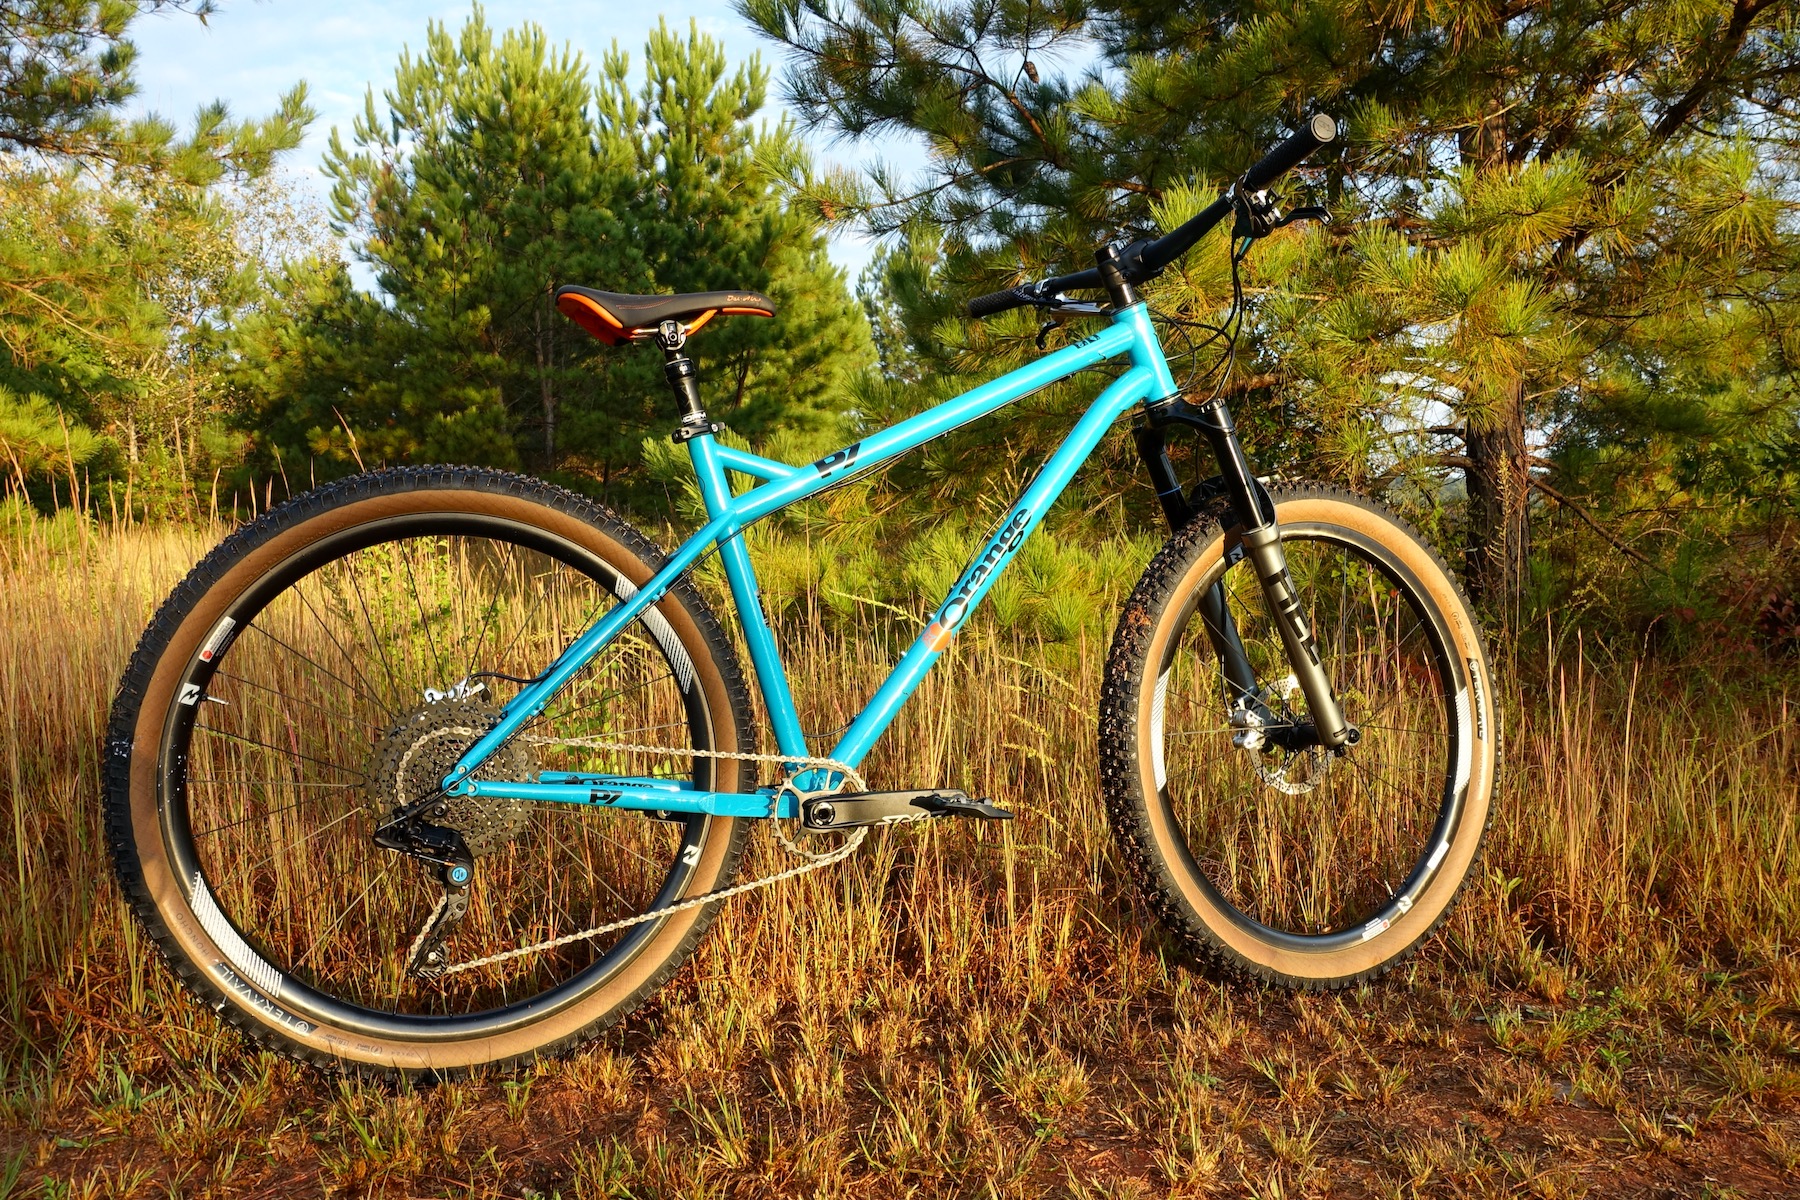
Why Build A Hardtail Mountain Bike?
A hardtail mountain bike has a frame with only front suspension, making it lighter and easier to maintain. For many riders, hardtails offer a balance of speed, control, and simplicity. You get direct power transfer, which is ideal for climbs and smooth trails. Building your own lets you:
- Choose the exact frame geometry for your riding style
- Select components based on quality, weight, and budget
- Learn how your bike works, making future repairs easier
- Save money compared to buying a high-end, complete bike
Hardtails are also great for beginners and advanced riders alike. They teach you handling skills and make every ride more engaging. Many experienced riders use hardtails to sharpen their technique, especially on tight corners and tricky climbs. You’ll feel more connected to the trail and develop a better sense of balance.
Plus, a custom build means you avoid parts you don’t need and can focus on what matters most for your riding.
Planning Your Build: Set Goals And Budget
Before buying anything, think about your main goals. Do you want a bike for fast cross-country rides, technical trails, or casual weekend trips? Your answers will guide every choice. If you’re unsure, visit local trails and watch what others ride, or ask friends for advice.
Write down your top priorities—speed, comfort, durability, or fun—and refer to them when choosing each part.
Setting A Realistic Budget
A custom hardtail can range from $800 to $5,000. Here’s a rough breakdown:
- Frame: $300–$1,500
- Fork: $150–$900
- Wheels: $200–$800
- Drivetrain: $150–$800
- Brakes: $100–$300
- Cockpit (handlebars, stem, grips): $50–$200
- Tires: $60–$180
- Seatpost and saddle: $50–$250
- Pedals: $30–$150
Add about $100–$200 for tools, grease, and cables. Plan for extra costs like shipping, taxes, and small parts. Don’t forget you’ll need a few specialty tools, such as a bottom bracket wrench or cable cutter, which can cost more upfront but last for years.
Choosing Your Bike Type
Hardtails come in several styles:
- Cross-country (XC): Light, fast, efficient for smooth trails and climbs.
- Trail: Stronger frames, wider tires, more comfort for rough terrain.
- All-mountain: Heavier, with tough parts for steep, technical riding.
Think about where you’ll ride most often. A cross-country bike is perfect for speed but less forgiving on rocky trails. Trail bikes are a good middle ground. All-mountain hardtails are less common but useful if your trails are steep and rough.
If you’re unsure, trail hardtails are versatile and suit most riders.

Credit: www.sepr.es
Picking The Right Frame
The frame is the heart of your hardtail. Most frames are made from aluminum, steel, or carbon fiber.
Material Comparison
Here’s how frame materials compare:
| Material | Weight | Durability | Cost | Feel |
|---|---|---|---|---|
| Aluminum | Light | High | Medium | Stiff, responsive |
| Steel | Medium | Very high | Low-Medium | Supple, comfortable |
| Carbon Fiber | Very light | Medium-High | High | Stiff, absorbs vibration |
Steel frames are often favored by riders who want a smooth, forgiving ride. Aluminum is lighter and common in mid-range bikes. Carbon fiber is the lightest and best for racing, but costs more and needs careful handling.
Frame Geometry
Geometry affects how your bike handles. Look for:
- Reach: Longer reach gives stability at speed.
- Head angle: Slacker angles are better for descents, steeper for climbs.
- Seat tube angle: Steeper angles improve pedaling efficiency.
- Wheelbase: Longer wheelbase = more stability.
Always check the frame size chart. Stand-over height and top tube length matter for comfort. The right geometry can make your bike feel lively or stable, depending on your preference. Consider also the chainstay length—short stays make the bike quicker to turn, while longer stays help with stability.
Non-obvious Insight
Many beginners forget to check bottom bracket height. A lower bottom bracket makes the bike feel more planted but increases the risk of pedal strikes. Think about your local trails before choosing. If your trails have lots of rocks or roots, a higher bottom bracket may help avoid hitting your pedals.
Selecting The Fork
The fork is the only suspension on a hardtail, so it’s crucial. Choose based on:
- Travel: 100–120mm for XC, 120–140mm for trail, 140–160mm for all-mountain.
- Axle type: Thru-axles are stiffer and safer than quick-release.
- Steerer tube: Most modern bikes use tapered steerer tubes for strength.
The right fork can transform your bike’s feel. A fork with more travel absorbs bigger bumps, but too much travel can make handling slow. For most riders, 120–130mm is ideal.
Air Vs Coil
Most forks are air-sprung (lighter, easy to adjust). Coil-sprung forks are heavier but smoother.
| Type | Weight | Adjustability | Maintenance | Performance |
|---|---|---|---|---|
| Air | Light | Easy | Low | Good for most riders |
| Coil | Heavy | Harder | Medium | Smoother, reliable |
Air forks can be tuned for different rider weights and riding styles, which is great for beginners or those sharing a bike.
Non-obvious Insight
Fork offset changes handling. Shorter offset improves stability on steep descents. Check compatibility with your frame’s geometry. Sometimes, a fork with the wrong offset can make your bike feel odd, so always match fork and frame recommendations.
Wheels And Tires: Choosing For Performance
Wheels affect speed, strength, and comfort. The right tires give grip and confidence. Light wheels spin faster, but strong wheels last longer on tough trails.
Wheel Size
Most hardtails use 29-inch or 27.5-inch wheels.
- 29-inch: Faster, smoother over rocks, better for XC.
- 27.5-inch: More playful, easier to turn, good for smaller riders.
If you’re unsure, try both sizes. Sometimes a smaller wheel fits your frame better, especially for shorter riders.
Rim And Hub Choices
Rims come in aluminum or carbon fiber. Carbon is lighter but expensive. Hubs should match your axle type and offer good sealing to keep out dirt. Sealed bearings last longer and require less maintenance. Make sure hubs are compatible with your frame and fork.
Tire Width And Tread
For XC, use 2.1–2.3-inch tires. Trail bikes use 2.3–2.6-inch. Tread pattern depends on your terrain:
- Knobby tires for mud and loose soil
- Semi-slick for dry, hardpack
A wider tire gives more comfort and grip, but can slow you down on smooth trails.
Tubeless Setup
Tubeless tires reduce flats and let you run lower pressures for more grip. Make sure your rims and tires are tubeless-ready. You’ll need tubeless sealant and special rim tape. Setting up tubeless can be tricky, but the benefits are worth it for most riders.
Non-obvious Insight
Check the internal rim width. Wider rims support wider tires, increasing grip but also weight. If your rims are too narrow, tires can feel squirmy or roll off in sharp turns.
Drivetrain: Gearing For Every Trail
The drivetrain includes your shifters, cassette, crankset, and chain.
1x Vs 2x/3x Systems
Modern bikes use 1x drivetrains (one front chainring). They’re lighter, simpler, and easier to maintain.
- 1x: Less weight, fewer parts, wide-range cassette (11–50 teeth)
- 2x/3x: More gears, better for extreme climbs, but heavier
Most riders find 1x easier and cleaner, but if your trails are very steep, a 2x setup may help.
Chainring Size
Choose a chainring based on your fitness and terrain:
- 30–32 teeth: Balanced for most riders
- 34+ teeth: For strong riders or flat trails
Smaller chainrings make climbs easier, but limit your top speed.
Cassette Range
A wide-range cassette (like 11–50) lets you climb steep hills and go fast on descents. Look for cassettes with big “granny” gears for tough climbs.
Shifter And Derailleur Choices
Shimano and SRAM are top brands. Match your shifter to your derailleur for smooth performance. Electronic shifting is available, but expensive and more complex to set up.
Non-obvious Insight
Don’t overlook chainline. Poor chainline causes noise and fast wear. Make sure your bottom bracket and crank match your frame’s specs. Also, check the rear hub spacing—some new frames use Boost spacing (148mm), which affects which wheels and cranks you can use.
Brakes: Control And Safety
Brakes are vital for mountain biking. Most hardtails use disc brakes.
Hydraulic Vs Mechanical
Hydraulic brakes are more powerful and need less finger force. Mechanical are easier to fix but less smooth.
| Type | Power | Maintenance | Weight | Cost |
|---|---|---|---|---|
| Hydraulic | High | Medium | Light | Medium-High |
| Mechanical | Medium | Low | Medium | Low-Medium |
Hydraulic brakes are more popular, but mechanical brakes can be fixed on the trail with simple tools.
Rotor Size
- 160mm: Light, good for XC
- 180–200mm: More power for trail and all-mountain
Larger rotors dissipate heat better and give more stopping power on steep descents.
Non-obvious Insight
Brake lever reach adjustment is important for small hands. Many beginners skip this and end up with less control. Take time to adjust levers so you can easily reach them without stretching.
Cockpit: Handlebar, Stem, And Grips
This area affects steering and comfort.
Handlebar Width
Wider bars (740–800mm) give more control. Narrow bars are lighter and fit tight trails. Try different widths to see what feels right for your shoulders and riding style.
Rise And Sweep
Rise refers to how high the bars are from the stem. More rise is comfortable for descents. Sweep affects wrist comfort. Bars with more sweep can reduce wrist pain on longer rides.
Stem Length
- Short stems (40–60mm): Quick handling, good for trail
- Long stems (70–110mm): Stable, good for XC
Choosing stem length changes how your bike steers and feels—short stems make turning faster, but may feel twitchy.
Grips
Choose lock-on grips for easy installation and no slipping. Foam grips reduce weight, rubber gives more comfort. Try different shapes—some grips have ergonomic designs for less hand fatigue.
Non-obvious Insight
Bar-end plugs prevent injury in crashes. Many new builders forget them, but they’re cheap and important. Without plugs, the open bar can cut or bruise your skin if you fall.
Saddle And Seatpost
Comfort matters, especially for long rides.
Saddle Shape
Try different shapes—some prefer wider, others narrow. Look for center cutouts to reduce pressure. Sometimes, a saddle that works for others won’t suit you, so test before committing.
Seatpost Types
- Standard: Simple, cheap
- Dropper: Lets you lower the saddle for descents, raise for climbs (cost $100–$400)
Dropper posts are a game-changer for trail riding. With a dropper, you can instantly move the saddle out of the way for steep sections.
Non-obvious Insight
Check seatpost diameter. Not all frames use the same size. Measure before buying. Also, some frames have internal cable routing for droppers, which can make setup cleaner.
Pedals: Clipless Vs Flat
Pedals are a personal choice.
- Flat pedals: Easy for beginners, quick to get off, more confidence on technical trails
- Clipless: Better power transfer, but takes practice
Look for pedals with sealed bearings and replaceable pins. If you ride in muddy conditions, larger flat pedals with good grip help keep your feet secure.
Tools And Assembly Supplies
You’ll need basic bike tools:
- Hex wrenches (Allen keys)
- Torque wrench (for bolts)
- Bottom bracket tool
- Chain tool
- Cable cutters
- Tire levers
- Grease, anti-seize, and thread locker
If you’re not sure about a step, many bike shops will assemble parts for a small fee. Don’t risk damaging expensive parts. Investing in a bike stand makes assembly easier and safer, especially when adjusting gears or brakes.
Step-by-step Assembly Guide
Building a hardtail takes focus. Here’s a clear order:
- Install headset and fork: Grease bearings, press cups, tighten stem.
- Install bottom bracket: Use correct tool, grease threads.
- Attach crankset: Set torque, check chainline.
- Install wheels: Fit tires, inflate, check axle fit.
- Mount brakes: Center rotors, adjust calipers.
- Fit drivetrain: Attach shifter, derailleur, cassette, chain.
- Install cockpit: Handlebar, stem, grips, check alignment.
- Fit seatpost and saddle: Set height for your leg length.
- Install pedals: Grease threads, tighten firmly.
- Check cables and housing: Smooth routing, no sharp bends.
- Adjust everything: Test shifting, brakes, tire pressure.
Take your time. Double-check bolt torques. If possible, use a torque wrench—overtightened bolts can crack expensive parts. Clean all parts before assembly to avoid grit or dirt that can cause wear.
Non-obvious Insight
Always check for frame compatibility before starting. For example, some frames only fit certain bottom brackets or hub widths. This can save you frustration and money. Also, some brake mounts are post or IS type—make sure your brakes match the frame.
Tuning And Testing
Once assembled, tune your bike.
- Adjust shifting: Fine-tune cable tension
- Set brake reach: Fit lever to your hand size
- Tune suspension: Adjust fork air pressure for your weight
- Set tire pressure: Lower for grip, higher for speed
Test ride in a safe area. Listen for noises, check for smooth shifting and braking. Try small jumps or quick turns to test handling. If anything feels off, stop and adjust—never ignore strange sounds.
Upgrades And Personalization
After riding, you may want upgrades. Common upgrades are:
- Lighter wheels
- Better tires for local conditions
- Dropper seatpost
- Custom grips or saddle
Personal touches like frame protection tape or colored bolts make your bike unique. You might also add a bike computer, lights, or stickers. As your skills grow, upgrading brakes or suspension can make a big difference.
Common Mistakes And How To Avoid Them
Building a hardtail is rewarding but can go wrong. Here are mistakes to avoid:
- Mixing incompatible parts: Check sizes (e.g., bottom bracket, headset, axle).
- Skipping torque checks: Over-tightening can crack carbon or aluminum.
- Wrong tire choice: Slick tires on muddy trails are dangerous.
- Ignoring cable routing: Poor routing causes friction and bad shifting.
- Buying cheap tools: Bad tools damage parts.
- Wrong frame size: Always check stand-over and reach.
- No tubeless setup: Flats are common with tubes.
- Missing bar-end plugs: Dangerous in crashes.
- Skipping test rides: Always test before hitting tough trails.
Some beginners also forget to grease bolts and threads, which can lead to stuck parts. Take photos during assembly to help remember where cables and hoses go.
Maintenance Tips
A bike needs care to last. Simple habits help:
- Clean after muddy rides
- Check bolts monthly
- Lube chain regularly
- Inspect tires for cuts
- Bleed hydraulic brakes once a year
A well-maintained bike is safer and faster. Store your bike indoors to protect it from rain and sun. Keep a regular maintenance schedule and record dates—this helps spot issues early.
Credit: www.singletracks.com
Real-life Example: Building A Hardtail For Trail Riding
Let’s look at a sample build for a trail-focused hardtail:
- Frame: Aluminum, modern geometry, $700
- Fork: 130mm air-sprung, $400
- Wheels: 29-inch, tubeless-ready, $350
- Tires: 2.4-inch, knobby tread, $120
- Drivetrain: SRAM 1×12, $450
- Brakes: Hydraulic, 180mm rotors, $200
- Cockpit: 780mm bars, 50mm stem, lock-on grips, $100
- Saddle/Seatpost: Dropper, $200
- Pedals: Flat, $80
Total Cost: $2,600 (excluding Tools)
This bike would be fast on climbs, confident on descents, and easy to maintain. You can tweak each part for your own needs. With tubeless tires and a dropper post, you’ll be ready for technical trails and fast singletrack. Choose colors and accessories to make the bike feel truly yours.
Data: Hardtail Vs Full-suspension Ownership
Here’s a comparison of hardtail and full-suspension bikes:
| Type | Average Weight | Maintenance Cost (Yearly) | Initial Price Range | Ride Feel |
|---|---|---|---|---|
| Hardtail | 23–27 lbs | $120 | $800–$3,500 | Direct, responsive |
| Full-suspension | 27–32 lbs | $250 | $1,500–$7,000 | Smoother, less efficient |
Hardtails cost less, weigh less, and teach better handling. Full-suspension bikes are smoother, but more complex. Hardtails are easier to clean and service, especially for home mechanics.

Credit: chumbausa.com
Where To Buy Parts
Buy from trusted shops and online stores. Some examples:
- Local bike shops (good advice, support)
- Online retailers (more choices, sometimes lower prices)
- Second-hand marketplaces (great deals, but check for damage)
Always check return policies. If possible, buy from stores with customer service. Used parts can save money, but inspect carefully for cracks or wear. Ask for photos and serial numbers if buying online.
Useful Resources For Builders
Learning doesn’t stop after assembly. For more technical details and deep guides, visit the Pinkbike website. It’s trusted by riders worldwide for reviews, how-tos, and community advice. You can also find video tutorials, forums, and tips from experienced builders.
Frequently Asked Questions
How Long Does It Take To Build A Hardtail Mountain Bike?
Most builds take 10–20 hours spread over several days. If you have all the tools and parts ready, you can finish faster. Beginners should plan extra time for learning and troubleshooting. Rushing can lead to mistakes, so take breaks and double-check each step.
What Tools Do I Really Need For A Home Build?
You need basic bike tools: hex wrenches, a torque wrench, bottom bracket tool, chain tool, cable cutters, tire levers, and grease. A bike stand helps but isn’t essential. Quality tools prevent damage and make the job easier. Keep a rag and cleaning brush handy for messy parts.
How Do I Choose The Right Frame Size?
Check the manufacturer’s size chart. Stand-over height, reach, and top tube length are key. Try to test similar frames in person or measure your body (inseam, height) for accuracy. If you’re between sizes, choose the smaller for more control, or the larger for stability.
Can I Upgrade My Hardtail Later?
Yes, you can upgrade wheels, drivetrain, brakes, and even add a dropper seatpost. Choose a frame with modern standards for easier upgrades. Upgrading lets you improve your bike as your skills grow. Keep your old parts as backups or sell them to fund new upgrades.
Is Building A Hardtail Cheaper Than Buying Complete?
Usually, yes—if you choose parts wisely. Custom builds can cost more if you pick high-end parts, but you get exactly what you want. Buying used parts or waiting for sales can lower costs. Remember, the real value is in learning and customization, not just price.
Building your own hardtail mountain bike is a challenge, but the reward is a bike that fits your needs perfectly. You learn about every part, gain confidence in repairs, and enjoy rides knowing your bike was built by your own hands.
If you plan carefully, follow each step, and avoid common mistakes, your new hardtail will be ready for any trail adventure. Whether you ride for fitness, fun, or competition, your custom bike will always feel special—because you built it.

Hello Guys! I am John Reese, a professional biker and my hobby is biking! I have been biking for last 12 years and I love using bikes while outing as well. Based on my experiences with the different type of bikes (mountain bikes, road bikes and hybrid bikes); I am sharing my opinion about various bikes so that a beginner can get started right away. Happy reading!