Building your own mountain bike skills course is a rewarding project that can transform any piece of land into a training ground for riders of all levels. Whether you want to improve your skills, coach others, or just have fun, a well-designed course offers endless possibilities.
But creating a course that is safe, challenging, and long-lasting takes careful planning, creativity, and some hard work. This guide will walk you through every step, from selecting a location to adding creative features and keeping everything in top shape.
Why Build A Mountain Bike Skills Course?
A dedicated skills course allows riders to practice safely and repeat key techniques like cornering, jumping, balance, and braking. It’s also perfect for introducing beginners to mountain biking in a controlled setting. Many riders find that regular practice on a skills course dramatically improves their confidence and ability on real trails.
Besides personal use, a home or community course can become a hub for friends, family, or even local clubs. Well-designed courses are used for coaching, events, and even youth camps. For some, building and maintaining the course becomes as enjoyable as riding itself.
Choosing The Right Location
The success of your mountain bike skills course starts with the right location. You don’t need a giant forest or hillside; many great courses fit in a backyard, empty lot, or small park. The most important thing is choosing a space that matches your goals and resources.
Key Factors To Consider
- Size and Shape: A larger area allows for more variety, but even a small space can offer good practice features.
- Terrain: Flat ground is fine for beginners and basic obstacles. Sloped or varied terrain lets you add more advanced features.
- Soil Type: Hard, well-draining soil is best. Avoid areas that stay wet or muddy.
- Accessibility: Make sure you and others can reach the course easily, and there’s space for parking bikes and gathering.
- Safety: Keep a safe distance from roads, buildings, and hazards like water, cliffs, or power lines.
- Permission: Always get permission if you don’t own the land. Check local rules about building structures or digging.
Non-obvious Insight: Many people overlook sunlight and wind exposure. Choose a spot that dries quickly after rain and isn’t too exposed to strong winds, which can dry out wooden features or erode dirt.
Planning Your Skills Course Layout
A good course balances fun, challenge, and safety. Start with a basic layout and add complexity over time as your skills and needs grow.
Sketching Your Plan
- Draw your space to scale: Measure the area and sketch it on paper or use simple design software.
- Mark key features: Trees, slopes, rocks, and existing paths can become part of your course.
- Plan flow: Design a loop or sequence that riders can follow without stopping. Think about how features connect.
- Separate skill zones: Beginners and advanced riders can share the course if you create easy and hard lines.
- Leave space: Don’t fill every inch—leave open areas for safety and future changes.
Common Skills Course Features
- Pump tracks: Rolling loops of small hills and banked turns, great for learning speed and bike handling.
- Rock gardens: Fields of rocks that teach balance and line choice.
- Log rides: Riding along logs or narrow planks builds balance.
- Drop-offs: Riding off small ledges helps with confidence.
- Jumps and tabletops: Learning to lift the bike safely.
- Switchbacks: Tight turns for practicing control.
Practical Tip: Start simple. A few basic features are better than many crowded, unsafe ones.
Gathering Materials And Tools
The right materials and tools make construction smoother and safer. Most skills course features are built from dirt, wood, or stone.
Essential Materials
- Dirt: Good quality, free from roots and large rocks. Clay-based soil compacts well for jumps and berms.
- Wood: Untreated hardwood for outdoor use. Pressure-treated wood lasts longer but can be slippery when wet.
- Rocks: Flat rocks for rock gardens or technical sections.
- Fasteners: Galvanized screws or nails resist rust outdoors.
Basic Tools
- Shovels, rakes, and hoes for shaping dirt
- Wheelbarrow for moving materials
- Saw and drill for cutting and assembling wood
- Level and measuring tape for accuracy
- Sledgehammer for staking logs or features
Insight: Buying materials in bulk often saves money. Ask local construction sites or landscapers about leftover dirt or rocks.
Building Safe And Fun Features
Now comes the creative part—building the actual features. Focus on safety, durability, and progression (from easy to hard).
Dirt Features: Berms, Jumps, And Rollers
Berms are raised, banked turns that help riders maintain speed through corners. Shape them with compacted dirt, about 2-3 feet high for beginners.
Jumps can be simple mounds of dirt or more advanced wooden ramps. For learning, start with tabletop jumps—flat tops that reduce the risk of crashing.
Rollers are small, rounded mounds (about 1-2 feet high) spaced 8-12 feet apart. They teach pumping and bike handling.
Construction Steps:
- Mark the shape with flags or string.
- Pile up dirt and roughly shape with shovels.
- Wet the dirt slightly, then compact firmly.
- Fine-tune the shape and pack again.
- Test ride and adjust as needed.
Mistake to Avoid: Don’t use loose, sandy dirt—features will erode quickly.
Wooden Features: Skinnies, Bridges, And Drops
Skinnies are narrow planks or logs, usually 4-8 inches wide, for balance practice. Build them low (6-12 inches high) at first.
Bridges help cross wet or rough areas. Use wide, sturdy boards and strong supports.
Drops are small ledges (12–24 inches high) with smooth landings. Build a sturdy platform and a gentle transition to the ground.
Safety Tip: Always check for splinters, loose boards, and sharp edges. Use non-slip paint or tape if wood gets slippery.
Rock Features: Gardens And Steps
Rock gardens challenge riders to pick a path through rough rocks. Use flat stones and set them securely in the ground.
Rock steps or ledges add technical difficulty. Make sure rocks don’t wobble or move under weight.
Non-obvious Insight: Place rocks with the most stable side facing up, and test with your full weight before riding.
Construction Timeline And Project Management
Building a skills course takes time, especially if you’re working alone or with friends. Break the project into manageable steps.
Sample Timeline For A Medium-sized Course
| Week | Main Tasks | Tips |
|---|---|---|
| 1 | Site clearing, plan layout | Mark features with flags |
| 2 | Dirt moving, build first berms/rollers | Test shapes before compacting |
| 3 | Build wooden features, add first jumps | Start simple, increase height later |
| 4 | Rock gardens, add signage | Secure all rocks deeply |
| 5 | Test ride, refine, safety checks | Fix soft spots and wobbly items |
| 6+ | Expand, add advanced features | Get feedback from other riders |
Adjust the timeline for your course size, weather, and how many helpers you have.
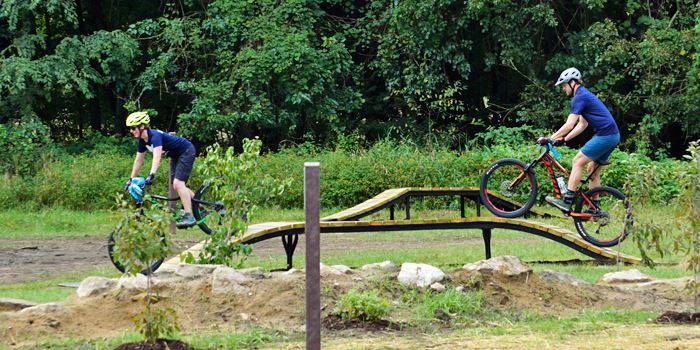
Credit: metroparkstoledo.com
Building For Progression And All Skill Levels
A great skills course lets riders progress at their own speed. Design features so that both beginners and experts find something challenging.
Creating Easy And Advanced Lines
Use “ride-around” options—easy paths that bypass harder features. Mark these clearly so beginners don’t feel pressured.
Build features in sets of three: a low, medium, and high version. For example, three log rides at increasing heights and widths.
Progression Table Example
| Feature | Beginner | Intermediate | Advanced |
|---|---|---|---|
| Drop | 12 inches, wide landing | 18 inches, narrower | 24 inches, technical landing |
| Skinny | 8 inches wide, 6 inches high | 6 inches wide, 12 inches high | 4 inches wide, 24 inches high |
| Corner | Wide, gentle berm | Medium berm, tighter turn | Steep, sharp berm |
Practical Insight: Most riders progress fastest when they can repeat the same skill on features of growing difficulty, not by switching between unrelated obstacles.
Drainage, Erosion Control, And Sustainability
A common mistake is ignoring water management. Well-built courses shed water quickly and resist erosion, saving you hours of repair.
Key Techniques
- Slope features gently: Build jumps and berms with a slight slope (2–4%) to let water run off.
- Use crushed stone: Place a layer under dirt features to improve drainage.
- Ditch and drains: Dig shallow ditches alongside features to channel water away.
- Reinforce high-wear spots: Add rocks or wood on landings and corners.
- Plant grass or ground cover: Stops dust and soil loss.
Advanced Tip: On steeper land, build water bars or small humps across the trail to slow water and reduce washouts.
Safety And Risk Management
Mountain biking is exciting, but safety is key—especially if others will use your course.
Essential Safety Steps
- Inspect regularly: Walk the course weekly to check for broken boards, loose dirt, or sharp edges.
- Signage: Mark difficult features with clear signs. Use “Beginner,” “Intermediate,” and “Expert” markers.
- Padding and runouts: Place soft dirt, mulch, or mats at the base of jumps and drops.
- First aid: Keep a basic kit nearby.
- Rules: Set clear rules (e.g., helmet required, no night riding).
Non-obvious Insight: Accidents often happen on familiar features. Don’t skip inspections just because a section “has always been fine.”
Budgeting And Sourcing Materials
Costs vary widely, but building a course doesn’t have to break the bank. Many features use reclaimed or free materials.
Typical Costs
| Item | Estimated Cost | Notes |
|---|---|---|
| Dirt (10 cubic yards) | $150 – $300 | May be free if sourced locally |
| Wood (pressure-treated, 50 ft) | $100 – $250 | Cheaper if using scrap or logs |
| Galvanized screws, nails | $30 – $60 | Rust-resistant is a must |
| Tools (shovel, rake, saw) | $100 – $200 | Borrow or rent to save money |
| Signage materials | $20 – $50 | Paint, wood, markers |
Money-saving Tip: Contact landscape or construction companies—many will give away dirt, rocks, or old pallets for free if you pick them up.
Working With Volunteers And Community
If your course is for a club, school, or community, teamwork is key. More hands make lighter work—and stronger connections.
How To Organize Volunteers
- Set clear work days: Choose regular dates and times.
- Divide tasks: Match jobs to skills (e.g., digging, carpentry).
- Provide food and water: Keeps morale high.
- Offer training: Show safe tool use and construction basics.
- Celebrate progress: Host a “first ride” day or BBQ.
Insight: Invite local bike shops or trail groups—they may donate materials or help with maintenance.
Maintenance And Upkeep
A skills course needs regular care, especially in the first year. Dirt settles, wood weathers, and features wear out.
Routine Maintenance Tasks
- Water and compact dirt: After rain or heavy use, reshape and pack down features.
- Replace broken boards: Inspect for rot or cracks.
- Weed and mow: Clear grass or weeds to keep lines visible.
- Pick up trash: Keep the area clean and safe.
Seasonal Adjustments
- Before winter: Cover dirt features with tarps or mulch to prevent erosion.
- Spring: Inspect for frost damage and repair quickly.
- After storms: Check for flooding or fallen branches.
Pro Tip: Keep a simple log of repairs and changes. This helps track what works best over time.
Creative Ideas And Advanced Features
Once your basic course is running smoothly, add creative features for more fun and challenge.
Ideas To Try
- Teeter-totters (see-saws): Moving planks that tip as you ride.
- Wall rides: Steep, wooden walls for advanced cornering.
- Gap jumps: For experienced riders only, with clear warning signs.
- Manual pads: Long, flat boxes for practicing front wheel lifts.
- Technical climbs: Steep or rocky sections to test power and balance.
Advanced Tip: Study videos or visit pro-level skills parks for inspiration. Always build new features low and slow, and test before raising height or difficulty.
Insurance And Liability
If your course is used by others, consider insurance and legal protection. In many areas, you are responsible if someone is hurt—even if they ignore the rules.
Steps To Reduce Risk
- Post rules clearly: Helmets, no drugs/alcohol, ride within ability.
- Waivers: For organized events, ask riders to sign a simple waiver.
- Insurance: Check with your home insurer or a sports club for coverage options.
Resource: For more on liability and trail building, see the International Mountain Bicycling Association (IMBA).

Credit: www.youtube.com
Real-world Examples
Seeing what others have built can inspire your own course. Here are two examples:
Backyard Flow Park: Built in a suburban yard, this course uses a simple dirt pump track, a wooden skinny, and a small rock garden. All features are low to the ground and have ride-around options. The owner invited neighbors to help, turning the build into a community event.
Community School Skills Area: A small park beside a school features a basic loop with berms, rollers, and three wooden bridges. The local bike club maintains it, and teachers use the course for after-school programs. Kids progress from the easy outer loop to the harder inner features.
Non-obvious Insight: Both courses started small and grew over time—owners added new features each year as skills improved and more riders joined.
Frequently Asked Questions
How Much Space Do I Need For A Mountain Bike Skills Course?
You can build a useful course in as little as 500–1,000 square feet, enough for a few rollers, a berm, and a log ride. Larger spaces (2,000–5,000 square feet) allow for pump tracks and more advanced features. Focus on creative layout rather than size—good flow matters more than area.
What’s The Best Way To Make Features Safe For Kids?
Start with wide, low features and gentle slopes. Always provide ride-around paths for harder obstacles. Use soft dirt for landings, avoid sharp edges, and supervise younger riders. Posting clear rules and requiring helmets helps prevent injuries.
How Do I Stop Features From Washing Out After Rain?
Good drainage is key. Build features with a slight slope, line bottoms with crushed stone, and dig small ditches to direct water away. Compact dirt firmly and cover with tarps before heavy storms. Regular checks after rain help catch small problems early.
Can I Use Recycled Materials For Building Features?
Yes—logs, pallets, rocks, and old boards can all be used if they are sturdy and safe. Always check for rot, nails, or splinters before building. Recycled materials save money and reduce waste, but safety should always come first.
Do I Need Special Permission To Build A Course?
If you own the land, you usually don’t need special permits for small courses, but always check local laws. For public or shared spaces, you must get permission from the owner or city. Some areas require building permits for permanent structures, so check before you start.
Building a mountain bike skills course is a big but satisfying project. With careful planning, teamwork, and regular care, you’ll create a space that brings people together, sharpens your riding, and gives years of enjoyment. Start simple, think safety first, and let your course grow with your skills.
Happy riding!

Credit: bigforestframeworks.com

Hello Guys! I am John Reese, a professional biker and my hobby is biking! I have been biking for last 12 years and I love using bikes while outing as well. Based on my experiences with the different type of bikes (mountain bikes, road bikes and hybrid bikes); I am sharing my opinion about various bikes so that a beginner can get started right away. Happy reading!