Changing a rear cassette on a mountain bike may seem tricky, but with the right steps and a bit of patience, anyone can learn to do it. Whether you want smoother shifting, need a new gear range, or your cassette teeth are simply worn out, knowing how to replace a cassette is an essential skill for every mountain biker.
This guide will walk you through each part of the process, from understanding the tools to making sure everything works perfectly afterward. Even if you’ve never changed bike parts before, you’ll find clear instructions and practical tips to help you succeed.
What Is A Rear Cassette And Why Change It?
The rear cassette is the cluster of sprockets (gears) on your bike’s back wheel. It works with your chain and derailleur to let you shift gears while riding. Over time, cassette teeth wear down, causing poor shifting, chain skipping, or loss of efficiency. Riders also swap cassettes to fit new terrain or upgrade to lighter components.
Here are the main reasons to change a cassette:
- Worn Out Teeth: Old cassettes make your chain slip, especially under pressure.
- Upgrading Gears: Adding more sprockets for wider gear range.
- Changing Terrain Needs: For steep climbs or fast descents, different gear ratios help.
- Switching Wheelsets: You may need a spare cassette for a second wheel.
Replacing your cassette improves shifting performance and keeps your bike running smoothly.
What Tools Do You Need?
Before starting, gather the right tools. Missing even one can make the job impossible.
- Cassette Lockring Tool: Fits your cassette’s lockring. Most mountain bikes use Shimano/SRAM or XD types.
- Chain Whip: Holds sprockets still while you unscrew the lockring.
- Adjustable Wrench or Socket Wrench: For turning the lockring tool.
- Bike Stand (optional): Helps keep your bike steady.
- Clean Rag: For wiping parts.
- Degreaser (optional): Cleans cassette area.
Having the correct tools reduces frustration and avoids damage. Here’s a quick comparison of cassette lockring tool types:
| Tool Type | Fits | Typical Brands |
|---|---|---|
| Shimano/SRAM Lockring Tool | Most mountain bikes | Shimano, SRAM |
| XD/XDR Lockring Tool | High-end SRAM cassettes | SRAM |
Preparing Your Bike For Cassette Removal
Preparation makes the process safer and easier. Follow these steps:
- Shift to the Smallest Cog: Move your chain onto the smallest sprocket. This reduces tension and makes removal easier.
- Remove the Rear Wheel: Open the quick release or unscrew thru-axle and pull the wheel off.
- Clean the Cassette Area: Wipe dirt away so parts are easy to handle.
If you’re new to bike maintenance, keep the wheel upright and avoid touching brake rotors to prevent oil contamination.
Removing The Old Cassette
Now you’re ready to remove the cassette. Carefully follow these instructions:
- Fit the Lockring Tool: Insert the lockring tool into the cassette’s lockring.
- Use the Chain Whip: Wrap the chain whip around one of the larger sprockets to keep cassette from spinning.
- Loosen the Lockring: With the chain whip holding the cassette, turn the lockring tool counter-clockwise using your wrench. You’ll feel resistance, then the lockring will loosen.
- Take Off the Lockring: Unscrew and remove the lockring. Keep it safe—you’ll reuse it.
- Remove the Cassette: Slide the sprockets and spacers off the freehub body. Some cassettes come off in one piece, others in several.
Here’s a simple visual comparison of cassette removal difficulty:
| Cassette Type | Removal Steps | Difficulty |
|---|---|---|
| Shimano/SRAM | Lockring + chain whip | Easy |
| SRAM XD/XDR | Special tool needed | Moderate |
| Campagnolo | Unique lockring tool | Challenging |
Common Mistakes When Removing
- Forgetting the Chain Whip: Without it, the cassette spins and lockring won’t loosen.
- Wrong Tool: Using the wrong lockring tool damages parts.
- Excess Force: Some lockrings are tight, but don’t force them. Use steady pressure.
- Losing Spacers: Keep track of spacers; missing one causes shifting problems.
Inspecting And Cleaning Before Installation
Before putting on your new cassette, spend a few minutes inspecting and cleaning.
- Check the Freehub Body: Look for deep grooves or damage. Light marks are normal, but deep cuts mean you need a new freehub.
- Clean the Freehub: Wipe with a rag and a bit of degreaser.
- Inspect Spacers: Make sure you have all spacers, especially if your new cassette is a different model or brand.
Most beginners skip cleaning, but a dirty freehub can cause sticking or noisy shifting.
Choosing The Right Replacement Cassette
Not all cassettes fit every mountain bike. Here’s what to check:
- Number of Speeds: Match your shifter and derailleur. For example, if you have a 10-speed setup, buy a 10-speed cassette.
- Freehub Compatibility: Shimano/SRAM cassettes fit standard freehubs, while SRAM XD needs a special body.
- Gear Range: Mountain cassettes range from 11–32T to wide 10–50T. Choose based on your riding style.
- Weight and Material: Cheaper cassettes use steel (heavier), while high-end are aluminum or titanium (lighter).
Here’s a quick gear range comparison:
| Cassette | Smallest Cog | Largest Cog | Typical Use |
|---|---|---|---|
| 11–32T | 11T | 32T | Cross-country |
| 11–42T | 11T | 42T | Trail/All-mountain |
| 10–50T | 10T | 50T | Enduro/Climbing |
If unsure, check your old cassette’s part number or ask a bike shop.
Two Insights Beginners Miss
- Spacer Placement: Some cassettes need extra spacers for 10-speed on 11-speed hubs. Forgetting them leads to shifting problems.
- Chain Compatibility: Wide-range cassettes (like 10–50T) often need a longer chain and compatible derailleur.
Installing The New Cassette
Once you have the right cassette, installation is straightforward.
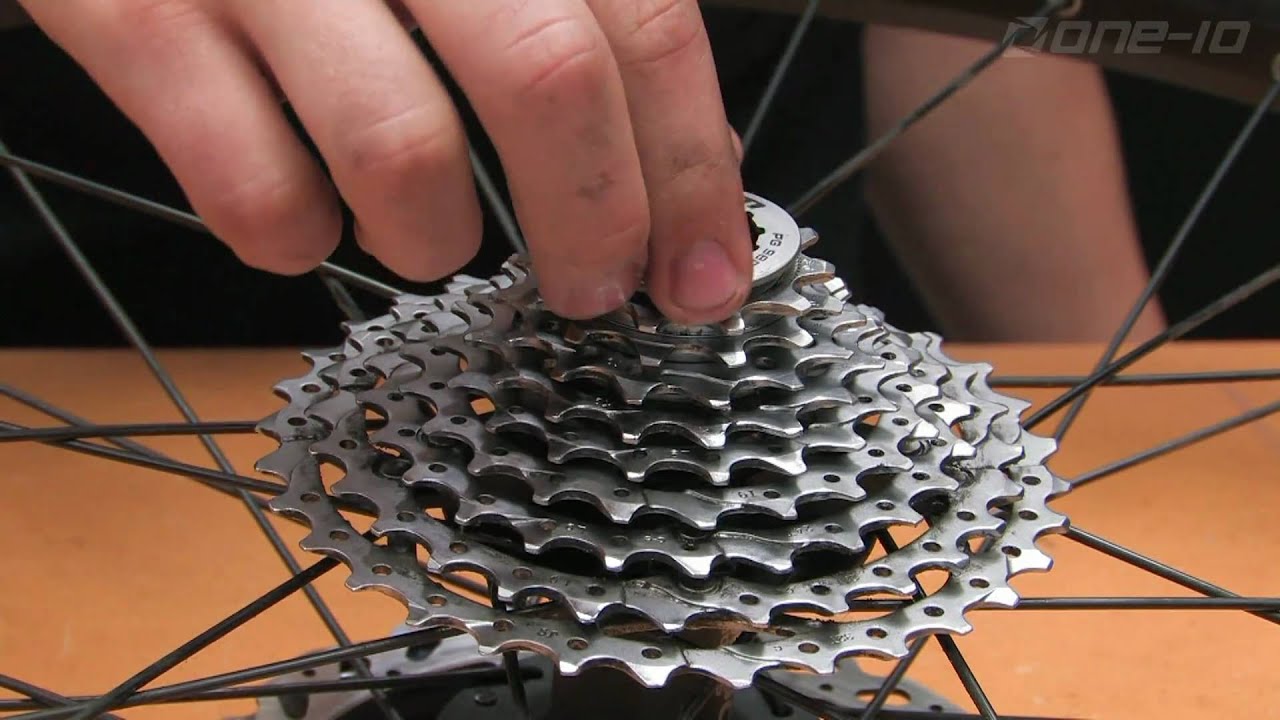
- Align the Sprockets: Look for the smallest spline on the freehub and match it with the cassette’s smallest groove. Only one fit is correct.
- Slide on the Sprockets: Place each sprocket and spacer in order. Some cassettes are one-piece, others are separate.
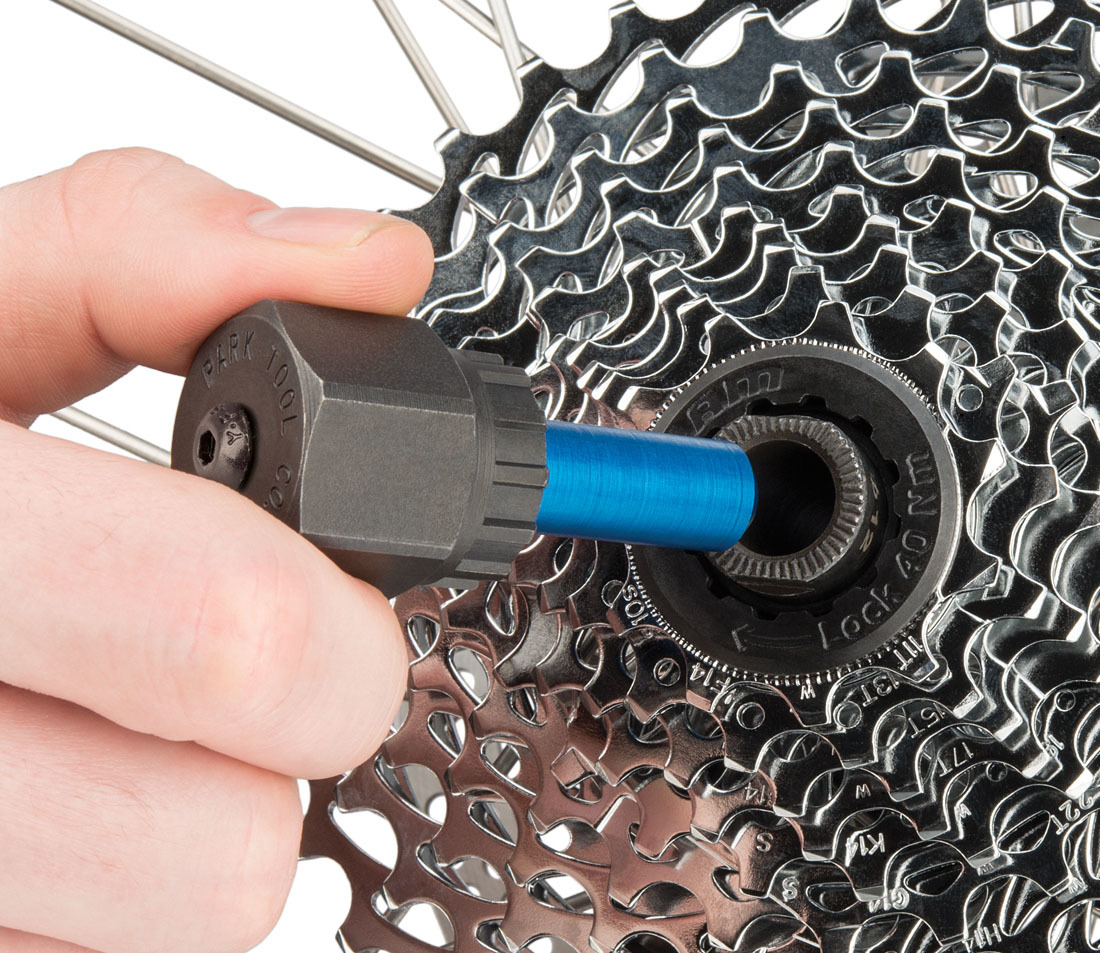
- Install the Lockring: Screw the lockring onto the freehub by hand until snug.
- Tighten the Lockring: Use the lockring tool and wrench to tighten. Most lockrings need 40 Nm torque. If you don’t have a torque wrench, aim for “firm but not forced.”
Practical Installation Tips
- Grease the Lockring Threads: A tiny bit of grease prevents seizing and makes removal easier later.
- Check Spacer Count: Double-check spacers before tightening.
- Don’t Over-Tighten: Too much force can damage threads.
Reinstalling The Rear Wheel And Checking The Setup
With the cassette installed, reinstall your rear wheel:
- Fit the Wheel: Slide it back into your frame, making sure it’s centered.
- Tighten Axle or Quick Release: Secure the wheel. For thru-axles, check manufacturer torque specs.
- Reconnect Chain: If you removed it, reinstall and make sure it sits on the smallest cog.
Now, check the setup:
- Spin the Wheel: Listen for odd noises.
- Shift Through Gears: Use your shifter to move the chain across all sprockets.
- Look for Smooth Shifting: If shifting is rough, check for missing spacers or misaligned cogs.

Credit: www.giovannirosso.com
Adjusting Derailleur And Chain After Cassette Change
A new cassette sometimes needs derailleur adjustment or a new chain. Here’s how:
Derailleur Adjustment
- Limit Screws: Set high and low limit screws so derailleur doesn’t move chain off cassette.
- B-Tension Screw: Adjust so derailleur clears largest cog.
- Cable Tension: Fine-tune shifting with barrel adjuster.
Chain Length
Wide-range cassettes may need a longer chain. If your chain is too short, it can damage drivetrain or cause chain breakage.
- Check Chain Length: In largest cog and chainring, chain should run through derailleur without stretching.
- Replace if Needed: Use a chain tool to remove old chain and install new.
Testing The Bike And Troubleshooting
Before riding, test everything:
- Shift Gears While Pedaling: Make sure chain moves smoothly across cassette.
- Check for Skipping: If chain skips, cassette or chain may be incompatible.
- Listen for Noise: Clicking or grinding means adjustment is needed.
Troubleshooting Common Issues
- Shifting Problems: Check for missing spacers, misaligned cogs, or improper cable tension.
- Chain Skipping: Inspect for worn chain, wrong cassette, or poor derailleur adjustment.
- Noise: Clean cassette area and check for loose parts.
If problems persist, consult a bike mechanic or refer to manufacturer manuals.
Credit: www.giovannirosso.com
Maintenance Tips For Longer Cassette Life
A new cassette can last thousands of miles if you care for it. Here’s how:
- Clean Regularly: Wipe cassette after muddy or dusty rides.
- Lubricate Chain: Keeps cassette teeth from wearing quickly.
- Avoid Cross-Chaining: Don’t use extreme gear combinations (big cog + big ring).
- Replace Chain Early: A worn chain damages cassette quickly.
Many riders overlook chain replacement. A new chain every 1,500–2,000 miles can double cassette life.
Data: Cassette Lifespan And Wear Rates
According to a study by the International Journal of Sports Engineering, mountain bike cassettes last about 3,000–6,000 miles, depending on riding conditions and maintenance. Dust, mud, and water shorten lifespan.
| Condition | Average Cassette Lifespan | Notes |
|---|---|---|
| Dry XC Riding | 5,000–6,000 miles | Low wear rate |
| Muddy/Technical Trails | 3,000–4,000 miles | High wear rate |
| Poor Maintenance | 2,000–3,000 miles | Frequent chain replacement needed |
Real-world Example: Upgrading For Steep Terrain
Imagine you ride mostly flat trails but are planning a trip to the mountains. Your current cassette is 11–32T, which works well for speed but not for climbing. Upgrading to an 11–42T cassette gives you lower gears for tough climbs.
However, you’ll need:
- Compatible Derailleur: Check if your derailleur can handle the larger range.
- New Chain: Longer to fit bigger cogs.
- Adjustment: Fine-tune shifting after installation.
Many riders miss these extra steps and end up with poor shifting. Always check compatibility before upgrading.
Environmental Impact Of Cassette Replacement
Replacing cassettes means more metal waste, but many brands use recyclable materials. Shimano and SRAM cassettes are mostly steel or aluminum. When swapping cassettes:
- Recycle Old Cassette: Most local recycling centers accept steel and aluminum bike parts.
- Buy Durable Models: Longer lasting cassettes mean less waste.
- Maintain Properly: Good maintenance reduces replacements.
Advanced Tips For Confident Cassette Changes
- Use a Torque Wrench: Prevents over-tightening and damage.
- Check Manufacturer Instructions: Some cassettes have special steps.
- Try Practice Runs: If nervous, practice on an old wheel first.
- Ask for Help: Bike shops or forums can guide you if stuck.
Frequently Asked Questions
How Often Should I Change My Mountain Bike Cassette?
Most riders change their cassette every 3,000–6,000 miles, depending on riding conditions and maintenance. If you notice chain skipping, poor shifting, or worn teeth, it’s time to replace.
Can I Use A Road Bike Cassette On My Mountain Bike?
Usually no. Mountain and road cassettes have different gear ranges and spacers. Always check compatibility with your freehub, derailleur, and chain.
Do I Need A New Chain When Changing Cassette?
If your chain is old or stretched, you should replace it with the cassette. A worn chain damages new cassette teeth and causes shifting problems. Use a chain checker tool to measure wear.
What Is The Difference Between 1x And 2x/3x Cassettes?
1x setups use a single front chainring, needing wide-range cassettes (like 10–50T). 2x/3x setups use two or three chainrings with narrower cassettes. Match your cassette to your drivetrain for best results.
Where Can I Find Official Cassette Compatibility Information?
For detailed compatibility charts and installation guides, visit the official SRAM Cassette Compatibility page.
Changing a rear cassette on a mountain bike is a valuable skill. With the right tools, careful steps, and a bit of practice, you can upgrade your bike and enjoy smoother rides. Maintenance and attention to detail make the difference between fast, trouble-free shifts and frustrating rides.
If you’re uncertain, ask for help or watch videos for extra confidence. Soon, you’ll be able to handle cassette changes like a pro and keep your mountain bike running strong.
Credit: www.youtube.com

Hello Guys! I am John Reese, a professional biker and my hobby is biking! I have been biking for last 12 years and I love using bikes while outing as well. Based on my experiences with the different type of bikes (mountain bikes, road bikes and hybrid bikes); I am sharing my opinion about various bikes so that a beginner can get started right away. Happy reading!