Building a mountain bike bridge is more than a simple woodworking project. It’s about creating a safe, durable structure that blends with nature and improves the trail experience. A well-made bridge can help riders cross streams, avoid muddy sections, and protect sensitive habitats.
But to build one, you need careful planning, the right materials, and a solid understanding of trail dynamics. Whether you’re a trail builder, club member, or a passionate mountain biker, this guide walks you through every step. You’ll discover how to choose the best site, design for different terrains, and build a bridge that lasts.
Along the way, you’ll find practical tips, examples from real trails, and advice that even experienced builders sometimes overlook.
Choosing The Site For Your Mountain Bike Bridge
The first step is picking the right spot. A bridge isn’t just a solution for crossing water—it can help riders bypass erosion-prone areas or reach new parts of a trail. But the location affects everything: materials, design, safety, and maintenance.
Assessing Trail Needs
Look for places where riders face problems:
- Water crossings: Streams, creeks, or drainage ditches that are hard to ride through.
- Erosion hotspots: Steep banks, muddy zones, or sensitive wetlands.
- Trail connectivity: Spots where a bridge opens new routes or links loops.
Take time to walk the area. Look for signs of:
- Heavy use: Tire marks, footprints, or worn soil.
- Seasonal changes: Flooding, mud during rain, or dry spells.
- Wildlife and plants: Avoid disrupting habitats or rare species.
Understanding Regulations
Many trails run through public land. Check local rules:
- Permits: Some parks require approval before building.
- Environmental impact: Bridges must avoid harming streams or wetlands.
- Landowner permissions: Private land needs written consent.
Contact local authorities or trail organizations. They often offer advice, and sometimes funding or volunteers.
Site-specific Factors
Every bridge site is unique. Consider:
- Width of crossing: Measure from bank to bank, and add extra if water rises during storms.
- Soil type: Sandy soil may need deeper footings; rocky banks might require special anchors.
- Access for construction: Can you bring materials in easily? If not, you may need smaller pieces or hand tools.
Planning And Designing Your Bridge
Before you buy wood or start digging, a clear plan is vital. Good design means safety, durability, and a bridge that feels natural to ride.
Measuring And Sketching
Start with a detailed sketch. Include:
- Bridge length: Add at least 1 foot extra on each end beyond the crossing width.
- Bridge width: For mountain bikes, aim for 30–48 inches. Wider bridges suit two-way traffic or hikers.
- Height above ground/water: Keep the bridge low, but high enough to avoid flooding.
Use a tape measure and mark both banks. Sketch the slope and vegetation, noting obstacles.
Choosing Bridge Type
Common mountain bike bridge types:
- Flat deck bridges: Simple, straight decks supported by beams.
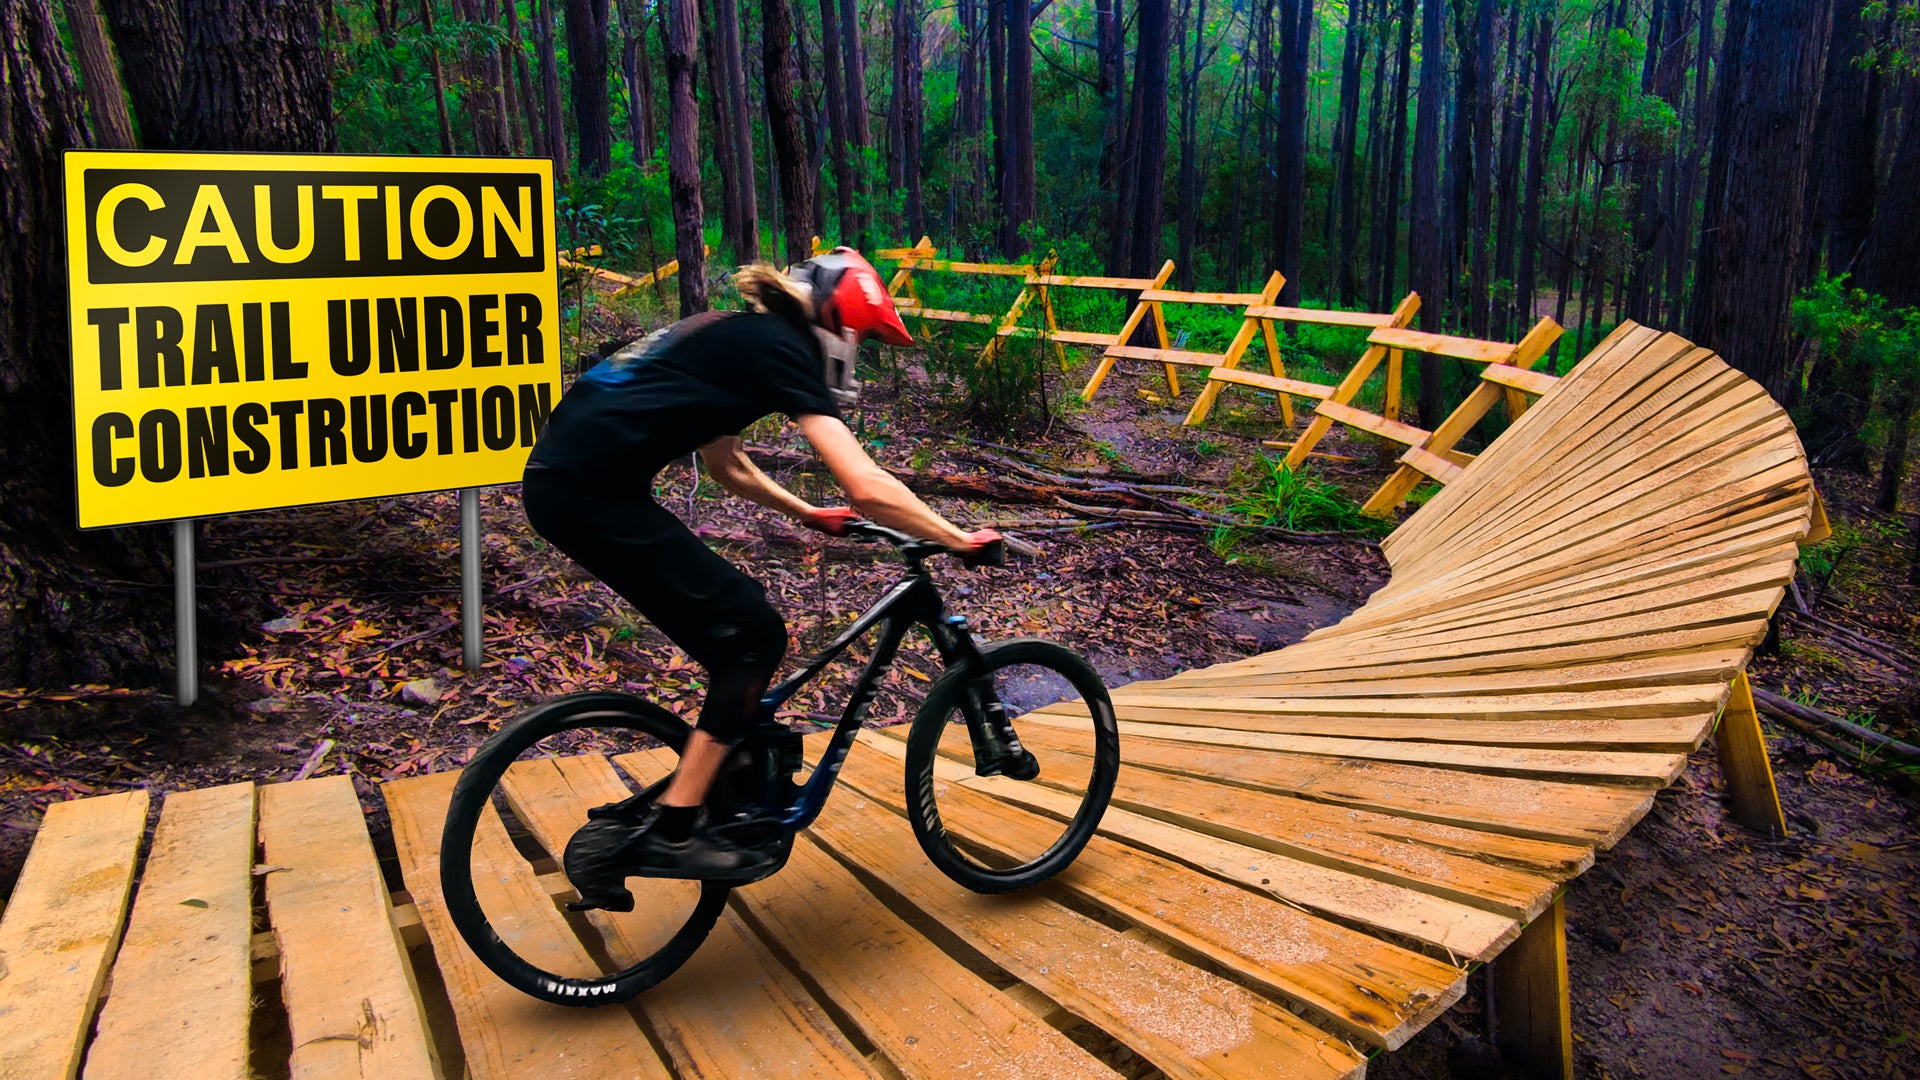
- Arched bridges: Curved beams for longer spans, often stronger but harder to build.
- Log bridges: Use local logs as supports and decking, blending with surroundings.
- Boardwalks: Raised platforms over wetlands or mud, often longer and narrow.
Pick the type based on span, terrain, and resources.
Material Selection
Most bridges use wood, but not all wood is equal.
| Material | Strength | Durability | Cost | Availability |
|---|---|---|---|---|
| Pressure-treated lumber | High | Excellent | Medium | Easy |
| Untreated pine | Medium | Poor | Low | Easy |
| Cedar | Medium | Good | High | Medium |
| Recycled plastic lumber | Medium | Excellent | High | Varies |
| Steel | Very High | Excellent | Very High | Hard |
For most projects, pressure-treated lumber is ideal. It resists rot, handles moisture, and is cost-effective. Avoid untreated wood—it rots quickly, especially in wet spots.
Calculating Load And Safety Factors
A bridge must support riders, bikes, and sometimes small vehicles. Standard mountain bike bridges carry at least 100 pounds per square foot. For club trails, aim higher—up to 300 pounds per square foot.
Add a safety margin:
- If your bridge is 3 feet wide and 12 feet long, total load = 3 x 12 x 300 = 10,800 pounds.
- Use beams rated for at least this load.
Consult span tables or an engineer for long spans. If in doubt, build stronger. Weak bridges fail fast.
Bridge Decking And Surface
Decking is where tires touch. Use boards spaced ¼–½ inch apart for drainage. Boards should be:
- 2×6 or 2×8 lumber
- Screwed, not nailed (screws hold better)
- Grain facing up (reduces splitting)
Add surface grip. Some builders use:
- Chicken wire mesh: Cheap, fast, adds traction.
- Anti-slip paint: Works, but needs re-coating.
- Textured boards: Saw cuts or grooves.
Slippery decks cause crashes, especially in rain.
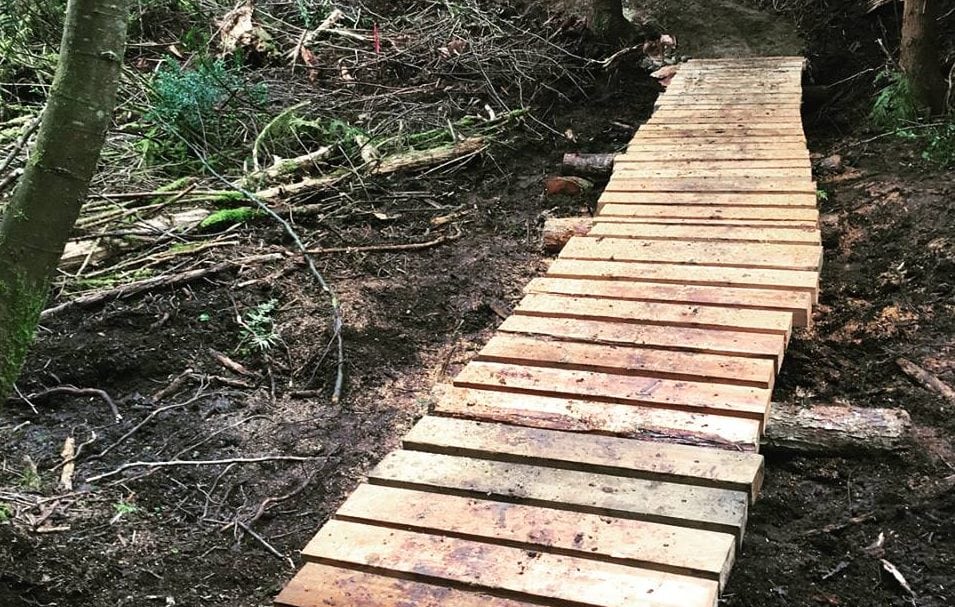
Credit: www.graysharbortalk.com
Gathering Tools And Materials
Before you start, gather everything. Missing tools slow the build, and forgotten materials risk mistakes.
Essential Tools
- Tape measure and level
- Circular saw or hand saw
- Cordless drill (with spare batteries)
- Impact driver (for screws/bolts)
- Shovel and digging bar
- Crowbar (for moving logs)
- Hammer (for minor adjustments)
- Wrench set
- Safety gear: Gloves, goggles, boots
For remote builds, use hand tools. Power tools save time if you have battery access.
Materials Checklist
- Pressure-treated beams (size depends on span)
- Decking boards (2×6 or 2×8)
- Galvanized screws and bolts
- Concrete mix (for footings, if needed)
- Steel brackets (for joins)
- Mesh or anti-slip surface
Bring extra fasteners. Dropped screws get lost.
Delivery And Storage
If building far from roads, split materials into smaller loads. Use a wheelbarrow or carry boards by hand. Store wood off the ground to prevent rot and warping.
Preparing The Bridge Site
A good site makes building easier and ensures long-term stability.
Clearing And Marking
Remove debris, branches, and loose stones. Clear at least 3 feet on each side for safe working and future maintenance.
Mark the bridge ends with stakes. Use spray paint or ribbon to outline the bridge footprint.
Leveling And Grading
Bridge supports need firm ground. Use a shovel to level both banks. For muddy or sandy soil, dig deeper and add crushed rock.
Slope the approaches for smooth entry and exit. Avoid abrupt steps—mountain bikes need gradual ramps.
Foundation Options
Strong foundations prevent settling and tipping.
- Concrete footings: Dig holes at each end, pour concrete, and set beams in brackets. Best for wet or unstable ground.
- Large rocks: Place flat stones under beams for quick builds. Effective for rocky sites.
- Buried logs: Lay thick logs and bury partly in the ground. Cheap, but not as durable.
For most bridges, concrete is best. But logs and rocks work well in dry, stable spots.
Building The Bridge Frame
The frame is the backbone. If it’s weak, the bridge fails.
Installing Main Beams
Lay out beams across the crossing. For short spans (under 8 feet), use two beams. For longer bridges, three or more beams spread the load.
Space beams evenly—usually 18–24 inches apart.
Fasten beams to footings:
- Use steel brackets for concrete.
- Drill into rocks and anchor with bolts.
- For logs, spike beams using large galvanized nails.
Check alignment with a level. A sloping bridge is unsafe.
Adding Cross Supports
Cross supports (joists) add strength. Install perpendicular to main beams every 2–3 feet.
Attach joists with galvanized screws or brackets. For extra strength, use metal straps.
Example: Real Trail Build
On the Appalachian Trail, volunteers built a 20-foot bridge using three 4×8 beams, anchored in concrete, with 2×6 cross supports every 2 feet. The bridge has lasted over 10 years, surviving floods and heavy use.
Decking And Surface Preparation
Decking is where riders feel the bridge. Good decking means comfort and safety.
Installing Deck Boards
Lay boards across the frame, perpendicular to beams. Leave ¼–½ inch gaps for drainage.
Screw boards in place. Use two screws per end to prevent twisting. Stagger joints if boards are shorter than the bridge length.
Trim overhanging boards for a neat finish.
Adding Traction
Wet wood is slippery. Add traction:
- Staple chicken wire mesh to deck boards.
- Paint with anti-slip coating.
- Use grooved boards for natural grip.
Check local rules—some parks ban wire mesh.
End Treatments
Finish the bridge ends with ramps. Use extra boards to create a gradual slope. Secure with screws and anchor to the ground.

Credit: www.youtube.com
Guardrails And Safety Features
Not all mountain bike bridges need guardrails, but they add safety on long or high spans.
When To Use Guardrails
- Bridges over 3 feet high
- Spans longer than 20 feet
- Areas with beginner riders
Most guardrails are 36–42 inches tall. Space posts every 4–6 feet.
Building Guardrails
Use 4×4 posts at each end and every 4–6 feet. Attach with brackets or bolt through beams.
Add horizontal rails—2×4 boards work well. For extra safety, add mesh or cable.
Avoid sharp edges. Sand rails and round corners.
Finishing Touches And Inspection
A finished bridge needs a close inspection before opening.
Quality Checks
- Walk and bounce on the bridge. Listen for creaks or movement.
- Check screws and bolts. Tighten any loose fasteners.
- Look for gaps, splinters, or sharp edges.
Invite club members or other riders for a test ride. Feedback helps spot issues.
Signage And Trail Marking
Add signs to warn riders of the bridge. Use reflective tape if needed.
Mark the bridge on maps and trail guides. New riders appreciate clear info.
Example: Community Bridge Inspection
The North Shore Mountain Bike Association runs annual bridge checks. Volunteers inspect 50+ bridges, looking for rot, loose boards, and safety hazards. Bridges are flagged for repair or replacement as needed.
Maintenance And Long-term Care
A bridge isn’t “done” after the build. Regular care extends its life and keeps riders safe.
Routine Checks
- Inspect every 6–12 months.
- Tighten screws and bolts.
- Check for rot, especially on decking.
- Look for erosion at the footings.
Replace damaged boards quickly. One loose board can cause accidents.
Cleaning And Repairs
Sweep leaves and mud off the bridge. Pressure wash if needed, but avoid harsh chemicals.
For repairs:
- Replace rotten wood with pressure-treated boards.
- Tighten or replace guardrails.
- Reapply anti-slip coating yearly.
Common Mistakes In Maintenance
- Ignoring small cracks—these grow fast.
- Letting dirt pile up—traps moisture and rots wood.
- Forgetting inspections—problems multiply.
Well-maintained bridges often last 10–20 years.
Advanced Bridge Designs And Unique Challenges
Some sites demand more than a simple deck bridge. Here’s how to tackle tough builds.
Long Span Bridges
For spans over 20 feet, consider:
- Steel beams: Strong but heavy and costly.
- Suspension bridges: Cables support the deck, ideal for deep ravines.
- Truss designs: Use triangles for strength.
Consult an engineer for long spans. Mistakes are costly.
Flood-prone Areas
Raise the bridge higher. Use longer beams and strong anchors. Install debris guards to stop logs from hitting the bridge.
Wetlands And Sensitive Habitats
Build boardwalks. Use narrow decks (18–30 inches) to minimize impact. Space supports every 4–6 feet.
Use recycled plastic lumber for durability and low impact.
Example: Data From Trail Organizations
| Bridge Type | Average Lifespan (Years) | Annual Maintenance Hours | Average Cost ($) |
|---|---|---|---|
| Standard wood deck | 12 | 8 | 1,200 |
| Boardwalk | 15 | 10 | 1,800 |
| Steel beam | 25 | 5 | 3,500 |
| Suspension | 30 | 12 | 7,000 |
Steel and suspension bridges cost more, but last longer.
Environmental Responsibility
Building a bridge affects nature. Protecting habitats and water quality is critical.
Minimizing Impact
- Build during dry seasons to avoid erosion.
- Use local materials when possible.
- Avoid heavy machinery near streams.
For sensitive areas, consult environmental experts. Sometimes, a bridge isn’t the answer.
Example: Sustainable Builds
The IMBA Trail Solutions team uses recycled lumber, small crews, and hand tools to minimize impact. Their bridges blend with nature and require less repair.
Involving The Community
Mountain bike bridges are often built by volunteers. Community support brings energy, funds, and lasting pride.
Organizing Workdays
- Schedule builds for weekends.
- Split crews into teams: Digging, framing, decking.
- Provide food and water.
Safety is vital. Brief all volunteers, supply gloves, and keep first aid handy.
Fundraising And Support
Bridges can cost from $800 to $5,000. Raise funds with:
- Local business sponsors
- Trail club memberships
- Online crowdfunding
Share updates and photos. Success builds trust and future support.
Example: Club-funded Bridge
The Midwest Mountain Bike Club raised $2,500 for a bridge. They ran a raffle, held a workday, and finished the bridge in one weekend.
Credit: cutlaps.com
Common Mistakes And How To Avoid Them
Even experienced builders make errors. Here are mistakes to watch for:
- Underestimating load: Weak beams collapse under heavy use.
- Poor drainage: Water pools, leading to rot.
- Skipping permits: Legal trouble or forced removal.
- Nailing instead of screwing: Nails loosen; screws last.
- Rushing ramps: Abrupt transitions cause crashes.
- Ignoring environmental impact: Damage leads to fines and loss of access.
- Overbuilding: Waste of money and materials.
- Bad alignment: Crooked bridges are unsafe and disliked.
- Forget guardrails: High bridges need rails for safety.
- No maintenance plan: Bridges rot and fail.
Learn from others. Visit local trails, talk to builders, and inspect old bridges.
Real-world Examples And Success Stories
The Whistler Bike Park
At Whistler, bridges cross streams, wetlands, and steep ravines. Builders use pressure-treated wood, steel beams, and recycled materials. Regular maintenance keeps bridges safe despite heavy use—over 200,000 riders annually.
The Appalachian Trail
Volunteers built dozens of bridges, often with local logs and simple designs. Some bridges have lasted 15+ years, thanks to careful site selection and community care.
The North Shore
Famous for wild, elevated bridges, the North Shore uses creative designs—arched decks, cable suspension, and narrow boardwalks. Builders learned to test new ideas, inspect often, and repair quickly.
Frequently Asked Questions
How Wide Should A Mountain Bike Bridge Be?
For most trails, aim for 30–48 inches. Narrow bridges work for singletrack, but wider decks suit two-way traffic or hikers. Check local rules—some parks set minimum widths.
What Type Of Wood Lasts Longest?
Pressure-treated lumber lasts longest. It resists rot and insects, especially in wet areas. Cedar is also durable, but costs more. Untreated wood decays fast—avoid it for bridges.
Do I Need A Permit To Build A Bridge?
Usually yes, especially on public land. Check with local park authorities or trail organizations. Permits ensure safety and protect the environment. Building without approval can lead to fines or removal.
How Much Does A Mountain Bike Bridge Cost?
Costs vary. Small bridges can cost $800–$1,500. Larger spans or steel beams may reach $3,000–$7,000. Save money by using local materials, volunteer labor, and careful planning.
Where Can I Find More Information About Trail Building?
Visit the IMBA Trail Solutions website for guides, videos, and advice: IMBA Trail Solutions. Local trail clubs and park authorities often share plans and tips.
Building a mountain bike bridge is a rewarding challenge. It improves trails, protects nature, and brings riders together. With careful planning, the right materials, and ongoing care, your bridge can last for years—and become a favorite part of the ride.
Remember, every bridge is unique. Adapt these tips to your site, involve your community, and enjoy the process. The best bridges aren’t just strong—they’re built with passion and pride.

Hello Guys! I am John Reese, a professional biker and my hobby is biking! I have been biking for last 12 years and I love using bikes while outing as well. Based on my experiences with the different type of bikes (mountain bikes, road bikes and hybrid bikes); I am sharing my opinion about various bikes so that a beginner can get started right away. Happy reading!