Changing the rear tire on a mountain bike can seem difficult, especially if you haven’t done it before. But with the right steps and a little patience, anyone can do it. This guide explains the process in simple terms, so you can get back on the trail quickly.
Whether you ride for fun or sport, knowing how to change your rear tire is a key skill. It saves money, time, and helps you avoid getting stuck with a flat far from home. Let’s break down the process, highlight common mistakes, and share tips that even many beginners miss.
By the end, you’ll feel confident handling this task yourself.
Why Rear Tires Matter More
On mountain bikes, the rear tire takes more stress than the front. It handles most of the rider’s weight and delivers power from the pedals. This means it wears out faster and is more likely to get a flat or other issues. Changing the rear tire is a bit more complex than the front because of the gears and the chain. That’s why learning this skill is extra important for mountain bike owners.
Some stats show that mountain bike riders replace their rear tire 2–3 times more often than the front. According to industry surveys, about 65% of flats happen on the rear tire, especially on rocky or rough terrain. Knowing this, it makes sense to focus on the rear tire first.
Tools And Materials You Need
Before you start, gather these items. Missing tools can make the job much harder.
- Spare rear tire (same size and type as your old one)
- Inner tube (if you use tubes)
- Tire levers
- Bike pump (with gauge)
- Wrench (if your wheel uses nuts, not quick release)
- Gloves (optional, keeps hands clean)
- Patch kit (if you want to repair instead of replace)
- Rag or towel (for cleaning and drying)
Some mountain bikes use tubeless tires, which need sealant and a special valve. For most riders, tube-type tires are more common, so this guide focuses on those. Always check your bike manual for tire size—usually printed on the sidewall.
Preparing Your Bike
Before removing the rear tire, make sure your bike is safe and stable.
- Shift the gears to the smallest cog (the smallest rear gear). This loosens the chain and makes wheel removal easier.
- Flip the bike upside down or use a bike stand. If upside down, place a towel under the handlebars and seat to prevent scratches.
- Check for any dirt or debris around the tire. Clean with a rag if needed.
Many beginners forget to shift gears before starting. This mistake makes it harder to remove the wheel and can damage the chain. Always shift first.
Removing The Rear Wheel
This is the step that confuses most people, but it’s not as hard as it looks.
- Release the brakes: If your bike has rim brakes, open the brake arms. Disc brakes don’t need this step.
- Open the quick release lever: Most mountain bikes have a lever on the axle. Flip it open and unscrew slightly.
- Pull the wheel out: Gently lift the wheel up and away from the bike frame. You may need to move the derailleur (gear arm) back to clear the chain.
If your bike uses nuts instead of a quick release, use the wrench to loosen them. Keep the nuts safe—you’ll need them to reattach the wheel.
Common Mistakes During Removal
- Forgetting to release the brakes can make it impossible to remove the wheel.
- Pulling too hard on the wheel can bend the derailleur.
- Losing small parts like axle nuts or washers. Keep a tray nearby for these.
Removing The Old Tire
Once the wheel is off, set it on a flat surface.
- Deflate the tire completely. Press the valve down or remove the core if possible.
- Insert tire levers under the tire edge (bead). Start opposite the valve.
- Pry the tire edge up over the rim. Work the lever around the wheel until one side is off.
- Remove the inner tube. Pull out gently, starting at the valve.
- Take off the tire. Pull the second side off the rim.
Some tires are tighter than others. If you struggle, add a little soapy water for lubrication. Never use metal levers—they can damage the rim.
Data Table: Tire Removal Difficulty
Here’s how different tire types compare for removal:
| Tire Type | Removal Difficulty | Typical Tool Needed |
|---|---|---|
| Standard Tube | Easy | Plastic Tire Lever |
| Reinforced MTB | Medium | Plastic Tire Lever |
| Tubeless | Hard | Special Lever, Sealant |
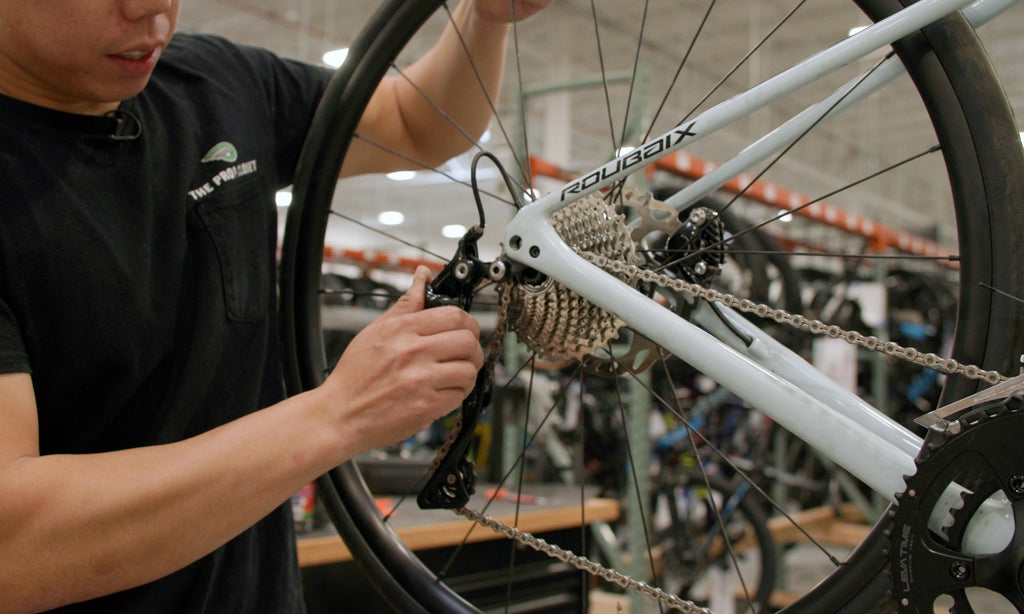
Inspecting The Rim And Components
Before installing the new tire, check the wheel for damage.
- Look for cracks or bends in the rim.
- Check the spokes for tightness.
- Clean the rim and hub with a rag.
- Inspect the rim tape (covers spoke holes). Replace if damaged.
Many riders skip this step, but a damaged rim can cause flats or unsafe riding.

Credit: www.wikihow.com
Choosing The Right Rear Tire
Not all mountain bike tires are the same. Choosing the right one depends on your riding style and terrain.
Key Factors For Tire Selection
- Tire size: Match the old tire’s diameter and width. Typical sizes are 26″, 27.5″, or 29″.
- Tread pattern: Aggressive tread is best for muddy trails. Smooth tread works for dry, hard surfaces.
- Durability: Reinforced sidewalls last longer but are heavier.
- Tubeless compatibility: If your wheel supports tubeless, consider switching for fewer flats.
Comparison Table: Tire Types For Rear Wheel
| Tire Type | Best For | Average Lifespan (miles) |
|---|---|---|
| Standard Tube | Casual Trails | 1,500 |
| Reinforced MTB | Rocky Terrain | 2,500 |
| Tubeless | Wet/Muddy | 2,000 |
Common Mistakes When Buying
- Picking the wrong size (too wide or too narrow).
- Not matching tread pattern to local terrain.
- Forgetting to check tubeless compatibility.
Always read the sidewall of your old tire and check your wheel rim for size markings.
Installing The New Tire
This is where patience pays off. Rushing can pinch the tube or damage the tire.
- Insert one side of the tire bead onto the rim. Start near the valve hole.
- Place the inner tube into the tire. Insert the valve into the rim hole first.
- Tuck the tube into the tire, making sure it’s not twisted.
- Push the second bead onto the rim. Use your thumbs, not levers, to avoid pinching the tube.
- Check for pinches by running your fingers around the tire. Make sure the tube isn’t caught under the tire bead.
If you use tubeless tires, skip the tube step and add sealant through the valve.
Inflating The Tire
Proper inflation is key for performance and safety.
- Use a bike pump with a gauge. Mountain bike tires usually need 30–50 PSI (check sidewall for exact number).
- Pump slowly, checking for bulges or leaks.
- Stop at recommended PSI. Over-inflating can cause tire blowouts.
Some pumps work for both Schrader and Presta valves. Make sure your pump matches your valve type.
Data Table: Common Valve Types
| Valve Type | Typical Use | Pressure Range (PSI) |
|---|---|---|
| Schrader | Most MTB | 30–50 |
| Presta | High-end MTB | 30–50 |
Reattaching The Rear Wheel
Once the tire is on and inflated, it’s time to put the wheel back.
- Line up the wheel with the frame. The chain should rest on the smallest cog.
- Slide the wheel into the dropouts (slots in the frame).
- Tighten the quick release or axle nuts. Make sure it’s snug but not overly tight.
- Reconnect the brakes if you have rim brakes.
Spin the wheel to check for rubbing or noise. If it doesn’t spin freely, adjust the positioning. Beginners often forget to align the chain on the cog, causing the wheel to jam.
Testing And Final Checks
Before riding, always check your work.
- Spin the rear wheel. It should turn smoothly without wobbling.
- Check the brakes. Squeeze the levers and make sure they grip properly.
- Inspect the tire for leaks or bulges.
- Test ride in a safe area. Listen for strange noises or shifting issues.
If you notice any problems, fix them before heading out. Many riders skip this test and only find issues when far from home.
Tips For Faster, Safer Tire Changes
Changing a rear mountain bike tire gets easier with practice. Here are tips that help most riders:
- Practice at home before you need to change a tire on the trail.
- Carry a spare tube and levers when riding. Flats can happen anytime.
- Use gloves to avoid greasy hands and minor cuts.
- Check tire pressure weekly. Low pressure causes more flats and rim damage.
- Clean the rim and hub every tire change to prevent grit buildup.
A non-obvious insight: Always inspect your rear cassette (gears) while the wheel is off. It’s easier to clean or spot damage with the wheel removed.
Common Problems And Solutions
Even with careful work, you might face some issues.
- Pinched tube: Causes sudden flats. Avoid by tucking tube in carefully.
- Stuck tire bead: Happens on tight rims. Use soapy water or tap gently.
- Wheel doesn’t align: Usually chain is not on the smallest cog. Shift gears and try again.
- Leaky valve: Tighten or replace valve core.
Many beginners think a flat after tire change means a faulty tube. Often, it’s just a pinched tube or bead.
How Often Should You Change Your Rear Tire?
The answer depends on your riding habits.
- Casual riders: Every 1,500–2,000 miles
- Aggressive trail riders: Every 1,000 miles
- If you see cracks, bald spots, or frequent flats, change sooner
Some mountain bikers replace their rear tire every season, especially if riding in rocky or muddy areas. Keep track of your miles and inspect your tires monthly.

Credit: davidpressleyschool.com
Environmental Impact And Recycling
Old tires and tubes shouldn’t end up in the trash. Many bike shops recycle them. The EPA estimates that millions of bike tires are thrown away yearly. Look for local recycling options or creative ways to reuse old tires, like making garden planters or playground surfaces.
Frequently Asked Questions
How Can I Know If My Rear Tire Needs Changing?
Look for bald spots, deep cuts, or frequent flats. If the tread is worn down or the tire feels thin in places, it’s time for a change. Also, if you notice less grip on trails, check the tire for wear.
Can I Use A Front Tire On The Rear Wheel?
It’s not recommended. Rear tires are designed for more weight and power. Using a front tire on the rear may cause faster wear and less control. Always match the tire to its position.
What’s The Difference Between Tubeless And Tube Tires?
Tubeless tires use a sealant and special rim, making them more resistant to flats. Tube tires are easier to install and cheaper but can get flats more often. For most beginners, tube tires are simpler.
How Tight Should I Make The Quick Release?
The quick release should be tight enough that the wheel doesn’t wobble, but you should still be able to close the lever with firm pressure. If it’s too loose, the wheel can come off. If too tight, it’s hard to remove later.
Where Can I Learn More About Mountain Bike Maintenance?
For more guides and tips, visit Bicycling Magazine. They offer expert advice and video tutorials.
Changing a rear mountain bike tire is a skill that pays off every time you ride. With the steps above, the right tools, and a bit of practice, you’ll handle flats and tire wear confidently. Remember, careful preparation and patience make the process smooth.
If you keep your tools handy and check your tires often, you’ll spend less time fixing and more time riding. Don’t wait until you’re stuck on the trail—try changing your rear tire at home and feel the difference in control and safety.
Credit: www.ovapiscis.com

Hello Guys! I am John Reese, a professional biker and my hobby is biking! I have been biking for last 12 years and I love using bikes while outing as well. Based on my experiences with the different type of bikes (mountain bikes, road bikes and hybrid bikes); I am sharing my opinion about various bikes so that a beginner can get started right away. Happy reading!