Mountain bikes are built for adventure, speed, and control. One of the most important parts for safe riding is the disk brake system. If your brakes are not working properly, you can lose control, stop too slowly, or even damage your bike. Adjusting disk brakes is not difficult, but it requires careful steps. Many riders ignore regular brake checks, but this can lead to serious issues over time. With the right guidance, you can keep your mountain bike brakes smooth and reliable—even if you’re new to bike maintenance.
This article will help you learn how to adjust disk brakes on a mountain bike. You’ll discover clear steps, practical tips, and common mistakes to avoid. Whether you use your bike for trails or daily rides, good brakes make every journey safer and more enjoyable.
Understanding Disk Brakes
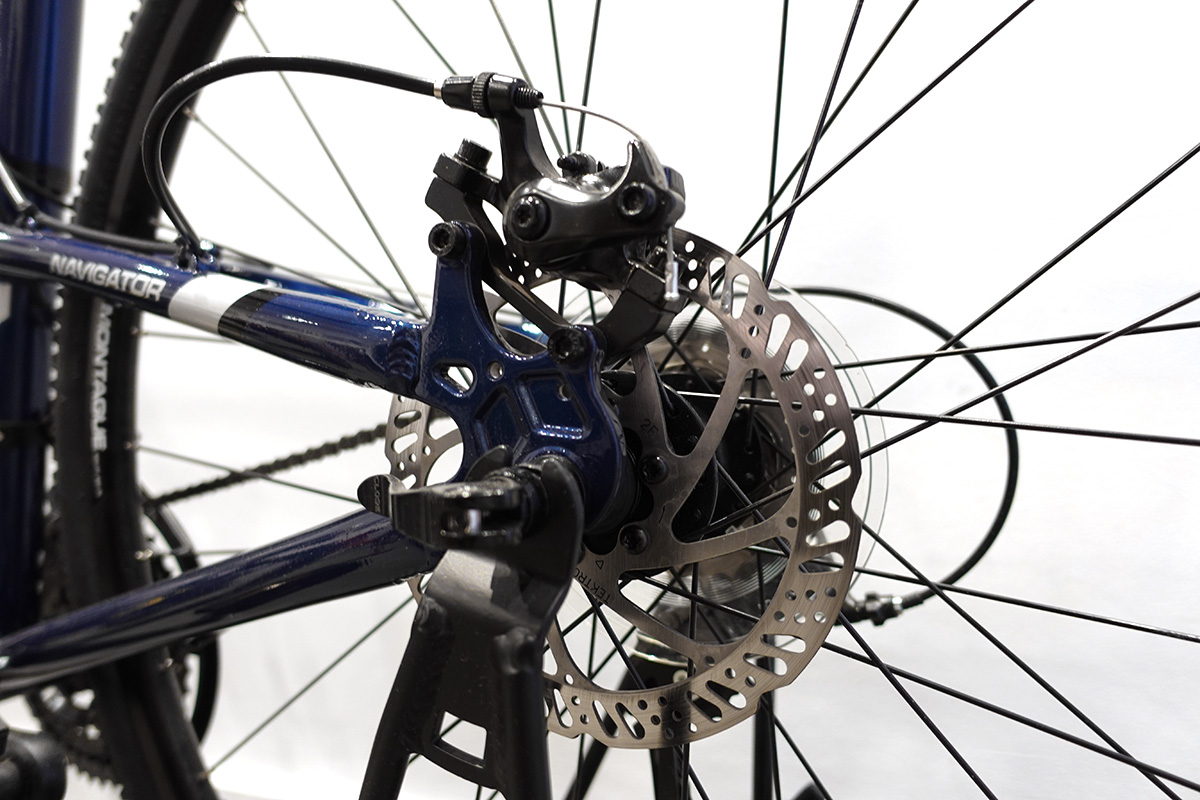
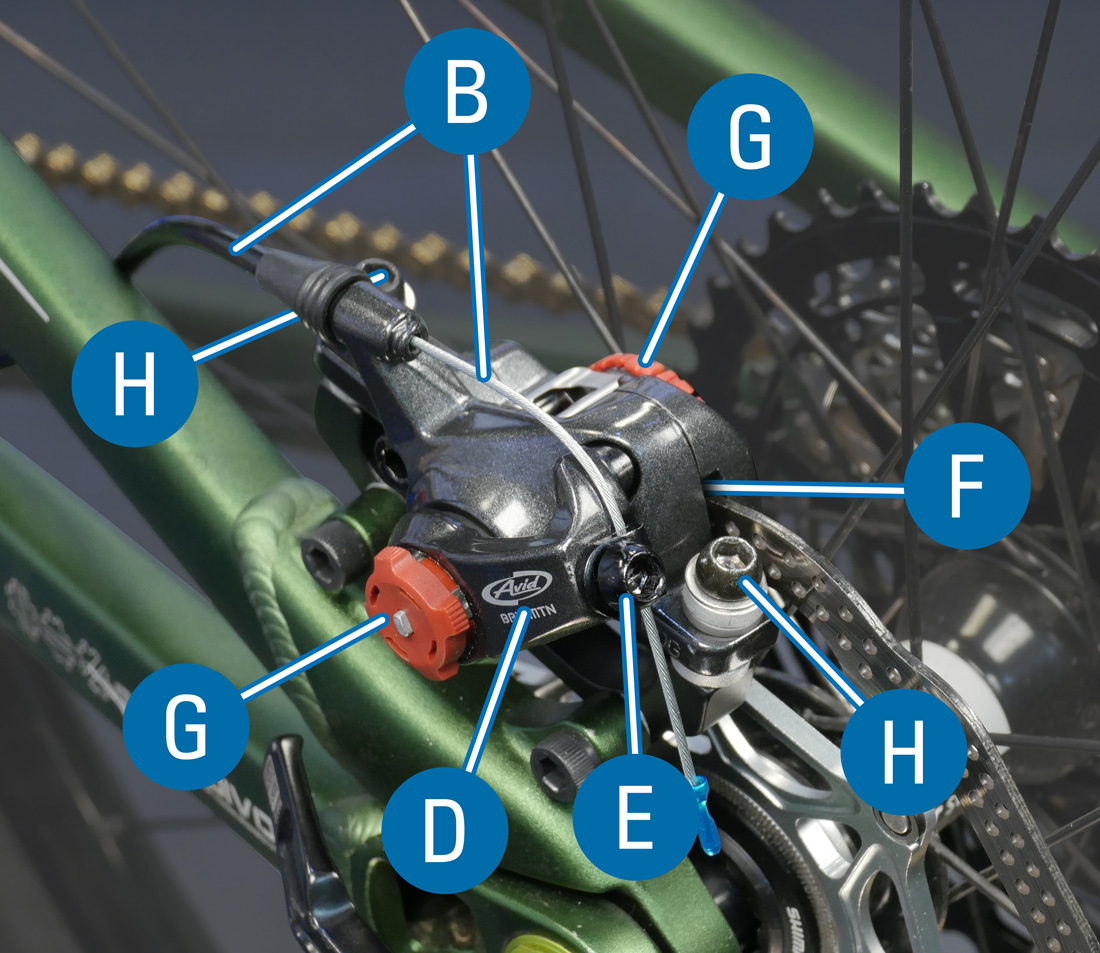
Disk brakes use a rotor (a metal disk) attached to the wheel and a caliper that squeezes brake pads against the rotor. This system offers strong stopping power, even in wet or muddy conditions. Two main types are found on mountain bikes:
- Mechanical disk brakes: These use a cable to move the caliper.
- Hydraulic disk brakes: These use fluid to transfer force, offering better control and less hand effort.
Each type has its adjustment methods, but the basic principles are similar. Knowing which type you have is the first step. Hydraulic systems are more common on higher-end bikes, while mechanical brakes are found on entry-level models.
Why Disk Brakes Need Adjustment
With time and use, disk brakes can:
- Rub or drag: Pads touch the rotor even when not braking.
- Feel weak: Brakes don’t stop the bike quickly.
- Make noise: Squealing or scraping sounds.
- Pull unevenly: One side grabs more than the other.
Adjusting your disk brakes restores performance and prevents wear on pads and rotors. Ignoring adjustment can cause expensive damage or unsafe riding.
Tools You Need
To adjust disk brakes, you need a few simple tools. Most are found in basic bike tool kits:
- Allen wrenches (usually 4mm, 5mm, or 6mm)
- Torx wrench (for some rotor bolts)
- Bike stand (optional but helpful)
- Clean rag
- Isopropyl alcohol (for cleaning)
- Cable tensioner tool (for mechanical brakes)
- Flathead screwdriver (sometimes needed)
Having the right tools makes the job easier and avoids damaging parts. Use only quality tools to prevent stripping bolts or rounding edges.

Credit: www.youtube.com
Preparing Your Bike
Before adjusting, prepare your bike to work safely:
- Shift your bike into its lowest gear and place it on a stable surface.
- If possible, use a bike stand so the wheels spin freely.
- Clean the rotor and caliper area with isopropyl alcohol and a rag. Dirt and oil reduce brake performance.
- Inspect pads and rotors for wear. If pads are thinner than 1 mm or rotors are warped, replace them before adjusting.
Many beginners forget to clean parts first. Dirty brakes can lead to poor adjustment and noise, so never skip this step.
Step-by-step Adjustment For Mechanical Disk Brakes
Mechanical disk brakes are easier for beginners to adjust. Here’s how to do it:
1. Check Pad Alignment
Spin the wheel and look at the gap between the rotor and pads. The rotor should run freely without rubbing. If you see rubbing, note which side.
2. Loosen The Caliper Bolts
Using an Allen wrench, loosen (but don’t remove) the two bolts holding the caliper to the frame. This lets the caliper move slightly.
3. Center The Caliper
Squeeze the brake lever firmly. This centers the caliper over the rotor. While holding the lever, tighten the caliper bolts. Release the lever and check the gap again. The rotor should spin freely with a small gap on each side.
4. Adjust Pad Distance
On most mechanical calipers, you can adjust the inner pad (closest to the wheel) with a small dial or screw. Turn it clockwise to move the pad closer, counterclockwise to move it away. Adjust until the gap is about the thickness of a credit card.
5. Check Cable Tension
If the lever feels too loose or too tight, adjust the cable at the barrel adjuster (found near the lever or caliper). Turn clockwise to loosen, counterclockwise to tighten. The lever should engage after about 1/4 of its travel.
6. Test And Fine-tune
Spin the wheel and squeeze the brake. If there’s still rubbing, repeat the steps. If the brake feels weak, increase cable tension slightly.
Non-obvious insight: Many riders forget to check cable fraying. Frayed cables can cause sudden brake failure. Always inspect cables for damage before adjusting.
Step-by-step Adjustment For Hydraulic Disk Brakes
Hydraulic disk brakes use fluid, so adjustment is a bit different:
1. Check Pad Alignment
Spin the wheel and look for rubbing. Hydraulic calipers self-adjust, but sometimes pads stick due to dirt or uneven wear.
2. Loosen Caliper Bolts
Just like mechanical brakes, use an Allen wrench to loosen the caliper mounting bolts.
3. Center The Caliper
Squeeze the brake lever hard, then tighten the caliper bolts while holding the lever. Release and check alignment.
4. Inspect Fluid Levels
If the lever feels soft or spongy, the system may need a bleed (removal of air from the hydraulic lines). This requires a special kit and is best done by a bike shop if you’re unsure.
5. Clean And Re-seat Pads
Remove the pads and clean with alcohol if they’re dirty. Re-seat them carefully. If pads are worn below 1 mm, replace them.
6. Test And Fine-tune
Spin the wheel and squeeze the brake. If rubbing persists, repeat the steps. If the lever still feels soft, bleed the brakes.
Non-obvious insight: Temperature changes can affect hydraulic fluid. If you ride in extreme heat or cold, check your brakes more often.
Common Problems And Solutions
Adjusting disk brakes isn’t always smooth. Here are some frequent issues and fixes:
- Squealing brakes: Usually caused by dirty pads or rotor. Clean with alcohol. If noise continues, lightly sand pads.
- Rotor rubs after adjustment: Try re-centering the caliper. If rotor is bent, use a rotor truing tool to straighten.
- Weak braking: For mechanical, increase cable tension. For hydraulic, check for air in system or worn pads.
- Brake lever pulls too far: Cable may be loose or pads too far from rotor. Adjust cable or pad distance.
- Sticky lever: For mechanical, lubricate the cable. For hydraulic, check for leaks or air.
| Problem | Likely Cause | Quick Fix |
|---|---|---|
| Squealing brakes | Dirty pads/rotor | Clean with alcohol |
| Weak braking | Loose cable/worn pads | Adjust cable/replace pads |
| Sticky lever | Cable friction/fluid issue | Lubricate cable/bleed brakes |
| Rotor rub | Misaligned caliper/bent rotor | Re-center caliper/true rotor |
Credit: www.conafovicer.com
When To Replace Parts
Disk brake parts wear out over time. Here’s when to replace:
- Pads: Replace when thinner than 1 mm or contaminated.
- Rotor: Replace if warped, cracked, or worn below manufacturer’s minimum thickness (usually 1.5 mm).
- Cables (mechanical): Replace if frayed or stiff.
- Hydraulic fluid: Replace if dirty or every 1–2 years.
Using worn parts can ruin the rotor or cause poor braking. Always check parts before adjusting.
| Part | Replacement Interval | Signs To Replace |
|---|---|---|
| Brake Pads | Every 6–12 months | Pad thickness < 1 mm |
| Rotor | Every 1–2 years | Warped/cracked/worn |
| Cable | Every 1 year | Frayed/stiff |
| Hydraulic Fluid | Every 1–2 years | Dirty/spongy lever |
Safety Checks After Adjustment
After adjusting, always check:
- Brake lever feel: Should be firm, not loose or spongy.
- Wheel spin: Rotor should spin freely with no rubbing.
- Stopping power: Test brakes at low speed before riding fast.
- No strange noises: Squealing or grinding indicates a problem.
Test your bike in a safe area before heading out. Many riders skip this, but it’s essential to avoid accidents.
Tips For Long-term Brake Performance
Keeping disk brakes in top shape is about regular care. Here are some expert tips:
- Clean rotors and pads monthly with alcohol.
- Check pad thickness every few weeks.
- Inspect bolts and cables for tightness and wear.
- Avoid touching rotors with oily hands.
- Replace fluid every 1–2 years (hydraulic).
- Store your bike indoors to prevent moisture damage.
- Use quality pads—cheap pads wear fast and cause noise.
- Don’t ignore small noises or rubbing; fix them early.
- Learn to true rotors (straighten minor bends) with a tool.
- If unsure, visit a bike shop for help.
Experience-based tip: Many riders only adjust brakes when something feels wrong. It’s smarter to check them regularly, especially after riding in mud, rain, or rough trails.
Comparing Mechanical Vs Hydraulic Disk Brakes
Choosing the right brake type matters for adjustment and performance. Here’s a quick comparison:
| Feature | Mechanical Disk Brakes | Hydraulic Disk Brakes |
|---|---|---|
| Adjustment Difficulty | Easy | Moderate |
| Maintenance | Low | Medium |
| Stopping Power | Good | Excellent |
| Cost | Lower | Higher |
| Common Problems | Cable stretch/fraying | Air/fluid issues |
Mechanical brakes are easier for beginners, but hydraulic brakes give better performance and control. If you ride often or in tough conditions, hydraulic is worth the extra care.
Credit: zefiropartners.com
Real-life Example: Adjusting Disk Brakes After Trail Ride
Imagine you finish a muddy trail ride. Your brakes squeal and feel weak. Here’s how you’d fix them:
- Clean rotors and pads with alcohol and a rag.
- Inspect pads—if mud is packed in, remove and clean.
- Check cable tension (mechanical) or lever feel (hydraulic).
- Re-center caliper by squeezing the lever and tightening bolts.
- Spin the wheel and check for rubbing.
- Test brakes at low speed.
Most riders notice improved performance after these steps. Regular care after tough rides keeps brakes working longer.
Why Professional Help Matters Sometimes
You can adjust most disk brakes yourself, but some issues need expert help:
- Hydraulic fluid leaks
- Major rotor bends
- Bleeding hydraulic lines
- Caliper piston problems
If you’re unsure, visit a local bike shop. Professionals have tools and experience to fix tough problems. For advanced guides, check resources like Park Tool.
Frequently Asked Questions
How Often Should I Adjust Disk Brakes On My Mountain Bike?
Adjust disk brakes every few months or after heavy rides. If you notice rubbing, noise, or weak braking, adjust them immediately. Regular checks prevent bigger problems.
What Is The Difference Between Mechanical And Hydraulic Disk Brakes?
Mechanical brakes use cables, are easier to adjust, and cheaper. Hydraulic brakes use fluid, offer stronger stopping power, and require more care. Both have their own adjustment steps.
Can I Use Household Cleaners On Rotors And Pads?
No. Only use isopropyl alcohol for cleaning. Household cleaners can leave residues that reduce braking power and cause noise.
Why Do My Brakes Squeal After Adjustment?
Squealing is usually caused by dirty pads, oil on the rotor, or glazed pad surfaces. Clean pads and rotors with alcohol, and lightly sand pads if needed.
What Should I Do If My Hydraulic Brake Lever Feels Soft?
A soft lever means air in the system or low fluid. Bleed the brakes or add fluid. If you’re not experienced, ask a bike shop for help.
Keeping disk brakes in good shape is one of the smartest ways to stay safe and enjoy your mountain bike. By following these steps, using the right tools, and checking your brakes regularly, you’ll ride with confidence. Even beginners can master disk brake adjustment with a little practice.
Always put safety first, and don’t hesitate to seek professional help for complex issues. Your mountain bike—and your rides—will thank you.

Hello Guys! I am John Reese, a professional biker and my hobby is biking! I have been biking for last 12 years and I love using bikes while outing as well. Based on my experiences with the different type of bikes (mountain bikes, road bikes and hybrid bikes); I am sharing my opinion about various bikes so that a beginner can get started right away. Happy reading!