Changing the back tire tube on a mountain bike might seem tricky at first. But with the right steps, you can do it quickly and safely—even if you’re not a bike expert. A flat tire can stop your ride, but knowing how to fix it gives you freedom and confidence on any trail.
This guide will walk you through every stage, from preparation to finishing touches. You’ll also find practical tips, mistakes to avoid, and answers to common questions. Whether you ride for fun or fitness, learning this skill will save you time and money.
Why Changing A Back Tire Tube Matters
Mountain bikes face tough terrain—rocks, roots, dirt, and sometimes glass or thorns. Flat tires are common. Fixing a flat quickly helps you avoid walking your bike home, missing a ride, or paying for expensive repairs. Many cyclists only know how to fix the front tire, but the back wheel is more complicated because it connects to the gears and chain. Understanding the process helps you stay prepared for emergencies and keeps your bike running smoothly.
Tools And Materials You Need
Before you start, gather these essential items. Having everything ready prevents frustration and saves time.
- New inner tube (match the size of your tire)
- Tire levers (usually 2)
- Bicycle pump (hand pump or floor pump)
- Wrench (if your bike doesn’t have quick-release)
- Gloves (optional for clean hands)
- Patch kit (if you want to repair instead of replace)
Check the sidewall of your tire for numbers like “29 x 2.25.” This tells you the diameter and width needed for the new tube. Most mountain bikes use sizes between 26 and 29 inches.
Preparing Your Bike And Work Area
Choose a flat, clean space—garage, driveway, or yard. If possible, use a bike stand to hold your bike upright. If not, flip your bike so it rests on the seat and handlebars (put a towel underneath to protect them). Shift the gears to the smallest chainring and smallest rear cog.
This makes removing the wheel easier and reduces tension on the chain.
Safety Tip: Always remove the back wheel with care. The chain and gears can be sharp. Wearing gloves helps avoid cuts and keeps your hands clean.
Removing The Back Wheel
This step is different from the front wheel because the derailleur and chain are involved. Follow these steps:
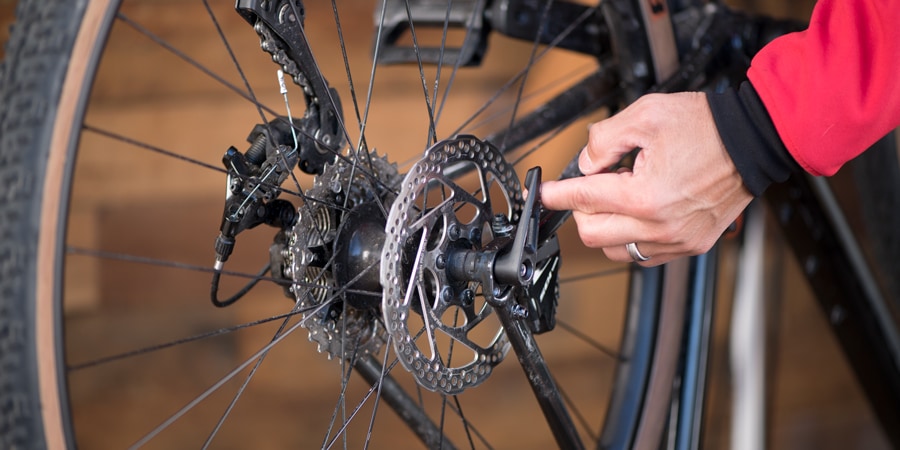
- Release the brake: If your bike has rim brakes, open the brake arms. For disc brakes, skip this step.
- Loosen the axle: If you have a quick-release lever, open it. If not, use a wrench to loosen the nuts.
- Lift the derailleur: Gently pull the rear derailleur backward to free the wheel.
- Remove the wheel: Pull the wheel out of the frame. Make sure the chain stays on the smallest cog.
Common Mistake: Forgetting Gear Position
Many beginners forget to shift to the smallest cog. This makes wheel removal harder and can bend the derailleur. Always shift before you start.
Credit: www.rei.com
Taking Off The Tire
With the wheel off, you’re ready to remove the tire. Here’s how:
- Let out all air: Press the valve to release air. If the tube is already flat, skip this step.
- Insert tire levers: Slide a lever under the tire edge (bead) and hook it onto a spoke. Place the second lever a few inches away and lift the tire bead over the rim.
- Work around the rim: Move the levers around until one side of the tire is off.
Pro Tip: Sometimes, tires are tight. Use the levers carefully to avoid damaging the rim or pinching the tube.
Removing The Old Tube
Now you can take out the damaged tube:
- Pull out the valve: Gently push the valve stem through the rim.
- Remove the tube: Pull the rest of the tube out from under the tire.
Check the tube for holes, cuts, or punctures. If you want to patch it, mark the damaged area. If you’re replacing it, discard the old tube.
Checking For Sharp Objects
Before you install the new tube, check the inside of the tire for sharp objects. Run your fingers inside the tire, but be careful—thorns, glass, or metal can cut your skin. Remove any debris to prevent another flat.
Installing The New Tube
Now comes the main step—putting in the new tube. Here’s a reliable method:
- Add a little air: Pump a small amount of air into the tube so it’s round but not tight.
- Insert the valve: Push the valve stem through the rim hole.
- Place the tube: Lay the tube inside the tire, making sure it’s not twisted.
Seating The Tire
- Push the tire bead back: Start at the valve and push the tire edge back onto the rim. Use your thumbs or the tire levers if necessary.
- Check for pinches: Make sure the tube isn’t caught between the tire and rim.
Advanced Tip: Experienced riders often use their hands instead of levers for the last section to avoid pinching the tube.
Inflating The Tire
Use a pump to inflate the tire to the recommended pressure. Check the sidewall for PSI numbers. Most mountain bike tires use 30–50 PSI. Do not overinflate—too much air can burst the tube.
Quick Tip: Stop and check the tire as you pump. Make sure it’s seated evenly, and the tube isn’t bulging out.

Credit: www.juristfurhoff.se
Reinstalling The Wheel
Putting the wheel back is sometimes tricky, especially with the chain and derailleur. Follow these steps:
- Align the wheel: Place the wheel between the chain stays, making sure the chain sits on the smallest cog.
- Lift the derailleur: Pull the derailleur back and position the wheel axle in the dropouts.
- Tighten the axle: Use the quick-release lever or wrench to secure the wheel.
- Reconnect brakes: If you released rim brakes, close them now.
Spin the wheel to check for smooth movement. If it wobbles, adjust the axle or check for misalignment.
Final Checks Before Riding
Make sure everything is secure and working:
- The tire is fully inflated and seated.
- The wheel spins freely.
- The brakes work properly.
- The gear shifts are smooth.
If you notice any problems, fix them before riding. Riding with loose parts or low pressure can cause accidents.
How Long Does It Take?
Experienced riders can change a back tire tube in 10–20 minutes. Beginners may take 30–40 minutes the first time. Practice makes the process faster and easier.
Data: Common Causes Of Flat Tires
Here’s a look at the most frequent reasons mountain bike tubes fail.
| Cause | Percent of Flats | Typical Prevention |
|---|---|---|
| Sharp objects (thorns, glass) | 40% | Check tires after rides |
| Pinch flats (impact) | 30% | Use correct tire pressure |
| Valve failure | 15% | Inspect valve regularly |
| Wear and tear | 15% | Replace tubes yearly |
Mistakes Beginners Often Make
Changing a tire tube is simple, but mistakes can cause new flats or damage. Here are errors to avoid:
- Pinching the tube: Using tire levers too forcefully can pinch and puncture the new tube.
- Wrong tube size: A tube that’s too small or big won’t fit or may burst.
- Not removing sharp objects: If you skip checking the tire, you risk another flat.
- Poor inflation: Too little air causes pinch flats; too much can burst the tube.
- Misaligning the wheel: If the wheel isn’t in the frame correctly, it can affect braking and shifting.
Comparing Quick-release Vs Axle Nut Wheels
The method to remove the back wheel depends on your bike’s design. Here’s a comparison:
| Feature | Quick-Release | Axle Nut |
|---|---|---|
| Tool Needed | None | Wrench |
| Speed | Fast | Slower |
| Security | Medium | High |
| Common on | Modern bikes | Older/entry bikes |
If you’re unsure which type you have, check your rear wheel: a lever means quick-release, nuts mean you need a wrench.
Choosing The Right Tube For Your Mountain Bike
The tube must fit your tire size and valve type. Here’s a simple guide:
| Tire Size | Tube Size Needed | Valve Type |
|---|---|---|
| 26 x 2.0 | 26 x 1.75–2.25 | Schrader |
| 27.5 x 2.25 | 27.5 x 2.1–2.4 | Presta |
| 29 x 2.25 | 29 x 2.0–2.4 | Schrader or Presta |
Schrader valves look like car tire valves. Presta valves are slimmer and found on high-end mountain bikes.
Non-obvious Tips That Make The Job Easier
- Align the tire label with the valve: This helps you quickly find the valve when pumping and locating leaks in the future.
- Carry a spare tube and patch kit: On long rides, a spare tube is faster than patching. But a patch kit can save you if you get multiple flats.
Another insight: If you ride tubeless tires, the process changes. But most mountain bikes still use tubes, especially for beginners.
When To Replace Vs. Patch
Patch kits are great for small holes, but sometimes replacing is better:
- Replace the tube if it has multiple holes, major tears, or valve damage.
- Patch for small punctures away from the valve.
Patching takes longer and can fail if not done right. Replacing is faster and more reliable during rides.
Real-life Example: Trailside Repair
Imagine you’re on a rocky trail, and you hear a hiss—your back tire is flat. You stop, flip the bike, and follow these steps:
- Remove the wheel (quick-release)
- Take out the tube, spot a thorn
- Remove thorn, insert new tube
- Inflate, reinstall wheel, and finish your ride
If you didn’t check for the thorn, your new tube would also go flat. This real-life scenario shows why careful inspection matters.
How To Avoid Flats In The Future
Prevention saves time and headaches. Here are proven strategies:
- Check tire pressure before every ride
- Use puncture-resistant tires if you ride rough trails
- Inspect tires for debris after each ride
- Replace tubes yearly, even if they seem fine
Some mountain bikers use sealant inside tubes to seal small punctures automatically. It’s not perfect, but it helps.
Environmental Impact: Dispose Tubes Responsibly
Old tubes are made from rubber, which doesn’t break down quickly. Many bike shops recycle tubes or reuse them for other projects. Don’t throw tubes in regular trash if you can help it.
For more info on recycling bike tubes, check Bicycle Retailer.

Credit: www.youtube.com
Frequently Asked Questions
How Do I Know What Size Tube I Need?
Check the sidewall of your tire for numbers like “29 x 2. 25. ” Match the tube to those dimensions. Also, check the valve type (Schrader or Presta).
Can I Patch A Tube Instead Of Replacing It?
Yes, you can patch small holes using a patch kit. However, for large tears or valve damage, it’s better to replace the tube.
Why Does My New Tube Keep Going Flat?
Usually, there’s a sharp object still inside the tire. Always check and remove debris before installing a new tube.
How Tight Should I Inflate My Mountain Bike Tire?
Check the recommended PSI on the tire sidewall. Most mountain bike tires use 30–50 PSI. Too much air can burst the tube; too little causes pinch flats.
Do I Need Special Tools For Changing The Back Tire Tube?
You need basic tools: tire levers, pump, and possibly a wrench. Quick-release bikes don’t need a wrench, but axle nut bikes do.
Learning how to change the back tire tube on your mountain bike is a key skill for every rider. It saves you from ruined rides, expensive repairs, and the frustration of walking your bike home. With the steps and tips above, you can handle flats confidently and keep your adventures rolling.
Remember to check your tire for debris, use the right tube, and practice the process at home. The more you do it, the easier it gets—and soon, you’ll fix flats in minutes, ready for any trail.

Hello Guys! I am John Reese, a professional biker and my hobby is biking! I have been biking for last 12 years and I love using bikes while outing as well. Based on my experiences with the different type of bikes (mountain bikes, road bikes and hybrid bikes); I am sharing my opinion about various bikes so that a beginner can get started right away. Happy reading!