Cleaning your mountain bike derailleur is not just about making your bike look better. It is a key step to keep your shifting smooth, extend the life of your components, and avoid unexpected breakdowns on the trail. Many riders ignore this task, thinking a quick spray or wipe is enough.
But dirt, mud, and grime build up fast—especially after tough rides. If you want your bike to shift perfectly and last longer, learning how to clean your derailleur properly is essential. In this guide, you’ll find clear steps, practical tips, and real examples to help you clean your mountain bike derailleur with confidence, even if English is not your first language.
Understanding The Mountain Bike Derailleur
The derailleur is a mechanical part that moves your bike’s chain from one gear to another. Mountain bikes usually have two main types: the front derailleur and the rear derailleur. Most modern mountain bikes use only a rear derailleur, but some have both.
What Does The Derailleur Do?
The derailleur works by pushing the chain sideways so it jumps onto a different gear. This lets you change how hard or easy it is to pedal. The rear derailleur moves the chain across the cassette (the set of gears at the back wheel).
The front derailleur moves the chain across the chainrings (the gears by the pedals).
Why Does Cleaning Matter?
Dirt and mud stick to the derailleur after every ride, especially in wet or dusty conditions. Over time, this can:
- Slow down shifting
- Cause skipping gears
- Make the chain slip or drop
- Wear out moving parts faster
A clean derailleur keeps your bike running smoothly and helps you avoid expensive repairs.
Derailleur Parts You Need To Clean
Each derailleur has several moving parts. The most important ones to clean are:
- Jockey wheels (small wheels on rear derailleur)
- Cage (the long arm holding the jockey wheels)
- Spring and pivots (the points where the derailleur moves)
- Limit screws (small screws controlling movement range)
- Cable attachment (where the gear cable connects)
- Body (main frame of the derailleur)
Ignoring any of these can lead to sticky, rough shifting.
Preparing To Clean: Tools And Supplies
You don’t need expensive tools to clean your derailleur, but having the right items makes the job easier and safer.
Essential Cleaning Tools
- Soft brushes: Use toothbrushes or small bike brushes to scrub dirt.
- Degreaser: A bike-specific degreaser removes oil, mud, and old lubricant.
- Clean rags: Old T-shirts or microfiber cloths work well.
- Chain cleaning tool: Optional, but helpful for cleaning chain and derailleur together.
- Water spray bottle: For rinsing (not high-pressure hose).
- Lubricant: Bike-specific lube for after cleaning.
- Hex wrenches: For adjusting or removing parts if needed.
- Gloves: Protect your hands from chemicals and grime.
Preparing Your Bike
- Shift your bike into the smallest rear gear (hardest gear) before cleaning.
- If possible, place your bike in a repair stand. This holds the bike steady and lets the wheels spin freely.
- If you do not have a stand, lean your bike against a wall and keep it stable.
Safety Tips
- Use bike-specific products. Household cleaners can damage bike parts.
- Avoid spraying water directly into bearings or pivots.
- Work in a well-ventilated area, especially when using degreasers.
Step-by-step: Cleaning The Mountain Bike Derailleur
Cleaning your derailleur is not difficult, but doing it step by step makes sure you don’t miss anything. Here is a clear guide to follow.
1. Remove Loose Dirt
Start by knocking off loose mud and dust. You can use a dry brush or gently tap the derailleur with a rag. Do not use a high-pressure hose—this can force dirt into the moving parts.
2. Apply Degreaser
Spray or brush a bike degreaser onto the derailleur’s main parts:
- Jockey wheels
- Cage
- Springs and pivots
- Cable area
Let the degreaser sit for 2–3 minutes. This helps break down thick grime.
3. Scrub All Moving Parts
Use your soft brush to scrub every part. Focus on the jockey wheels—they collect the most dirt. Scrub inside and outside the cage. Clean the pivots and springs. If you see sticky buildup, apply more degreaser and keep scrubbing.
4. Clean The Chain And Cassette
Dirt on the chain and cassette can transfer back to the derailleur. Run the chain through a cleaning tool or scrub with a brush and degreaser. Spin the pedals to move the chain and reach all sections.
5. Wipe Everything Down
Use a clean rag to wipe away degreaser, dirt, and moisture. Make sure the derailleur is dry. Moisture left behind can cause rust.
6. Inspect For Damage
Check for signs of wear:
- Bent cage or hanger
- Worn jockey wheels
- Loose bolts or screws
- Frayed cables
If you find damage, replace parts or take your bike to a mechanic.
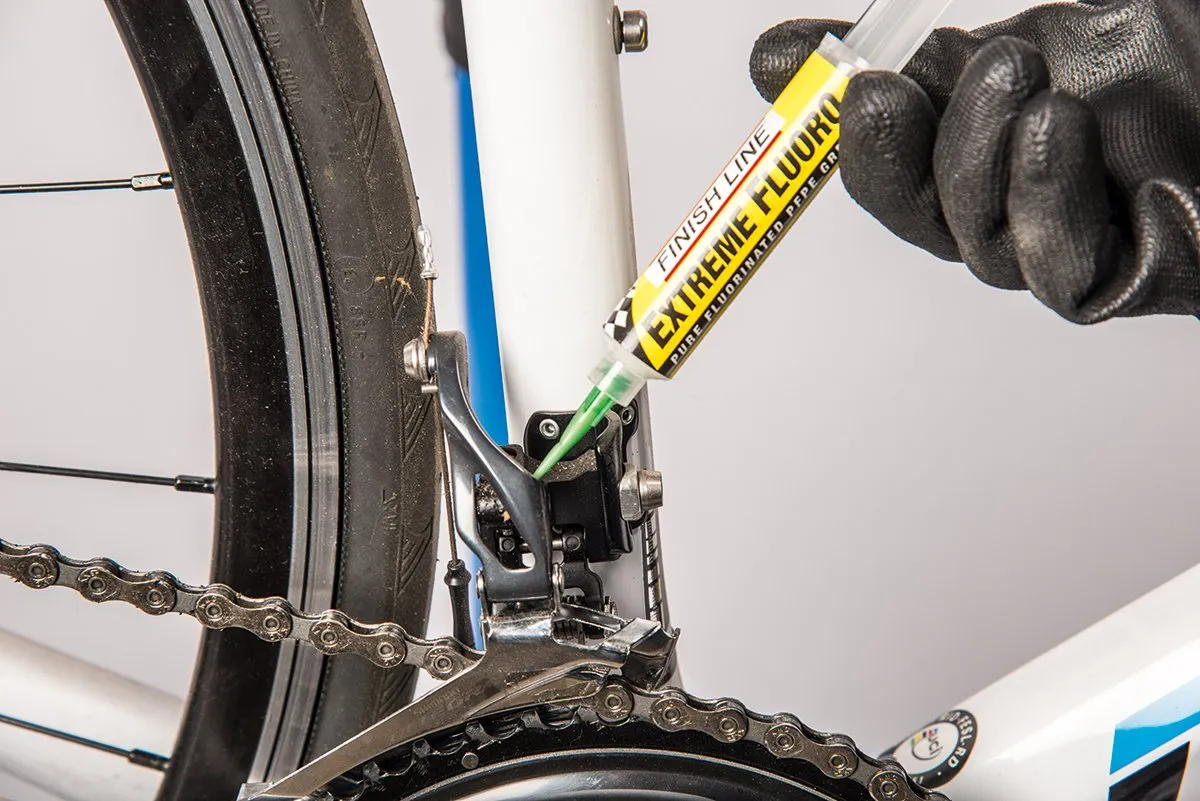
7. Lubricate Moving Parts
Apply a small amount of bike-specific lubricant to:
- Jockey wheels
- Pivots
- Springs
Do not over-lubricate. Extra oil attracts dirt.
8. Test Shifting
Spin the pedals and shift through all gears. The derailleur should move smoothly, and the chain should jump onto each gear without hesitation. If you notice sticking or skipping, check for missed spots or adjust the derailleur.
Deep Cleaning: When And How
Sometimes basic cleaning is not enough. After muddy races, long trips, or every few months, do a deep clean.
Removing The Rear Derailleur
If you want a deep clean, remove the rear derailleur from the bike. This is easy if you use a hex wrench to unscrew the mounting bolt. Be careful—do not lose the small washers.
Cleaning Jockey Wheels
Jockey wheels are small but important. They collect thick grease and mud. You can remove them using a hex wrench. Clean them with degreaser, scrub, and dry. If they look worn, consider replacing them.
Cleaning Springs And Pivots
With the derailleur off the bike, you can reach the inner springs and pivots. Use a brush and degreaser to scrub these hidden spots. Dry them well.
Reassembly
Put the derailleur and jockey wheels back. Tighten bolts securely, but do not overtighten. Check alignment—make sure the derailleur is not bent.

Credit: www.sepr.es
Comparing Cleaning Methods: Quick Vs Deep Cleaning
Different riders use different methods. Here’s a comparison to help you choose the best for your needs.
| Method | Time Needed | Tools Needed | Best For | Results |
|---|---|---|---|---|
| Quick Cleaning | 10–15 minutes | Brush, rag, degreaser | Regular rides | Removes surface dirt |
| Deep Cleaning | 30–60 minutes | Brushes, hex wrench, degreaser, lubricant | Muddy trips, races | Removes hidden grime, extends part life |
Most riders should do quick cleaning after every few rides, and deep cleaning once a month or after tough conditions.
Common Mistakes When Cleaning Derailleurs
Even experienced riders make mistakes. Here are some to avoid:
- Using household degreasers: These can damage rubber and plastic parts.
- High-pressure water: Forces dirt into bearings and pivots.
- Skipping lubrication: Dry parts wear out fast.
- Over-lubricating: Extra oil attracts more dirt.
- Ignoring jockey wheels: These small parts need regular attention.
- Forgetting to check alignment: Bent derailleurs cause shifting problems.
- Not drying parts fully: Moisture leads to rust.
- Cleaning only the visible parts: Hidden pivots and springs need cleaning, too.
Avoiding these mistakes will help your bike shift smoothly and last longer.
Signs Your Derailleur Needs Cleaning
Sometimes you don’t realize your derailleur needs cleaning until you have problems. Look for these signs:
- Hard or slow shifting
- Gear skipping
- Chain noise
- Visible mud or grime
- Sticky movement in derailleur arm
If you notice any of these, stop and clean your derailleur before your next ride.
Derailleur Maintenance Schedule
A regular cleaning schedule keeps your derailleur in top shape. Here’s a simple guide:
| Frequency | Action | Conditions |
|---|---|---|
| After every muddy ride | Quick cleaning | Mud, wet, dust |
| Every 2–4 weeks | Deep cleaning | Heavy use, racing |
| Every 6–12 months | Replace worn jockey wheels | Signs of wear |
| Annually | Full inspection and overhaul | Before new season |
Following this schedule will prevent most shifting problems.
How Weather And Trail Conditions Affect Cleaning
The weather and trail conditions change how often and how thoroughly you need to clean.
Muddy And Wet Rides
Mud sticks to every part of your derailleur. It dries hard and traps moisture. Clean your derailleur after every muddy ride. Use more degreaser and scrub harder.
Dry And Dusty Trails
Dust is less sticky but can work its way inside pivots and springs. Clean your derailleur every 2–3 rides. Wipe off loose dust and check for hidden buildup.
Winter Riding
Salt and snow cause corrosion. Clean your derailleur after every winter ride. Rinse with water, dry fully, and apply fresh lubricant.
Choosing The Right Degreaser And Lubricant
Not all cleaning products are equal. Here is how to pick the best ones for your mountain bike.
Degreaser Types
- Bio-based degreasers: Safe for plastic, rubber, and the environment.
- Solvent-based degreasers: Strong, fast, but can damage some parts.
Lubricant Types
- Wet lubricants: Best for rainy, muddy rides. Stay on longer but attract more dirt.
- Dry lubricants: Good for dry, dusty trails. Wash off in rain but keep parts cleaner.
Comparison Of Lubricants
| Lubricant Type | Best Conditions | Durability | Attracts Dirt |
|---|---|---|---|
| Wet | Mud, rain | High | Yes |
| Dry | Dust, dry | Medium | No |
Pick your lubricant based on the weather and trail you ride most often.
Real-life Example: Cleaning After A Muddy Trail Ride
Let’s say you finish a muddy ride. The derailleur is caked with mud and shifting is rough. Here’s how you would clean it:
- Knock off as much mud as possible with a brush.
- Spray degreaser on jockey wheels, cage, pivots, and cable area.
- Let sit for 2–3 minutes.
- Scrub all parts with a brush until clean.
- Clean the chain and cassette.
- Wipe everything dry.
- Inspect for damage—check if the derailleur is bent.
- Apply lubricant to moving parts.
- Test shifting.
After this, your bike should shift smoothly again. If not, check for hidden damage or consult a mechanic.
Advanced Tips For Experienced Riders
Experienced riders can take cleaning a step further:
- Use compressed air (low pressure) to blow out hidden dirt.
- Remove jockey wheels and clean them individually.
- Use small picks to reach tight spaces.
- Apply lubricant with a needle tip for precise control.
- Mark your maintenance schedule in a notebook or phone app.
These tips help keep your derailleur running perfectly, even after hard rides.
Derailleur Problems That Cleaning Can Fix
Many shifting problems are caused by dirt and grime. Cleaning can fix:
- Sticky shifting: Caused by clogged pivots or jockey wheels.
- Gear skipping: Dirt stops the derailleur from moving fully.
- Chain dropping: Mud makes the cage less responsive.
- Noise: Dry, dirty parts grind against each other.
But cleaning cannot fix bent parts or broken springs. If your derailleur is damaged, cleaning will not solve the problem.
Derailleur Upgrades And When To Replace
Sometimes cleaning is not enough. If your derailleur is old or damaged, consider upgrading.
- Replace jockey wheels every 6–12 months or when worn.
- Replace the derailleur if the cage is bent, springs are weak, or shifting is always rough.
- Upgrade to a clutch derailleur for better chain stability on rough trails.
Newer derailleurs shift better and last longer, but regular cleaning helps any model perform well.
Cleaning Front Derailleurs
If your bike has a front derailleur, clean it too.
- Use the same degreaser and brush.
- Focus on the cage and pivots.
- Wipe dry and apply lubricant.
- Test shifting from small to large chainring.
Front derailleurs collect less dirt but still need attention.
Cleaning For E-mountain Bikes
E-mountain bikes have electric parts, so be careful:
- Do not spray water or degreaser on electrical connections.
- Clean the derailleur like a regular bike.
- Dry parts fully before riding.
E-bike derailleurs are usually stronger, but mud still affects shifting.
Professional Cleaning: When To Use A Bike Shop
If you’re not confident or your derailleur is damaged, visit a bike shop.
- Professional mechanics use special tools and products.
- They can spot hidden problems.
- Full cleaning and adjustment usually cost $20–$50.
If you ride often or race, professional cleaning once a season is a smart choice.
Cleaning Derailleur Hanger
The derailleur hanger is a small metal piece that attaches the derailleur to the frame. Clean it with degreaser and brush. Check if it’s bent—this is a common cause of shifting problems. Replace if needed.
Environmental Tips: Cleaning Without Harm
Bike cleaning can use chemicals and water. Here’s how to clean responsibly:
- Use bio-based products when possible.
- Clean over a bucket or tray to catch dirty water.
- Do not wash bikes over grass or near rivers.
- Dispose of dirty rags and water properly.
Protecting the environment is important for mountain bikers.
How To Clean Derailleur In The Field
Sometimes you need to clean your derailleur during a ride. Here’s how:
- Carry a small brush or old toothbrush in your pack.
- Use water from your bottle to rinse mud.
- Wipe with a rag or paper towel.
- Apply a few drops of lubricant if needed.
Field cleaning is not perfect but can help finish a ride without problems.
Derailleur Cleaning For Different Brands
Most derailleurs (Shimano, SRAM, Campagnolo) use similar designs. But some differences exist:
- Shimano: Easy to remove jockey wheels, simple cage design.
- SRAM: Sealed jockey wheels, clutch mechanism—extra care needed.
- Campagnolo: Fewer mountain bike models, but similar cleaning steps.
Always check your brand’s manual for special instructions.
How Cleaning Extends Derailleur Life
Regular cleaning can double the life of your derailleur. Dirt wears out springs, pivots, and jockey wheels. Clean parts shift better and last longer. Riders who clean after every muddy ride report smoother shifting and fewer breakdowns.

Credit: www.lumicapital.eu
Cleaning Other Gear Parts
Cleaning your derailleur is important, but don’t forget:
- Chain
- Cassette
- Chainrings
- Gear cables
Dirty cables can make shifting rough, even with a clean derailleur. Clean all gear parts together for best results.
Useful Resources For Mountain Bike Maintenance
Want to learn more? The Park Tool Guide is a trusted resource for bike repair and maintenance. It has step-by-step videos and expert tips.
Credit: www.cyclist.co.uk
Frequently Asked Questions
How Often Should I Clean My Mountain Bike Derailleur?
Clean your derailleur after every muddy ride and at least once a month for regular use. If you ride in dry, dusty conditions, clean every 2–3 rides. Deep cleaning is needed after tough trips or races.
Can I Use Wd-40 To Clean My Derailleur?
WD-40 is not recommended for cleaning derailleurs. It is not a true degreaser and can leave parts too slippery. Use a bike-specific degreaser for best results.
How Do I Know If My Derailleur Is Damaged Or Just Dirty?
If cleaning does not fix shifting problems, check for bent cages, worn jockey wheels, loose bolts, or frayed cables. If you see damage, replace parts or visit a bike shop.
Is It Safe To Use A Pressure Washer On My Derailleur?
Pressure washers force water and dirt into pivots and bearings, causing long-term damage. Use a spray bottle or gentle hose instead. Avoid high pressure near any moving parts.
What Should I Do If My Derailleur Is Still Not Shifting Well After Cleaning?
If shifting is still rough, adjust the derailleur’s limit screws, check cable tension, and inspect for damage. If you are unsure, take your bike to a professional mechanic for a full check.
Keeping your mountain bike derailleur clean is one of the best ways to enjoy smooth shifting and longer-lasting parts. With the right tools, regular care, and smart tips, you can make every ride easier and avoid costly repairs. Now that you know how to clean your derailleur, you’ll be ready for any trail—rain or shine.

Hello Guys! I am John Reese, a professional biker and my hobby is biking! I have been biking for last 12 years and I love using bikes while outing as well. Based on my experiences with the different type of bikes (mountain bikes, road bikes and hybrid bikes); I am sharing my opinion about various bikes so that a beginner can get started right away. Happy reading!