Learning to ride a mountain bike opens up a world of adventure. From rocky trails and steep climbs to forest paths and fast descents, mountain biking lets you explore places most bikes can’t reach. If you’re new, you might feel a bit overwhelmed.
But with the right guidance, anyone can master the basics and enjoy the freedom of riding off-road. This article is your complete guide to riding a mountain bike. We’ll cover everything—from choosing your bike, adjusting it for comfort, basic riding skills, trail etiquette, safety tips, and common mistakes to avoid.
By the end, you’ll be ready to hit the trails with confidence.
Choosing The Right Mountain Bike
A good mountain bike makes riding safer and more fun. Before buying, think about where you’ll ride and your budget. Choosing the right bike is an important first step, and knowing the differences between types and features will help you make a smart decision.
Types Of Mountain Bikes
Mountain bikes come in different styles. Here are the main types:
- Hardtail: Has a front suspension fork but no rear suspension. Good for beginners and smooth trails. Hardtails are lighter, easier to maintain, and usually less expensive. For new riders, they’re a practical choice because the simpler design means fewer parts to worry about. If you plan to ride mostly on packed dirt or gravel, a hardtail is often ideal.
- Full Suspension: Has both front and rear suspension. Better for rough terrain but usually more expensive. Full suspension bikes absorb bumps and shocks from rocks, roots, and drops, making them more comfortable for longer rides. They’re heavier and cost more, but if you want to tackle challenging trails or ride for hours, full suspension bikes help reduce fatigue.
- Fat Bike: Has wide tires for snow, sand, or loose dirt. Fat bikes are popular in places with soft ground, like beaches or snowy areas. The oversized tires provide extra grip and float over surfaces regular bikes sink into. These bikes aren’t as fast, but they’re very stable and fun to ride in extreme conditions.
- Trail Bike: Balanced for climbing and descending; great for most riders. Trail bikes are versatile and can handle a variety of terrain. They’re good for riders who want to try different types of trails and don’t want to specialize in downhill or cross-country.
- Downhill Bike: Designed for steep, fast descents. Heavy and not good for climbing. Downhill bikes have strong frames, big suspension, and powerful brakes. They’re made for racing down mountains at high speed. For most beginners, these bikes aren’t practical unless you plan to ride only in downhill parks.
Mountain bikes also come in kids’ sizes, women’s models, and e-bikes (electric assist). For most new riders, start with a hardtail or trail bike.
| Type | Suspension | Best For | Average Price (USD) |
|---|---|---|---|
| Hardtail | Front only | Smooth trails, beginners | $500–$1,500 |
| Full Suspension | Front & Rear | Rough terrain | $1,500–$5,000 |
| Fat Bike | Front only/None | Snow, sand, loose dirt | $800–$2,000 |
| Trail Bike | Front & Rear | Mixed terrain | $1,200–$3,500 |
| Downhill Bike | Front & Rear | Steep descents | $2,500–$6,000 |
What Matters When Choosing
- Fit: The bike must match your height. Stand over the frame; there should be 1–2 inches between you and the bike. Many shops will help you find the right size, but you can also measure at home. If the bike feels awkward, it’s probably not the right fit.
- Wheel Size: Most mountain bikes have 27.5-inch or 29-inch wheels. Larger wheels roll over rocks better, but smaller wheels are easier to handle. A 29-inch wheel is great for taller riders or those who want to cover more distance quickly. For shorter riders, 27.5-inch wheels can feel more nimble.
- Suspension: More suspension means smoother rides but higher cost and weight. For most beginners, simple front suspension is enough. If you ride rocky trails often, consider full suspension.
- Frame Material: Aluminum is common and affordable. Carbon fiber is lighter but more expensive. Steel frames are rare but strong and comfortable for long rides.
- Brakes: Disc brakes work best in all conditions. Rim brakes are cheaper but don’t perform well in mud or rain.
Also consider extra features like dropper seat posts (for quick seat height adjustment), tubeless tires (less chance of flat), and gear range. If you plan to ride at night, look for bikes that can mount lights easily.
Common Buyer Mistakes
- Buying a bike that is too big or too small. Riding an ill-fitting bike can cause discomfort or injury.
- Ignoring the type of trails you’ll ride. Don’t buy a downhill bike if you’ll ride flat trails.
- Skipping a test ride. Try before you buy—test rides show how the bike feels.
- Focusing only on looks, not performance. Fancy colors don’t matter if the bike isn’t comfortable.
Non-obvious insight: Some new riders forget about local bike shops. A shop can help you choose, fit, and maintain your bike, and offer advice on trails.
Setting Up Your Mountain Bike
Before riding, your bike needs proper setup. This makes your ride smoother and safer. A well-adjusted bike helps prevent injuries and makes handling easier.
Adjusting The Saddle
Set the saddle height so your leg is almost straight when the pedal is at the lowest point. Too high or low can cause pain.
- Sit on the bike.
- Place your heel on the pedal.
- Adjust the saddle until your leg is straight.
If you feel knee pain, the saddle is likely too low. Hip pain can mean it’s too high. Try small adjustments until it feels right.
Handlebar Position
- Bars should be level with or slightly higher than the saddle.
- Adjust for comfort and control.
Handlebar width affects stability. Wider bars give more control but can feel awkward for small riders. Try different positions.
Tire Pressure
Mountain bike tires need less air than road bikes.
- For 27.5-inch/29-inch tires, use 25–35 psi.
- Lower pressure gives better grip but can cause flats.
If you ride on rocky trails, use lower pressure for grip. For hard, dry trails, increase pressure to avoid pinch flats. Use a good pump and check pressure before every ride.
Suspension Settings
If your bike has suspension:
- Set the “sag” so the fork compresses about 20–30% when you sit on the bike.
- Adjust rebound and compression for comfort.
Many bikes have a dial for rebound (how fast the suspension returns) and compression (how much force it takes to compress). Beginners often leave factory settings, but small changes make a big difference. Test settings on a short ride and adjust as needed.
Safety Checks
Before every ride:
- Check brakes. Squeeze levers; they should feel firm.
- Test gears. Shift through all gears; make sure they work smoothly.
- Look for loose bolts. Tighten bolts on the stem, seat, and wheels.
- Spin wheels to check for wobbles. If they wobble, visit a shop.
Also check quick-release levers (if your bike has them), and make sure lights or reflectors are secure.
Non-obvious tip: Beginners often forget to check pedals. Loose pedals can cause crashes. Tighten them before every ride.
Essential Gear And Clothing
Mountain biking needs more gear than regular cycling. Here’s what you need:
- Helmet: Always wear a mountain bike helmet. It protects against falls and branches. Some helmets have extra coverage at the back for better protection.
- Gloves: Prevent blisters and improve grip. Full-finger gloves also protect from thorns and sharp rocks.
- Padded Shorts: Make long rides comfortable. They prevent chafing and reduce saddle soreness.
- Eye Protection: Sunglasses or goggles keep out dust and bugs. Clear lenses are good for cloudy days or forests.
- Hydration Pack: Carry water easily. Some packs hold tools and snacks as well.
- Shoes: Flat-soled shoes are best for beginners. They grip pedals well and are easy to walk in.
- Repair Kit: Includes a pump, spare tube, tire levers, and multi-tool. A small patch kit is handy for fixing punctures.
Also consider a lightweight jacket for cool mornings, sunscreen, and a bell for alerting other trail users.
Non-obvious insight: Many beginners forget to pack a small first-aid kit. Cuts and scrapes are common, so carry bandages and antiseptic. Add tweezers for removing splinters and a few pain relief tablets.
Basic Mountain Biking Skills
Mountain biking is different from road cycling. You need new skills to handle uneven ground. Practicing these skills often will help you ride smoothly and safely.
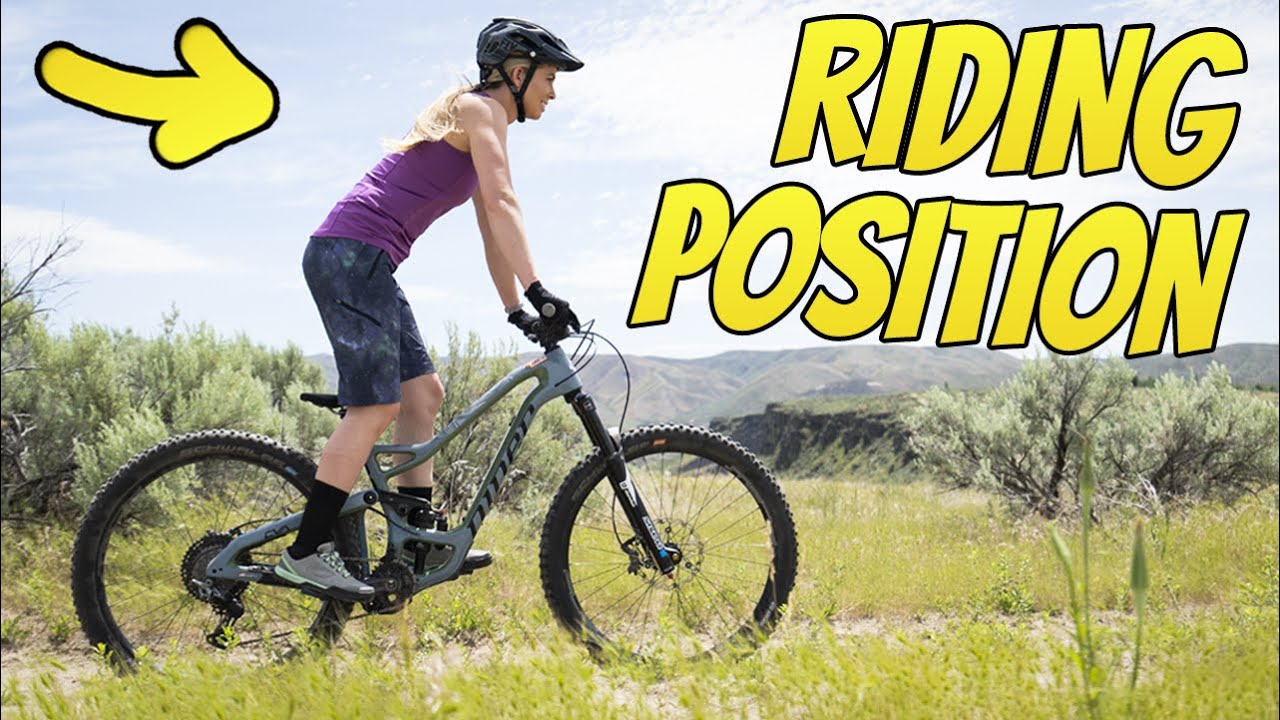
Body Position
Keep your weight balanced:
- Neutral Position: Stand with knees and elbows slightly bent. This lets you move with the bike. Stay relaxed so you can absorb bumps.
- Attack Position: Lean forward, lift your butt off the saddle, and stay ready to react. Use this when approaching rough sections or drops.
On flat sections, stay neutral. On descents, shift your weight back. On climbs, move forward.
Braking
- Use both brakes gently.
- Most stopping power comes from the front brake.
- Don’t grab the brakes suddenly; squeeze slowly to avoid skidding.
Practice braking on flat ground before hitting trails. Learn to modulate pressure—more on the front for quick stops, more on the back for control.
Shifting Gears
- Shift before climbing or descending.
- Don’t shift under heavy load; it can break the chain.
- Practice shifting smoothly while pedaling.
If you hear grinding, ease off the pedals and shift again. Use lower gears for climbs, higher gears for flats and descents.
Cornering
- Slow down before the turn.
- Lean the bike, not your body.
- Look where you want to go.
Practice cornering on grass or dirt. The more you look ahead, the smoother you turn.
Climbing
- Stay seated for traction.
- Lean forward to prevent the front wheel from lifting.
- Shift to a lower gear before the climb.
If the rear wheel slips, scoot forward or try a different line.
Descending
- Move your weight back.
- Keep your pedals level.
- Use both brakes, but don’t lock the wheels.
Look ahead for obstacles and keep your arms loose to absorb bumps.
Lifting The Front Wheel
For obstacles:
- Push down, then lift up on the handlebars.
- Practice on small bumps first.
Once you master this, you’ll clear logs and rocks with ease.
Non-obvious tip: Many beginners forget to relax their grip. A tight grip makes arms tired faster. Hold handlebars firmly but not tightly.

Credit: www.bicycling.com
Trail Etiquette And Rules
Mountain bike trails often have rules to keep everyone safe. Following trail etiquette helps you and others enjoy the ride.
- Yield to hikers and horses. Stop and let them pass.
- Don’t block the trail. Move to the side when resting.
- Announce yourself when passing. Say “on your left” or ring a bell.
- Stay on marked trails to protect nature. Riding off-trail damages plants and causes erosion.
- Don’t litter—carry out trash.
If trails are busy, slow down and be patient. Respect other users and local rules.
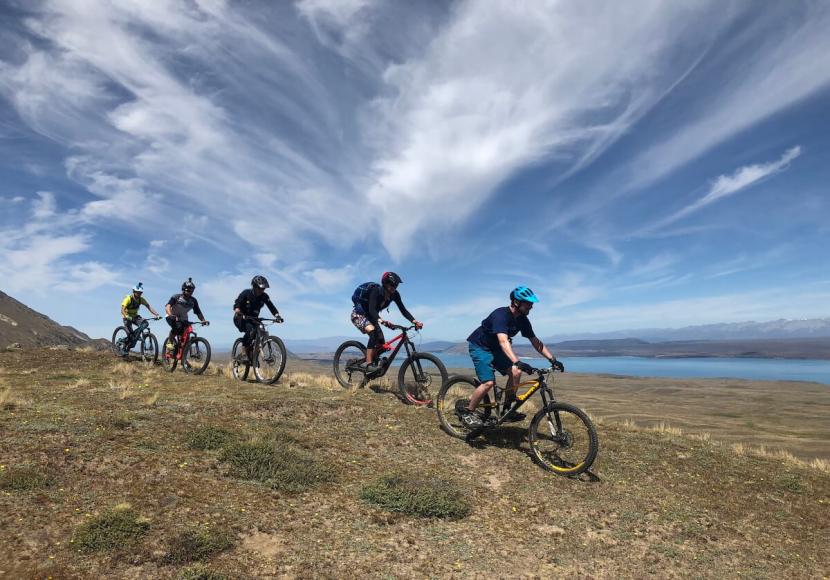
Non-obvious tip: Ride in groups if you’re new. It’s safer, and experienced riders can help. Groups can also help in emergencies and make rides more enjoyable.
Riding Your First Trail
Start with easy trails to build your skills. Don’t rush to advanced trails—practice helps you gain confidence.
Planning Your Ride
- Check trail maps and ratings. Trails are often marked as Green (easy), Blue (intermediate), or Black (difficult). Pick a green trail for your first ride.
- Tell someone where you’re going. If riding alone, let friends or family know your plan.
- Bring enough water and snacks. Energy bars, nuts, or fruit are good choices.
Also check weather and trail conditions. Avoid trails after heavy rain—they can be slippery and dangerous.
Warm Up
Begin with light pedaling and stretching. Warm up your legs, back, and arms. This prevents injuries and helps you ride better.
On The Trail
- Keep your speed low.
- Practice body position and braking.
- Stop often to rest and check your bike.
Take time to enjoy the scenery and learn the trail. If you feel tired or nervous, pause and breathe.
Navigating Obstacles
- Slow down for rocks, roots, or drops.
- Use your arms and legs as shock absorbers.
- Don’t panic—look ahead and stay calm.
If you can’t ride over an obstacle, walk your bike around it.
Finishing Strong
- Cool down by riding slowly.
- Stretch your legs and arms.
- Check your bike for damage.
After the ride, clean your bike and eat a healthy snack.
Non-obvious tip: Many beginners forget to check their energy. If you feel tired halfway, turn back or rest longer.
Credit: www.youtube.com
Advanced Skills For Mountain Biking
As you improve, learn advanced techniques for tougher trails. These skills help you ride faster, safer, and with more confidence.
Bunny Hops
Jumping both wheels over obstacles:
- Compress your body, then explode upward.
- Practice on flat ground.
Once you master bunny hops, you can clear logs, rocks, and gaps.
Manualing
Lifting the front wheel and riding on the rear:
- Lean back, pull the bars up.
- Balance with your legs and arms.
Manuals help you roll over obstacles without stopping. Practice in a safe area.
Riding Technical Terrain
- Scan the trail for lines. Look for the smoothest path.
- Stay relaxed and move with the bike.
Technical trails require concentration and patience. Practice often.
Jumping
- Approach straight and balanced.
- Compress before the jump, extend as you leave the ramp.
Start with small jumps and build up slowly.
Cornering At Speed
- Enter wide, exit tight.
- Lean the bike more, keep your body upright.
Fast cornering needs practice. Try different speeds and angles.
Non-obvious insight: Many riders ignore mental focus. Staying calm helps you react quickly and avoid mistakes. Visualization helps—think about your line before riding.
Safety Tips And Common Mistakes
Mountain biking can be risky, but most injuries are preventable. Smart habits keep you safe.
Safety Tips
- Always wear a helmet.
- Ride within your skill level.
- Check your bike before every ride.
- Bring a phone and ID.
Add emergency contacts to your phone and carry a whistle in case you need help.
Common Mistakes
- Riding too fast for your skill. Slow down until you’re comfortable.
- Not looking ahead—focus on the trail, not your front wheel.
- Forgetting to shift gears before climbs. Plan ahead for smoother riding.
- Skipping warm-ups and stretching.
- Ignoring trail signs and rules.
Crash Prevention
- Keep your speed under control.
- Practice emergency braking.
- Learn to fall safely: Try to roll, not land stiff.
If you crash, check for injuries and your bike. Don’t rush back—rest if needed.
Non-obvious tip: Many riders ride alone with no ID. Carry ID and emergency contact info.
Mountain Bike Maintenance
A well-maintained bike is safer and lasts longer. Good maintenance prevents accidents and expensive repairs.
Cleaning Your Bike
- Use water and a soft brush.
- Clean the chain with degreaser.
- Dry the bike to prevent rust.
After muddy rides, rinse your bike soon. Dirt can damage gears and brakes.
Lubrication
- Oil the chain every few rides.
- Wipe off excess oil.
Too much oil attracts dirt. Use a small amount and wipe clean.
Checking Wear
- Look for worn tires, brake pads, and cables.
- Replace parts before they fail.
If you see cracks or frayed cables, change them soon.
Quick Maintenance Table
Here’s a simple guide for how often to check each part:
| Part | Check Frequency | What to Look For |
|---|---|---|
| Brakes | Before every ride | Pads wear, cables tight |
| Chain | Weekly | Rust, links stiff |
| Tires | Before every ride | Pressure, cuts |
| Suspension | Monthly | Leaks, smooth movement |
| Bolts | Weekly | Tightness |
Non-obvious tip: Many beginners skip cleaning pedals and crank arms. Dirt here can cause noise and make pedaling harder.
Nutrition And Hydration
Mountain biking burns lots of calories and uses energy fast. Good nutrition keeps you strong and prevents fatigue.
What To Eat Before Riding
- Eat complex carbs like oatmeal or bananas. They provide steady energy.
- Avoid heavy, greasy foods. They slow you down and cause stomach upset.
Eat 1–2 hours before your ride. Add a little protein, like yogurt or eggs.
During The Ride
- Drink water often. A good rule: 1 bottle per hour.
- Carry energy bars or gels.
If your ride is longer than 2 hours, eat small snacks every 30–45 minutes.
After Riding
- Eat a mix of carbs and protein—like yogurt or a sandwich.
- Drink water or sports drinks to replace lost fluids.
Stretch after eating to help muscles recover.
Non-obvious tip: Many riders forget about electrolytes. Sweating loses salt and minerals. Carry electrolyte tablets or drinks. Signs of low electrolytes include cramps and fatigue.
Trail Selection And Planning
Choosing the right trail is key for a good ride. Picking trails that match your skill and fitness makes riding more fun.
Trail Ratings
Trails are rated by difficulty:
- Green Circle: Easy, smooth, gentle slopes.
- Blue Square: Intermediate, some rocks, roots, steeper.
- Black Diamond: Difficult, steep, technical, big drops.
| Rating | Features | Recommended For |
|---|---|---|
| Green Circle | Wide, smooth, gentle | Beginners |
| Blue Square | Narrow, rough, moderate climbs | Intermediate riders |
| Black Diamond | Steep, technical, obstacles | Advanced riders |
Planning Your Route
- Check online maps and local trail guides.
- Plan for your skill level and distance.
- Avoid trails after heavy rain—they become slippery and can be damaged.
If you’re unsure about a trail, ask local riders or visit a bike shop.
Non-obvious tip: Many beginners don’t check trail closures. Some trails close for repairs or wildlife protection—check online before you go.
Weather And Riding Conditions
Weather affects mountain biking more than road cycling. Prepare for changes to stay safe and comfortable.
Riding In Dry Conditions
- Dusty trails mean less grip.
- Wear glasses to protect your eyes.
Dry weather can make trails fast but slippery. Slow down on loose corners.
Riding After Rain
- Mud makes trails slippery.
- Tires with deep tread help.
- Avoid braking hard—it damages the trail.
Wet trails can hide roots and rocks. Ride slower and scan ahead.
Hot Weather
- Drink more water.
- Wear light, breathable clothing.
Take breaks in the shade and avoid midday rides when possible.
Cold Weather
- Dress in layers.
- Warm up before riding.
Use gloves and a hat under your helmet. Cold air can make hands and feet numb.
Non-obvious insight: Check wind direction. Strong winds can make climbs harder and descents risky. Plan routes with sheltered sections when windy.
Credit: sacredrides.com
Group Riding Vs Solo Riding
Both solo and group rides have their advantages. Try both to see which suits you best.
Solo Riding
- More freedom to choose your pace and trail.
- Good for practicing skills.
Solo rides help you focus on technique and enjoy nature.
Group Riding
- Safer in case of injury.
- Learn from experienced riders.
- More fun and motivation.
Groups can help with repairs and give advice on difficult sections.
Tips For Group Rides
- Agree on route and speed.
- Wait for slower riders at checkpoints.
- Communicate before turns or stops.
Non-obvious tip: Bring extra snacks and water for group rides. Sharing helps everyone.
Mountain Biking For Fitness
Mountain biking is excellent exercise. It improves strength, endurance, and mental health.
Health Benefits
- Burns up to 600 calories per hour.
- Builds leg and core muscles.
- Improves balance and coordination.
- Reduces stress.
Regular riding can lower blood pressure and boost mood.
Training Plan Example
For beginners:
- Week 1: Ride 3 times, 30 minutes each on easy trails.
- Week 2: Add hills and ride 40 minutes.
- Week 3: Try a blue trail, ride 45–60 minutes.
Track your rides and rest days. Increase time and difficulty slowly.
Non-obvious tip: Track your progress with a simple notebook or app. This keeps you motivated and shows improvement. Write down distance, time, and how you felt.
Environmental Responsibility
Mountain biking can impact nature. Be responsible to protect trails.
- Don’t ride on wet, muddy trails.
- Stay on marked paths.
- Avoid disturbing plants and animals.
- Support local trail groups.
Clean up after yourself and repair trails if you can.
If you want to learn more about trail care, visit the International Mountain Bicycling Association.
Non-obvious tip: Carry a small trash bag and pick up litter. Small actions protect nature for everyone.
Frequently Asked Questions
How Do I Choose The Right Mountain Bike Size?
Measure your height and inseam. Most brands have size charts. Stand over the frame; there should be 1–2 inches between you and the bike. Test ride if possible. If unsure, ask at a bike shop—they help fit your bike and make adjustments.
What Should I Do If I Get A Flat Tire On The Trail?
Stop in a safe spot. Remove the wheel. Use tire levers to take off the tire. Replace the tube, pump it up, and check for leaks before riding again. Practice fixing flats at home before hitting trails.
How Can I Improve My Mountain Biking Skills?
Practice regularly on different trails. Watch videos, ride with experienced friends, and focus on body position, braking, and cornering. Take a skills clinic if available.
Is Mountain Biking Safe For Beginners?
Yes, if you start slow, wear a helmet, and choose easy trails. Avoid risky jumps and steep descents until you gain confidence. Ride with friends for extra safety.
How Do I Find Mountain Bike Trails Near Me?
Use online maps, local bike shops, or apps like Trailforks and MTB Project. Ask other riders for recommendations. Local clubs often list group rides and trail info.
Mountain biking is an exciting sport that combines skill, endurance, and adventure. With careful preparation and practice, you can enjoy safe rides and explore beautiful places. Remember to respect nature, ride responsibly, and keep improving your skills. The trail is waiting—so get out there and ride!

Hello Guys! I am John Reese, a professional biker and my hobby is biking! I have been biking for last 12 years and I love using bikes while outing as well. Based on my experiences with the different type of bikes (mountain bikes, road bikes and hybrid bikes); I am sharing my opinion about various bikes so that a beginner can get started right away. Happy reading!