Mountain biking is about more than just speed and strength. It’s also about control—especially when it comes to your gears. If you want to climb steep hills, coast down rough trails, or ride smoothly over changing terrain, knowing how to switch gears on a mountain bike is essential. Many beginners think gear shifting is just about moving a lever, but there’s much more to it. In this guide, you’ll learn how mountain bike gears work, when to shift, common mistakes, and useful tips to ride smarter. With clear explanations and real examples, you’ll be ready to face any trail with confidence.
Understanding Mountain Bike Gears
Mountain bikes have gears to help you handle different types of terrain. The gears change how hard you need to pedal and how fast your bike moves. Most mountain bikes use derailleur systems, which are made up of front and rear gears (called chainrings and cogs), and shifters.
Types Of Gear Systems
There are three main types:
- Derailleur Gears: Most common on mountain bikes. There are two sets—front (chainrings) and rear (cogs/cassette).
- Internal Hub Gears: Sealed inside the rear hub. Rare on mountain bikes, more common on city bikes.
- Single-Speed: Only one gear. Used for simple, flat rides.
Most mountain bikes have 1x (single front chainring) or 2x/3x (two or three front chainrings). The rear cassette usually has 8 to 12 cogs.
| Gear System | Number of Gears | Common Use | Maintenance |
|---|---|---|---|
| Derailleur | 8–24 | Mountain trails | Regular |
| Internal Hub | 3–14 | City/commuter | Low |
| Single-Speed | 1 | Flat roads | Minimal |
How Gear Ratios Work
The gear ratio is the relationship between the number of teeth on the front chainring and the rear cog. A lower ratio means easier pedaling but slower speed. A higher ratio means harder pedaling but more speed.
For example, a 32-tooth front chainring paired with a 42-tooth rear cog gives a low gear—perfect for climbing. A 32-tooth front with an 11-tooth rear gives a high gear—better for flat or downhill.
Why Switching Gears Matters
Changing gears helps you:
- Climb hills: Use lower gears for less effort.
- Go faster: Use higher gears on flat or downhill.
- Save energy: Pedal efficiently, avoid fatigue.
- Protect your bike: Reduces wear on chain and cassette.
If you stay in the wrong gear, you’ll tire quickly or damage your bike. Efficient shifting also keeps your ride smooth and safe.
The Parts Involved In Gear Shifting
To switch gears, you need to know the main parts:
- Shifters: Controls on your handlebars. One for front gears, one for rear (unless you have 1x).
- Derailleurs: Mechanisms that move the chain between gears.
- Chainrings: Front gears attached to the pedal crank.
- Cogs/Cassette: Rear gears on the back wheel.
- Chain: Connects everything.
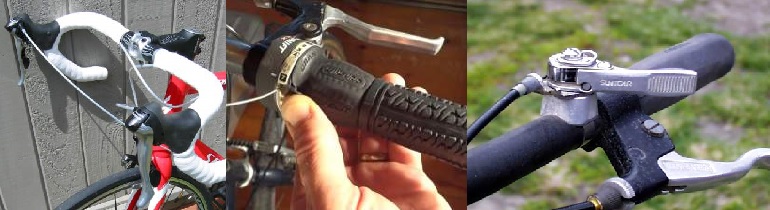
Most modern bikes use trigger shifters (push levers) or twist shifters (rotate the grip).
| Component | Function | Location |
|---|---|---|
| Shifter | Changes gear | Handlebar |
| Derailleur | Moves chain | Near chainrings/cassette |
| Chainring | Front gear | Crankset |
| Cassette | Rear gear | Rear wheel |
| Chain | Transfers power | Connects gears |
How To Switch Gears On A Mountain Bike
Switching gears is not just about pushing a lever. The right timing and technique matter a lot. Here’s how to do it step by step.
Step 1: Identify Your Shifters
Check your bike’s handlebar. Most bikes have two shifters:
- Left controls the front chainring.
- Right controls the rear cassette.
If you have a 1x system, you’ll only have the right shifter.
Step 2: Start Pedaling
You must be pedaling forward to shift gears. If you don’t pedal, the chain can’t move. Never shift while stopped.
Step 3: Shift One Gear At A Time
Press or twist the shifter gently. Don’t change multiple gears quickly—this can jam the chain or damage the derailleur. Wait for the chain to move before shifting again.
Step 4: Listen And Feel
A well-adjusted gear shift is smooth and quiet. If you hear grinding or feel resistance, shift back and try again. Sometimes a little adjustment in pedaling speed helps.
Step 5: Match Your Gear To The Terrain
- For steep climbs, shift to the smallest front chainring and largest rear cog.
- For flat or downhill, shift to the largest front chainring and smallest rear cog.
Remember, shift before the terrain changes—not during. If you wait until you’re struggling, it’s too late.
When To Shift Gears
Knowing when to shift is as important as knowing how. Many beginners shift too late or too early, which leads to problems.
Shifting Before Obstacles
Shift to a lower gear before you reach a hill. If you wait until you’re climbing, you’ll have to push hard and may risk chain damage.
Shifting During Flat Riding
Use middle gears for steady, comfortable pedaling. If you feel your legs spinning too fast (high cadence), shift to a higher gear. If you’re struggling, shift lower.
Shifting Before Descents
Shift to a higher gear before going downhill. This lets you pedal faster and keeps control. Avoid shifting while going fast—this can stress the chain.
Shifting For Technical Sections
On rocky or root-filled trails, use lower gears for better control. You can pedal smoothly and adjust your speed easily.
Common Mistakes Beginners Make
Many new riders face problems because they don’t understand gear shifting fully. Here are mistakes to avoid:
- Shifting under heavy load: Trying to shift while pushing hard can cause the chain to slip or break.
- Cross-chaining: Using the smallest front ring with smallest rear cog, or largest front with largest rear. This puts the chain at an awkward angle and causes extra wear.
- Ignoring maintenance: Dirty or dry chains and derailleurs make shifting slow or noisy.
- Not anticipating terrain: Waiting until you’re on a hill or obstacle to shift leads to tough pedaling.
- Shifting too many gears at once: Quick, multiple shifts can jam the chain.
- Using only one shifter: Some beginners forget to use both front and rear shifters, missing out on smoother rides.
- Not listening to the bike: Ignoring grinding noises or rough shifts is risky. These are signs you need to adjust or maintain your gear system.
A non-obvious insight: Even experienced riders sometimes forget to shift before a change in terrain, not during. Anticipation is key.
Practical Tips For Smooth Gear Shifting
Getting the basics right is good, but small changes make a big difference. Here are practical tips:
- Ease off pedaling: When shifting, lighten your pedal pressure. This lets the chain move smoothly.
- Clean and lubricate regularly: A dirty chain makes shifting hard. Lubricate your chain every 100 miles or after wet rides.
- Check cable tension: Loose or tight cables cause poor shifting. Adjust tension as needed.
- Practice on flat ground: Try shifting gears on easy terrain first. Get used to how each gear feels.
- Learn your gear range: Know which gears are best for which situations. Try different combinations and remember what works.
- Avoid cross-chaining: This not only wears your chain but can also make pedaling less efficient.
Many riders miss the importance of small adjustments. Sometimes, half a shift or a tiny movement of the shifter improves performance.
Gear Combinations Explained
Mountain bikes can have many gear combinations. But not all are useful. Here’s how to use them wisely.
Single Front Chainring (1x)
- Only rear gears to shift.
- Simple to use, less risk of cross-chaining.
- Good for beginners.
Double Or Triple Front Chainrings (2x/3x)
- More combinations.
- Use lower front ring for climbs, higher for speed.
- Rear gears fine-tune resistance.
| Front Chainring | Rear Cog | Best Use |
|---|---|---|
| Small | Large | Steep climbs |
| Medium | Medium | Mixed terrain |
| Large | Small | Flat/downhill |
Avoid using the smallest front ring with the smallest rear cog, or the largest front with the largest rear cog. This causes cross-chaining and extra wear.

Credit: xtracycle.com
How To Practice Gear Shifting
Learning to shift gears is like learning to drive. Practice makes perfect.
Find A Safe Place
Choose a flat, open area. Parks or quiet streets are ideal.
Practice Smooth Pedaling
Start pedaling at a steady pace. Try shifting up and down. Notice how your bike responds.
Test Gear Combinations
Try different front and rear gear combinations. See which feels easiest for climbing or fastest for flat ground.
Try Real Terrain
Once comfortable, practice on small hills or rough trails. Shift before you reach obstacles and adjust as needed.
Record Your Experience
Keep track of which gears you use most. This helps you remember the best combinations for future rides.
Adjusting Your Gear System
Sometimes your gears don’t shift smoothly. Here’s how to fix common problems:
Adjusting Cable Tension
If your gears skip or hesitate, check the cable tension. Use the barrel adjuster (near shifter or derailleur) to make small adjustments.
- Turn clockwise to tighten.
- Turn counter-clockwise to loosen.
Fine-tuning Derailleur
If your chain doesn’t move to the right gear, adjust the derailleur screws (marked H and L).
- H screw: Controls highest gear.
- L screw: Controls lowest gear.
If unsure, ask a bike shop for help or check guides at Park Tool.
Cleaning And Lubricating
Dirty gears cause poor shifting. Clean the cassette and chain regularly. Use bike-specific lubricant for best results.
Advanced Gear Shifting Techniques
Once you’re comfortable, learn advanced techniques for better control.
Shifting While Standing
When climbing or sprinting, you may stand up to pedal. Shift gears before you stand. Shifting while standing puts extra load on the chain.
Pre-shift Before Obstacles
If you see a rock or root ahead, shift to a lower gear before hitting it. This helps you keep balance and control.
Cadence Management
Cadence is your pedaling speed (measured in RPM). Aim for 70–90 RPM for efficient riding. Shift gears to maintain this cadence, especially on changing terrain.
Emergency Shifting
If you need to shift quickly (for example, unexpected steep climb), ease off the pedals for a moment, shift, then resume.
Mountain Bike Gear Shifting Myths
Some myths confuse riders. Let’s clear them up.
- Myth: More gears mean faster speed.
*Fact:* The right gear matters more than the number.
- Myth: You can shift anytime.
*Fact:* You must be pedaling, and avoid heavy load.
- Myth: Only pros need to worry about gear combinations.
*Fact:* Every rider benefits from smart gear use.
Credit: www.lansakhealth.com
Comparing Mountain Bike Gear Systems
Choosing the right gear system is important. Here’s how the main types compare:
| System | Weight | Ease of Use | Durability | Best For |
|---|---|---|---|---|
| 1x (Single Front) | Light | Easy | High | Beginner, trails |
| 2x/3x (Multiple Front) | Medium | Moderate | Medium | Mixed terrain |
| Internal Hub | Heavy | Easy | High | City, low maintenance |
Most mountain bikers prefer 1x systems for simplicity and reliability.
Essential Maintenance For Smooth Shifting
Gear shifting depends on proper maintenance. Here’s what to do:
- Check chain wear: Replace every 2000–3000 miles.
- Clean cassette and chainrings: After muddy or dusty rides.
- Lubricate chain: After cleaning or every 100 miles.
- Inspect cables: Replace if frayed or sticky.
- Adjust derailleurs: As needed for smooth shifting.
Neglecting maintenance leads to poor shifting and costly repairs.
Real-life Examples
Let’s look at two scenarios:
Example 1: Climbing A Hill
You approach a steep hill. Before you reach the slope, shift to your smallest front chainring and largest rear cog. Pedal smoothly and keep cadence steady. If you feel resistance, shift lower early—not during the climb.
Example 2: Descending A Trail
You reach a downhill section. Shift to your largest front chainring and smallest rear cog before the descent. Pedal faster as you go downhill, but avoid shifting gears rapidly.
These examples show why timing and anticipation are so important.
Frequently Asked Questions
How Many Gears Does A Mountain Bike Usually Have?
Most mountain bikes have between 8 and 24 gears. Modern bikes often use 1x systems with 10–12 rear gears, while older models may have 2x or 3x front chainrings.
What Is Cross-chaining, And Why Is It Bad?
Cross-chaining means using the smallest front chainring with the smallest rear cog, or the largest front with the largest rear. This puts the chain at an awkward angle, causing extra wear and reducing efficiency.
Can I Shift Gears While Stopped?
No. You must be pedaling forward to shift gears. Shifting while stopped can damage the chain or derailleur.
How Do I Know If My Gears Need Maintenance?
Signs include slow or noisy shifting, chain skipping, or stuck gears. Regular cleaning and lubrication, plus cable adjustment, prevent most issues.
Is Gear Shifting Different For Electric Mountain Bikes?
Electric mountain bikes use similar gear systems. However, you may need to shift more often to match the motor’s power and keep cadence steady for longer battery life.
Mastering gear shifting on a mountain bike makes every ride smoother and safer. With practice and attention to your bike’s signals, you’ll find the right gear for every trail. Proper gear use saves energy, protects your bike, and helps you enjoy mountain biking more.
Remember to anticipate terrain, maintain your gear system, and keep learning as you ride. The trails are waiting—shift smart and ride strong.

Credit: www.youtube.com

Hello Guys! I am John Reese, a professional biker and my hobby is biking! I have been biking for last 12 years and I love using bikes while outing as well. Based on my experiences with the different type of bikes (mountain bikes, road bikes and hybrid bikes); I am sharing my opinion about various bikes so that a beginner can get started right away. Happy reading!