Changing brake pads on a mountain bike is a job many riders can do at home. You don’t need to be a professional mechanic, but you do need to pay attention to detail and safety. Proper brake pads help your bike stop quickly, control speed, and avoid accidents on tough trails.
If your brakes feel weak, squeak, or you see that the pads are worn, it’s time to change them. This guide will walk you through everything, from the tools you need to common mistakes beginners make. You’ll learn about different brake types, step-by-step instructions, and helpful tips for a smooth process.
Whether you’re preparing for a big ride or just want to keep your bike in top shape, changing your own brake pads saves money and builds your confidence as a cyclist.
Why Brake Pads Matter On Mountain Bikes
Mountain bikes face rough terrain, fast descents, mud, and dust. The brake pads are the main part of your braking system that touch the wheel or rotor. They create friction to slow or stop the bike. Good brake pads mean you can stop quickly and safely. Worn pads increase stopping distance, risk damage to your bike, and can even cause accidents.
There are two main types of brakes on mountain bikes: rim brakes and disc brakes. Rim brakes use pads that squeeze the wheel rim, while disc brakes use pads that squeeze a metal disc (rotor) near the hub. Most modern mountain bikes use disc brakes because they work better in wet or muddy conditions.
If your pads are thin, damaged, or contaminated with oil, replace them right away. Riding with bad pads can wear out other parts like the rotors, which are more expensive to fix.
Tools And Materials Needed
Before you start, gather these tools and materials. Using the right tools makes the job easier and prevents damage.
- Replacement brake pads (correct type for your brake system)
- Hex/Allen wrenches (usually 2mm, 4mm, 5mm)
- Needle-nose pliers
- Torx wrench (for some disc brake calipers)
- Flathead screwdriver (for pad removal)
- Clean cloth
- Isopropyl alcohol (for cleaning)
- Bike stand (optional, but helpful)
- Gloves (to keep hands clean and oil-free)
- Rotor cleaner (optional but recommended for disc brakes)
Having everything ready before you start prevents frustration and lost time. For disc brakes, check your bike’s manual or the pad packaging to make sure you buy the correct shape and material.
Credit: thelostco.com
Types Of Brake Pads: Rim Vs Disc
Mountain bikes use different brake pads depending on the system. Understanding the differences helps you buy the right pads and install them correctly.
| Brake Type | Pad Material | Common Uses | Durability |
|---|---|---|---|
| Rim Brake | Rubber | Older bikes, entry-level | Low (wears out faster) |
| Disc Brake (Resin) | Organic/Resin | Light trail, dry conditions | Medium |
| Disc Brake (Metal) | Metal/Sintered | Muddy, wet, heavy use | High |
Rim brake pads are made of rubber and fit into holders that press against the wheel rim. They’re simple to change but don’t last long in muddy or wet conditions.
Disc brake pads come in two main types: resin (organic) and metal (sintered). Resin pads are quieter and better for dry, light trails. Metal pads are tougher and ideal for wet or aggressive riding, but they can be noisy. The shape and attachment method vary between brands (Shimano, SRAM, Tektro, etc.), so always check compatibility.
When To Change Brake Pads
Knowing when to change pads is important for safety. Here are signs your pads need replacing:
- Pad thickness: If rim pads are less than 3mm thick, or disc pads have less than 1mm of material, change them.
- Noise: Squeaking or grinding means pads are worn or dirty.
- Reduced braking power: If your bike doesn’t stop as quickly, pads may be worn.
- Visible wear: Rim pads might have deep grooves; disc pads may be shiny or uneven.
- Contamination: Oil or dirt can make pads useless.
It’s smart to check your pads every few rides, especially after muddy or wet conditions. Riders who go downhill or ride in bad weather should check even more often.
Step-by-step Guide: Changing Rim Brake Pads
Rim brakes are less common on mountain bikes now but still found on older or entry-level bikes. Here’s how to change rim brake pads:
1. Prepare The Bike
Put your bike in a stable position. A bike stand helps, but you can lean it against a wall. Shift gears so the wheel spins freely. Remove the wheel if it makes access easier.
2. Remove The Old Pads
Most rim pads are held by a small bolt or a pin. Use a hex wrench to loosen the bolt. Slide out the old pad. If it’s stuck, gently use pliers.
3. Clean The Brake Surface
Use a clean cloth and isopropyl alcohol to wipe the rim. Dirt and oil reduce braking power.
4. Install The New Pads
Slide the new pad into the holder. Make sure the pad’s “arrow” or “direction” mark faces forward. Tighten the bolt but don’t over-tighten.
5. Adjust The Pad Position
The pad should touch the rim evenly when you squeeze the brake lever. Adjust the angle so the pad contacts the rim flat, not at a slant. Some recommend “toe-in”—the front of the pad touches the rim first—to reduce squealing.
6. Test The Brakes
Squeeze the lever several times. Spin the wheel to check for rubbing. Ride slowly and test the brakes before heading out.
Step-by-step Guide: Changing Disc Brake Pads
Disc brakes are the standard on modern mountain bikes. They require more care but offer better performance.
1. Secure The Bike
Place your bike in a stand or stable position. Remove the wheel for easier access. Always remove the wheel before changing disc pads to avoid contaminating the rotor.
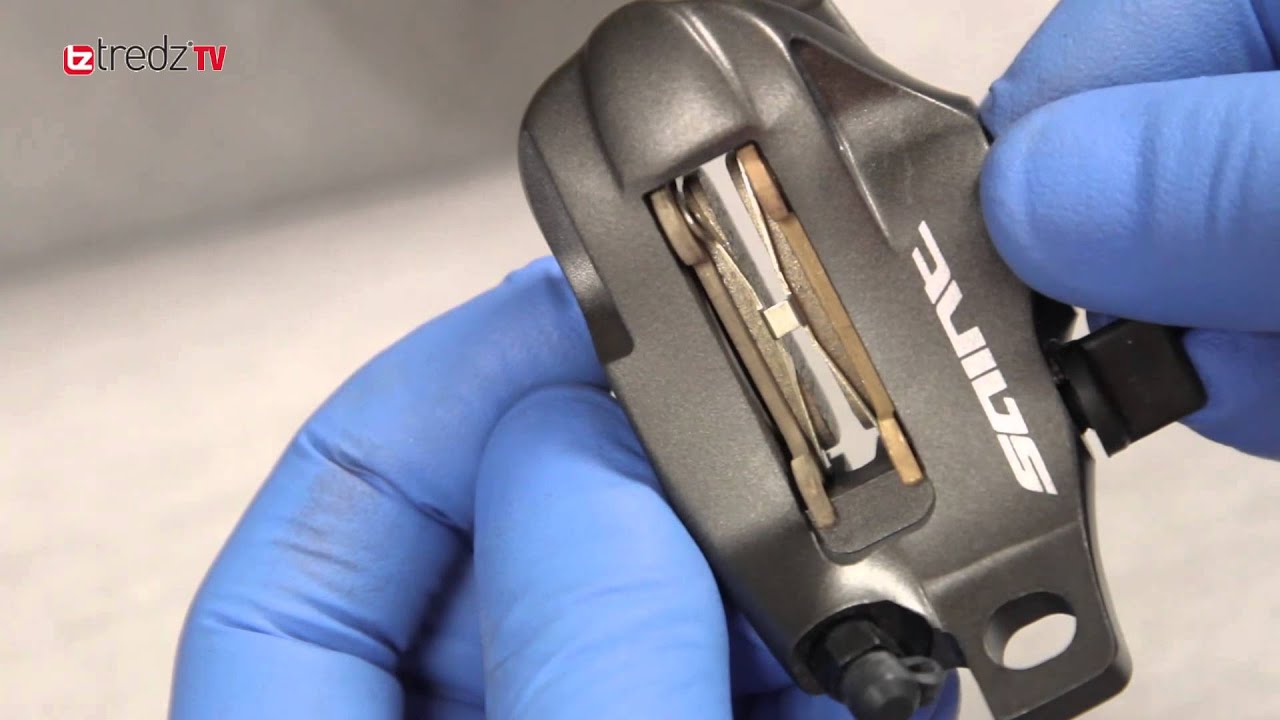
2. Open The Caliper
Look for a retaining pin, clip, or bolt that holds the pads. Use a hex wrench or Torx wrench to remove it. Some calipers have a split pin—straighten it with pliers and pull it out.
3. Remove Old Pads
Slide the old pads out of the caliper. If they’re stuck, gently use a flathead screwdriver to pry them. Be careful not to damage the caliper.
4. Inspect And Clean
Look inside the caliper for dirt or oil. Wipe the inside with isopropyl alcohol and a clean cloth. Never use oil-based cleaners.
5. Reset The Pistons
When pads wear down, the caliper pistons move closer. Use a pad separator tool or a clean flathead screwdriver to gently push the pistons back. This makes space for the new pads.
6. Install New Pads
Slide the new pads into the caliper. Make sure they’re seated properly. Insert the retaining pin or bolt and secure it.
7. Reinstall The Wheel
Put the wheel back in place. Make sure the rotor slides between the new pads without rubbing.
8. Test And Bed-in
Squeeze the brake lever several times. The pads may feel soft at first—this is normal. To “bed-in” new pads, ride and brake gently several times. This helps the pad surface grip the rotor.
Credit: www.shaaretefila.org
Choosing The Right Brake Pads
Picking the right pads depends on your bike, riding style, and budget. Here’s a quick comparison of pad materials and their best uses:
| Pad Material | Performance | Noise | Cost | Best For |
|---|---|---|---|---|
| Organic/Resin | Good initial bite, smooth feel | Low | Low | Dry, light trail |
| Metal/Sintered | Strong bite, lasts longer | High | Medium | Wet, muddy, downhill |
| Semi-Metallic | Balanced performance | Medium | Medium | All conditions |
- Organic pads are softer and quieter, but wear out faster.
- Metal pads are tough and work well in harsh conditions, but can be noisy.
- Semi-metallic pads offer a mix of both.
Match your pads to your riding environment. For example, if you ride in muddy trails, metal pads last longer and grip better. For dry singletrack, organic pads are fine.
Common Mistakes Beginners Make
Changing brake pads is simple, but small errors can cause big problems. Here are mistakes to avoid:
- Using wrong pads: Not all pads fit all brakes. Check your brake brand and model.
- Touching rotors with oily hands: Oil ruins braking power. Always use gloves and clean the rotor.
- Not resetting caliper pistons: New pads won’t fit if pistons are not pushed back.
- Over-tightening bolts: This can strip threads or break the caliper.
- Skipping cleaning: Dirt and oil can stay inside the caliper, reducing performance.
- Not bedding-in pads: New pads need a gentle break-in for full performance.
One insight many miss: Sometimes, a squealing brake isn’t from worn pads, but from dirty rotors or calipers. Clean everything before blaming the pads.
Tips For A Smooth Pad Change
Changing brake pads is easier with some practical tips:
- Lay out all tools before starting. This avoids searching mid-job.
- Read the pad package instructions. Brands like Shimano and SRAM differ slightly.
- Take photos before removal. Use your phone to remember pad placement.
- Keep spare pads in your bike bag. Pads can wear unexpectedly, especially on long rides.
- Inspect rotors when changing pads. Deep grooves or warping mean the rotor needs attention.
- Use a bike stand if possible. Makes the process smoother and safer.
- Don’t rush. Working slowly prevents mistakes and damage.
Another overlooked tip: If your brakes still feel weak after changing pads, check the brake cables (rim brakes) or hydraulic lines (disc brakes). Sometimes, the issue isn’t the pads.
Safety Checks After Changing Pads
Before riding, always check your brakes:
- Squeeze levers: They should feel firm, not spongy.
- Spin wheels: Watch for rubbing or noise.
- Test on flat ground: Ride slowly and brake several times.
- Check pad alignment: Pads should contact the rim or rotor evenly.
- Look for leaks: On hydraulic brakes, check for fluid leaks.
If anything feels wrong—soft lever, rubbing, strange noises—fix the issue before heading out. Safety comes first.

Credit: www.ovapiscis.com
Long-term Brake Maintenance
Changing pads is just part of good brake care. Here are ways to keep brakes working well:
- Clean pads and rotors regularly. Use isopropyl alcohol, not soap or oil.
- Check pad thickness every month, or more often if you ride often.
- Store bike indoors. Moisture and dirt can damage pads over time.
- Replace cables or fluid if brakes feel slow or sticky.
- Inspect rotors for warping or grooves. Replace if damaged.
- Avoid spraying lubricants near brakes.
Regular care means your bike is ready for every ride. Many riders forget to check brakes after muddy rides, but mud and grit wear pads faster.
Environmental Impact Of Brake Pads
Many riders don’t realize that old brake pads are not always eco-friendly. Metal pads, especially, contain heavy metals. Some brands recycle pads, but most end up in landfills. If possible, choose pads from companies with recycling programs or return old pads to your local shop.
Also, avoid washing pads and rotors with soap or chemical cleaners. Use isopropyl alcohol or dedicated bike cleaners. This protects the environment and your brakes.
Real-world Example: Changing Pads Before A Race
Imagine you’re preparing for a mountain bike race. You notice your brakes feel weak. On inspection, your pads are thin and shiny—classic signs of wear and contamination.
You gather your tools, remove the wheel, and take out the old pads. Cleaning the caliper reveals mud and oil. After installing new metal pads, you reset the pistons and reinstall the wheel. You ride around the parking lot, bedding-in the pads with gentle stops.
Now your brakes are strong, and you’re ready for the race.
Many pros recommend changing pads before big events. It’s a simple step that avoids problems during tough rides.
Troubleshooting Brake Pad Problems
Sometimes, new pads don’t solve brake issues. Here’s how to troubleshoot:
- Still squealing: Clean rotors and check for contamination.
- Weak braking: Make sure pads are seated and bedded-in.
- Rubbing noise: Check pad alignment and rotor position.
- Sticky lever: Inspect cables or hydraulic lines.
- Quick pad wear: Check for grit or mud in caliper.
If you can’t fix the problem, visit a local bike shop. They have tools and experience for tough cases.
Comparison: Hydraulic Vs Mechanical Disc Brakes
Hydraulic and mechanical disc brakes both use pads, but their maintenance differs. Here’s a quick comparison:
| Brake Type | Adjustment | Maintenance | Brake Feel |
|---|---|---|---|
| Hydraulic | Self-adjusting, automatic | Fluid changes, bleeding | Strong, smooth |
| Mechanical | Manual, cable tension | Cable replacement | Less smooth, more setup |
Hydraulic brakes are easier for pad changes—just push back pistons and swap pads. Mechanical brakes need cable adjustment after changing pads. Both systems need clean pads and rotors for best performance.
How Often Should You Change Brake Pads?
There’s no fixed rule, but most mountain bike pads last 500–1,000 miles in normal conditions. Mud, rain, and downhill riding wear pads faster. Check pads every month if you ride often. Keep spare pads ready for unexpected changes.
Some riders change pads before big rides or races. If you notice reduced braking, squealing, or thin pads, change them right away.
Advanced Tips For Experienced Riders
If you ride often or race, consider these advanced tips:
- Try different pad materials for different seasons. Metal in winter, resin in summer.
- Upgrade to larger rotors for more stopping power.
- Experiment with pad brands. Some brands last longer or offer better feel.
- Check pad wear pattern. Uneven wear means caliper alignment issues.
- Use torque specs from your bike manual for bolts. Avoid guessing.
Many experienced riders keep a log of pad changes and brake performance. This helps spot patterns and avoid surprises.
Frequently Asked Questions
How Do I Know Which Brake Pads Fit My Mountain Bike?
Check your brake brand and model. Pads are shaped differently for Shimano, SRAM, Tektro, and others. Look for a part number on the caliper or check your bike manual. If unsure, bring the old pad to your local shop or search on Park Tool for guidance.
Can I Change Brake Pads Without Removing The Wheel?
For rim brakes, you can often change pads without removing the wheel. For disc brakes, it’s best to remove the wheel to avoid contaminating the rotor and make access easier.
Why Do New Brake Pads Feel Weak At First?
New pads need to be “bedded-in. ” Ride and gently brake several times to transfer material from the pad to the rotor. This improves grip and power.
What If My Brakes Still Squeal After Changing Pads?
Squealing is often caused by dirty rotors, misaligned pads, or contamination. Clean rotors with isopropyl alcohol, check pad alignment, and make sure pads are seated properly.
How Long Do Mountain Bike Brake Pads Last?
Most pads last 500–1,000 miles, but heavy mud, rain, or downhill riding can wear them faster. Check pads every month and replace them if they’re thin or performance drops.
Changing brake pads on a mountain bike is a skill every rider should learn. It saves money, boosts safety, and improves your riding experience. With the right tools, careful steps, and regular checks, you’ll keep your bike stopping smoothly for every adventure.

Hello Guys! I am John Reese, a professional biker and my hobby is biking! I have been biking for last 12 years and I love using bikes while outing as well. Based on my experiences with the different type of bikes (mountain bikes, road bikes and hybrid bikes); I am sharing my opinion about various bikes so that a beginner can get started right away. Happy reading!