Mountain biking is more than just riding on rough trails and dirt tracks. It’s about control, comfort, and handling tough terrain. One of the most important parts of any mountain bike is its suspension system. Suspension changes how a bike feels, rides, and handles bumps, roots, and jumps. But how does mountain bike suspension really work? Let’s break down the science, mechanics, and choices behind these systems so you can understand—and even improve—your own ride.
Why Suspension Matters
Imagine riding a bike over rocks and roots without any shock absorption. Every bump would shake your body, slow you down, and possibly throw you off balance. Mountain bike suspension solves these problems. It absorbs impacts, keeps your wheels on the ground, and helps you stay in control. Suspension also makes long rides more comfortable and safer, especially on steep or technical trails.
Here’s what suspension does for mountain bikers:
- Reduces fatigue by absorbing shocks
- Helps tires grip the ground better
- Allows faster riding on rough terrain
- Improves steering and braking control
Many beginners think suspension is just about comfort. In reality, it’s about speed and safety too. A good system lets you ride more confidently and tackle harder trails.
Basic Suspension Types
Mountain bike suspension comes in different forms. The two main types are front suspension (hardtail) and full suspension.
Front Suspension (hardtail)
A hardtail bike has suspension only in the front fork. The rear stays rigid. This setup is lighter, easier to maintain, and often cheaper. Hardtails are popular for cross-country riding and less technical trails.
Full Suspension
Full suspension bikes have both front fork and rear shock systems. This design offers more comfort and control, especially on rough or downhill terrain. The extra suspension adds weight and complexity, but most riders find the benefits worth it.
Rigid Bikes
Some mountain bikes have no suspension at all. These rigid bikes are rare and mainly used for very smooth trails or special events.
Here’s a quick comparison:
| Type | Suspension | Typical Use | Pros | Cons |
|---|---|---|---|---|
| Hardtail | Front only | Cross-country, light trails | Lightweight, simple | Less comfort on rough terrain |
| Full Suspension | Front + Rear | Trail, enduro, downhill | Better control, comfort | Heavier, more expensive |
| Rigid | None | Smooth paths, special use | Very light, low maintenance | Harsh ride |
How Suspension Works: The Core Principles
Every suspension system follows basic physics. When a wheel hits a bump, energy travels into the bike frame. Suspension components absorb this energy, then release it slowly to keep the bike stable.
The main suspension parts are:
- Spring: Stores and releases energy
- Damper: Controls the speed of movement
- Linkage: Connects parts and guides motion
Both front and rear suspension use these elements. Let’s look deeper.
Springs: The Heart Of Suspension
Springs do the heavy lifting. They compress when you hit a bump, then return to shape.
There are two main types:
- Coil Springs: Made from steel wire wound into a spiral. They provide consistent resistance and are common in downhill bikes.
- Air Springs: Use compressed air in a chamber. Adjusting air pressure changes stiffness. Air springs are lighter and easy to tune.
Many riders don’t realize that air springs can be very sensitive to temperature. On cold days, air pressure drops, making the suspension softer. This detail matters if you ride in changing weather.
Dampers: Controlling The Ride
Without damping, springs would bounce like pogo sticks. Dampers use oil and valves to control speed. They slow down compression and rebound, making the ride smoother.
Damping is divided into:
- Compression damping: Controls how fast the suspension compresses (absorbs bumps)
- Rebound damping: Controls how fast it returns to normal (releases energy)
Proper damping adjustment is vital. Too fast, and your bike feels unstable. Too slow, and it’s sluggish. Many beginners set damping too soft, which can cause “packing,” where the suspension stays compressed after repeated bumps.
Linkages: Guiding Motion
Rear suspension uses linkages to connect the shock to the frame. These systems change how the rear wheel moves. Some linkages focus on smooth movement, others on resisting pedal force.
Common linkage designs include:
- Single pivot
- Horst link
- Virtual pivot point (VPP)
- Four-bar linkage
Each design affects how the bike climbs, descends, and handles bumps.
Front Suspension: The Fork
The front fork is a key part of mountain bike suspension. It allows the front wheel to move up and down, absorbing impacts.
Fork Anatomy
A typical fork includes:
- Stanchions (upper tubes)
- Lowers (outer tubes)
- Crown (connects both stanchions)
- Dropouts (hold the wheel)
- Spring and damper (inside the stanchions)
Forks range from 80 mm to 200 mm of travel (movement distance). More travel means more bump absorption.
Adjusting The Fork
Most forks allow you to adjust:
- Air pressure or coil preload (spring stiffness)
- Compression damping
- Rebound damping
- Lockout (stops movement for climbing)
A common mistake is setting fork pressure based only on body weight. Riding style and terrain matter too. For example, aggressive riders need stiffer setups.
Fork Maintenance
Forks need regular care. Dust and dirt can damage seals and affect performance. Clean stanchions after every ride and service internals yearly.
Rear Suspension: The Shock
Rear suspension uses a shock absorber connected to the frame and rear triangle. Shocks are more complex than forks due to linkage designs.
Shock Anatomy
A typical rear shock includes:
- Air or coil spring
- Oil damper
- Mounting hardware
- Adjustment knobs
Travel ranges from 100 mm (cross-country) to 220 mm (downhill).
Suspension Linkages
Linkages change how the shock moves. The most common designs:
| Linkage Type | Key Features | Best For |
|---|---|---|
| Single Pivot | Simple, easy to maintain | Trail, all-mountain |
| Horst Link | Reduces pedal feedback | Enduro, trail |
| VPP | Balances climbing and descending | All-round use |
| Four-bar | Great bump absorption | Downhill |
Shock Adjustments
Like forks, shocks allow you to change:
- Spring rate (air pressure or coil preload)
- Compression damping
- Rebound damping
- Lockout
Beginners often forget to check sag—the amount the suspension compresses under your weight. Proper sag (typically 25–30% of travel) is crucial for grip and comfort.
Suspension Travel: How Much Is Enough?
Travel means how far the suspension moves. More travel absorbs bigger bumps but adds weight and can reduce pedaling efficiency.
Typical travel ranges:
- Cross-country: 80–120 mm
- Trail: 120–150 mm
- Enduro: 150–170 mm
- Downhill: 180–220 mm
Choosing the right travel depends on your riding style:
- Short travel for smoother trails and climbing
- Long travel for steep, rough descents
Many riders think more travel is always better. But too much can make a bike sluggish and hard to control on flat ground.
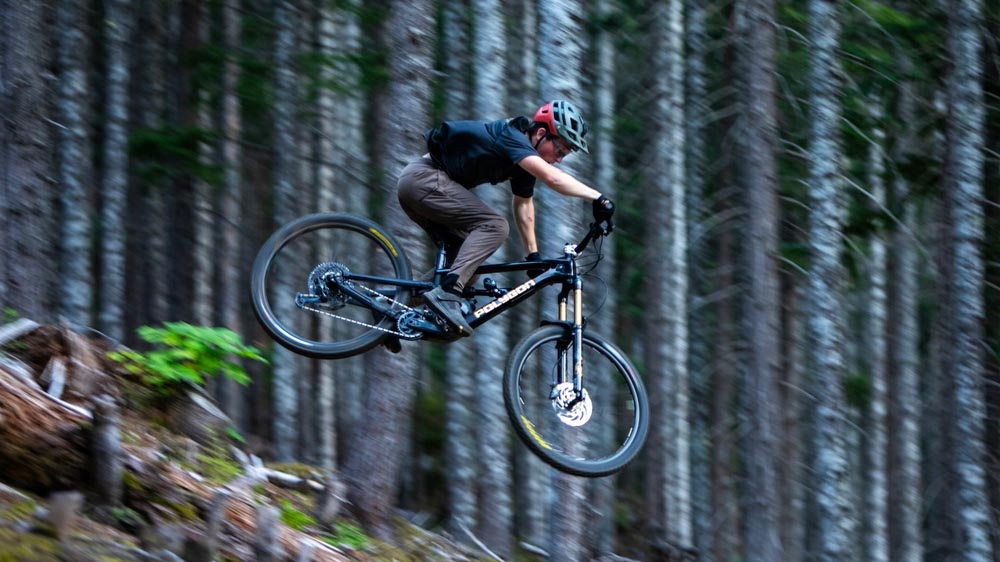
Credit: www.polygonbikes.com
Suspension Settings: Getting It Right
Suspension must be set up for your body, bike, and terrain. Here’s how:
- Set sag: Stand on your bike and measure how much the suspension compresses. Adjust air pressure or coil preload until you reach the recommended sag.
- Tune damping: Use the adjustment knobs to change compression and rebound. Start with the manufacturer’s settings and tweak based on feel.
- Check pressure/coil rate: Adjust for your weight, but also consider your riding speed and aggression.
- Test on real trails: Fine-tune settings as you ride. Suspension needs to match your local terrain.
A non-obvious tip: Use zip ties on your fork stanchion to measure maximum travel used during a ride. This shows if you’re bottoming out or not using enough travel.
Common Suspension Mistakes
Many new riders struggle with suspension setup. Here are frequent errors:
- Setting too much air pressure (makes suspension harsh)
- Ignoring sag (reduces grip)
- Not adjusting damping (leads to bouncing or sluggishness)
- Skipping maintenance (causes wear and poor performance)
- Using lockout all the time (reduces shock absorption)
Even experienced riders sometimes forget to update settings after changing tire pressure or adding gear.
Advanced Suspension Technologies
Modern bikes use smart features for better performance. Here are some examples:
Adjustable Travel
Some forks and shocks let you change travel on the fly. This helps for climbing or descending.
Remote Lockout
Riders can lock suspension from the handlebar, making it rigid for sprinting or climbing.
Electronic Suspension
New systems use sensors and motors to adjust damping in real time. For example, Fox Live Valve automatically stiffens suspension for climbs and softens it for descents.
Progressive Springs
These springs get harder as they compress, preventing bottoming out. Air springs often use tokens (small spacers) to make spring curves more progressive.
Comparing Coil Vs Air Suspension
Both coil and air systems have advantages. Here’s a quick comparison:
| Feature | Coil | Air |
|---|---|---|
| Weight | Heavier | Lighter |
| Adjustment | Swap coils | Change air pressure |
| Consistency | Stable in all temperatures | Can change with weather |
| Feel | Smoother, more linear | Can feel firmer |
| Cost | Often cheaper | Often more expensive |
Most trail bikes use air for lightness and easy tuning. Downhill bikes often use coil for reliability and smoothness.

Credit: www.polygonbikes.com
How Suspension Affects Bike Geometry
Suspension doesn’t just absorb bumps—it changes your bike’s geometry (shape and angles) as it moves.
Key effects include:
- Lowering the bottom bracket (center of gravity)
- Changing head angle (steering feel)
- Increasing wheelbase (stability)
If suspension is too soft, your bike may feel unstable. If too stiff, you lose grip and comfort. Adjusting settings can change how your bike turns, climbs, and descends.
Suspension Maintenance
Suspension needs regular care to stay smooth and safe.
Basic steps:
- Clean fork stanchions and shock after every ride
- Check air pressure or coil preload monthly
- Inspect for leaks or damaged seals
- Service internals (oil, seals) every 50–100 hours of riding
Neglecting maintenance can lead to loss of performance and expensive repairs. Many beginners think suspension is “set and forget”—but regular checks are critical.

Credit: www.evo.com
Real-world Examples: Suspension In Action
Let’s look at how suspension affects performance:
- Cross-country race: Riders use short travel, firm settings for speed and efficiency. Suspension helps absorb small bumps but stays stiff for climbing.
- Trail riding: Medium travel, balanced settings. Suspension is soft enough for comfort but firm enough for control.
- Downhill: Long travel, soft settings. Suspension absorbs big jumps and impacts, keeping riders safe at high speed.
Suspension is not just for pros. Even casual riders benefit from proper setup. For more technical details, visit the Wikipedia Bicycle Suspension page.
Two Insights Beginners Often Miss
- Suspension setup is not just about body weight. Your riding style (aggressive vs cautious), trail conditions (mud, rocks, roots), and even weather all affect the ideal settings.
- Suspension changes bike geometry as it moves. This affects steering, cornering, and climbing. Testing your setup on real trails and adjusting accordingly is more important than following standard charts.
Frequently Asked Questions
What Is Suspension Sag, And Why Is It Important?
Sag is the amount your suspension compresses under your weight. It helps keep tires on the ground and makes the bike comfortable. Too little sag reduces grip; too much makes the bike unstable. Correct sag is usually 25–30% of the suspension’s travel.
How Often Should I Service My Suspension?
Regular maintenance is key. Clean the fork and shock after every ride. Check air pressure monthly. Full service (oil and seals) is needed every 50–100 hours of riding, or once a year for most riders.
Is Air Or Coil Suspension Better For Beginners?
Both work well. Air suspension is lighter and easier to adjust for different riders. Coil suspension is simpler and gives a smoother feel but is heavier. Most beginners prefer air for its flexibility.
Can I Upgrade My Bike’s Suspension?
Yes, many bikes allow upgrades. Check compatibility for fork and shock sizes. Upgrading can improve comfort, control, and performance, but requires careful setup.
What’s The Difference Between Lockout And Damping?
Lockout stops suspension movement, making the bike rigid for climbing or sprinting. Damping controls how fast the suspension moves, affecting comfort and stability. Both are important, but damping is used for fine-tuning, while lockout is for temporary changes.
Mountain bike suspension is a blend of engineering and art. It helps you ride faster, safer, and more comfortably. By understanding how suspension works and how to set it up, you can unlock your bike’s full potential. Whether you’re a beginner or a seasoned rider, taking time to tune and maintain your suspension will transform your experience on the trails.

Hello Guys! I am John Reese, a professional biker and my hobby is biking! I have been biking for last 12 years and I love using bikes while outing as well. Based on my experiences with the different type of bikes (mountain bikes, road bikes and hybrid bikes); I am sharing my opinion about various bikes so that a beginner can get started right away. Happy reading!