Building dirt jumps for mountain bikes is both art and science. Whether you’re a beginner or a seasoned rider, learning how to construct your own jumps transforms your local trail and gives you more freedom to practice. This guide walks you through everything you need to know—design, tools, safety, construction, and maintenance.
By the end, you’ll be ready to build dirt jumps that are safe, fun, and durable.
Understanding Dirt Jumps
Dirt jumps are shaped mounds of soil designed for mountain bikers to launch, land, and perform tricks. Unlike natural bumps, well-built jumps offer predictability, safety, and flow. They can range from small rollers to large tabletop jumps and doubles. Building them involves careful planning, correct materials, and proper shaping.
The main types of dirt jumps are:
- Rollers: Small mounds for pumping speed without jumping.
- Tabletops: Flat-topped jumps, easier and safer for beginners.
- Doubles: Two separate mounds with a gap; more advanced.
- Step-ups: Landing area is higher than takeoff.
- Step-downs: Landing area is lower than takeoff.
Each type serves a different skill level and riding style. Beginners often start with tabletops or rollers, while advanced riders prefer doubles and step-ups.
Planning Your Dirt Jump Project
Building dirt jumps isn’t just about shoveling soil. Smart planning makes the difference between a fun, safe jump and a dangerous or short-lived mound.
Choosing The Right Location
The best location for dirt jumps is:
- Flat or gently sloping land: Makes shaping and drainage easier.
- Away from homes and roads: Reduces noise complaints and accidents.
- Accessible, but not too public: Minimizes vandalism and unwanted attention.
- Good drainage: Prevents waterlogging and erosion.
Before digging, check local rules. Some cities require permits for outdoor construction, especially in public parks or forests. Always respect landowners and neighbors.
Mapping Out Your Layout
Design your jump line on paper first. Consider:
- Space available: Avoid overcrowding jumps.
- Flow: Jumps should follow a natural path for smooth riding.
- Skill level: Start with smaller jumps, then add bigger ones as you progress.
- Safety buffer: Leave at least 10 feet between jumps and obstacles.
Measure distances and mark the ground with spray paint or stakes. Common spacing for jumps:
- Rollers/Tabletops: 10–15 feet apart
- Doubles: 15–25 feet apart
Gathering Permissions
Building dirt jumps on private land is easier than public land. If you’re in a park, get written approval. For backyard projects, check with your city zoning board. Sometimes, even homeowners’ associations have rules against large dirt mounds.
Estimating Costs And Materials
Dirt jumps can be cheap or expensive, depending on size and location. Basic costs include:
- Dirt/soil: Free if you dig onsite, $10–$20 per cubic yard if delivered.
- Tools: Shovels, rakes, wheelbarrows, tampers, water hoses.
- Safety gear: Gloves, boots, eye protection.
For a small jump (approx. 4 feet tall, 6 feet wide), you’ll need about 3–5 cubic yards of soil.
| Jump Type | Soil Needed (cubic yards) | Estimated Cost |
|---|---|---|
| Roller | 1–2 | $10–$40 |
| Tabletop | 3–5 | $30–$100 |
| Double | 4–7 | $40–$140 |
Most beginners underestimate the amount of soil required. It’s better to start small and add more later.
Selecting Materials And Tools
The right materials and tools ensure your jumps last and stay safe.
Types Of Soil
Not all dirt is equal. The best soil is clay-rich, which packs tightly and holds shape. Sandy or loose soil erodes quickly and is hard to sculpt.
Ideal soil mix:
- 60–70% clay
- 30–40% sand and silt
- No rocks, sticks, or roots
You can buy dirt from landscaping suppliers or dig it onsite if the soil is good.
Essential Tools
You’ll need:
- Flat shovel: For moving and shaping soil.
- Spade shovel: For digging and forming curves.
- Rake: To smooth surfaces.
- Wheelbarrow: For transporting soil.
- Tampers: For packing dirt (manual or gas-powered).
- Garden hose: For moistening soil.
Optional but helpful:
- Pickaxe: For breaking hard ground.
- String line and stakes: For measuring and marking.
- Level: To check angles.
Safety Gear
Always wear work gloves, sturdy boots, and eye protection when digging. For larger projects, consider a dust mask and knee pads.
Many beginners skip gloves, but blisters slow down progress and make shoveling painful.
Designing Your Dirt Jumps
Jump design affects safety, fun, and longevity. A well-shaped jump lets you progress your skills without risk.
Jump Shape And Dimensions
Every jump has three main parts:
- Takeoff: The ramp you launch from.
- Lip: The edge where you leave the ground.
- Landing: The area you land on.
Common dimensions for beginner jumps:
- Height: 2–4 feet
- Width: 4–6 feet (wider is safer)
- Length: 6–12 feet (takeoff to landing)
For example, a tabletop jump might be:
- Takeoff ramp: 4 feet high, 8 feet long
- Flat top: 4 feet wide, 6 feet long
- Landing ramp: 4 feet high, 8 feet long
Slope And Angle
The angle of your takeoff and landing ramps is crucial. Too steep and you’ll launch too high; too shallow and you won’t clear the gap.
Ideal angles:
- Takeoff: 30–40 degrees
- Landing: 25–35 degrees
Use a level or angle finder to check slopes. Beginners often build ramps that are too steep, making jumps unpredictable.
Gap And Tabletop Length
For doubles, the gap is the space between takeoff and landing. Start with small gaps (3–5 feet), then increase as you gain confidence.
For tabletops, the flat section provides safety if you don’t clear the jump. Tabletop length depends on your skill:
- Beginner: 4–6 feet
- Intermediate: 6–10 feet
- Advanced: 10–15 feet
Jump Progression
Plan jumps so riders can progress. Start with small rollers, then add larger tabletops and doubles. This keeps the trail fun for all skill levels.
| Skill Level | Jump Type | Typical Height (ft) | Gap/Tabletop Length (ft) |
|---|---|---|---|
| Beginner | Roller/Tabletop | 2–3 | 4–6 |
| Intermediate | Tabletop/Double | 3–5 | 6–10 |
| Advanced | Double/Step-up | 5–8 | 10–15 |
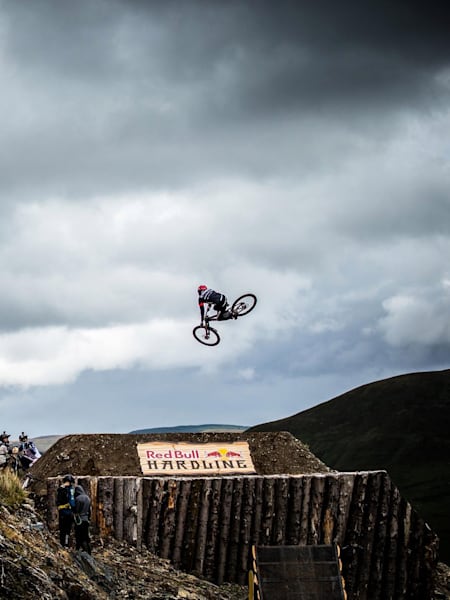
Credit: www.redbull.com
Building Dirt Jumps: Step-by-step
Now, let’s walk through the actual construction. Patience and attention to detail are key.
Step 1: Prepare The Site
Clear the area of rocks, roots, sticks, and weeds. Remove grass to prevent it from regrowing under the jump. Mark your layout with stakes and string.
If the ground is uneven, level it before starting. A flat base makes shaping easier and prevents jumps from leaning or collapsing.
Step 2: Move And Pile Soil
Start piling dirt where the takeoff and landing will be. For a tabletop jump:
- Build two mounds: One for takeoff, one for landing
- Shape a flat top in between
Pile soil higher than needed, as it will compact and shrink. For a 4-foot jump, start with a 5-foot mound.
Step 3: Shape The Jump
Use shovels and rakes to sculpt the mound into the desired shape. Start with rough shaping, then refine:
- Smooth the sides and top
- Create a gradual curve for the takeoff
- Shape the lip with a steeper angle
- Make the landing longer and slightly less steep
Begin shaping from the base up. Avoid sharp edges; smooth transitions are safer and more fun.
Step 4: Pack And Water The Soil
Moist soil packs better. Sprinkle water on the mound and use tampers to compress it. Manual tampers are fine for small jumps; gas-powered tampers speed up large projects.
Pack each layer as you build. Unpacked jumps crumble quickly, especially after rain.
Packing Tips
- Moisten soil lightly, don’t soak
- Pack from the bottom up, layer by layer
- Use a shovel to press the lip and landing edges
Beginners often forget to pack the landing—this leads to soft, dangerous landings.
Step 5: Final Shaping
Once packed, use a shovel and rake for final smoothing. Shape the lip sharply but avoid overhangs. Double-check angles with a level.
For tabletops, flatten the top and round the edges. For doubles, ensure the gap is clear and both ramps line up.
Step 6: Test And Adjust
Before riding, walk over the jump and check for soft spots. Fill holes and pack again if needed. Test with a slow ride. If you sink or the jump crumbles, add more soil and pack harder.
After several test rides, adjust the shape for flow and comfort.
Step 7: Build Multiple Jumps
Once you’re comfortable, repeat the process for more jumps. Connect them with smooth transitions. Maintain consistent spacing and angles for flow.
Building a full jump line takes time. Start with one or two, then expand.
Safety Considerations
Safety should always come first. Poorly built jumps lead to accidents and injuries.
Common Safety Mistakes
- Steep lips: Launch riders too high, causing loss of control.
- Short landings: No space to land safely.
- Loose soil: Jumps collapse under weight.
- Hidden rocks/roots: Cause crashes and injuries.
- Poor drainage: Water erodes jumps and creates slippery surfaces.
Double-check your jump after rain and before each session. Remove debris and smooth rough spots.
Protective Gear For Riders
Always wear:
- Helmet
- Gloves
- Knee and elbow pads
- Long sleeves and pants
Many beginners skip pads, but falls are common when learning new jumps.
Group Riding Etiquette
If you ride with friends:
- Wait until the previous rider clears the jump before starting.
- Call out “clear” or “dropping” before each run.
- Watch for beginners or young riders.
Respecting others keeps everyone safe and avoids collisions.

Credit: www.youtube.com
Maintaining Dirt Jumps
Well-built jumps need regular care, especially after rain or heavy use.
Routine Maintenance
- Fill holes and cracks weekly
- Water and repack dry spots
- Smooth surfaces with a rake
- Remove weeds and grass
A neglected jump loses shape and becomes dangerous. Assign maintenance days if you ride with a group.
Weather Protection
Cover jumps with tarps during heavy rain. This prevents erosion and saves hours of repair work. If tarps aren’t available, shape jumps with steep sides so water runs off.
After rain, check for soft spots. Let the jump dry before riding again.
Seasonal Care
In winter, freeze-thaw cycles can crack and soften jumps. Cover them or add extra clay to prevent damage. In dry summer months, water more often to keep soil compact.
Environmental Impact And Sustainability
Building dirt jumps affects the environment. Responsible builders minimize harm and keep their trails legal.
Soil Erosion
Unprotected jumps erode quickly, especially on slopes. Use clay-rich soil and pack tightly. Add grass or plants around jumps to stabilize edges.
Wildlife And Vegetation
Avoid building in sensitive habitats or near water. Clear only what’s necessary and avoid cutting mature trees. Leave some natural cover for wildlife.
Legal And Community Issues
Respect local laws and neighbors. Illegal jumps often get destroyed, wasting your hard work. Work with local mountain bike clubs for advice and support.
The International Mountain Bicycling Association (IMBA) offers guidance on sustainable trail building. For more, see IMBA.
Advanced Jump Features
Once you master basic jumps, consider adding advanced features.
Berms And Rollers
Berms are banked turns that add speed and flow. Rollers are small mounds for pumping. Both improve your jump line and keep riders engaged.
Step-ups And Step-downs
Step-ups require riders to jump up to a higher landing. Step-downs are drops to a lower landing. These features challenge advanced riders and add variety.
Rhythm Sections
A rhythm section is a series of closely spaced jumps and rollers. Riders must maintain speed and control to clear each feature. Rhythm sections are popular in BMX and mountain bike parks.
Gap Jumps
Gap jumps are advanced features with a space between takeoff and landing. They require confidence and skill. Start with small gaps and increase as you improve.
Wood Features
Some builders add wood ramps or lips to their dirt jumps. Use treated lumber and secure it properly. Wood features add durability but require more maintenance.
Common Beginner Mistakes And How To Avoid Them
Learning from others’ mistakes can save time and prevent accidents.
- Underestimating soil needs: Most jumps require more dirt than expected. Start with extra soil and pile higher than needed.
- Skipping packing: Unpacked jumps collapse or crumble. Pack each layer thoroughly.
- Ignoring drainage: Water ruins jumps. Build on high ground and shape sides to shed water.
- Steep takeoff lips: Too steep leads to loss of control. Aim for 30–40 degrees.
- Short landings: Give yourself plenty of space to land safely.
- Not testing with slow rides: Always test jumps gently before going big.
- Building in wrong location: Avoid areas with poor soil or legal issues.
- Riding before jumps are ready: Let jumps dry and settle before riding.
- Skipping safety gear: Always wear a helmet and pads.
- Neglecting maintenance: Regular care keeps jumps safe and fun.
Many beginners think a jump is finished after shaping, but ongoing maintenance is essential.
Practical Tips For Building Better Jumps
Experience teaches valuable lessons. Here are some practical tips:
- Work with friends: Building is faster and more fun with a team.
- Use local soil: Transporting dirt is expensive. Test soil quality before digging.
- Shape during cool hours: Avoid working in midday heat.
- Keep tools sharp and clean: Dull shovels make shaping difficult.
- Mark progress: Take photos as you build. This helps with repairs and improvements.
- Plan for expansion: Leave space for future jumps or features.
- Respect the environment: Use only what you need and avoid damaging habitats.
One non-obvious insight: Pack the landing more than the takeoff. Riders land with more force than they take off, so the landing must be extra solid.
Another often-missed tip: Add a small “knuckle” at the start of the landing ramp. This softens harsh landings and prevents crashes.
Example: Building A Beginner Tabletop Jump
Let’s break down a real-world example for a beginner tabletop jump.
Materials Needed
- 3–4 cubic yards of clay-rich soil
- Flat shovel, spade shovel, rake, wheelbarrow
- Manual tamper
- Garden hose
- Stakes and string
- Work gloves, boots, eye protection
Construction Steps
- Mark the area: Use stakes and string to outline a 12-foot-long, 6-foot-wide jump.
- Pile soil: Build two mounds—one for takeoff, one for landing—each 4 feet high.
- Shape ramps: Sculpt the takeoff and landing ramps to 30–35 degrees.
- Form flat top: Shape a 6-foot-long, 4-foot-wide flat section between ramps.
- Pack soil: Water lightly and pack each layer, especially the landing.
- Smooth surfaces: Use rake and shovel for final smoothing.
- Test ride: Start slow, adjust shape as needed.
Estimated Time
- Solo builder: 10–15 hours
- Group of 3: 4–6 hours
Building jumps is hard work but rewarding. Many beginners expect quick results, but patience leads to safer, longer-lasting jumps.
Comparing Dirt Jump Types
Choosing the right jump depends on skill, space, and goals.
| Jump Type | Safety | Skill Level | Popularity |
|---|---|---|---|
| Roller | Very safe | Beginner | High |
| Tabletop | Safe | Beginner–Intermediate | High |
| Double | Moderate risk | Intermediate–Advanced | Medium |
| Step-up | Higher risk | Advanced | Medium |
| Step-down | Higher risk | Advanced | Low |
Beginners should start with rollers and tabletops, then progress to doubles and step-ups as skills improve.
How Weather Affects Dirt Jumps
Weather is one of the biggest challenges in building and maintaining jumps.
Rain
Rain softens and erodes jumps. Use tarps or shape jumps with steep sides for drainage. Wait for jumps to dry before riding.
Heat
Hot weather dries soil quickly, making it hard to pack. Work early or late, and water soil before packing.
Cold
Freeze-thaw cycles crack jumps. Add extra clay and cover jumps in winter. Repair cracks as soon as they appear.
Wind
Wind can blow loose soil away. Pack jumps tightly and avoid building during windy days.
Weather effects are often underestimated. Plan maintenance and riding sessions around local forecasts.
Building Dirt Jumps In Small Spaces
Even with limited space, you can build fun jumps.
Tips For Small Yards
- Use rollers and small tabletops
- Keep jumps low (2–3 feet)
- Combine jumps with berms and rollers for flow
- Space jumps 8–10 feet apart
- Avoid doubles unless you have room for safe landings
Small jumps are great for beginners and younger riders. Focus on safety and gradual progression.
Community And Resources
Building dirt jumps is more fun with a community. Local mountain bike clubs offer advice, help, and sometimes legal support.
Online Forums
- Pinkbike: Popular for jump building tips and videos
- MTBR: Good for troubleshooting and sharing builds
- Reddit r/mountainbiking: Discussions and feedback
Books And Guides
- “IMBA Trail Solutions” (official guide)
- “Mountain Bike Skills Manual” (basic jump building tips)
Local Clubs
Join a mountain bike club for help, legal guidance, and group building days. Clubs often have access to land and resources.
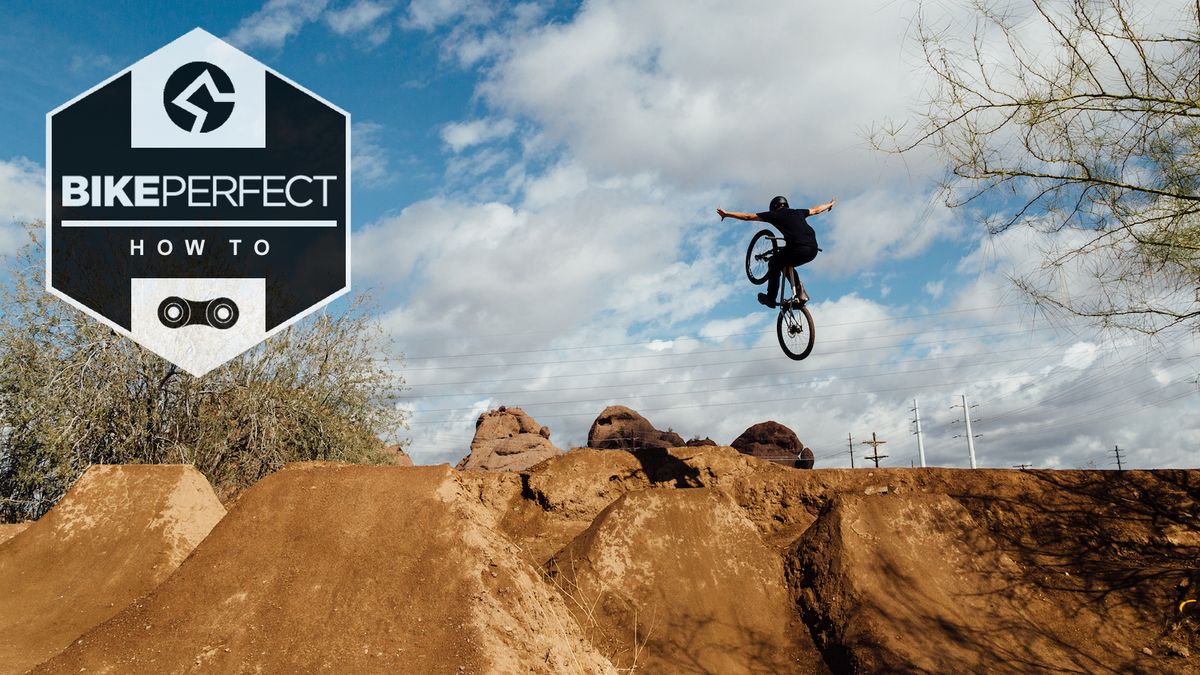
Credit: www.bikeperfect.com
Frequently Asked Questions
How Much Dirt Do I Need For A Basic Jump?
For a small tabletop jump (about 4 feet tall and 6 feet wide), you’ll need 3–5 cubic yards of soil. This is enough for both the takeoff and landing. Always pile extra dirt, as jumps settle and shrink after packing.
What Is The Best Soil For Dirt Jumps?
Clay-rich soil is ideal. It packs tightly and holds shape. Sandy soil erodes quickly and is hard to sculpt. Aim for 60–70% clay with some sand and silt. Avoid rocks, sticks, and roots in your soil mix.
How Do I Make Jumps Last Longer?
Pack soil tightly, especially the landing. Water regularly and cover jumps with tarps during heavy rain. Fill cracks and holes weekly. Plant grass or low plants around the edges to prevent erosion.
Are Dirt Jumps Legal In Public Parks?
It depends. Many parks require permits or approval. Always check local rules and get written permission before building. Illegal jumps can be destroyed or lead to fines. Work with local mountain bike clubs for guidance.
Can I Build Dirt Jumps Alone?
Yes, but it’s harder and slower. Building with friends speeds up the process and makes shaping easier. Solo builders should start with small jumps and plan extra time for packing and maintenance.
Building dirt jumps for mountain bikes is rewarding and fun. With careful planning, the right materials, and proper shaping, you can create jumps that are safe, durable, and enjoyable. Respect the environment, maintain your jumps, and always put safety first.
As your skills grow, expand your jump line and try new features. With patience and practice, your backyard or local trail can become a mountain bike playground.

Hello Guys! I am John Reese, a professional biker and my hobby is biking! I have been biking for last 12 years and I love using bikes while outing as well. Based on my experiences with the different type of bikes (mountain bikes, road bikes and hybrid bikes); I am sharing my opinion about various bikes so that a beginner can get started right away. Happy reading!