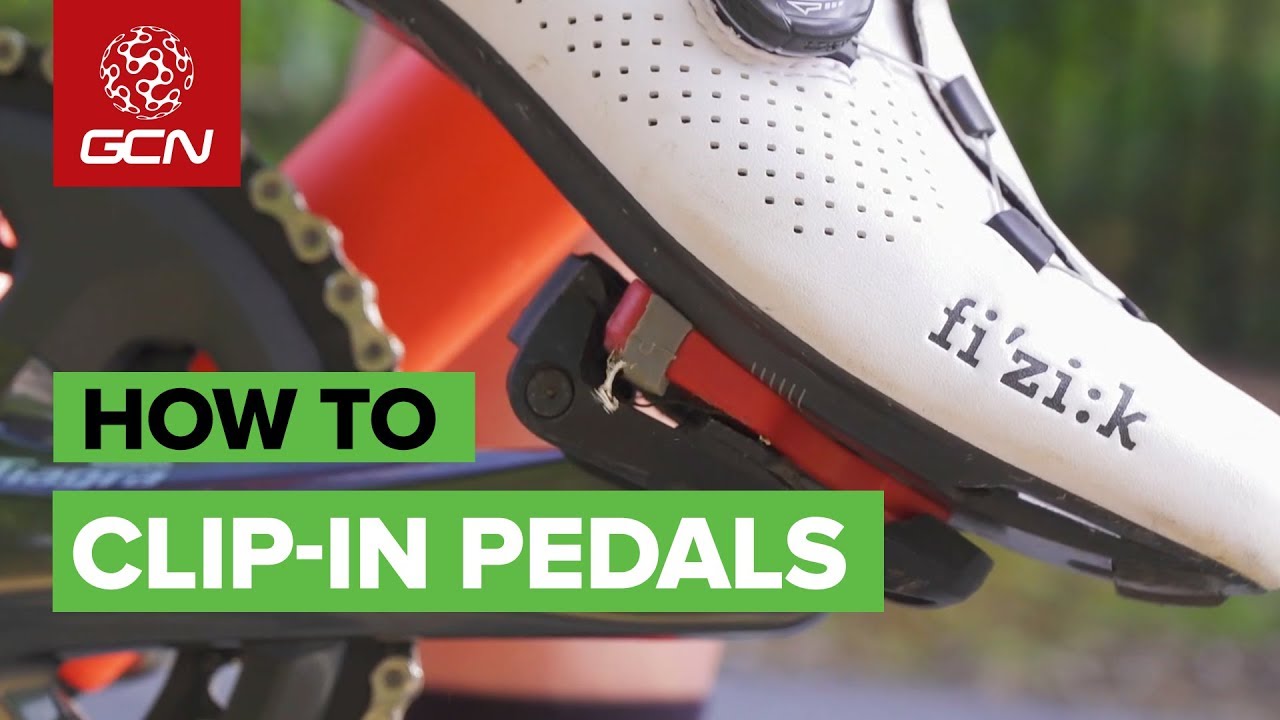
Clipping into mountain bike pedals is a skill that can transform your riding experience. Riders often feel nervous about switching from flat pedals to clipless ones, but learning how to use them safely and efficiently opens new possibilities. You gain more control, better power transfer, and improved confidence on the trail.
However, this step requires practice, proper technique, and the right equipment. In this article, you’ll discover everything you need to know about clipping into mountain bike pedals, from choosing the right pedals to troubleshooting common problems, all explained in simple, clear language.
Understanding Clipless Pedals
Clipless pedals are a system where your shoes attach directly to the pedal using a special mechanism. Despite the name, you actually “clip in” to these pedals, which surprises many beginners. The term “clipless” was introduced to distinguish these pedals from the older toe-clip style. This modern system uses cleats attached to the bottom of your cycling shoes, which lock into the pedal for a secure connection.
Types Of Clipless Mountain Bike Pedals
Mountain bike clipless pedals come in several styles. The most common are:
- SPD (Shimano Pedaling Dynamics): The most widely used, featuring two-sided entry and adjustable release tension.
- Crankbrothers: Known for easy engagement and mud-shedding ability.
- Time ATAC: Popular for reliability and float (movement before release).
- Look X-Track: Offers high power transfer and durability.
Each type has unique features. For example, SPD pedals are favored for their reliability and simplicity. Crankbrothers pedals are often chosen for muddy conditions because they don’t get clogged easily.
How Clipless Pedals Work
The pedal has a mechanism (often spring-loaded) that grabs the cleat attached to your shoe. When you push your foot down, the cleat clicks into place. To release, you twist your heel outward. This action is called “unclipping. ” The system is adjustable, so you can set how hard it is to clip in or out.
Choosing The Right Clipless Pedal System
Selecting the right pedal system is crucial for comfort, safety, and performance. Different pedal systems suit different riding styles and preferences.
Key Features To Consider
- Float: This is the amount your foot can move side-to-side while clipped in. More float means less stress on your knees.
- Release Tension: Adjustable tension lets you control how hard it is to clip out.
- Mud Clearance: Some pedals work better in muddy conditions.
- Weight: Lightweight pedals are easier to spin but may be less durable.
- Platform Size: Bigger platforms offer more support, especially for technical riding.
Comparison Of Popular Mountain Bike Pedal Systems
Below is a comparison of four popular clipless pedal systems:
| Pedal System | Float (degrees) | Release Tension | Mud Clearance | Weight (pair) |
|---|---|---|---|---|
| SPD | 4-6 | Adjustable | Good | 350g |
| Crankbrothers | 6 | Non-adjustable | Excellent | 290g |
| Time ATAC | 5-13 | Non-adjustable | Very Good | 320g |
| Look X-Track | 6 | Adjustable | Good | 370g |
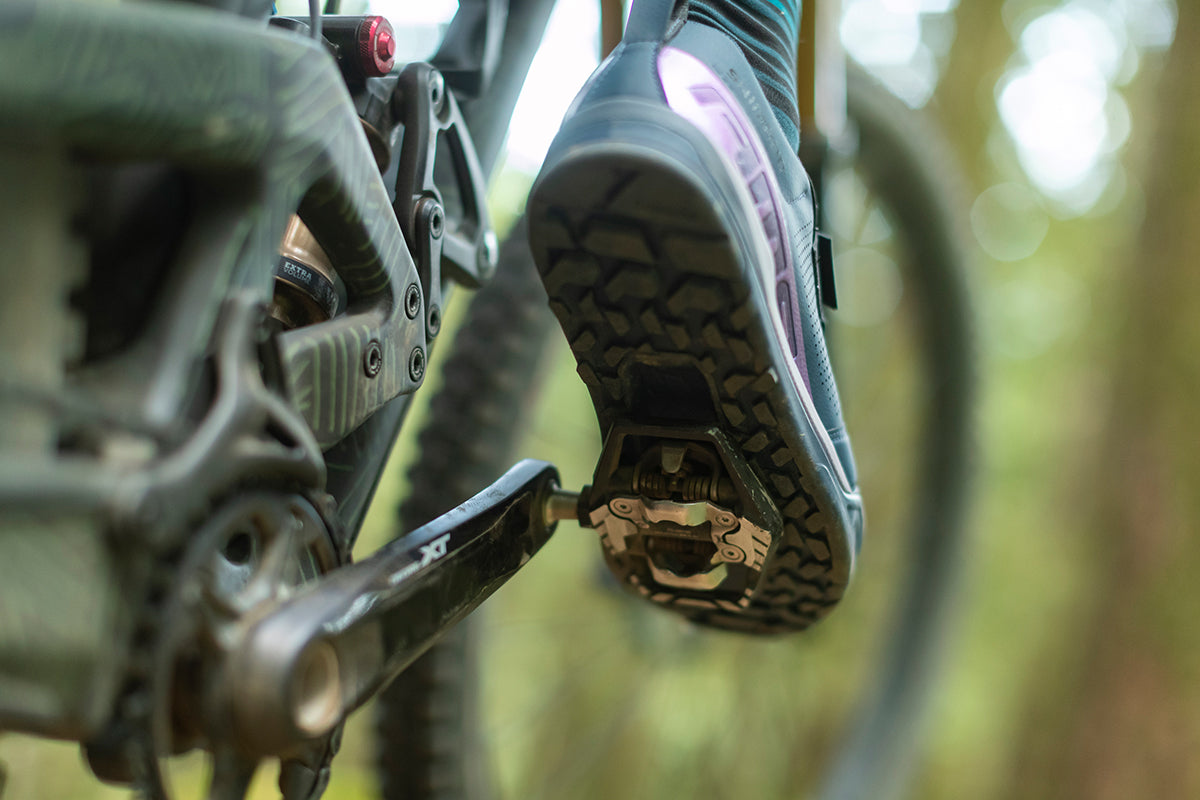
Shoe Compatibility
Mountain bike clipless shoes have 2-bolt holes for attaching cleats. Make sure your shoes match the pedal system you choose. Some shoes are stiffer for racing, while others are more flexible for walking.
Installing Cleats And Pedals
Before you can clip in, you need to install the pedals on your bike and the cleats on your shoes. This setup is important for safety and performance.
How To Install Clipless Pedals
- Remove your old pedals with a pedal wrench.
- Apply a small amount of grease to the pedal threads.
- Screw in the new pedals. The right pedal tightens clockwise; the left pedal tightens counterclockwise.
- Use a pedal wrench to secure them firmly, but do not overtighten.
How To Attach Cleats To Shoes
- Identify the correct position. Most riders place the cleat just behind the ball of the foot.
- Use the bolts provided to attach the cleat to your shoe’s sole.
- Tighten the bolts enough to hold the cleat, but allow minor adjustments.
- Stand with your shoes on and check your natural foot angle. Adjust the cleat so your foot feels comfortable.
- Tighten the bolts fully.
Cleat Positioning Tips
- If you experience knee pain, move the cleat slightly forward or backward.
- For better stability, adjust for a neutral foot angle.
- Beginners should start with maximum float to reduce injury risk.
Learning To Clip In And Out
Clipping in and out is the most important skill for using mountain bike pedals. Beginners often worry about getting stuck or falling, but with practice, these fears fade.
Clipping In
To clip in, follow these steps:
- Stand over your bike with one foot on the ground.
- Place your other foot on the pedal and align the cleat with the mechanism.
- Press down with moderate force until you hear a click.
- Repeat with the other foot once you start moving.
Clipping Out
To unclip, twist your heel outward. This movement releases the cleat from the pedal. Practice this motion until it feels natural.
Practicing Safely
- Start on a flat surface, like a driveway or parking lot.
- Hold onto a wall or fence for support.
- Practice clipping in and out several times before riding.
- Adjust release tension to the easiest setting at first.
Common Mistakes Beginners Make
- Forgetting to unclip before stopping.
- Setting release tension too high.
- Not practicing unclipping enough.
- Placing the cleat too far forward or back.
Confidence-building Exercises
- Try riding in circles while practicing unclipping.
- Practice sudden stops and immediate unclipping.
- Experiment with both feet to see which feels more natural.
Advantages Of Clipless Pedals For Mountain Biking
Clipless pedals offer several benefits. Understanding these can help you decide if the switch is right for you.
Improved Power Transfer
When you’re clipped in, you can pull up as well as push down on the pedals. This uses more muscle groups and makes your pedaling more efficient. Studies show clipless pedals can increase average power output by up to 10% for trained riders.
Better Bike Control
Being attached to the pedal lets you maneuver the bike more easily. You can lift the rear wheel, bunny hop, or shift your weight without slipping off.
Increased Confidence
Once you master clipping in and out, you’ll feel more secure on rough terrain. Your feet stay put, so you’re less likely to slip off during jumps or fast turns.
Enhanced Safety
Many riders believe clipless pedals are dangerous, but they can actually make you safer. Your feet won’t slip off in unexpected situations. Clipless pedals also help avoid ankle injuries from sudden pedal strikes.
Reduced Fatigue
Clipless pedals spread the workload across more muscles, reducing fatigue. You can ride longer and harder without getting tired as quickly.
Disadvantages And Challenges
Clipless pedals aren’t perfect. Understanding their limitations helps you make a smart decision.
Learning Curve
Most riders fall at least once when learning to use clipless pedals. It’s a normal part of the process. Practicing in a safe area reduces the risk.
Risk Of Injury
If you can’t unclip quickly, you may tip over and land awkwardly. This is especially true in technical sections or when stopping suddenly.
Cleat Wear
Cleats wear out over time, especially if you walk a lot in your cycling shoes. Worn cleats make clipping in and out harder.
Shoe Comfort
Some clipless shoes are stiff, making walking difficult. If you plan to hike-a-bike, choose shoes with more flexibility.
Compatibility Issues
Not all pedals fit all shoes. Always check compatibility before buying.
Step-by-step Guide: How To Clip Into Mountain Bike Pedals
The process of clipping in is simple, but small details matter. Follow these steps for a smooth experience:
- Stand with your bike on a stable surface.
- Position your preferred foot (usually your dominant one) on the pedal.
- Align the cleat with the pedal mechanism.
- Push down until you hear and feel a “click.”
- Start pedaling and clip in with your other foot once moving.
- To unclip, twist your heel outward.
- Repeat the process until it feels automatic.
Practice Drills
- Clip in and out while stationary, holding a wall or fence.
- Clip in with your non-dominant foot to improve balance.
- Ride slowly and practice unclipping both feet before stopping.
Troubleshooting Common Problems
- If you can’t clip in easily, check for mud or debris in the pedal.
- If unclipping feels hard, lower the release tension.
- If you hear squeaking, lubricate the pedal mechanism.
Real-world Example: Clipping In On The Trail
Imagine you’re riding a rocky trail. You approach a steep climb. With clipless pedals, you can pull up as well as push down, giving you extra power. If you need to stop quickly, you twist your heel outward and unclip instantly.
Over time, these movements become second nature. Most mountain bikers report that after a few weeks, they rarely think about clipping in or out — it’s automatic.
Comparing Clipless Pedals Vs. Flat Pedals
Many riders wonder if clipless pedals are better than flat pedals. Each has strengths and weaknesses.
Advantages Of Flat Pedals
- Easier to step off in emergencies.
- No special shoes required.
- Better for beginners.
Advantages Of Clipless Pedals
- More efficient power transfer.
- Improved bike control.
- Less foot slippage.
Here’s a side-by-side comparison:
| Feature | Flat Pedals | Clipless Pedals |
|---|---|---|
| Ease of use | Very easy | Requires practice |
| Power transfer | Good | Excellent |
| Foot stability | Moderate | High |
| Safety in crashes | High | Medium |
| Shoe compatibility | Any shoe | Special shoe required |
Most experienced mountain bikers prefer clipless pedals for racing or technical trails, while flat pedals are popular for downhill or casual riding.
Essential Safety Tips
Safety is critical when using clipless pedals, especially for new riders.
Start Slow
Begin in a safe, flat area. Avoid busy roads or technical trails until you’re comfortable clipping in and out.
Set Release Tension Low
Most pedals have adjustable tension. Set it as low as possible at first. You can increase it as you gain confidence.
Plan Your Stops
Always unclip before coming to a stop. Practice this until it becomes automatic.
Wear Protective Gear
Use gloves, knee pads, and helmet. Falls are common during the learning phase.
Inspect Your Equipment Regularly
Check for worn cleats, loose bolts, and pedal damage. Replace parts as needed.
Listen To Your Body
If you feel pain in your knees, hips, or ankles, adjust your cleat position or float.
Advanced Techniques For Mountain Bike Pedals
Once you master the basics, you can explore advanced skills.
Bunny Hops And Rear Wheel Lifts
Clipless pedals make it easier to lift the bike. Pull up with your feet while pushing down with your hands.
Technical Climbing
Clipless pedals let you use both legs for maximum power. This helps on steep or rocky climbs.
High-speed Cornering
With your feet secure, you can lean the bike more aggressively.
Emergency Unclipping
Practice quick heel twists for fast release. Try unclipping with both feet at once.
Maintenance And Care
Proper maintenance keeps your pedals and cleats working smoothly.
Cleaning
Mud and debris can clog the pedal mechanism. Clean pedals after every ride with water and a brush.
Lubrication
Apply a small amount of bike lubricant to moving parts. Do not over-lubricate, as it attracts dirt.
Cleat Replacement
Replace cleats when they show signs of wear, such as difficult engagement or release.
Bolt Tightening
Check cleat bolts regularly. Loose bolts can cause accidents.
Pedal Inspection
Look for cracks or bent parts. Replace damaged pedals immediately.
Credit: www.youtube.com
Common Mistakes And How To Avoid Them
Many beginners make mistakes that can be easily avoided.
Not Practicing Enough
Practice clipping in and out daily. Muscle memory takes time.
Ignoring Cleat Position
Improper cleat placement leads to knee pain. Test different positions until comfortable.
Forgetting To Unclip
Always unclip before stopping. Anticipate stops and practice quick release.
Over-tightening Release Tension
High tension makes unclipping difficult. Start low and adjust gradually.
Neglecting Equipment Checks
Regularly inspect pedals and cleats. Worn parts cause accidents.
How To Switch From Flat Pedals To Clipless
Transitioning from flat pedals can be intimidating. Here’s how to do it safely:
- Choose beginner-friendly clipless pedals with easy engagement and release.
- Practice in a controlled environment before hitting the trail.
- Use shoes with maximum float.
- Lower the release tension.
- Gradually increase difficulty as you gain confidence.
- Ride with experienced friends for support.
Tips From Experienced Riders
Experienced mountain bikers offer practical advice:
- Always unclip your non-dominant foot first when stopping.
- Don’t rush the learning process. Take your time.
- Check cleats and pedals before every ride.
- If you fall, laugh it off and keep practicing.
- Use lightweight shoes for racing, but flexible shoes for trail riding.
Data: Clipless Pedal Adoption Rates
Clipless pedals are now standard for cross-country and enduro mountain biking. According to a 2026 survey by Singletracks, over 68% of mountain bikers use clipless pedals for regular rides. Among racers, the number rises to over 80%.
Troubleshooting Guide
Here are solutions for common clipless pedal problems:
- Difficulty clipping in: Clean pedals, check for mud, lower tension.
- Difficulty unclipping: Lower tension, check cleat wear.
- Knee pain: Adjust cleat position and float.
- Squeaking: Lubricate pedal mechanism.
- Loose pedals: Retighten pedal bolts.
If problems persist, consult a bike shop for help.
How To Adjust Clipless Pedal Tension
Most clipless pedals allow you to adjust release tension with a small screw.
- Find the adjustment screw (usually marked with “+” and “-“).
- Turn clockwise to increase tension; counterclockwise to decrease.
- Test by clipping in and out.
- Adjust until you feel comfortable.
Environmental Considerations
Clipless pedals work best in dry conditions, but many are designed for mud and rain. Crankbrothers pedals are famous for mud clearance. If you often ride in wet conditions, choose pedals with open designs and easy maintenance.
Comparing Mountain Bike Shoes For Clipless Pedals
Shoes are as important as pedals. Different shoes suit different riding styles.
| Shoe Type | Stiffness | Walking Comfort | Cleat Compatibility | Weight |
|---|---|---|---|---|
| Race | Very stiff | Poor | 2-bolt | 320g |
| Trail | Moderate | Good | 2-bolt | 380g |
| Enduro | Stiff | Fair | 2-bolt | 350g |
| Casual | Low | Excellent | 2-bolt | 410g |
Choose shoes based on your riding style. Racers need stiff shoes for power transfer, while trail riders benefit from more flexible soles.
Credit: ride.shimano.com
Non-obvious Insights For Beginners
- Most falls happen at low speed. Practice unclipping during slow rides to build confidence.
- Mud can block pedal engagement. Carry a small brush or stick to clear mud from pedals during rides.
- Shoe tread affects engagement. Deep tread can make clipping in harder. Choose shoes with moderate tread for best results.
Additional Resources
For more detailed information about clipless pedal systems, visit Wikipedia.

Credit: ride.shimano.com
Frequently Asked Questions
What’s The Difference Between Clipless And Flat Pedals?
Clipless pedals use a mechanism to attach your shoe directly to the pedal. Flat pedals have no attachment; you simply rest your foot on top. Clipless offers better power transfer and control, while flat pedals are easier for beginners.
How Do I Know If My Shoes Are Compatible With Clipless Pedals?
Mountain bike clipless shoes have 2-bolt holes on the sole for attaching cleats. Check your shoe’s specifications and make sure they match your chosen pedal system.
How Long Does It Take To Get Used To Clipless Pedals?
Most riders feel comfortable after a week of daily practice. The learning curve varies, but practicing unclipping before stopping helps speed up the process.
Are Clipless Pedals Safe For Beginners?
Yes, if you start slow, practice unclipping, and set the release tension low. Wearing protective gear and practicing in a safe area reduces risk.
What Should I Do If I Fall While Clipped In?
Stay calm and try to unclip your feet. If you can’t, roll to the side to minimize injury. Most falls are minor and part of the learning process.
Clipping into mountain bike pedals is a valuable skill that improves your riding efficiency, safety, and enjoyment. With the right equipment, proper setup, and careful practice, you’ll soon ride confidently on any trail. Remember, every rider learns at their own pace — persistence and patience are key.

Hello Guys! I am John Reese, a professional biker and my hobby is biking! I have been biking for last 12 years and I love using bikes while outing as well. Based on my experiences with the different type of bikes (mountain bikes, road bikes and hybrid bikes); I am sharing my opinion about various bikes so that a beginner can get started right away. Happy reading!