Riding a mountain bike downhill is thrilling, but it also requires skill, focus, and a deep understanding of braking technique. Many beginners make mistakes that lead to loss of control, skidding, or even crashes. Learning how to brake properly not only boosts your confidence but also keeps you safe on steep, rocky, or unpredictable trails. This guide will walk you through everything you need to know about how to brake downhill mountain bike, from choosing the right equipment to mastering advanced techniques.
Whether you’re just starting or looking to improve your skills, understanding the science and art of braking is essential. We’ll explore the mechanics of mountain bike brakes, how your body position affects stopping power, and why terrain matters more than you might think.
You’ll get detailed tips, data-backed insights, and answers to common questions so you can ride with greater control and enjoyment.
Understanding Mountain Bike Brakes
Before you can brake confidently downhill, you need to know your equipment. Mountain bike brakes come in different types, and each responds differently under pressure.
Types Of Mountain Bike Brakes
- Rim brakes – These use pads to squeeze the wheel rim. They’re lightweight and easy to maintain but offer less stopping power in wet or muddy conditions. Rim brakes are rare on modern downhill bikes.
- Mechanical disc brakes – These use a cable system to activate brake pads on a metal rotor attached to the wheel. They’re stronger than rim brakes but can be less consistent on long descents.
- Hydraulic disc brakes – The standard for most downhill mountain bikes. They use fluid to push brake pads against the rotor, offering strong, smooth, and reliable stopping power, especially on long, steep trails.
Comparison Of Brake Types
Here’s a quick look at how brake types compare for downhill riding:
| Brake Type | Stopping Power | Modulation | Performance in Wet | Maintenance |
|---|---|---|---|---|
| Rim | Low | Low | Poor | Easy |
| Mechanical Disc | Medium | Medium | Fair | Medium |
| Hydraulic Disc | High | High | Excellent | Medium-Hard |
Key Parts Of A Mountain Bike Brake
- Brake lever – Mounted on your handlebars. You use your fingers to pull this.
- Brake caliper – Holds the pads and squeezes the rotor.
- Brake pads – The part that presses against the rotor or rim to create friction.
- Rotor – The metal disc attached to your wheel, used in disc brake systems.
- Brake lines – Cables or hoses that transmit force from the lever to the caliper.
Knowing these parts will help you with adjustments and troubleshooting.
The Physics Of Braking Downhill
Braking is about managing friction. When you pull the lever, the brake pads press against the rotor or rim, turning your forward motion into heat. Downhill, gravity increases your speed and momentum, so you need more skill and better technique to stop safely.
Weight Transfer
As you brake, your weight shifts forward. This means your front tire gains grip, but your rear tire can lose contact with the ground. Too much front brake can cause you to go over the bars (an “endo”), while too much rear brake can make you skid.
A balanced approach uses both brakes, with more emphasis on the front, but not so much you lose control.
Modulation
Modulation is your ability to control how much braking force you apply. Good modulation lets you slow down smoothly, instead of grabbing the brakes and locking your wheels. Hydraulic disc brakes offer the best modulation, making them ideal for downhill.
Heat And Brake Fade
On long descents, brakes can get hot. If they overheat, you’ll experience brake fade—a loss of stopping power. This is why proper technique, equipment, and even timing your braking are so important.
Body Position For Downhill Braking
Your body position is just as important as your finger position on the lever. It helps you maintain balance and control, especially on steep or technical sections.
The Attack Position
- Arms bent: Elbows out, soft but ready to absorb bumps.
- Hips back: Shift your hips toward the rear wheel, keeping your weight low and centered.
- Knees bent: This lowers your center of gravity and lets your legs absorb shocks.
- Head up: Look ahead, not down at your front wheel.
This position helps you stay stable as you brake and lets you shift your weight as needed.
Adjusting For Steepness
The steeper the trail, the more you need to move your hips back. However, don’t go too far—if your body is over the rear wheel, you lose control of the bike’s front end. Practice finding the right balance on different slopes.
Standing Vs. Sitting
Most downhill braking is done standing on the pedals. This keeps your center of gravity low and allows you to move with the bike. Sitting can be useful on smoother, less steep trails, but it limits your ability to react quickly.
How To Use Your Brakes Properly
Knowing when and how to use each brake is a skill every downhill rider must learn. Here’s a breakdown of the essentials.
Front Vs. Rear Brake
- Front brake: Provides about 70% of your stopping power. Use it smoothly and progressively.
- Rear brake: Adds stability and helps control speed, especially on loose or slippery surfaces.
Proper Technique
- Use one or two fingers on the brake lever. This gives you better control and leaves your other fingers gripping the handlebar.
- Squeeze, don’t grab. Apply pressure smoothly to avoid locking the wheel.
- Release slightly if the wheel starts to skid, then reapply gently.
When To Brake
- Before corners: Slow down before entering, not during the turn.
- Before obstacles: Brake before rocks, roots, or drops.
- On straight sections: Use these to control your speed, then let go and roll smoothly through technical spots.
When Not To Brake
- In the middle of a turn: Braking while turning can cause your tires to lose grip.
- On loose surfaces: Hard braking on gravel or mud can cause skidding. Use more rear brake and less front.
Example: Braking On A Steep, Rocky Trail
Imagine descending a steep, rocky section. Shift your weight back, arms and knees bent. Use mostly your front brake, but feather the rear for stability. Brake before entering the rocks, release slightly as you roll over them, and reapply as the trail smooths out.
Common Braking Mistakes And How To Avoid Them
Many downhill crashes happen because of poor braking habits. Here are the most common mistakes and how to fix them.
Locking The Wheels
Slamming on the brakes can lock your wheels, causing you to skid and lose control. To avoid this:
- Apply brakes smoothly and progressively.
- Learn to feel when your tires start to slide, and ease off slightly.
- Practice on gentle slopes to get a sense of how much pressure is too much.
Overusing The Rear Brake
Relying only on the rear brake can lead to long skids and poor control, especially on steep trails. The rear brake is for stability, not main stopping power. Use both brakes together for best results.
Grabbing The Front Brake Suddenly
Sudden, hard pulls on the front brake can flip you over the handlebars. Always squeeze the lever gradually, increasing pressure as you feel the bike slow down.
Braking In The Wrong Place
Braking in corners or on loose surfaces can lead to crashes. Focus on slowing down before the tricky section, then roll through with less or no braking.
Not Looking Ahead
Beginners often stare at their front wheel, missing upcoming obstacles. Look ahead on the trail so you can prepare to brake in advance.
Ignoring Bike Setup
Worn brake pads, dirty rotors, or poorly adjusted levers can make even good technique useless. Check your equipment regularly.
How Terrain Affects Braking
Different trail surfaces and gradients require different braking strategies. Here’s how to adjust for common conditions.
Loose Gravel Or Sand
- Use more rear brake to avoid washing out the front tire.
- Stay relaxed and let the bike move beneath you.
- Look for firmer ground or tire tracks for better grip.
Wet Or Muddy Trails
- Modulate both brakes gently—wet rotors can be less predictable.
- Avoid sudden movements; keep your weight balanced.
- Brake earlier than you would on dry ground.
Rocky Or Rooty Sections
- Get your braking done before entering the rough section.
- Stand tall, with elbows and knees bent.
- Let the bike roll over obstacles, using brakes lightly if needed.
Steep Descents
- Shift your weight further back.
- Use mostly the front brake, but feather the rear for control.
- Keep your body low and centered.
Table: Braking Strategies By Terrain
| Terrain | Front/Rear Ratio | Key Tips |
|---|---|---|
| Loose Gravel | 40% Front / 60% Rear | Brake gently, avoid front lockup |
| Mud | 50% Front / 50% Rear | Modulate, brake earlier |
| Rocky | 60% Front / 40% Rear | Brake before entering, roll through |
| Steep | 70% Front / 30% Rear | Shift weight back, stay centered |
Braking Techniques For Different Trail Features
Downhill trails often have a mix of features. Here’s how to approach each one:
Corners
- Slow down before you reach the corner.
- Release the brakes as you enter, letting the tires grip the trail.
- Resume braking gently after exiting if needed.
Drops And Ledges
- Brake before the drop, not during.
- As you roll off, keep your weight centered and arms loose.
- Land with knees and elbows bent to absorb impact.
Technical Sections (rocks, Roots)
- Approach at a controlled speed.
- Use light, controlled braking.
- Let the bike move beneath you—don’t fight it.
Fast Straightaways
- Use this time to relax your grip and recover.
- Lightly feather the brakes to maintain a safe speed.
- Stay alert for sudden turns or obstacles.
Advanced Braking Techniques
As your skills improve, you can add more advanced techniques for even better control.
Feathering
“Feathering” means applying very light, quick touches to the brakes. This helps you maintain speed without sudden slowdowns.
- Use on long descents to control speed without overheating the brakes.
- Practice applying just enough pressure to feel resistance, but not enough to slow the bike dramatically.
Trail Braking
This is a technique where you continue to brake gently as you start a turn, then release as the bike leans. It allows for better control entering corners but requires practice to avoid sliding out.
- Start with gentle corners before trying on steep or technical trails.
- Always prioritize safety over speed.
Emergency Braking
Sometimes you need to stop as quickly as possible. The key is to apply both brakes hard, shift your weight back, and keep your elbows and knees bent to avoid flipping over.
- Practice in a safe, open area.
- Learn to recognize when your tires start to slide.
Brake Pumping
On very long descents, alternate between braking and releasing to prevent brake fade. This also helps keep your hands from getting tired.
Equipment Setup Tips
Your bike’s setup can make a huge difference in how well you brake downhill.
Brake Lever Position
Set your levers so you can reach them easily with one or two fingers. The lever should be at a comfortable angle—usually in line with your arms when you’re in the attack position.
Pad And Rotor Choice
- Metallic pads: Last longer and handle heat well, but can be noisy.
- Resin pads: Quieter and offer better initial bite but wear out faster.
Larger rotors (180mm or 203mm) offer more stopping power and better heat management for steep descents.
Tire Pressure And Tread
Lower pressure gives more grip but increases rolling resistance. Choose tread patterns that match your local trails—aggressive knobs for mud, smaller knobs for hardpack.
Suspension Setup
Proper suspension tuning helps keep your wheels in contact with the ground, improving braking control.
- Set sag and rebound according to your weight and riding style.
- Don’t lock out your suspension on descents.
Table: Downhill Brake Setup Checklist
| Component | Recommended Setup | Why It Matters |
|---|---|---|
| Brake Levers | 1–2 finger reach, 45° angle | Comfort and control |
| Brake Pads | Metallic for steep/long, resin for quiet | Heat and noise management |
| Rotors | 180–203 mm | More power, less fade |
| Tire Pressure | Lower for grip, higher for speed | Improved traction |
| Suspension | Proper sag and rebound | Wheel contact, smoother ride |
Building Braking Skills Through Practice
Reading about braking is one thing—doing it is another. Here’s how to develop your skills safely and effectively.
Start Small
Begin on gentle slopes and easy trails. Practice slowing down and stopping at different speeds. Focus on smooth, controlled braking.
Practice Modulation
Find a straight, smooth section. Try to slow down using only your front brake, then only your rear, then both together. Notice how each feels and how the bike responds.
Simulate Real Trail Features
Set up cones or markers to practice braking before corners, obstacles, or “drop-offs” (like curbs). Focus on timing your braking.
Ride With More Experienced Riders
Watching and following skilled riders can help you see good technique in action. Ask for feedback and tips.
Record Your Progress
Use a phone or action camera to record your riding. Review your body position and braking technique. Small adjustments can make a big difference.
Don’t Rush
Skill comes with time and repetition. Stay patient, and don’t push past your comfort zone too quickly. Crashes often happen when riders try to go faster than their skills allow.
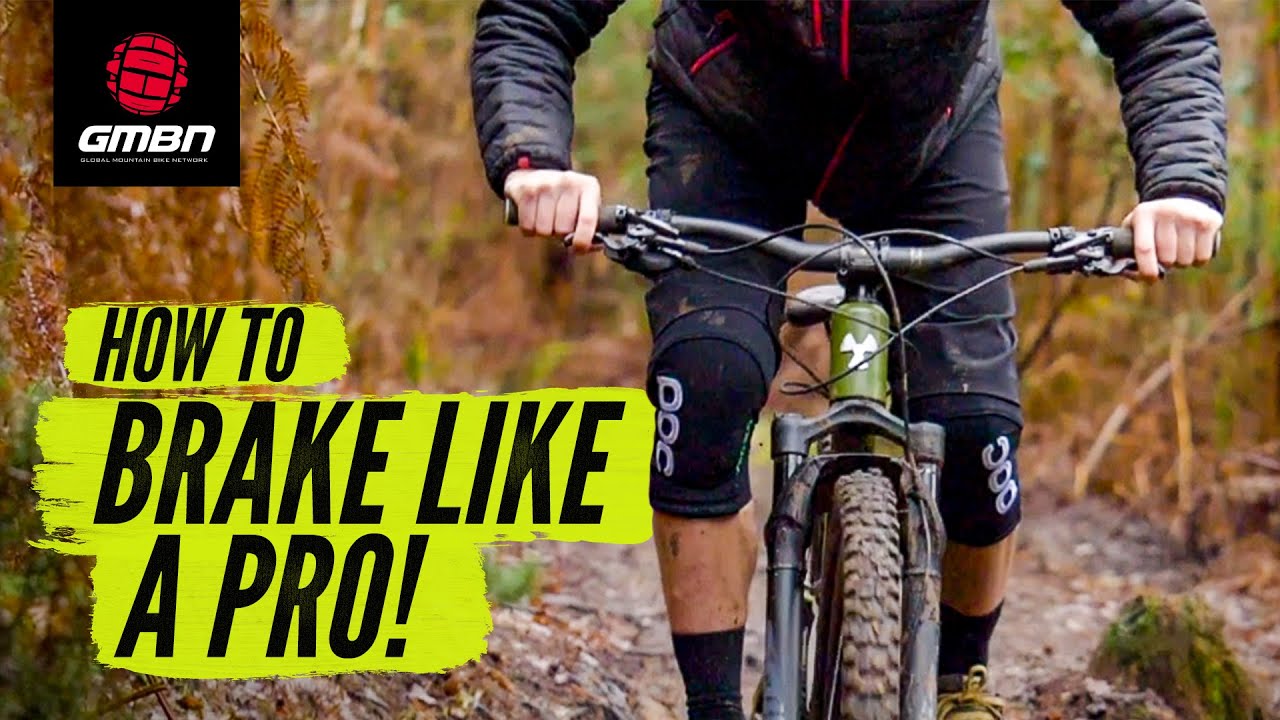
Credit: www.youtube.com
Braking For Different Rider Levels
Every rider approaches braking a little differently based on their experience.
Beginners
- Focus on smooth, gentle braking.
- Practice weight shifting and modulation.
- Learn to look ahead, not down.
Intermediate
- Work on timing and brake control in corners.
- Experiment with different brake pad types or rotor sizes.
- Start using advanced techniques like feathering.
Advanced
- Refine trail braking and emergency stops.
- Practice braking on technical features and in all weather conditions.
- Fine-tune equipment for your riding style and terrain.
Safety Tips For Downhill Braking
Downhill biking is fun, but it comes with risks. These tips help you stay safe:
- Wear protective gear – Always use a helmet, and consider knee/shin pads, gloves, and body armor.
- Inspect your bike before every ride – Check brakes, pads, rotors, and tire condition.
- Ride within your limits – Don’t attempt trails or speeds you’re not ready for.
- Stay relaxed – Tension makes braking harder and can lead to crashes.
- Know your trail – If possible, walk or ride slowly the first time to spot hazards.
- Stay hydrated – Long descents can be tiring.
- Ride with a buddy – Especially in remote or challenging areas.

Credit: www.redbull.com
Braking: Non-obvious Insights
While most guides cover the basics, here are two advanced insights most beginners miss:
- Brake heat is cumulative: On a long descent, even small, repeated braking adds up. Give your brakes a “rest” when possible—release them on straight, smooth sections to let them cool.
- Finger strength matters: Downhill biking can cause “arm pump,” where your hands and forearms get tired from braking. Regular grip and hand exercises off the bike can reduce fatigue and improve control.
Real-world Example: Braking On The World Cup Circuit
Professional downhill racers use these same principles, but with even more precision. For example, on a World Cup course, riders plan every braking point in advance—often braking hard before turns, then letting the bike roll at high speed through technical sections.
They use larger rotors, metallic pads, and even custom brake levers for maximum control. According to data from the Union Cycliste Internationale (UCI), top riders can reach speeds over 50 mph (80 km/h) and must stop in just a few seconds when needed.
If you want to learn more about the science behind mountain bike braking, you can visit the BikeRadar braking skills guide.

Credit: mbaction.com
Frequently Asked Questions
How Much Should I Use The Front Brake When Braking Downhill?
You should use your front brake for about 60–70% of your stopping power on most downhill trails. The front brake provides more stopping power because weight shifts forward as you slow down. However, always apply pressure smoothly and avoid grabbing the lever suddenly to prevent flipping over the handlebars.
What Should I Do If My Brakes Start To Fade On A Long Descent?
If you notice brake fade (less stopping power), release the brakes for a few seconds to let them cool. Use “pumping” or feathering techniques instead of dragging the brakes constantly. If possible, upgrade to larger rotors or metallic brake pads for better heat management.
Is It Safe To Brake In Corners?
It’s best to brake before entering corners. Braking while turning can cause your tires to lose grip and slide out. Slow down before the corner, release the brakes as you turn, and resume braking after you exit if needed.
How Do I Stop Skidding When Braking Downhill?
To avoid skidding, modulate your braking—apply pressure smoothly, and ease off if you feel the tires starting to slide. Use more of the front brake for power but combine it with the rear for stability. Practice on different surfaces to learn how your tires respond.
What Maintenance Should I Do On My Brakes For Downhill Riding?
Check your brake pads for wear, clean your rotors regularly, and make sure your brake levers are set up for easy reach. For hydraulic brakes, check fluid levels and bleed the system if the lever feels spongy. Replace worn parts before they become a problem.
—
Learning how to brake downhill mountain bike is a journey that pays off every time you ride. With the right technique, equipment, and practice, you’ll enjoy faster, safer, and more confident descents. Remember, skill comes with time and attention to detail—so keep practicing, stay curious, and enjoy the thrill of mastering the mountain.

Hello Guys! I am John Reese, a professional biker and my hobby is biking! I have been biking for last 12 years and I love using bikes while outing as well. Based on my experiences with the different type of bikes (mountain bikes, road bikes and hybrid bikes); I am sharing my opinion about various bikes so that a beginner can get started right away. Happy reading!