Few moments on a mountain bike can feel as thrilling as the rush of a steep descent or the challenge of a technical trail. But every skilled rider knows that braking is not just about slowing down—it’s about control, safety, and confidence on any terrain. Whether you’re new to mountain biking or looking to master advanced trails, understanding how to brake properly can transform your riding experience. Mistakes here can mean lost speed, damaged bikes, or even dangerous crashes. The good news: learning the right techniques is simple, and can make your rides smoother and safer.
This guide explains how to brake on a mountain bike for all skill levels. You’ll learn how different brakes work, where and when to use them, and how to adjust your technique for different trail types. We’ll cover common mistakes, advanced skills, and answer the questions riders ask most.
Let’s unlock the secrets of safe, effective braking—so you ride faster, longer, and with more confidence.
Understanding Mountain Bike Brakes
Brakes are a mountain bike’s most important safety feature. Choosing the right type and understanding how they work will improve your control on any trail.
Types Of Mountain Bike Brakes
Most mountain bikes use one of two main brake types:
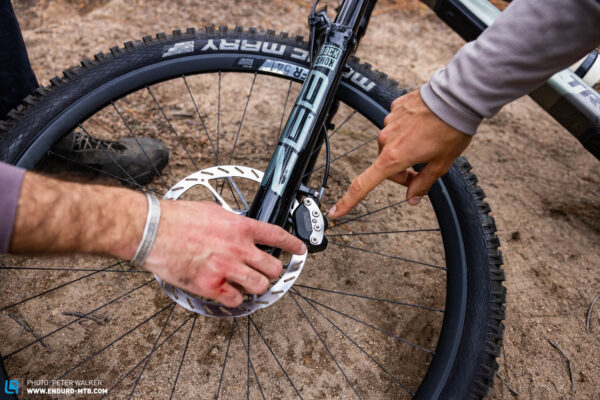
- Disc Brakes: These are the most common on modern bikes. They use a metal rotor attached to the wheel, with calipers squeezing the rotor to slow the bike. Disc brakes work well in wet, muddy, or steep conditions.
- Rim Brakes: Older bikes or budget models may use rim brakes. These squeeze the wheel’s rim. Rim brakes are lighter and cheaper, but less powerful in wet or muddy conditions.
Disc Brake Comparison
Here’s how disc brakes compare to rim brakes:
| Feature | Disc Brakes | Rim Brakes |
|---|---|---|
| Stopping Power | High | Medium |
| Performance in Wet/Mud | Excellent | Poor |
| Maintenance | Moderate | Low |
| Weight | Heavier | Lighter |
| Cost | Higher | Lower |
Disc brakes are better for mountain biking because they handle rough conditions well and provide reliable stopping power. However, they are more expensive and require more care.
Mechanical Vs Hydraulic Disc Brakes
Disc brakes come in two styles:
- Mechanical: Cable-operated, easier to fix, but less power.
- Hydraulic: Fluid-powered, stronger, smoother, but harder to repair.
Hydraulic disc brakes are the standard for most mountain bike riders because they are more responsive and require less force to operate.
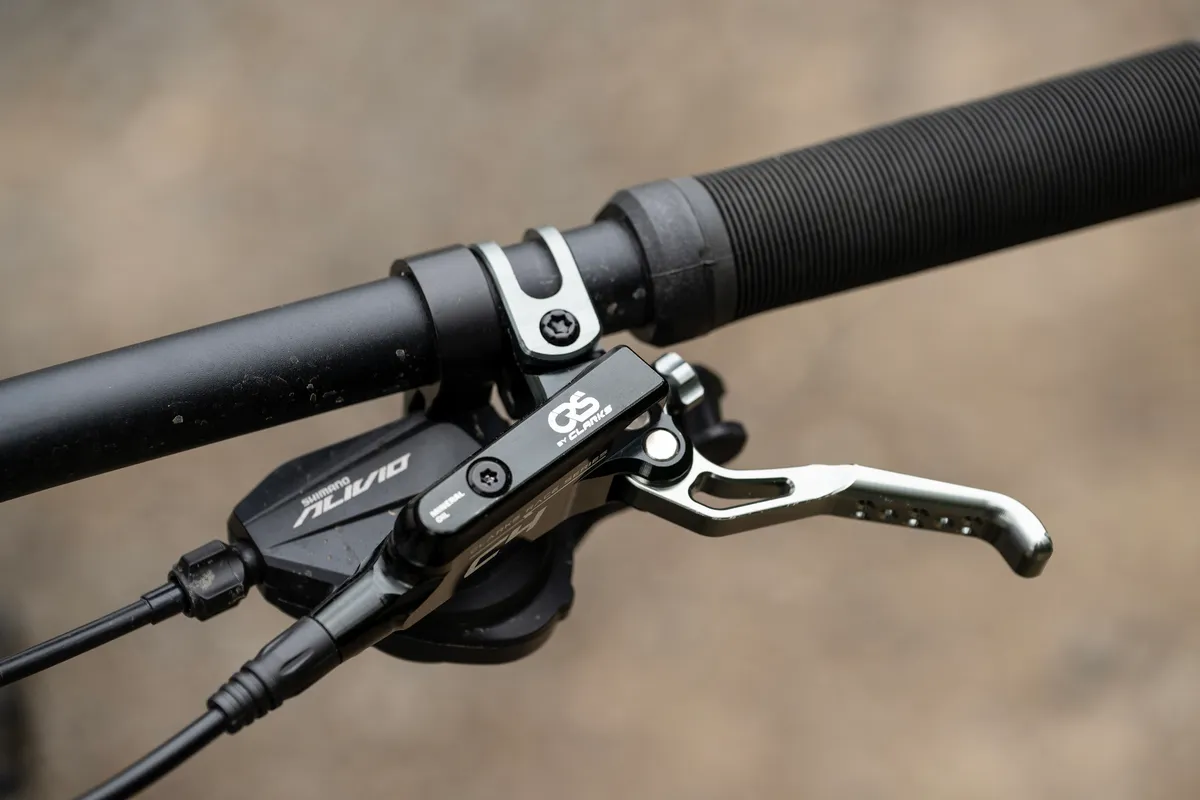
Brake Lever Placement
For proper braking, your levers should be positioned for easy one-finger use. Adjust them so you can reach them comfortably without stretching your hands. This helps keep your grip strong and reduces fatigue on long rides.
The Basics Of Braking On A Mountain Bike
Before you hit the trails, it’s important to understand the fundamentals of braking. Proper technique protects you from accidents and gives you more control.
How Brakes Work
Brakes slow your wheels by creating friction. When you squeeze the lever, pads press against the rotor (disc brakes) or rim (rim brakes). The harder you squeeze, the more friction, and the faster you stop. But too much force can lock the wheels and cause skidding.
Front Vs Rear Brake
Mountain bikes have two brakes:
- Front Brake: Provides most of the stopping power (about 70%). Use with care, especially downhill.
- Rear Brake: Offers stability and control. Less powerful, but safer to use aggressively.
Brake Power Distribution Table
| Brake | Power (%) | Use Case |
|---|---|---|
| Front | 70 | Major slowing, steep descents |
| Rear | 30 | Stability, cornering, technical sections |
Many beginners make the mistake of relying only on the rear brake. This slows you less and can cause the rear wheel to skid. Learning to balance both brakes is crucial.
Proper Hand Technique
Use one finger (index) on the brake lever. This leaves your other fingers to grip the handlebars. Squeeze gently, not suddenly. Braking should be smooth and controlled.
Body Position While Braking
Your body position matters as much as your brakes. For safe braking:
- Move your weight back slightly when braking hard
- Keep elbows bent and low
- Stand tall, not crouched
- Look ahead, not at your front wheel
Moving your weight back prevents going over the handlebars, especially when using the front brake.
Credit: www.youtube.com
Braking Techniques For Different Terrain
Trails change quickly. Each surface needs a different approach to braking. Knowing how to adjust your technique keeps you safe and lets you ride faster.
Braking On Loose Gravel
Gravel is slippery. Sudden braking here can cause you to lose control.
- Brake gently, mostly with the rear brake
- Start slowing down before entering the gravel section
- Keep your arms relaxed to absorb bumps
Braking On Mud
Mud reduces traction. Your tires slip easily.
- Use both brakes, but lighter pressure
- Brake earlier than usual
- Avoid locking the wheels—let them roll to maintain grip
Braking On Steep Descents
Steep hills require careful braking. Too much front brake can flip you; too little means you go too fast.
- Shift your weight back as far as possible
- Use mostly the front brake, but balance with the rear
- Brake before the steepest section, not during
A good rule: brake in short bursts, not constantly. This prevents overheating and keeps your tires gripping the trail.
Braking In Corners
Braking in a corner is tricky. The bike is leaning, and tires have less contact with the ground.
- Slow down before the corner, not while turning
- Use mostly the rear brake if you must brake in the corner
- Look through the corner, not at your front wheel
Many riders try to brake during the turn, but this increases the risk of sliding out.
Braking On Wet Trails
Wet rocks and roots are slippery. Braking too hard can cause instant loss of control.
- Use lighter, steady pressure on both brakes
- Brake early and reduce speed before entering wet areas
- Avoid sudden braking on slick surfaces
Braking On Technical Sections
Technical sections have rocks, roots, and drops.
- Brake before obstacles, not while crossing them
- Keep your weight centered or slightly back
- Use the rear brake for better control
If you need to brake on a rock or root, do it gently. Sudden force can cause your tires to slip.
Advanced Braking Skills
Once you master basic braking, you can use advanced techniques to ride faster and safer. These skills help you handle tougher trails, race downhill, or ride with more confidence.
Modulation
Modulation means controlling the amount of braking power, not just “on” or “off.” Good riders can apply just enough force for each situation.
- Squeeze the lever gradually
- Feel for the point where the tire starts to slip
- Release slightly, then reapply
This takes practice, but it’s key for smooth riding.
Feathering
Feathering is applying light, repeated pressure to the brakes. It’s useful for controlling speed on long descents.
- Tap the brakes gently and often
- Avoid holding the lever hard for a long time
- Keeps your tires rolling and prevents overheating
Emergency Braking
Sometimes, you need to stop fast. The right technique can prevent crashes.
- Shift your weight back quickly
- Use mostly the front brake, but balance with the rear
- Keep your arms and legs loose to absorb impact
Practice emergency stops in a safe area before trying them on trails.
Trail Braking
Trail braking is slowing down as you enter a turn, then releasing the brakes to accelerate out.
- Start braking before the turn
- Reduce speed until you feel comfortable
- Let go of the brakes as you exit
Trail braking is common in racing and helps you maintain speed through corners.
Braking While Jumping
If you need to slow down before a jump:
- Brake early, not on the ramp
- Release the brakes before leaving the ground
- Keep your weight centered
Braking in the air is not possible, so all adjustments must happen before takeoff.
Common Braking Mistakes And How To Avoid Them
Even experienced riders make mistakes. Knowing these can help you avoid accidents and improve your skills.
Locking The Wheels
Locking means the wheels stop turning and skid. This reduces control and damages the trail.
- Avoid squeezing the brake too hard
- Practice gentle pressure and modulation
Using Only One Brake
Relying only on the rear or front brake limits your control.
- Always use both brakes, adjusting balance for each situation
Braking Too Late
Waiting until the last moment to brake can cause panic and mistakes.
- Slow down before obstacles or corners
- Plan your braking zones ahead
Braking In The Wrong Place
Braking on rocks, roots, or mid-turn increases the risk of losing grip.
- Brake before obstacles, not on them
Poor Body Position
Staying upright or leaning forward while braking can cause crashes.
- Move your weight back, keep elbows bent, and look ahead
Not Adjusting For Terrain
Braking the same way on every surface is unsafe.
- Change your technique for mud, gravel, steep hills, and wet trails
How To Practice Braking Skills
Skill comes from practice. Here are ways to improve your braking:
- Find a safe, flat area: Practice emergency stops and modulation.
- Try braking on different surfaces: Gravel, mud, grass, and pavement.
- Set up cones or markers: Practice slowing down and stopping at specific points.
- Ride gentle slopes: Work on feathering and controlling speed.
- Practice corners: Learn to slow down before turning, then accelerate out.
A non-obvious tip: Use a buddy or coach to watch your technique. Many riders don’t realize they’re braking too hard or too late until someone points it out.
Credit: www.bikeradar.com
How Braking Affects Your Bike And Gear
Braking doesn’t just affect your speed—it also impacts your bike’s health.
Brake Pad Wear
Brake pads wear out over time. Disc brake pads may last 500–700 miles, depending on conditions. Riding in mud or water wears pads faster.
Rotor And Rim Damage
Overusing the brakes can heat up the rotors or rims, causing warping or cracks. If you feel vibrations or see discoloration, check your bike.
Tire Wear
Sliding or skidding wears tires quickly. Avoid locking wheels to extend tire life.
Maintenance Tips
- Clean your brakes after every ride, especially in wet or muddy conditions.
- Check pads and rotors regularly.
- Replace pads when they are less than 2mm thick.
- Adjust brake cables or hydraulic fluid as needed.
Braking For Different Rider Levels
Beginners
- Focus on smooth, gentle braking
- Practice one-finger technique
- Learn to balance both brakes
Intermediate Riders
- Work on modulation and feathering
- Practice braking on different surfaces
- Improve body positioning
Advanced Riders
- Master emergency braking and trail braking
- Practice on steep, technical trails
- Fine-tune lever placement and brake feel
Braking For E-bikes And Heavy Bikes
E-bikes and downhill bikes are heavier and faster, so braking needs special care.
- Use stronger brakes (hydraulic recommended)
- Start braking earlier, as stopping distance increases
- Check pads and rotors more often
A useful insight: Heavier bikes require more force to stop, but it’s easy to overheat brakes. Give them time to cool on long descents.
Comparing Brake Brands And Models
Choosing the right brakes matters. Here’s a comparison of popular mountain bike brake brands:
| Brand | Type | Power | Weight | Price |
|---|---|---|---|---|
| Shimano Deore | Hydraulic Disc | High | Medium | $100 |
| SRAM Guide | Hydraulic Disc | High | Medium | $130 |
| Tektro Auriga | Hydraulic Disc | Medium | Medium | $80 |
| Shimano Alivio | Mechanical Disc | Medium | Lighter | $60 |
When choosing, consider your riding style, trail conditions, and budget.
How Weather Changes Braking
Dry Conditions
Braking is easier. Use normal technique, but check for dust that can reduce grip.
Wet Conditions
Brakes take longer to respond. Feather them, and start slowing down earlier.
Cold Weather
Cold makes hydraulic fluid thicker, slowing brake response. Adjust lever feel and check fluid level.
Hot Weather
Long descents heat up pads and rotors. Use short bursts, not constant braking, to avoid overheating.
How Braking Affects Riding Speed And Safety
Braking isn’t just about slowing down. It lets you ride faster safely.
- Proper braking helps you enter corners at higher speed
- Controlled braking lets you tackle steep descents with confidence
- Smooth braking reduces crashes and injuries
Many beginners think braking slows them down, but it actually lets you ride faster by keeping you in control.
Braking And Trail Etiquette
Mountain biking is about fun and respect. Good braking technique is part of trail etiquette.
- Avoid skidding—this damages trails and annoys other riders
- Yield to other riders and hikers by slowing down early
- Use brakes to control speed, not to compete or show off
A tip many miss: Braking quietly and smoothly is safer for wildlife and other trail users.
Braking And Suspension
Suspension affects braking. A stiff fork or shock can cause the bike to bounce or lose grip.
- Set suspension for your weight and riding style
- Use brakes before rough sections, not during
- Keep suspension maintained for best performance
Braking For Downhill And Enduro Riding
Downhill and enduro biking demand advanced braking skills.
- Use powerful hydraulic brakes
- Brake in short bursts to avoid overheating
- Shift your weight back more on steep descents
- Practice emergency stops and trail braking often
Braking For Xc And Trail Riding
Cross-country (XC) and trail riding need different braking:
- Use lighter, faster brakes
- Focus on modulation and smooth stops
- Practice feathering on long, rolling hills
Braking And Bike Setup
Proper bike setup makes braking easier.
- Adjust lever reach for your hand size
- Set brake pads close to the rotor, but not touching
- Use quality pads for better feel
Many riders overlook lever adjustment. Even small changes can make a big difference in comfort and control.
Frequently Asked Questions
How Often Should I Replace My Brake Pads?
Replace brake pads when they are less than 2mm thick, or if you notice reduced stopping power. Most mountain bike pads last 500–700 miles, but riding in mud or rain wears them faster.
Can I Use Only The Rear Brake For Safety?
Using only the rear brake is less effective and can cause skidding. Balance both brakes for control and safer stopping, especially on steep or technical trails.
How Can I Avoid Skidding While Braking?
Avoid sudden, hard pressure on the levers. Use smooth, gradual braking and practice modulation. Shift your weight back, especially downhill, to keep tires gripping the trail.
What Should I Do If My Brakes Feel Weak?
Check for worn pads, dirty rotors, or air in hydraulic lines. Clean and adjust your brakes, and replace pads if needed. If problems persist, visit a bike shop for expert help.
Are Hydraulic Disc Brakes Worth The Cost?
Hydraulic disc brakes offer stronger, smoother braking and are easier to use. They are more expensive and require more maintenance, but most riders find the performance worth the investment. For more details, see this Wikipedia guide to bicycle brakes.
Mastering how to brake on a mountain bike is more than just squeezing a lever—it’s about technique, timing, and understanding your bike. With practice, you’ll ride safer, faster, and with more confidence. Remember, every trail is different, and good braking can make all the difference between a great ride and a tough day.
Keep learning, keep practicing, and enjoy the adventure.
Credit: enduro-mtb.com

Hello Guys! I am John Reese, a professional biker and my hobby is biking! I have been biking for last 12 years and I love using bikes while outing as well. Based on my experiences with the different type of bikes (mountain bikes, road bikes and hybrid bikes); I am sharing my opinion about various bikes so that a beginner can get started right away. Happy reading!