Mountain biking is all about adventure, freedom, and exploring wild trails. But every ride, from quick loops to multi-day journeys, brings a big question: how do you carry gear on a mountain bike? If you pack too much, your ride feels heavy and slow. If you pack too little, you risk trouble. Finding the right balance is not just about comfort—it’s about safety, fun, and making sure your essentials are always within reach.
Whether you’re new to mountain biking or looking to upgrade your setup, carrying gear can seem confusing. There are many options, from simple pockets to high-tech packs. Some solutions fit short rides, while others are best for epic adventures. In this guide, you’ll learn all the practical ways to carry gear, how to choose what fits your needs, and smart tips to avoid common mistakes.
By the end, you’ll know exactly how to pack for any mountain bike ride—without feeling overloaded or underprepared.
Understanding Mountain Bike Gear Needs
Before you choose how to carry gear, it’s important to know what gear you really need. Packing too much can slow you down; packing too little can leave you stranded.
Essential Gear For Every Ride
Even for short rides, some items are almost always required:
- Spare tube or patch kit
- Mini pump or CO2 inflator
- Multi-tool
- Tire levers
- Water bottle or hydration pack
- Energy snacks
- Phone
- ID and cash
Longer rides or remote trails demand more:
- First aid kit
- Extra layers (jacket, gloves)
- GPS or map
- Lights
- Chain links or quick links
- Emergency blanket
Assessing Ride Types
The gear you carry depends on your ride:
- Short local rides: Minimal gear, focus on repair and hydration.
- Day-long adventures: Add food, layers, navigation tools.
- Multi-day trips: Camping gear, spare parts, more food.
Ask yourself:
- How far am I going?
- How remote is the trail?
- What is the weather forecast?
- Can I get help if something goes wrong?
Most beginners over-pack. Start with essentials and add only what you truly need.
Main Ways To Carry Gear On A Mountain Bike
There are several methods to carry gear, each with pros and cons. Your choice depends on your riding style, bike setup, and personal preference.
On-body Carry: Packs And Pockets
Hydration Packs
Hydration packs are the most popular for mountain bikers. They combine a water reservoir with storage for tools and snacks.
- Capacity: Usually 1.5–3 liters for water, plus pockets for gear.
- Fit: Worn on the back, adjustable straps for stability.
- Best for: Medium and long rides, technical terrain.
Example: The Camelbak Mule holds 3 liters of water and has space for tools and food.
Pros: Easy access to water, keeps weight centered, quick to put on.
Cons: Can feel hot on the back, adds weight to your body.
Waist Packs (hip Packs)
Waist packs (also called hip packs) are smaller and worn around the waist.
- Capacity: 0.5–2 liters, some have small water bottles.
- Best for: Short to medium rides, riders who dislike backpacks.
Pros: Lower profile, less sweaty, quick access.
Cons: Limited storage, may bounce if overloaded.
Jersey Pockets
Some bike jerseys have rear pockets, mainly used for lightweight items.
Pros: Simple, no extra gear needed.
Cons: Limited space, not secure for heavy or sharp tools.
On-bike Carry: Mounts, Bags, And Straps
Frame Bags
Frame bags fit inside the triangle of your bike frame. They come in full or partial sizes.
- Capacity: 1–5 liters depending on size.
- Best for: Long rides, bikepacking, carrying heavier gear.
Pros: Keeps weight low and centered, no impact on rider comfort.
Cons: Can block bottle cages, may not fit all frames.
Saddle Bags
Saddle bags attach under the seat. They’re common for carrying repair kits and small items.
- Capacity: 0.3–1 liter.
- Best for: Spares, tools, short rides.
Pros: Out of the way, easy to attach.
Cons: Limited space, can loosen on rough trails.
Handlebar Bags
Handlebar bags mount in front of the bike, good for items you need often.
- Capacity: 1–3 liters.
- Best for: Snacks, cameras, lightweight gear.
Pros: Easy access, adds storage without blocking main frame.
Cons: Can affect steering, not great for heavy items.
Top Tube Bags
Top tube bags sit on the frame between the seat and handlebars.
- Capacity: 0.5–1 liter.
- Best for: Energy gels, phone, small items.
Pros: Quick access, easy to install.
Cons: Limited space, may interfere with pedaling.
Fork And Down Tube Mounts
Some bikes allow for extra cages or bags on the fork or down tube.
Pros: Adds more storage for water or gear.
Cons: Can affect handling, not compatible with all frames.
Cargo Cages
Cargo cages are larger brackets for carrying bottles or dry bags.
Best for: Bikepacking, carrying larger items.
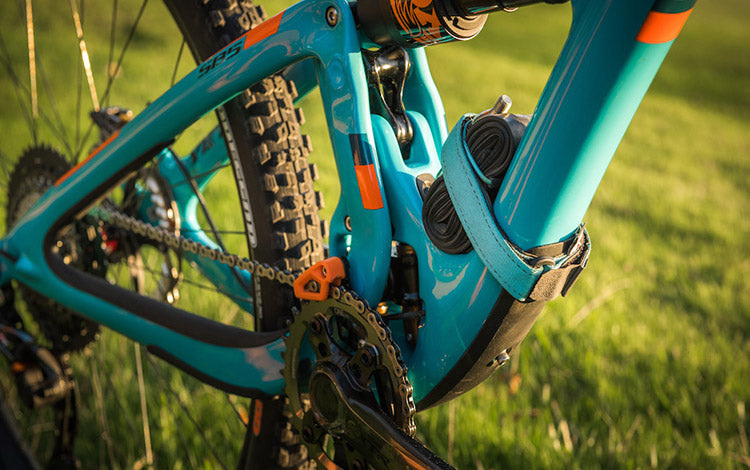
External Straps And Add-ons
Simple straps (like Voile straps) are used to attach tubes, pumps, or bags directly to the frame.
Pros: Lightweight, flexible, cheap.
Cons: Not secure for heavy items, can scratch paint.
Comparison: On-body Vs. On-bike Carry
Here’s a look at how body and bike options compare for typical gear:
| Carry Method | Comfort | Gear Capacity | Accessibility | Best Use |
|---|---|---|---|---|
| Hydration Pack | Medium | High | Easy | Long rides |
| Waist Pack | High | Low | Easy | Short rides |
| Frame Bag | High | High | Medium | Bikepacking |
| Saddle Bag | High | Low | Medium | Repair kit |
| Handlebar Bag | Medium | Medium | Easy | Snacks/tools |
Non-obvious tip: Mixing methods (like a small pack plus a saddle bag) is often more comfortable than relying on one. Many pros use a combination for balance and easy access.
Choosing The Right Gear Carry Solution
Selecting the best method depends on your bike, body, and ride style.
Factors To Consider
- Bike frame shape: Not all bags fit all frames.
- Ride length: Short rides need less storage; long rides require more.
- Terrain: Rocky trails can shake loose poorly attached bags.
- Personal comfort: Some riders dislike packs on their back.
Example: Packing For A Day Ride
For a 3–4 hour trail ride:
- Hydration pack (2L water, tools, snacks)
- Saddle bag (spare tube, tire levers)
- Jersey pockets (phone, cash)
For a multi-day trip:
- Frame bag (food, clothing)
- Handlebar bag (sleeping gear)
- Saddle bag (repair kit)
- Hydration pack (water, first aid)
Mistakes To Avoid
- Overloading on-body packs: Too much weight leads to back pain and fatigue.
- Loose bags: Poorly attached gear can fall off or affect bike handling.
- Ignoring weather: Waterproof bags are essential for rainy rides.
- Neglecting balance: Heavy gear at the front or back makes steering harder.
Detailed Look: Bag Types And Their Uses
Mountain bike bags come in many shapes and sizes. Let’s dig deeper into their features.
Hydration Packs
Modern hydration packs are made for bikers, with slim profiles and smart pockets.
Features to look for:
- Adjustable straps
- Ventilated back panels
- Separate tool pockets
- Magnetic bite valves
Data: Most packs weigh 1–2 pounds empty, can carry 2–3 liters of water.
Pro insight: Packs with lumbar reservoirs feel more stable on rough terrain.
Frame Bags
Frame bags are popular for bikepacking but also useful for day rides.
Features:
- Waterproof zippers
- Internal dividers
- Velcro or bolt-on mounts
Data: Full-size bags can carry up to 5 liters; partial bags 1–2 liters.
Beginner mistake: Buying a bag that blocks water bottle cages. Measure your frame before purchasing.
Saddle Bags
Small and simple, saddle bags are ideal for spares.
Features:
- Quick-release buckles
- Reflective strips
- Water-resistant materials
Data: Typical size is 0.5 liter, enough for tube, levers, and CO2.
Pro insight: Larger saddle bags can sway on rough trails. Choose compact models for mountain biking.
Handlebar Bags
Handlebar bags are gaining popularity for snacks, electronics, and lightweight clothing.
Features:
- Easy-open zippers
- Attachment loops for lights
- Removable shoulder straps
Data: Most weigh under 1 pound, capacity up to 3 liters.
Beginner tip: Don’t overload; steering gets difficult if bag is too heavy.
Waist Packs
Waist packs offer freedom for riders who dislike backpacks.
Features:
- Secure closure
- Small water bottle pockets
- Adjustable fit
Data: Capacity up to 2 liters, enough for tools and snacks.
Expert insight: Packs with flexible straps and padding reduce bouncing.
How To Pack Gear Efficiently
Packing well is as important as choosing the right bag. Here’s how to do it smartly.
Organize By Use
Pack items based on how often you’ll need them.
- Quick access: Snacks, phone, map—keep in handlebar or top tube bag.
- Less frequent: Spare tube, multi-tool—in saddle bag or frame bag.
- Rare: First aid kit, emergency blanket—bottom of pack or frame bag.
Weight Distribution
Balance is key. Place heavier items low and centered.
| Bag Location | Recommended Gear | Weight Impact |
|---|---|---|
| Frame Bag | Food, heavier tools | Low, stable |
| Saddle Bag | Spare tube, levers | Rear, minimal |
| Handlebar Bag | Snacks, light clothing | Front, light |
| Hydration Pack | Water, first aid | Body, moderate |
Weather Protection
Use waterproof bags or liners for electronics and clothing. Many mountain bike bags are water-resistant, but not fully waterproof. In wet climates, dry bags are a must.
Non-obvious tip: Use ziplock bags inside packs for extra protection.
Credit: www.mtbdirect.com.au
Advanced Gear Carrying: Bikepacking And Epic Rides
For multi-day trips or races, carrying gear gets more complex.
Bikepacking Setups
Bikepacking means riding with camping gear. Most setups use:
- Full frame bag (food, tools)
- Large handlebar roll (tent, sleeping bag)
- Oversized saddle bag (clothes, repair kit)
- Fork cages (extra water, stove)
Data: Typical total gear weight is 15–20 pounds, spread across bags.
Mounting Considerations
Bikepacking bags use velcro, straps, or bolts. Not all mountain bikes have enough space for big bags. Test your setup before your trip.
Packing For Races
Mountain bike races often require quick access to repair tools and food. Many racers use:
- Small hydration pack
- Minimal saddle bag
- Top tube bag for gels
Mistake to avoid: Packing too much slows you down. Only carry what the race rules demand.
Custom Solutions
Some riders use custom frame bags for odd-shaped bikes. Others add bottle cages to the fork. There are even racks for carrying extra gear, but these are rare in mountain biking.
Practical Tips For Safe And Comfortable Carry
Carrying gear is not just about storage—it impacts your ride safety and comfort.
Secure Attachment
Check all straps and mounts before every ride. Bags can loosen, especially after crashes or rough trails.
Tip: Use double straps for heavy items. If your gear rattles, fix it before riding.
Keep Gear Accessible
Don’t bury important items deep in your pack. If you need a tool or snack quickly, keep it near the top or in a separate pocket.
Reduce Weight
Lighter is better. Remove unnecessary items. Choose multi-use tools (like a multi-tool with a chain breaker).
Plan For Emergencies
Carry a small first aid kit and a backup way to call for help (phone, GPS). For remote rides, bring extra food and water.
Test Your Setup
Before a big ride, test your gear carrying system on a short loop. Adjust straps, check for bounce, and make sure everything stays secure.
Real-world Examples: How Riders Pack For Different Trails
Let’s look at how mountain bikers carry gear for various ride types.
Example 1: Short Trail Ride (1–2 Hours)
- Waist pack (multi-tool, snacks)
- Saddle bag (spare tube)
- Bottle on bike
Minimal gear, fast access, light weight.
Example 2: Day Adventure (4–6 Hours)
- Hydration pack (water, food, first aid)
- Frame bag (extra layers, tools)
- Handlebar bag (phone, map)
Balanced storage, enough room for surprises.
Example 3: Multi-day Bikepacking
- Full frame bag (food, stove)
- Handlebar roll (tent, sleeping bag)
- Saddle bag (clothes, spares)
- Fork cages (extra water)
- Hydration pack (water, snacks)
Careful weight distribution, waterproofing, and lots of planning.
Example 4: Race Setup
- Small hydration pack (water)
- Top tube bag (energy gels)
- Minimal saddle bag (quick repair kit)
Speed-focused, only essentials.
Product Recommendations And Buying Advice
Finding the right gear carry solution is easier with trusted brands and smart shopping.
Leading Brands
- Camelbak: Top hydration packs, durable and comfortable.
- Osprey: High-end packs, great ventilation.
- Revelate Designs: Bikepacking bags, waterproof and custom-fit.
- Topeak: Saddle bags and frame bags, budget-friendly.
Features To Look For
- Durability: Tough fabrics like Cordura or ripstop nylon.
- Water resistance: Essential for mountain biking.
- Attachment system: Reliable velcro, buckles, or bolts.
- Fit: Should not interfere with pedals, wheels, or body movement.
Price Range
- Small saddle bags: $15–$30
- Hydration packs: $50–$150
- Frame bags: $50–$200
- Handlebar bags: $40–$120
Pro tip: Don’t buy cheap bags—they often tear or fail on trails.
Where To Buy
Local bike shops offer good advice and fitting. Online stores like REI and Amazon have wide selection. For custom bags, look at brands like Revelate Designs or Apidura.
Credit: pizzavilleusa.com
Maintenance And Longevity
Your gear carrying setup will last longer with care.
Cleaning
- Wash packs and bags after muddy rides.
- Dry thoroughly to prevent mold.
- Remove water reservoirs and clean separately.
Checking Wear
- Inspect straps and zippers for damage.
- Replace worn bags before they fail.
Storage
- Store bags in a cool, dry place.
- Keep hydration packs empty and clean.
Repairs
- Many brands offer repair kits.
- Use fabric patches for small tears.
Environmental Impact: Sustainable Gear Choices
Mountain biking is about enjoying nature. Your gear choices affect the environment.
Eco-friendly Materials
Some brands use recycled fabrics or biodegradable plastics.
Reusable Solutions
Choose durable bags and packs to avoid waste. Avoid single-use plastic bags for packing.
Responsible Disposal
Donate old gear or recycle materials when possible.
Supporting Sustainable Brands
Look for brands with eco-friendly practices. For more information, visit REI Sustainable Cycling.

Credit: www.youtube.com
Frequently Asked Questions
How Much Gear Should I Carry On A Mountain Bike Ride?
Carry only essentials—spare tube, tool, water, snacks, phone, and ID. For longer rides, add layers, food, and first aid. Avoid overpacking; extra weight slows you down.
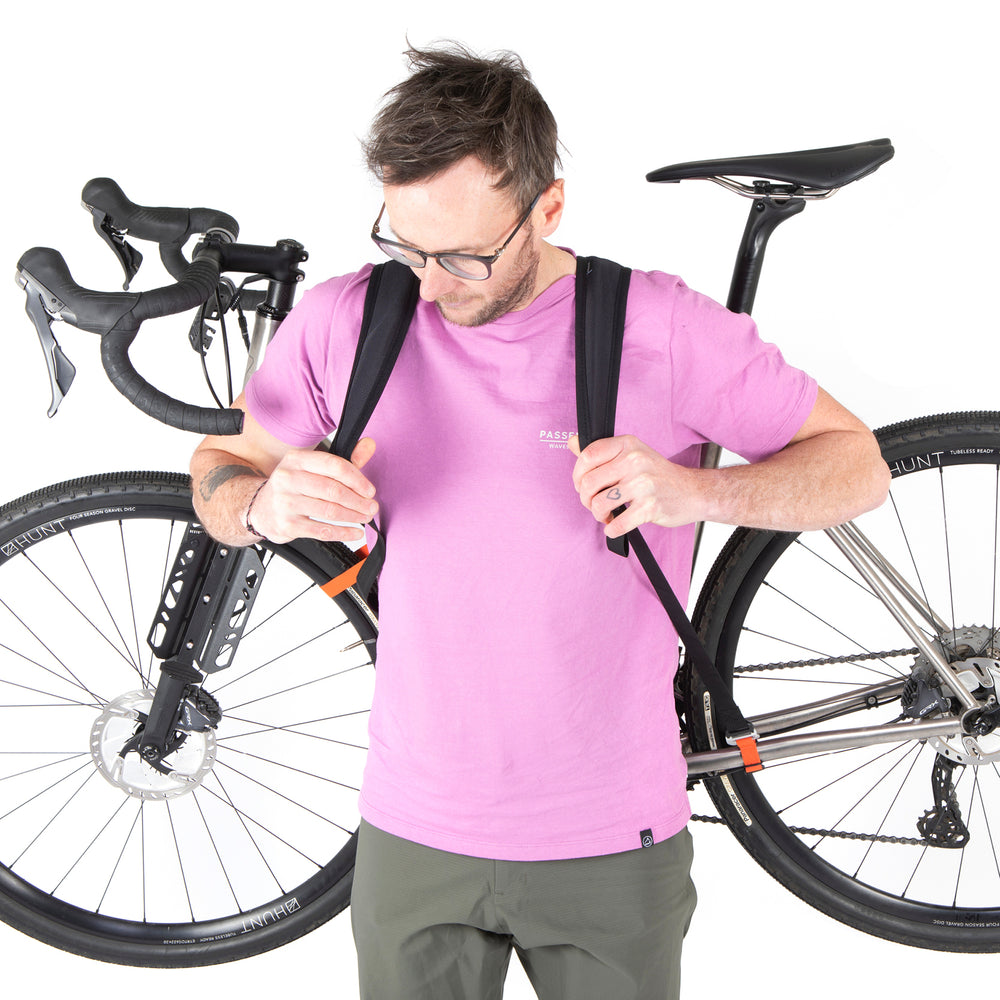
Can I Use Regular Backpacks For Mountain Biking?
Regular backpacks work for short rides but lack bike-specific features. They may shift, bounce, and cause back sweat. Bike packs offer better fit, hydration, and pockets.
What’s The Best Way To Carry Water On A Mountain Bike?
Hydration packs are best for longer rides. For short rides, use bottle cages. Some riders use both for extra water on hot days.
Are Bike Bags Waterproof?
Most bags are water-resistant, not fully waterproof. Use dry bags or waterproof liners for electronics and clothing. Check specs before buying.
How Do I Stop Gear From Bouncing Or Falling Off?
Secure all straps tightly. Use double straps for heavy items. Test your setup before riding. If bags loosen, adjust or upgrade to better mounts.
Mountain biking is about freedom and adventure, but preparation makes the journey safer and more enjoyable. The right gear carrying system lets you ride with confidence, knowing you have what you need for repairs, hydration, and emergencies. Start simple, pack smart, and adjust as you gain experience.
With these practical tips and real-world advice, you’re ready to carry gear on your mountain bike—no matter where the trail leads.

Hello Guys! I am John Reese, a professional biker and my hobby is biking! I have been biking for last 12 years and I love using bikes while outing as well. Based on my experiences with the different type of bikes (mountain bikes, road bikes and hybrid bikes); I am sharing my opinion about various bikes so that a beginner can get started right away. Happy reading!