Changing the cassette on a mountain bike is a key skill that every rider should learn. Whether you want to upgrade your gearing, replace worn parts, or simply understand your bike better, knowing how to change a cassette can save you time and money.
Many beginners think this job is only for mechanics, but with the right tools and some careful steps, anyone can do it at home. This guide will walk you through every detail, including common mistakes, pro tips, and how to pick the right cassette for your riding style.
Why Change Your Cassette?
The cassette is a group of sprockets on your rear wheel that affects how your bike rides. Over time, the teeth on these gears wear out. You might notice your chain slipping, rough shifting, or strange noises. If you keep riding with a worn cassette, you can damage your chain and derailleur, leading to expensive repairs.
Upgrading to a cassette with more or fewer teeth can also change your bike’s performance, making climbs easier or letting you go faster on flat trails.
Replacing your cassette is not just about fixing problems—sometimes, it’s about customizing your ride. Riders often swap cassettes for races, mountain adventures, or long journeys. Each cassette type affects your pedaling effort and speed. Understanding this can help you make smarter choices when buying new parts or fixing your bike.
Tools You Need For The Job
Changing a cassette does require a few special tools. Without these, the job is almost impossible to do safely or correctly. Here’s what you’ll need:
- Cassette Lockring Tool: This fits into the lockring that holds the cassette to the hub.
- Chain Whip: This tool holds the cassette in place so it doesn’t spin while you loosen the lockring.
- Adjustable Wrench: Used to turn the lockring tool.
- Grease: For protecting the hub and making future removal easier.
- Clean Rag: For wiping off dirt and old grease.
- Gloves: Optional, but helpful for keeping your hands clean.
Buying these tools can be a small investment, but they last for years. Many local bike shops will loan them if you ask politely, or you can buy a starter kit online for about $20-$30.
Credit: www.bike-components.de
Step-by-step: Removing The Old Cassette
Taking off your old cassette is not hard, but you must follow the steps in order and avoid rushing. Mistakes can damage your hub or cassette, making repairs costly.
1. Remove The Rear Wheel
Start by shifting your chain to the smallest cog. This makes wheel removal easier. Open your quick release or loosen the thru-axle and carefully slide the wheel out. Place your bike on a stable stand or rest it upside down.
2. Take Off The Skewer Or Axle
Unscrew the quick release skewer or thru-axle from the hub. Set these parts aside somewhere safe. This step is often missed by beginners, but it’s essential because the lockring tool needs to fit inside the cassette.
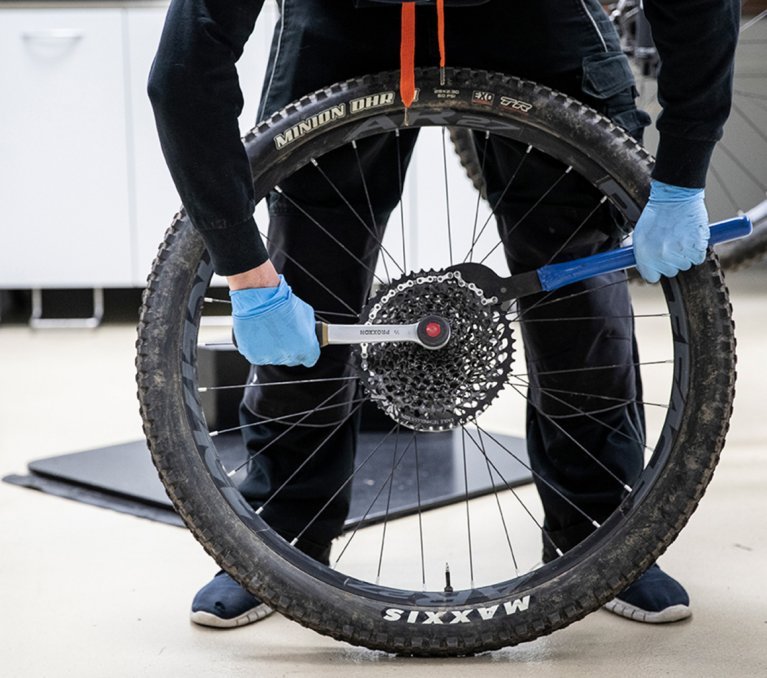
3. Position The Tools
Fit the cassette lockring tool into the lockring. The splines must match perfectly—never force it. Hold the chain whip on one of the larger sprockets, pulling it backward. This stops the cassette from spinning as you turn the lockring.
4. Loosen The Lockring
With your other hand, use the adjustable wrench to turn the lockring tool counterclockwise. The first turn is usually tight, but it will loosen quickly. Be careful: the lockring may come off suddenly.
5. Remove The Cassette
Slide the cassette off the freehub body. Watch for small spacers between the sprockets—these are easy to lose but crucial for reassembly. Clean the freehub with a rag and check for any damage or old grease.
Comparing Cassette Types
Not all cassettes are the same. Mountain bikes use different cassettes than road bikes, and even mountain bike cassettes come in many styles. Here’s a quick comparison of popular cassette types for mountain bikes:
| Cassette Model | Speeds | Tooth Range | Best For |
|---|---|---|---|
| SRAM GX Eagle | 12 | 10-52T | Wide Range Trails |
| Shimano Deore M5100 | 11 | 11-51T | All-Mountain |
| Shimano SLX M7100 | 12 | 10-51T | Enduro, XC |
| SunRace CSMX8 | 11 | 11-50T | Budget Builds |
If you’re unsure which cassette to buy, check the number of gears (speeds) on your shifter and derailleur. Always match the cassette’s speed to your shifter and chain. Using the wrong type can cause shifting problems or even damage your drivetrain.
Cleaning And Inspecting The Freehub
Before installing your new cassette, always clean the freehub body. Dirt, old grease, or metal shavings can cause bad shifting or noise. Wipe the area with a clean rag. Check for deep scratches or burrs—these can stop the cassette from sitting flat. If you see any, smooth them out with fine sandpaper or ask a bike shop for help.
Apply a light layer of bike-specific grease to the splines. This stops the cassette from seizing over time, especially if you ride in wet or muddy conditions. Don’t use too much grease—just a thin coating is enough.
Step-by-step: Installing The New Cassette
Putting on your new cassette is easier than removal, but alignment is key. Here’s how to do it:
1. Check Sprocket Order
Cassettes usually come connected with a plastic strip. If yours is loose, arrange the sprockets in the right order. Look for numbers or arrows to guide you. Mixing up the order can cause skipping or make the cassette impossible to install.
2. Align The Splines
The freehub body has one wide spline. Line this up with the wide groove on your cassette. This ensures the cassette slides on correctly. Forcing it in the wrong position can damage both parts.
3. Slide On Sprockets And Spacers
Slide each sprocket onto the freehub, adding spacers if your cassette needs them. Not all cassettes use the same number or thickness of spacers. If you’re unsure, check the instructions or look up your cassette model online.
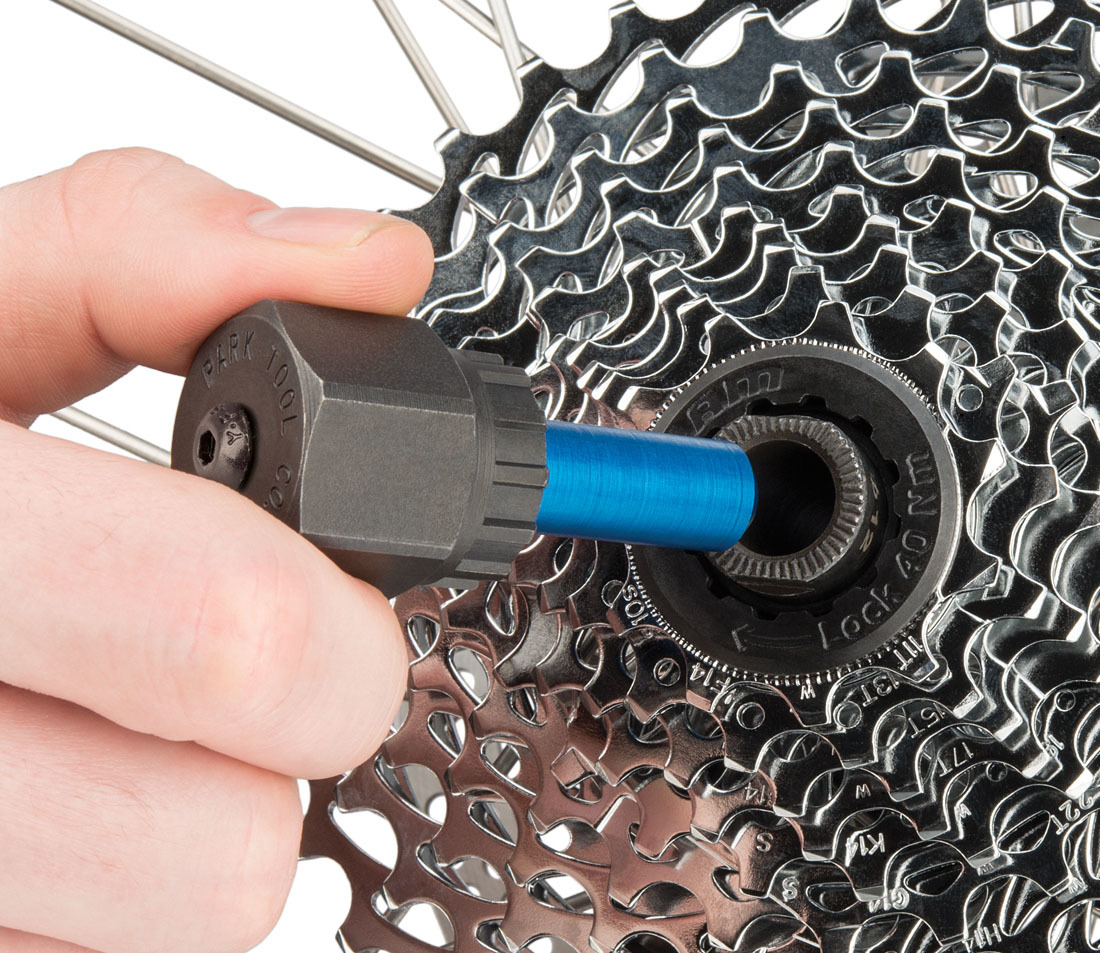
4. Thread On The Lockring
Screw the lockring onto the freehub by hand first. Once it catches, use the lockring tool and wrench to tighten it clockwise. Most lockrings have a recommended torque (usually 40 Nm)—if you have a torque wrench, use it for best results.
Too loose, and the cassette may rattle; too tight, and you can strip the threads.
5. Reinstall The Skewer Or Axle
Put your quick release skewer or thru-axle back through the hub. Make sure the springs face the right way and tighten until secure.
6. Put The Wheel Back On
Slide the wheel into the frame, making sure it sits straight. Tighten the quick release or thru-axle. Spin the wheel to check for any rubbing or misalignment.
Credit: www.giovannirosso.com
Fine-tuning: Checking Chain Compatibility
A new cassette with an old chain often leads to poor shifting or chain skipping. Chains and cassettes wear together. If your chain has stretched (become longer), it may not mesh well with the new cassette. You can check chain wear with a simple gauge tool or by measuring 12 links—if they’re over 12 1/16 inches, it’s time for a new chain too.
Mixing old and new parts is a common beginner mistake. Always check both before finishing the job. For best performance, replace the chain and cassette together.
Cost Breakdown: Diy Vs. Bike Shop
Many riders wonder if changing a cassette at home is really worth it. Here’s a comparison of the costs involved:
| Item/Service | DIY Cost (USD) | Bike Shop Cost (USD) |
|---|---|---|
| Cassette (11-speed) | $40-100 | $40-100 |
| Chain Whip | $10-20 (one-time) | Included |
| Lockring Tool | $10-15 (one-time) | Included |
| Labor | Free | $20-40 |
| Total (first time) | $60-135 | $60-140 |
| Total (next time) | $40-100 | $60-140 |
As you can see, buying the tools pays off quickly, especially if you own more than one bike or ride often.
Pro Tips For A Smooth Cassette Change
Changing a cassette isn’t hard, but these tips can save you time and trouble:
- Wear gloves to avoid cuts from sharp sprockets.
- Always check the lockring’s direction—it tightens clockwise, loosens counterclockwise.
- Use a torque wrench for the lockring if possible.
- Keep small parts (spacers, springs) in a bowl so nothing gets lost.
- If you hear creaking or grinding after installation, stop and check your work. Don’t ride until you’re sure everything is secure.
One insight beginners often miss is to double-check the freehub type. Some wheels use SRAM XD, Shimano Micro Spline, or standard Shimano/SRAM freehubs. Each needs a matching cassette. Forcing a cassette onto the wrong type can damage expensive parts.
Another pro tip: Clean your derailleur pulleys while the wheel is off. This part collects dirt and makes shifting less smooth. A quick wipe now saves time later.
Common Mistakes And How To Avoid Them
Even careful riders sometimes make errors. Here are the most frequent mistakes and how you can avoid them:
- Not matching cassette speed to shifter/derailleur. Always count the gears on your shifter before buying a new cassette.
- Losing small spacers. Lay out all parts in order and take a phone photo before removing anything.
- Over-tightening the lockring. Use a torque wrench and don’t force it.
- Forgetting to grease the freehub. This can cause the cassette to rust in place, making future removal very hard.
- Using a worn chain with a new cassette. This causes skipping and poor shifting.
By paying attention to these details, you’ll avoid the most frustrating problems.
Upgrading Your Mountain Bike Cassette: What To Consider
If you’re not just replacing a worn part but want to upgrade, there are a few things to think about:
- Number of speeds: More gears give you finer control, but need matching shifters and derailleurs.
- Largest sprocket size: Bigger cogs make climbing easier but may require a new derailleur.
- Weight: High-end cassettes are lighter but cost more.
- Material: Steel lasts longer but is heavier; aluminum or titanium cassettes are lighter but wear out faster.
Upgrading your cassette can make your bike feel completely different. If you switch to a wider range (like 10-52T), you’ll notice easier climbing but may need a longer chain or different derailleur. Always check manufacturer specs before buying.
For more on bike part compatibility, see this Wikipedia guide.
How Cassette Choice Affects Riding
The cassette you pick impacts your ride every day. A wide-range cassette gives easier gears for steep hills but may have bigger jumps between gears. This can make finding the perfect cadence harder. A close-range cassette is smoother for flat trails or racing, letting you fine-tune your speed.
If you ride in muddy or wet places, look for cassettes with mud-shedding ramps or cutouts. These designs help keep your drivetrain clean and shifting smooth.
Heavier riders or those carrying gear should avoid the cheapest, lightest cassettes. Heavier-duty cassettes last longer under extra load.
Environmental Impact: Recycle Old Cassettes
Don’t just throw your old cassette in the trash. Most cassettes are made from steel or aluminum, both of which are recyclable. Check with your local recycling center. Some shops collect old bike parts for reuse or recycling. By recycling, you help cut waste and reduce the need for new raw materials.
How Often Should You Change Your Cassette?
Cassette lifespan depends on riding style, terrain, and maintenance. On average, a mountain bike cassette lasts 1,500 to 3,000 miles. Riding in muddy or sandy conditions can wear it out faster. Keeping your chain clean and well-lubed extends cassette life.
A good rule: replace your cassette every two chain changes, or sooner if you notice skipping or poor shifting. If in doubt, ask a mechanic to check for wear.
Troubleshooting: If Shifting Isn’t Smooth After Cassette Change
Sometimes, even with a new cassette, your gears may not shift perfectly. Here’s what to check:
- Derailleur alignment: A bent derailleur hanger causes bad shifting. Check it with an alignment tool or ask your shop.
- Cable tension: New cables stretch. Adjust the barrel adjuster on your derailleur for crisp shifts.
- Chain length: Installing a larger cassette may need a longer chain. Too short, and you risk damage; too long, and shifting will feel loose.
- Limit screws: These set the range of your derailleur. If set wrong, you can overshift or undershift.
Don’t ignore shifting problems. Fixing them early prevents damage and keeps your rides safe.
Extra Tips For First-time Cassette Changers
If you’re changing a cassette for the first time, set aside at least 30 minutes. Work in a clean, well-lit area. Read your bike and cassette manuals before starting—many are available online if you lost the paper copy.
Take photos as you go, especially if you need to remember the order of parts. Watch a video guide if you’re a visual learner. Don’t rush, and double-check each step.
If you get stuck, don’t force anything. Ask a friend or your local bike shop for help. It’s better to take your time than risk breaking an expensive part.

Credit: www.youtube.com
Real-world Example: Changing A Cassette On A Trail Ride
Imagine you’re on a long mountain ride and your cassette starts skipping badly. If you have the tools and a spare cassette, you could swap it in under 20 minutes—even trailside. This is rare, but it shows how learning this skill gives you independence. You’re not stuck waiting for a shop or a ride home.
Many experienced riders carry a multi-tool with a lockring adapter for emergencies. While this won’t replace a full repair stand, it’s handy for on-the-go fixes.
When To Ask For Help
There’s no shame in seeking help for your first few cassette changes. Mechanics can spot problems you might miss—like worn freehubs, bent axles, or mismatched parts. If your cassette won’t fit, or you’re not sure about compatibility, a quick visit to a shop can save hours of frustration.
Some repairs, like freehub replacement or fixing stripped threads, need special tools or skills. It’s smart to know your limits and ask for help when needed.
Frequently Asked Questions
How Do I Know When My Cassette Is Worn Out?
You’ll notice chain slipping, poor shifting, or teeth that look sharp and hooked. If you replace your chain and it skips on the old cassette, it’s time for a new one. Most cassettes last 1,500 to 3,000 miles, but riding in harsh conditions wears them out faster.
Can I Use A Road Bike Cassette On My Mountain Bike?
Sometimes, but not always. Road cassettes often have smaller largest cogs, making climbs harder. They may also require different derailleur lengths or freehubs. Always check compatibility before mixing road and mountain parts.
Do I Need To Replace My Chain When I Change The Cassette?
Usually, yes. An old chain can skip or wear out your new cassette quickly. It’s best to replace both together for smooth shifting and longer part life.
What Happens If I Install The Cassette Without Spacers?
Missing spacers can cause poor shifting or cassette wobble. Always use the correct number and size of spacers as specified for your cassette and hub. If you’re unsure, check the manual or ask at your local bike shop.
Can I Change The Cassette Without A Chain Whip?
It’s possible, but much harder and riskier. The chain whip holds the cassette while you loosen the lockring. Without it, you might injure yourself or damage the cassette. If you don’t own a chain whip, borrow one or make a DIY version using an old chain and handle.
Changing a cassette on a mountain bike might seem complex, but with clear steps and a bit of patience, it’s a task anyone can master. You’ll save money, gain confidence, and keep your bike running smoothly for many rides to come.

Hello Guys! I am John Reese, a professional biker and my hobby is biking! I have been biking for last 12 years and I love using bikes while outing as well. Based on my experiences with the different type of bikes (mountain bikes, road bikes and hybrid bikes); I am sharing my opinion about various bikes so that a beginner can get started right away. Happy reading!