Swapping out the front forks on your mountain bike can seem complicated. But with the right knowledge, tools, and careful steps, you can do it at home. Changing your forks can improve performance, handling, and comfort—especially if your old fork is damaged, outdated, or just not suited to your riding style.
This guide walks you through every step, from choosing the right fork to safe installation and post-swap adjustments. Whether you’re upgrading to a plush air fork or switching to a rigid model for better climbing, this article makes the process clear and manageable—even if you’re new to bike maintenance.
Why Change Mountain Bike Forks?
Your fork is a key part of your bike’s suspension. It affects how you ride, how bumps feel, and even your safety. Riders usually change forks for these reasons:
- Upgrading suspension for better shock absorption
- Reducing weight with a lighter fork
- Replacing a broken or worn-out fork
- Switching to a fork with different travel (how much the fork moves up and down)
- Changing fork style (from rigid to suspension or vice versa)
A well-chosen fork can transform your ride. For example, moving from a 100mm travel fork to a 140mm can make tough trails smoother but may raise your front end and affect climbing.
Understanding Fork Types And Compatibility
Before you buy a new fork, you must know what fits your bike. Not all forks will work with every mountain bike. There are several compatibility factors to consider.
Key Compatibility Factors
- Steerer Tube Type and Size
- Most modern mountain bikes use a tapered steerer (1-1/8” to 1.5”). Older bikes may use a straight steerer.
- Measure your current steerer tube’s diameter and length.
- Wheel Size
- Common sizes are 26″, 27.5″ (650B), and 29″. Your fork must match your wheel.
- Axle Type
- Fork dropouts accept either a quick release or a thru-axle (e.g., 15x100mm, 15x110mm Boost).
- Check your front wheel’s axle type and width.
- Brake Mount
- Most modern forks use post-mount disc brakes. Older forks may have IS mounts or rim brake posts.
- Travel
- Travel changes your bike’s geometry. Too much travel can make the bike unstable on climbs.
- Crown Race
- The crown race is the bearing surface at the base of the steerer tube. Some headsets need a specific crown race.
Example Compatibility Chart
Here’s a simple comparison of common fork and bike frame features:
| Feature | Common Option 1 | Common Option 2 |
|---|---|---|
| Steerer Tube | 1-1/8” Straight | Tapered 1-1/8” to 1.5” |
| Wheel Size | 27.5” (650B) | 29” |
| Axle Type | 9mm Quick Release | 15x110mm Thru-Axle (Boost) |
| Brake Mount | Post-Mount Disc | IS Mount Disc |
Tip: Always check your bike’s specs before buying a new fork. Bringing your bike or old fork to the shop can help you get the right fit.
Tools And Supplies You’ll Need
Having the right tools makes the job much easier and safer. Here’s what you’ll need:
- Allen wrenches (multi-size, usually 4mm–6mm)
- Torque wrench (for proper bolt tightness)
- Crown race setting tool (or a large socket)
- Rubber mallet
- Grease
- Headset press (optional but useful)
- Star nut setter (for new star nut installation)
- Cutting tool (if you need to shorten the steerer tube—e.g., pipe cutter or hacksaw)
- Measuring tape
- Bike work stand (optional but helpful)
- Clean rag and isopropyl alcohol (for cleaning)
- Replacement fork
- New star nut and crown race (sometimes come with new forks)
- Zip ties or cable guides (for brake and sensor cables)
Many local bike shops will let you rent special tools if you don’t want to buy them.
Removing Your Old Fork
Removing your fork is a careful process. Work slowly and keep track of small parts. Here’s how to do it:
- Remove the Front Wheel
- Open the quick release or unscrew the thru-axle.
- Pull the wheel out.
- Remove the Front Brake Caliper
- Use the correct Allen wrench to unbolt the caliper from the fork.
- Hang the caliper gently to avoid stressing the brake hose or cable.
- Loosen the Stem Bolts
- Loosen the bolts holding the stem to the steerer tube (usually 4mm or 5mm).
- Do not fully remove the stem yet.
- Remove the Top Cap
- Unscrew the top cap bolt from the top of the stem. Keep the cap and bolt safe.
- Slide the Stem and Spacers Off
- Gently slide the stem upward and off the steerer tube.
- Remove any headset spacers and keep them in order.
- Remove the Headset Bearings
- Carefully lift the fork out of the head tube.
- The headset bearings may fall out—catch them and set aside.
- Inspect and Clean
- Wipe the head tube and bearings clean with a rag and isopropyl alcohol.
- Inspect bearings for wear or rust.
Common Mistake
A common error is letting the fork drop out unexpectedly, which can damage bearings or mark your frame. Always support the fork and be ready to catch any loose parts.
Credit: sv-probsteierhagen.de
Preparing The New Fork
Before installing your new fork, a few steps are essential:
1. Check Steerer Tube Length
- Compare the new fork’s steerer tube length to your old fork.
- If it’s too long, you’ll need to cut it to match (see below).
- If it’s too short, you may need more spacers or a new stem.
2. Cut The Steerer Tube (if Needed)
- Mark the cut line with tape or marker, using your old fork as a reference.
- Use a pipe cutter or a fine-tooth hacksaw with a guide for a straight cut.
- Deburr the cut edge with sandpaper to avoid sharp metal.
3. Install The Star Nut
- Place the star nut into the steerer tube, about 10–15mm below the top.
- Use a star nut setter for even alignment.
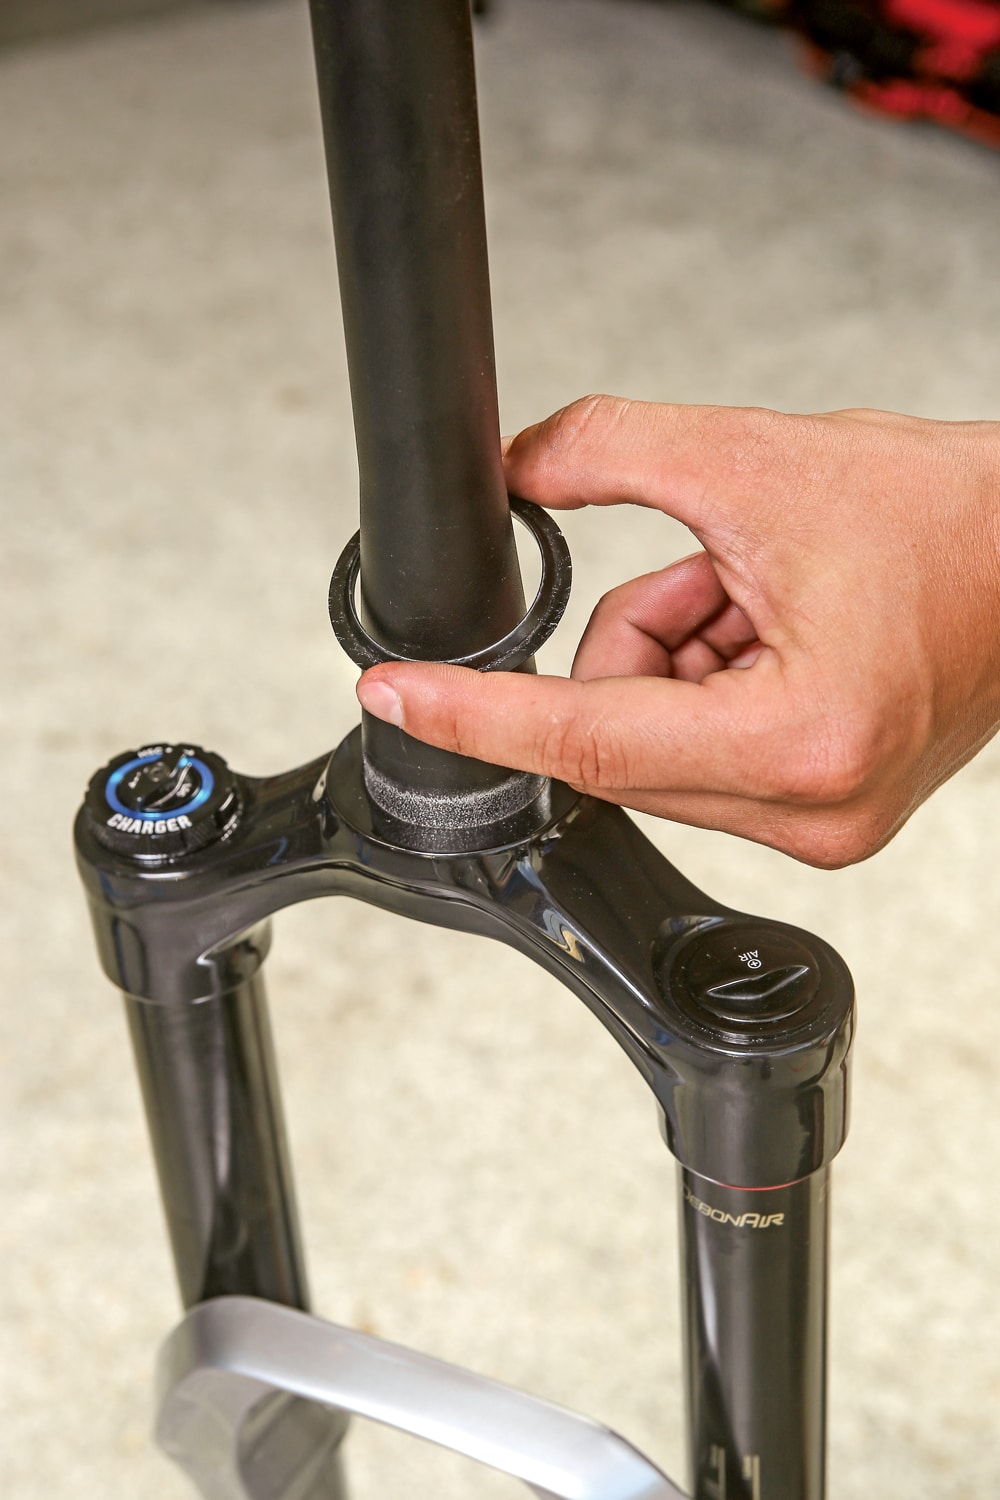
4. Install The Crown Race
- Place the crown race at the base of the steerer tube.
- Tap into place using a crown race tool or a large socket and mallet.
5. Grease Contact Points
- Lightly grease the crown race and any bearing seats.
Non-Obvious Insight: Many beginners forget to transfer the crown race from the old fork to the new one. The crown race must match your headset. If your new fork didn’t come with one, reuse the old one if possible.
Installing The New Fork
Now you’re ready to fit the new fork onto your bike.
- Insert the Fork
- Slide the steerer tube up through the head tube.
- Make sure the lower bearing and crown race are in place.
- Install Upper Bearings and Spacers
- Put the upper headset bearing (and any dust covers) on the steerer.
- Add the same spacers you removed earlier, in the same order.
- Attach the Stem
- Slide the stem onto the steerer tube.
- If you changed steerer tube length, adjust spacer placement to keep a small gap (1–2mm) above the stem for compression.
- Install the Top Cap and Preload
- Place the top cap and bolt on the steerer tube.
- Tighten until there is no play (looseness) but do not overtighten.
- Align the Stem
- Turn the handlebars straight and align the stem with the front wheel.
- Tighten the stem clamp bolts evenly to the manufacturer’s torque spec.
- Reinstall the Brake Caliper
- Attach the caliper to the new fork.
- Make sure the rotor is centered between the pads.
- Reinstall the Front Wheel
- Insert the wheel into the fork dropouts.
- Tighten the quick release or thru-axle as needed.
- Check for Smooth Operation
- Turn the bars left and right. If you feel any grinding or tightness, check the headset bearings and adjust preload.
Example Installation Steps Comparison
Here’s a quick look at the differences between installing a quick release and a thru-axle fork:
| Step | Quick Release Fork | Thru-Axle Fork |
|---|---|---|
| Wheel Attachment | Open lever, slide axle out, remove wheel | Unscrew axle, pull straight out, remove wheel |
| Reinstallation | Slide wheel in, close lever | Insert axle, screw tight to spec |
| Security | Lower, more common on older bikes | Higher, better stiffness and safety |
Non-Obvious Insight: Always check fork manufacturer’s torque specs, especially on carbon or lightweight forks. Overtightening can crush a carbon steerer tube.
Adjusting And Fine-tuning Your New Fork
After installation, your fork may need some adjustments to work perfectly with your bike and riding style.
1. Adjust Air Pressure Or Spring Preload
- Air forks: Use a shock pump to set air pressure for your weight. Start with the manufacturer’s chart, then fine-tune after a test ride.
- Coil forks: Adjust the preload collar if your fork has one.
2. Set Rebound And Compression
- Most modern forks have rebound (how fast the fork returns after compressing) and sometimes compression (how firm the fork feels).
- Adjust rebound so the fork returns quickly but doesn’t bounce.
- Adjust compression for your trail type and comfort.
3. Check Brake Alignment
- Spin the front wheel. If you hear rubbing, re-center the brake caliper.
- Squeeze the front brake to ensure solid stopping power.
4. Test Ride And Recheck Bolts
- Take a short, gentle ride.
- Check all bolts (stem, axle, brake, top cap) after the ride. Things may settle and need retightening.
5. Fine-tune Headset
- Hold the front brake and rock the bike back and forth. If you feel movement in the headset, tighten the top cap slightly and retighten the stem.
Tip: Write down your air pressure and settings. It’s easy to forget them after making changes.
Safety Checks And First Ride
Your first ride on a new fork shouldn’t be an all-out downhill run. Here’s how to make sure everything is safe:
- Check All Bolts
- Use a torque wrench to confirm bolts are tight to the recommended spec.
- Inspect Brake Function
- Squeeze the lever hard. The wheel should not move or slip.
- Listen for Strange Noises
- Creaks or clicks can mean a loose headset or stem.
- Test Suspension
- Bounce on the bike. The fork should move smoothly without binding.
- Short Test Ride
- Ride slowly and check handling, steering, and braking.
- Stop and retighten bolts after 5–10 minutes.
- Progress to Harder Trails
- Once you’re confident, try rougher terrain.
Common Mistake: Skipping the retightening step. New parts sometimes settle after the first ride and bolts can loosen.
Troubleshooting Common Problems
Even with care, problems can happen. Here’s how to handle the most frequent ones:
Fork Doesn’t Fit
- Steerer tube too short: You may need a new fork or a lower-profile headset/stem.
- Wrong axle type: Adapters are sometimes available, but it’s best to get a matching fork.
Headset Feels Loose Or Tight
- Loose: Tighten the top cap before tightening the stem bolts.
- Tight: Loosen the top cap slightly.
Brake Rub
- Loosen the caliper bolts, squeeze the brake lever, and retighten while holding the lever.
Fork Feels Sticky
- Check for over-tightened headset or misaligned bearings.
- Make sure the fork is greased and properly installed.
Unusual Noises
- Recheck all bolts.
- Inspect headset bearings and crown race seating.
Pro Tip: If you’re stuck, take a photo of your setup and show a local bike mechanic. Sometimes a fresh set of eyes sees an easy fix.
How To Choose The Right Fork For Your Riding Style
Selecting the right fork isn’t only about compatibility—it’s also about your trails, speed, and style.
Travel Length
- 80–120mm: Best for cross-country and climbing.
- 120–140mm: Good for trail riding—balance between climbing and descending.
- 140–170mm: Suited for all-mountain and enduro.
- 180mm+: For downhill and extreme riding.
Suspension Type
- Coil: Feels plush, simple, and reliable. Heavier and less adjustable.
- Air: Lighter, easily adjustable for rider weight, and more modern.
Stanchion Diameter
- Thicker stanchions (upper fork tubes) mean more stiffness, important for aggressive riders.
- Common sizes: 32mm (XC), 34–36mm (trail/enduro), 38mm+ (downhill).
Weight
- Lighter forks are better for long climbs and racing.
- Heavier forks offer more strength for jumps and rough terrain.
Adjustability
- More expensive forks often have more adjustment knobs (rebound, high/low-speed compression, lockout).
Example Fork Comparison
Here’s a look at how three popular fork models compare:
| Model | Travel | Stanchion | Weight | Type |
|---|---|---|---|---|
| RockShox Judy Silver | 100mm | 30mm | 2.2kg | Air |
| Fox 34 Rhythm | 140mm | 34mm | 2.0kg | Air |
| SR Suntour XCR Coil | 120mm | 32mm | 2.5kg | Coil |
Insider Tip: Don’t just buy the fork with the most features. Consider your local terrain and bike geometry. Too much travel can make climbing harder and affect handling.
When To Ask A Bike Shop For Help
While many riders can change forks at home, some situations need a pro’s touch:
- Cutting a carbon steerer tube: Mistakes can be expensive and dangerous.
- Press-fit headsets: Special tools are needed.
- Hydraulic brake lines: If you need to disconnect or shorten hoses, bleeding the brakes is required.
- Unusual frame or fork sizes: Shops can check fit before you buy.
A shop can also check your work for safety if you’re unsure.
Maintenance Tips After Changing Forks
Your new fork will last longer and perform better with a bit of care:
- Clean regularly: Wipe dust and dirt from the stanchions and seals.
- Check bolts: Inspect torque every few rides.
- Inspect for leaks: Oil on the fork means seals may need service.
- Keep air pressure correct: Check monthly.
- Service intervals: Follow the fork manufacturer’s schedule—usually every 50–100 hours of riding.
Extra Advice: Write down the date and settings after the swap. It helps you track service needs and share info if you sell the bike.

Credit: www.youtube.com
The Real Impact Of A Fork Swap
Changing your mountain bike fork isn’t just an upgrade—it can change how your bike feels on every ride. Riders often report:
- Better comfort on rough trails
- Improved confidence in handling and braking
- More control on descents
- Faster times on local routes (if the fork matches their riding style)
But the real win is understanding your bike better. After a fork swap, most riders are more confident in fixing, tuning, and customizing their ride.
If you want more technical details or need to check compatibility, see the helpful guides at Park Tool.
Frequently Asked Questions
How Do I Know If My New Fork Will Fit My Mountain Bike?
Measure your current fork’s steerer tube diameter and length, check your wheel size, and confirm your axle type and brake mount. Compare these to the new fork’s specs. If unsure, bring your bike and new fork to a shop for a fit check.
Can I Replace A Rigid Fork With A Suspension Fork?
Yes, but you must check steerer tube size, axle type, and crown race compatibility. You may also need a different headset or stem, and your bike’s geometry will change (higher front end, slacker angles).
Do I Need Special Tools To Change My Fork?
You’ll need Allen wrenches, a torque wrench, and possibly a crown race tool and star nut setter. For some forks, you’ll also need a pipe cutter if the steerer is too long. Many shops rent tools or can help with tricky steps.
How Tight Should I Make The Bolts When Installing The Fork?
Always follow the manufacturer’s torque specifications. Overtightening can damage parts, especially on carbon forks. Under-tightening can be dangerous. Use a torque wrench for best results.
Can I Use My Old Headset With A New Fork?
Usually yes, if the steerer tube size and crown race match. Inspect the bearings—if they’re rough or rusty, replace them. If the new fork’s steerer is a different size, you may need a new headset or adapters.
Changing the forks on your mountain bike might seem challenging, but it’s a rewarding upgrade that pays off every time you ride. Take your time, follow each step, and don’t hesitate to ask for help if you hit a roadblock.
Your bike—and your rides—will thank you.

Credit: www.youtube.com

Hello Guys! I am John Reese, a professional biker and my hobby is biking! I have been biking for last 12 years and I love using bikes while outing as well. Based on my experiences with the different type of bikes (mountain bikes, road bikes and hybrid bikes); I am sharing my opinion about various bikes so that a beginner can get started right away. Happy reading!