Mountain biking is exciting, but your bike’s performance depends on the setup. If your ride feels harsh, bouncy, or hard to control, the problem is often the front forks. Adjusting the front suspension makes riding smoother, safer, and more fun. Many riders, especially beginners, feel confused about fork adjustments. This guide explains every step clearly, so you can tune your mountain bike’s front forks for the best results—even if you have little experience.
Understanding Front Forks And Their Importance
The front fork is the part of the bike that connects the front wheel to the frame. On most mountain bikes, this fork has suspension—springs and dampers that absorb shocks and bumps. Adjusting the suspension helps control comfort, traction, and handling.
There are two main types of mountain bike forks:
- Rigid forks: No suspension, usually found on older or entry-level bikes.
- Suspension forks: Have built-in springs and damping systems.
Most modern mountain bikes use suspension forks. These allow you to ride over rocks, roots, and rough trails without losing control.
Suspension forks are designed to flex and absorb force so your arms and hands don’t feel every bump. This makes riding much more comfortable and helps you keep your grip on the handlebars, especially when trails get rough.
Why Fork Adjustment Matters
Forks are designed to handle different weights, riding styles, and terrains. If your fork is too stiff, you feel every bump. If it’s too soft, you lose control and stability. Proper adjustment makes your bike safer and more enjoyable.
You should adjust your forks if:
- You recently bought a new bike.
- You changed riding style or terrain.
- You feel discomfort, loss of control, or odd noises.
- You changed your body weight (added gear, etc.)
Many riders don’t realize that even small changes, like riding with a backpack or water bottle, can affect fork performance. As your riding skill improves, you may also notice that your original settings no longer suit your needs. For example, aggressive riders need firmer settings to handle jumps, while casual riders benefit from softer setups for comfort.
Another overlooked reason for adjustment is seasonal change. Cold weather makes fork oil thicker, which can affect damping. If you notice your fork feels different in winter or summer, it’s not your imagination—adjustments can help.
Key Parts Of A Suspension Fork
Before making adjustments, know the basic components:
- Stanchions: The shiny upper tubes that move up and down.
- Lowers: The lower part, holding the wheel.
- Spring: Can be air or coil. Controls compression.
- Damper: Controls speed of fork movement.
- Adjuster knobs: Let you change settings like rebound or compression.
Most forks have the following adjustments:
- Preload: Sets starting tension of the spring.
- Rebound: Controls how quickly the fork returns after compression.
- Compression: Controls how the fork absorbs impacts.
- Air pressure: For air forks, affects stiffness.
Understanding these parts helps you know what each knob or valve does. For example, the damper is often inside one fork leg and is responsible for controlling how the fork responds to fast and slow bumps. Some forks have extra features, such as lockout or travel adjust, which let you adapt the fork to different situations.
If your fork has labels like “LSC” (Low Speed Compression) or “HSC” (High Speed Compression), these refer to how the fork responds to different bump speeds. Beginners often ignore these settings, but learning them can give you more control.
Tools And Preparation
To adjust your front fork, gather these items:
- Shock pump: For air forks.
- Allen wrenches: Usually 4, 5, or 6 mm.
- Flathead screwdriver: For some adjuster knobs.
- Clean rag: Wipe off dirt and oil.
- Bike stand or wall support: Keeps bike steady.
- Tape measure: For sag measurement.
Always check your fork’s manual for specific instructions. Some brands use unique tools or procedures.
If you don’t have a bike stand, leaning your bike against a wall or railing can help. Make sure the bike is stable before adjusting anything. For measuring sag, a ruler or even a phone app can work if you don’t have a tape measure.
Before you start, clean your fork’s stanchions and lowers. Dirt can hide scratches or leaks and make adjustments harder. A clean surface also helps prevent contamination when adjusting air pressure or knobs.
Another tip: Write down your starting settings before you make changes. If you don’t like the new feel, you can easily return to your original settings.
Fork Types: Air Vs. Coil
Your fork will be either air or coil:
- Air forks: Use air pressure for spring force. Lighter, easy to adjust.
- Coil forks: Use a metal spring. Heavier, simple but less adjustable.
Here is a quick comparison:
| Fork Type | Weight | Adjustment Ease | Maintenance | Typical Use |
|---|---|---|---|---|
| Air | Lighter | Easy | Moderate | Trail, All-Mountain |
| Coil | Heavier | Less Easy | Low | Downhill, Enduro |
If you’re not sure, check your fork for an air valve (usually on top of one leg). If it’s there, you have an air fork.
Air forks are popular because they allow fast, simple adjustments for different riders and conditions. Coil forks are often chosen by downhill riders for their consistent feel and reliability. Each type has strengths, but air forks are usually best for beginners because you can adjust them without changing parts.
A less obvious difference: Coil forks tend to perform better in cold weather, because metal springs don’t change as much as air pressure does with temperature. If you ride in winter, keep this in mind.
Step-by-step Guide: Adjusting Front Forks
1. Setting The Sag
Sag is how much the fork compresses under your weight. Too little sag means harsh rides; too much means loss of control.
How To Measure Sag
- Wear your usual riding gear.
- Stand on the bike, holding handlebars.
- Bounce gently, then settle.
- Measure fork stanchion movement.
Most forks have a rubber ring or markings. If not, use a zip tie.
Typical sag values:
- Cross-country: 15–20% of fork travel
- Trail: 20–25%
- Downhill: 25–30%
Example: If your fork has 100mm travel, 20mm sag is ideal for trail riding.
If you don’t have markings, measure from the dust seal to the rubber ring or zip tie after you step off the bike. Make sure someone helps steady the bike if possible.
Adjusting Sag For Air Forks
- Remove the air cap.
- Use a shock pump to add or remove air.
- Check sag after each change.
If you increase air pressure, the fork becomes stiffer. If you decrease, it becomes softer. Adjust in small steps (5 psi at a time) and re-measure sag each time.
Adjusting Sag For Coil Forks
- Change preload using the top knob.
- If sag is too much or little, you may need a different coil spring.
Coil springs come in different stiffness levels, called “spring rates. ” If you’re too heavy or light for your spring, the preload knob can only do so much. Swapping springs is the best fix.
Beginners often miss that sag measurement should be done in full riding gear, including helmet and backpack. This ensures the fork responds to your real weight.
2. Setting Rebound
Rebound controls how fast the fork returns after hitting a bump.
- Too fast: Fork feels bouncy, loses traction.
- Too slow: Fork feels sluggish, packs down.
Find the rebound knob (usually red, at the bottom of one fork leg).
How to Adjust:
- Turn knob fully clockwise (slowest).
- Count clicks as you turn counterclockwise (fastest).
- Start in the middle setting.
Test by pushing down on the handlebars. The fork should return smoothly, not too fast or slow.
A practical tip: Watch the fork after a strong push. If it jumps back with a “boing,” it’s too fast. If it takes too long, or doesn’t return all the way before you push again, it’s too slow.
Rebound is easy to overlook but affects how your bike handles obstacles and corners. For example, a fork with too-slow rebound can “pack down” on rough trails, losing travel and making the ride harsh.
3. Adjusting Compression
Compression controls how the fork absorbs impacts.
There are usually two types:
- Low-speed compression: Handles small bumps and pedaling forces.
- High-speed compression: Handles big hits like jumps.
Find the compression knob (often blue, on top).
Adjusting Compression:
- Turn knob clockwise for firmer feel.
- Counterclockwise for softer.
Start softer for rough trails, firmer for smooth terrain.
Some forks have only one compression knob, while others have two. If you’re unsure, check your manual. The main goal is to find a balance where the fork feels supportive but not rigid.
A non-obvious tip: Compression also affects fork dive when braking. Firmer compression reduces dive, making descents more controlled.
4. Adjusting Preload (coil Forks)
Preload sets how much initial force is on the spring.
- Find the preload knob on top.
- Turn clockwise to increase tension.
- Turn counterclockwise to decrease.
If you can’t get correct sag, change the spring to a different rate.
Preload doesn’t change the fork’s overall stiffness, just how much force is needed before it starts to compress. Too much preload can reduce comfort and make the fork harsh over small bumps.
5. Lockout And Other Features
Many forks have lockout—a switch that makes the fork rigid for climbing.
- Use lockout on smooth roads or steep climbs.
- Turn off for rough terrain.
Some forks also have travel adjust—lets you change the fork’s travel for different styles.
Lockout is useful if you ride a lot on pavement or fire roads. It prevents the fork from bobbing up and down when you pedal hard, saving energy.
Common Mistakes And How To Avoid Them
Many riders adjust forks incorrectly. Here are mistakes to watch for:
- Ignoring sag: Sag is the most important step. Skipping it makes all other settings useless.
- Using wrong air pressure: Too much makes fork harsh; too little causes bottoming out.
- Over-tightening knobs: Damages fork internals.
- Not testing on trail: Adjustments made in the garage may feel different on real terrain.
- Forgetting regular maintenance: Dirty or dry forks don’t work well.
Non-obvious insight: Forks change over time as seals wear or oil leaks. Recheck your settings every few months, especially after hard riding.
Another mistake is copying someone else’s settings without considering your own weight, style, or terrain. Fork tuning is personal—what works for your friend may not work for you.
Many riders also forget to check fork alignment after adjustments. Misaligned forks can cause handling issues or even damage the bike.
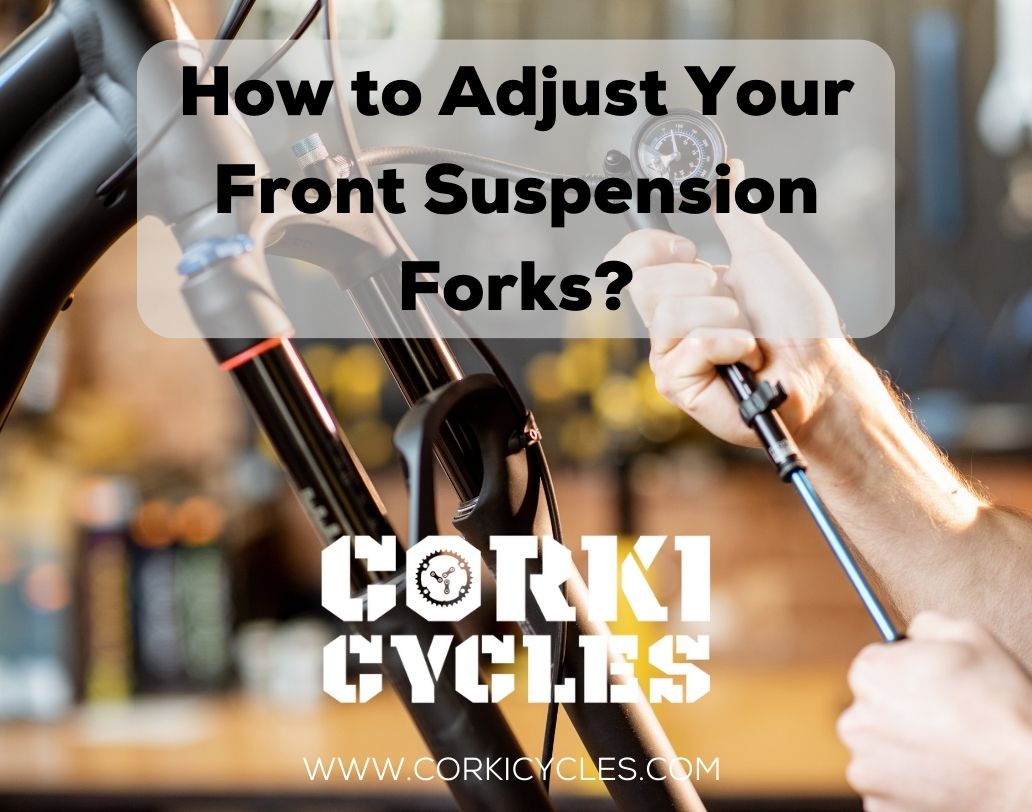
Credit: www.corkicycles.com
Tuning Forks For Different Terrains
Your fork settings should match where you ride:
- Rocky trails: Softer compression, slower rebound for better control.
- Smooth trails: Firmer compression, faster rebound for efficiency.
- Downhill: More sag, softer settings for big impacts.
- Climbing: Use lockout or firmer compression.
| Terrain | Sag (%) | Compression | Rebound | Lockout |
|---|---|---|---|---|
| Rocky | 25 | Softer | Slower | Off |
| Smooth | 15 | Firmer | Faster | On (optional) |
| Downhill | 30 | Softer | Medium | Off |
| Climbing | 15 | Firmer | Faster | On |
Matching settings to terrain gives you the most control and comfort. If you ride mixed trails, start with middle settings and adjust as you gain experience.
A less obvious factor: Weather affects terrain. Wet trails need softer compression for grip, while dry, hard trails can use firmer settings.
Rider Weight And Suspension Settings
Fork settings depend on your weight. Most fork manuals give air pressure charts.
Example for a 100mm air fork:
| Rider Weight (lbs) | Air Pressure (psi) | Sag (mm) |
|---|---|---|
| 120 | 60 | 20 |
| 150 | 75 | 20 |
| 180 | 90 | 20 |
| 210 | 105 | 20 |
Always start with the chart, then fine-tune based on feel.
If your weight is between values, start lower and add air in small steps. Remember, gear weight matters—if you ride with tools or a hydration pack, include them in your calculation.
Many beginners miss that air pressure changes with altitude. If you travel to mountain areas, check your fork pressure after arrival.
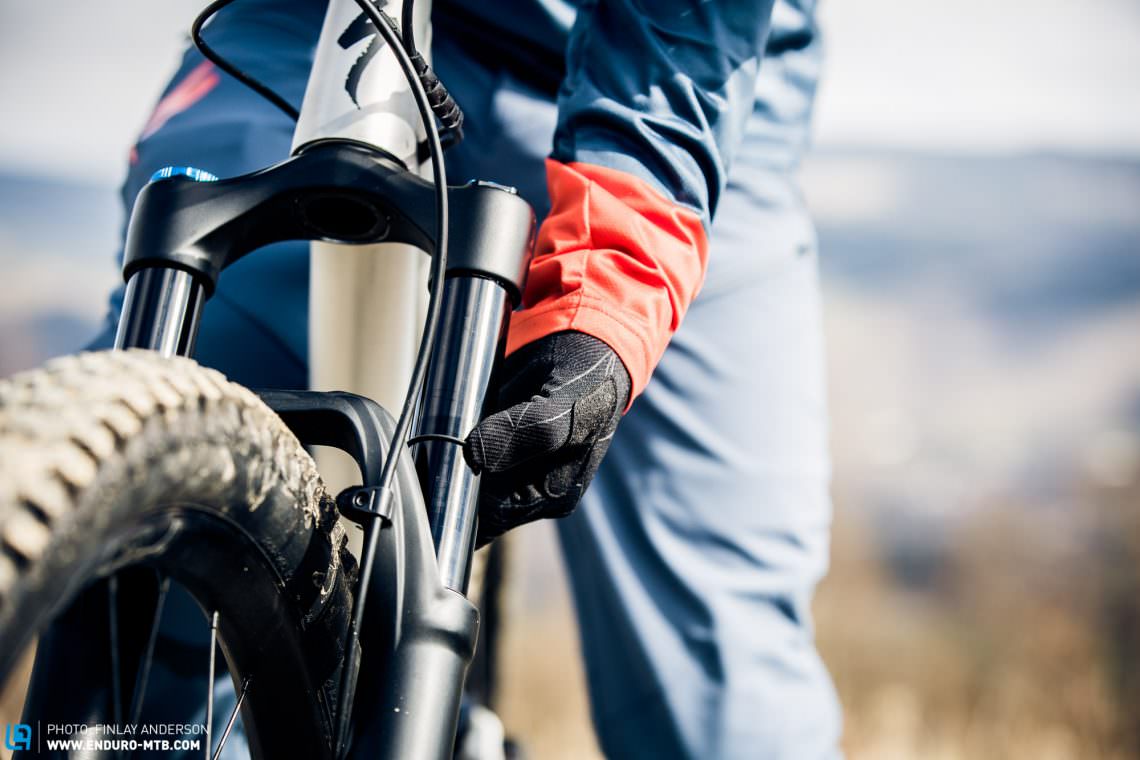
Credit: enduro-mtb.com
How To Test Your Adjustments
After making changes, test your bike:
- Parking lot test: Bounce bike, check fork movement.
- Trail test: Ride on real terrain, note comfort and control.
- Adjust again: Small tweaks make a big difference.
Non-obvious insight: Fork settings are personal. What works for one rider may not suit another, even if they weigh the same. Try different settings and keep notes.
For best results, test forks on the terrain you ride most. If you ride in a bike park, do your testing there. Note how the fork feels on big impacts, small bumps, and corners.
Keep a notebook or phone notes about each change. This helps you track what works, especially as your skills improve.
Maintenance Tips For Fork Performance
Forks need regular care. Here’s how to keep them working well:
- Clean stanchions after every ride. Dirt wears seals.
- Check air pressure monthly (for air forks).
- Lubricate seals with fork-specific oil.
- Inspect for leaks: Oil on stanchions means seal failure.
- Service fork annually: Replace oil and seals.
Neglecting maintenance leads to poor performance and expensive repairs.
A practical tip: After washing your bike, dry the fork completely. Water can cause corrosion or dilute fork oil.
If you ride in mud or rain, clean your fork more often. Mud and grit wear down seals quickly, leading to leaks.
Upgrading Forks: When And Why
Sometimes, adjusting isn’t enough. You may need to upgrade if:
- Your fork is old or damaged.
- You ride harder trails than before.
- You want more travel or better damping.
Upgrading tips:
- Match fork travel to your bike frame.
- Check axle compatibility (thru-axle vs. quick release).
- Choose air or coil based on your riding style.
Upgrading is a big investment. If unsure, ask a bike shop for advice.
One mistake beginners make is buying a fork with too much travel for their bike frame. This can change handling or even damage the frame. Always check your bike’s maximum fork travel before upgrading.
Adjusting Forks For Women, Kids, And Lightweight Riders
Lighter riders often struggle with standard fork settings. Here’s what helps:
- Use lower air pressure for air forks.
- Change to softer coil springs if possible.
- Fine-tune rebound and compression for lighter weight.
Some brands offer women-specific or youth-specific forks. These may have softer settings and shorter travel.
A helpful tip: Some forks have “volume spacers” that change how the fork behaves for lighter riders. Ask your bike shop if these are available.
Troubleshooting Fork Problems
Sometimes, adjustments don’t solve issues. Here’s how to spot problems:
- Fork feels sticky: Clean and lubricate stanchions.
- Fork bottoms out: Increase air pressure or compression.
- Fork doesn’t compress: Reduce air pressure or preload.
- Odd noises: Check for loose bolts or damaged internals.
If your fork still doesn’t work, take it to a professional.
A hidden problem can be bent stanchions. If your fork feels rough even after cleaning and adjusting, inspect for bends or dents.
Safety Considerations
Proper fork adjustment is not just about comfort—it’s about safety.
- Loose or damaged forks can fail, causing crashes.
- Always check bolts after adjustment.
- Never ride with leaking oil or broken parts.
Pro tip: After adjusting, go for a short ride and check fork function before heading to the trail.
After big jumps or crashes, inspect your fork for signs of damage. Cracks or oil leaks can mean serious problems.

Credit: www.youtube.com
How Suspension Fork Technology Is Evolving
Modern forks are becoming smarter. Some high-end models have:
- Electronic adjustments: Change settings with a button.
- Automatic lockout: Detect terrain and adjust automatically.
- Remote controls: Adjust from handlebars.
While these features are expensive, they make tuning easier and more precise. For most riders, manual adjustment is still the best option.
For more technical details, you can read about fork technology at Pinkbike.
Another advance is “self-tuning” forks. These use sensors to detect your riding style and adjust settings automatically. While rare, they may become more common as prices drop.
Real-life Example: Adjusting Forks For A Trail Ride
Let’s look at a practical example.
Sarah is a beginner rider. She weighs 140 lbs and rides a trail bike with a 120mm air fork. Her rides feel harsh, and she loses control on rocky sections.
Steps Sarah follows:
- Checks fork manual for recommended air pressure: 70 psi for her weight.
- Uses shock pump to set air pressure.
- Measures sag: 24mm (20% of travel—ideal for trail).
- Sets rebound in the middle setting.
- Sets compression softer for rocky terrain.
- Tests bike on local trail. Feels smoother and safer.
- Fine-tunes rebound after first ride.
Sarah’s experience shows that small changes make big improvements.
After several rides, Sarah notices her fork feels harsher in cold weather. She checks air pressure and finds it’s dropped. By adding a few psi, she restores comfort. This highlights how seasonal changes can affect fork performance.
Frequently Asked Questions
How Often Should I Adjust My Mountain Bike Fork?
Adjust your fork whenever your weight, riding style, or terrain changes. For most riders, check settings at the start of each season, after a big ride, or if the bike feels uncomfortable.
Can I Adjust A Coil Fork Without Changing The Spring?
You can adjust preload, but if sag is far off, you need a different spring. Most coil forks come with options for different spring rates.
What Is The Best Fork Setting For Beginners?
Start with recommended air pressure or spring rate for your weight. Set rebound in the middle. Use softer compression for comfort. Test and adjust after riding.
Why Does My Fork Lose Air Pressure?
Air forks can lose pressure due to seal wear or temperature changes. Check air pressure monthly. If you notice frequent drops, inspect for leaks.
Should I Use Lockout For Downhill Riding?
No. Lockout is for climbing or smooth roads. For downhill, turn off lockout so the fork absorbs big impacts.
Adjusting your front fork is simple once you know the basics. With the right tools and steps, you can transform your ride in less than an hour. Remember, fork settings are personal—test, tweak, and find what works for you. Small changes make big differences. If you’re unsure, ask for help at your local bike shop or read more on trusted sites like Bicycling. Properly adjusted forks mean safer, smoother, and more enjoyable mountain biking.

Hello Guys! I am John Reese, a professional biker and my hobby is biking! I have been biking for last 12 years and I love using bikes while outing as well. Based on my experiences with the different type of bikes (mountain bikes, road bikes and hybrid bikes); I am sharing my opinion about various bikes so that a beginner can get started right away. Happy reading!