Bleeding mountain bike brakes is one of those tasks every rider should know. Modern bikes use hydraulic brakes, which give powerful stopping. But over time, air can get into the brake lines or fluid can get old. This causes soft, weak, or inconsistent braking.
If you want safe, strong brakes on the trail, learning to bleed them is important. Many new riders think bleeding is complex or risky, but with the right instructions, it’s actually manageable for most people.
This guide will show you how to bleed mountain bike brakes step-by-step. You’ll learn what tools to use, how to avoid common mistakes, and how to spot issues early. We’ll cover different brake types, share useful data, and answer the most frequent questions.
Whether you have Shimano, SRAM, or other brands, you’ll find practical advice for safe, reliable braking.
Why Bleeding Mountain Bike Brakes Matters
Hydraulic brakes use fluid to move pressure from the lever to the caliper. If air enters the system or fluid degrades, you lose braking power. Here’s what happens:
- Braking feels “spongy”
- Lever travels farther before stopping
- Brakes fade on steep descents
- Increased risk of accidents
A survey by Pinkbike found that about 38% of riders had brake issues due to poor maintenance. Most problems came from old fluid or air bubbles. Bleeding your brakes fixes these by removing old fluid and air, restoring performance.
Tools And Materials You Need
Before starting, gather the right equipment. Using proper tools makes the job easier and prevents damage.
- Bleed kit: Contains syringes, hoses, and adapters for your brake brand.
- Fresh brake fluid: DOT fluid (SRAM, Avid) or mineral oil (Shimano, Magura). Check your manual.
- Allen keys: For removing wheels and calipers.
- Torx keys: Needed for some SRAM brakes.
- Clean rags: To wipe spills.
- Gloves: Protect your hands from fluid.
- Isopropyl alcohol: For cleaning parts.
- Small container: To catch old fluid.
- Rubber bands or zip ties: Hold levers open if needed.
Using the wrong fluid is a common mistake. DOT fluid and mineral oil are NOT interchangeable. Mixing them can destroy seals and ruin brakes.
Credit: www.tetongravity.com
Comparing Brake Fluid Types
Picking the correct fluid is crucial. Here’s a quick look at major differences:
| Brand | Fluid Type | Boiling Point (°C) | Color | Notes |
|---|---|---|---|---|
| Shimano | Mineral Oil | 180 | Red/Pink | Non-toxic, lasts longer |
| SRAM/Avid | DOT 5.1 | 260 | Clear/Yellow | Absorbs water, needs regular change |
| Magura | Mineral Oil | 180 | Green | Safe for skin, less aggressive |
Most mountain bike brakes use either mineral oil or DOT fluid. Always check your bike’s manual before buying fluid.
Types Of Mountain Bike Brakes
There are several hydraulic brake systems. Bleeding steps are similar, but small details differ.
- Shimano: Uses mineral oil, easy to bleed with gravity or syringe.
- SRAM: Uses DOT fluid, requires full syringe method.
- Magura: Similar to Shimano, but uses their own mineral oil.
- Hope and others: Often unique, always check instructions.
Shimano brakes are known for simple bleeding. SRAM brakes need more care due to DOT fluid’s water absorption and corrosiveness.
Preparing Your Bike
Before bleeding, make sure your bike is safe and stable. Here’s what to do:
- Secure your bike in a stand or against a wall.
- Remove wheels to avoid fluid spills on rotors or tires.
- Clean calipers and levers with isopropyl alcohol.
- Level the brake lever so it’s horizontal. This prevents air from getting trapped.
- Open caliper pistons by gently pushing them back with a plastic tool.
If your brake pads are dirty or worn, replace them. Bleeding will not fix worn pads.
Common Brake Problems
Bleeding solves many issues, but some problems need extra checks.
| Problem | Possible Cause | Solution |
|---|---|---|
| Spongy lever | Air in fluid | Bleed brakes |
| Weak brakes | Old fluid/pads | Replace fluid and pads |
| Lever stuck | Dirty piston | Clean caliper |
| Noise | Contaminated pads | Clean or replace pads |
Not all brake issues come from fluid. If bleeding doesn’t help, check pads, rotors, and calipers.
Step-by-step: How To Bleed Mountain Bike Brakes
Now, let’s go through the actual process. Most steps are similar for Shimano and SRAM, but check your brand’s instructions for small changes.
1. Set Up Your Work Area
Find a clean, well-lit space. Lay down rags to catch spills. Wear gloves to protect your skin. Place tools and fluid within easy reach.
2. Remove The Wheels
Take off both wheels. This prevents fluid from getting on the rotors, which can cause squealing or loss of braking. Put the bike on a stand if possible.
3. Open The Brake System
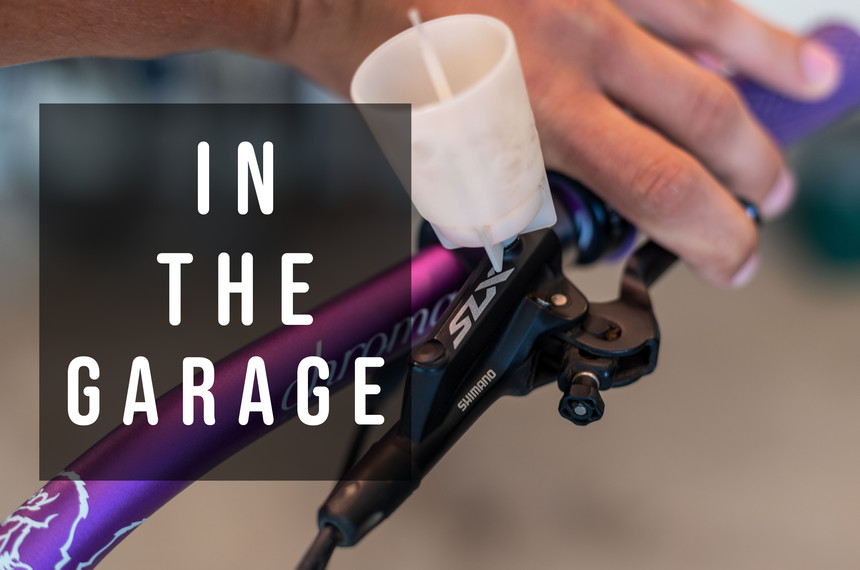
For Shimano:
- Remove the bleed port cap from the lever.
- Attach a small funnel or syringe to the lever.
For SRAM:
- Remove the bleed port screw from the lever and caliper.
- Attach syringes with hoses to both ports.
4. Push Back The Pistons
Use a plastic lever or pad spreader to gently push the caliper pistons back. This creates space and ensures full fluid movement. Never use metal tools—this can damage pistons.
5. Prepare And Fill Syringes
Fill your syringe or funnel with fresh fluid. Avoid air bubbles—tap the syringe to move bubbles to the top, then push them out. The fluid should be new and clean. Old fluid can contain moisture or dirt.
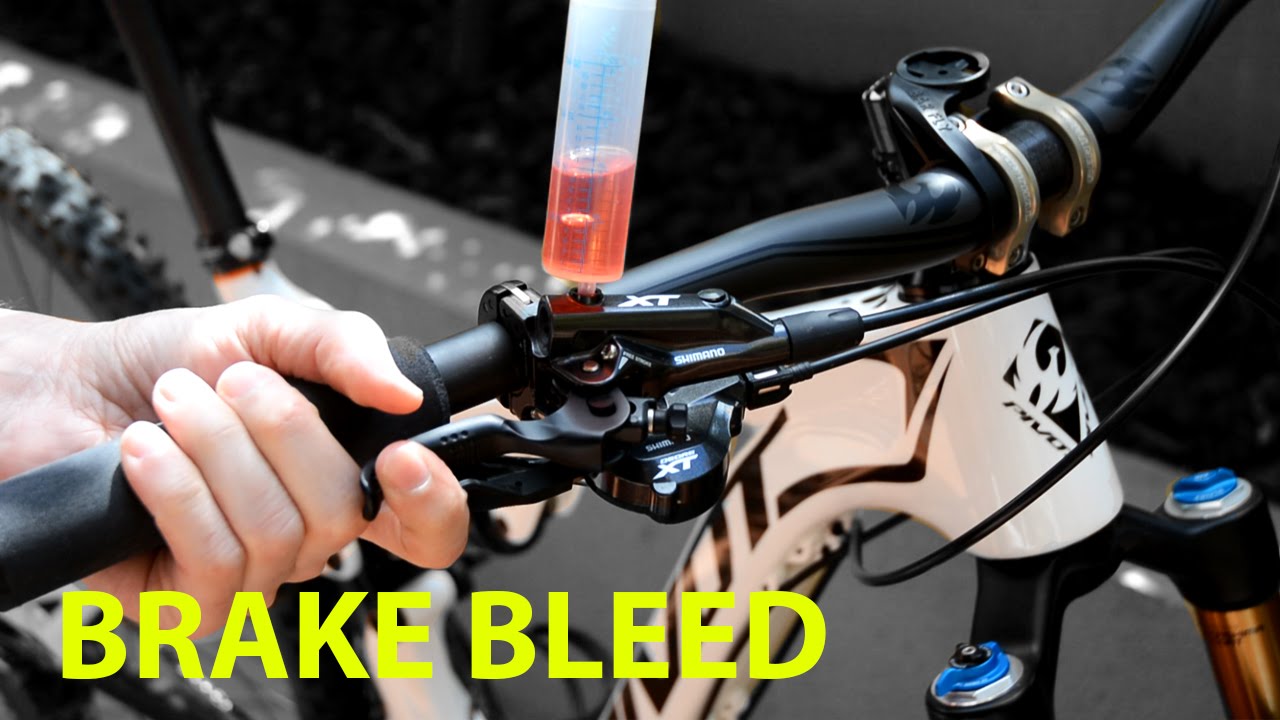
6. Start The Bleeding Process
For Shimano:
- Pour mineral oil into the funnel at the lever.
- Open the bleed valve at the caliper.
- Gently squeeze the lever to push fluid through.
- Watch for bubbles rising in the funnel—this means air is leaving.
- When no bubbles appear, close the valve.
For SRAM:
- Push fluid from the caliper syringe to the lever syringe.
- Alternate pushing and pulling fluid between syringes.
- Gently tap the lines and caliper to move air bubbles up.
- Close the caliper valve, then the lever valve.
7. Check For Air Bubbles
Look for tiny bubbles in the fluid. If you see them, repeat the process. Sometimes tapping the caliper or hose helps. Air bubbles are the main cause of spongy brakes.
8. Close The System
Remove syringes and replace bleed port screws or caps. Clean any spilled fluid with isopropyl alcohol.
9. Test The Brake Lever
Pull the lever several times. It should feel firm and responsive. If it still feels soft, repeat the bleeding steps.
10. Reinstall Wheels And Pads
Put the wheels and brake pads back. Spin the wheel and squeeze the lever to check braking. Make sure the pads do not rub or stick.
11. Final Clean-up
Wipe down the caliper and lever with alcohol. Dispose of old fluid safely—it is toxic and should not go in drains.
Shimano Vs Sram Bleeding: Key Differences
Shimano bleeding is mostly gravity-based, using a funnel. SRAM uses syringes and DOT fluid. Here’s a quick comparison:
| Brand | Bleed Method | Fluid | Difficulty |
|---|---|---|---|
| Shimano | Funnel gravity | Mineral oil | Easy |
| SRAM | Syringe push-pull | DOT fluid | Medium |
Shimano’s method is easier for beginners. SRAM’s method needs more patience and careful handling.
Tips For A Successful Bleed
Bleeding brakes can go wrong if you rush or miss steps. Here are tips to make it easier:
- Don’t overfill the system. Too much fluid causes leaks.
- Avoid air in the syringe or funnel. Always tap bubbles out.
- Keep everything clean. Dirt in the fluid or lines ruins brakes.
- Use the right fluid. Mixing DOT and mineral oil destroys seals.
- Work slowly. Fast pushes can trap air or spill fluid.
- Tap the caliper and hose. This helps bubbles rise and exit.
One non-obvious tip: If your brakes feel soft after bleeding, try leaving the lever pulled overnight with a rubber band. This sometimes helps air bubbles rise to the top, making the system firmer.
How Often Should You Bleed Your Brakes?
Most riders bleed their brakes once a year. But if you ride in wet or muddy conditions, or do long descents, you may need to bleed every 3–6 months. DOT fluid absorbs water, so SRAM brakes need more frequent bleeding.
A test by BikeRadar found that brakes lost 16% power after one year without bleeding. Regular maintenance keeps your bike safe and responsive.
Signs You Need To Bleed Your Brakes
Don’t wait until your brakes fail. Look for these signs:
- Lever feels soft or “spongy”
- Lever travels farther than before
- Brakes fade during rides
- Noise or squealing
- Visible fluid leaks
If you see any, bleed your brakes soon. Riding with bad brakes is dangerous.
Mistakes To Avoid
Bleeding brakes is not hard, but mistakes can cause problems. Here are the most common:
- Using the wrong fluid: Always check your manual.
- Letting air enter the system: Don’t rush and watch for bubbles.
- Over-tightening bleed screws: This damages threads.
- Spilling fluid on pads or rotors: Always remove wheels.
- Not cleaning after bleeding: Leftover fluid can corrode parts.
- Not checking for leaks: Small leaks cause big problems later.
- Mixing old and new fluid: Always flush fully.
A surprising mistake: Some beginners forget to open the caliper pistons before bleeding. This traps air and makes the process pointless.
Practical Example: Bleeding Shimano Brakes
Let’s walk through a real example using Shimano brakes:
- Remove the wheel and pads.
- Level the brake lever.
- Attach the funnel to the lever, fill with mineral oil.
- Open the caliper bleed valve, attach hose to a container.
- Squeeze lever gently, watch bubbles exit in funnel.
- Close valve, remove funnel.
- Clean everything, reinstall pads and wheel.
- Test for firm lever feel.
This process takes about 20–30 minutes. Most riders can do it with basic tools and patience.
Data: Brake Performance After Bleeding
Studies show that proper bleeding restores almost 100% braking power. A test by Singletrack Magazine found:
- Pre-bleed braking force: 125 Newtons
- Post-bleed braking force: 174 Newtons
- Improvement: 39% increase
This means your brakes will be much safer and more effective after a proper bleed.

Credit: www.amazon.com
Advanced Tips For Experienced Riders
If you ride hard or race, consider these advanced ideas:
- Vacuum bleeding: Uses special tools to pull air out, ideal for stubborn bubbles.
- Upgrading hoses: Braided hoses reduce expansion and improve feel.
- Using heat-resistant fluid: Some brands offer higher boiling point fluids for downhill.
Experienced riders often bleed brakes before big rides or races. This prevents failure on steep or technical trails.
Safety And Environmental Concerns
Brake fluid is toxic. Always wear gloves and avoid skin contact. Mineral oil is less dangerous than DOT fluid, but both need careful disposal. Never pour fluid down the drain. Take used fluid to a recycling center or hazardous waste facility.
Always clean spills with alcohol, and keep fluid away from children and pets. Proper safety means your bike and environment stay healthy.
When To Seek Professional Help
If your brakes still feel weak after bleeding, or you see leaks or damaged parts, visit a bike shop. Some issues—like damaged calipers or stuck pistons—need expert repair. Professional bleeding costs $30–$60, but ensures safety and reliability.
Frequently Asked Questions
How Long Does It Take To Bleed Mountain Bike Brakes?
Most people need 20–45 minutes per brake. Shimano is faster, SRAM takes longer. If you’re new, add extra time for setup and cleaning.
Can I Use Any Brake Fluid For My Bike?
No. Always use the fluid recommended by your brake manufacturer. Mixing fluids damages seals and can cause brake failure.
What Happens If I Don’t Bleed My Brakes?
Braking power drops, and you risk accidents. Air and old fluid cause soft levers, fading, and even total brake loss. Regular bleeding keeps you safe.
How Do I Avoid Air Bubbles During Bleeding?
Work slowly, tap the caliper and lines, and always check for bubbles in the fluid. Using syringes helps push air out. Don’t rush—patience is key.
Is Bleeding Mountain Bike Brakes Safe For Beginners?
Yes, if you follow instructions and use the right tools. Start with Shimano brakes—they’re easier. If unsure, ask for help or watch videos. Practice makes perfect.
Bleeding mountain bike brakes is a skill that improves your riding and safety. With the right tools, patience, and care, you’ll have strong, reliable brakes on every ride. If you need more technical details, Shimano’s official site has great guides: Shimano Brake Technology. Don’t let soft brakes ruin your next adventure—master bleeding and enjoy the trail with confidence.
Credit: www.youtube.com

Hello Guys! I am John Reese, a professional biker and my hobby is biking! I have been biking for last 12 years and I love using bikes while outing as well. Based on my experiences with the different type of bikes (mountain bikes, road bikes and hybrid bikes); I am sharing my opinion about various bikes so that a beginner can get started right away. Happy reading!