Building your own full suspension mountain bike is a dream for many riders. It’s more than just assembling parts—you shape every detail, from the frame geometry to how the bike handles rough terrain. If you want a bike that fits your riding style, terrain, and budget, building it yourself can be the best choice. But it’s not easy: you need to plan carefully, choose the right components, and understand how everything works together. In this guide, you’ll learn step-by-step how to build a full suspension mountain bike, with practical advice, real examples, and expert tips that go beyond basic instructions.
Planning Your Full Suspension Mountain Bike Build
Building a mountain bike starts with a clear plan. Before buying parts, decide what type of riding you want to do—cross-country, trail, enduro, or downhill. Each style needs different frame geometry and suspension travel. It’s easy to get excited and buy parts quickly, but matching everything to your riding goals and body is key for a successful build.
Key Decisions
- Frame size and geometry: Choose based on your height and riding style. A frame that is too small or too large will feel uncomfortable and can be unsafe. For example, a rider who is 5’8” to 5’11” often fits a medium frame, but always check the brand’s sizing chart. Frame reach and stack, not just seat tube length, also affect fit.
- Suspension travel: For cross-country, 100-120mm is common. Trail bikes use 120-150mm, and enduro/downhill bikes need 150-200mm. More travel means more comfort and control on rough trails, but less efficiency on climbs.
- Wheel size: Most modern bikes use 29” or 27.5” wheels. 29” rolls faster and handles obstacles better; 27.5” is more agile. If you ride twisty, technical trails, 27.5” could feel more playful. For long, rocky descents, 29” gives extra confidence.
Example: Geometry Differences
| Bike Type | Head Angle | Suspension Travel | Wheel Size |
|---|---|---|---|
| Cross-Country | 69–71° | 100–120mm | 29″ |
| Trail | 66–68° | 120–150mm | 27.5″/29″ |
| Enduro | 64–66° | 150–180mm | 27.5″/29″ |
| Downhill | 62–65° | 180–220mm | 27.5″ |
A slacker head angle (lower number) means the bike is more stable on descents but less nimble at slow speed. Think about the trails you ride most often.
Budget Planning
A full suspension build can cost anywhere from $1,500 to over $8,000, depending on the parts you choose. It’s important to set a realistic budget, keeping in mind that frame and suspension are the most expensive components. Many beginners underestimate the cost of small parts and tools—include these in your plan.
For example, a solid set of Allen wrenches, a torque wrench, and a shock pump can add $100–$200 if you don’t already own them.
Don’t forget about shipping costs if you buy online, or possible taxes. Some riders also choose used components for less critical parts (like handlebars) to save money, but always buy new for suspension and safety-critical items.
Hidden Insight
Most beginners focus only on the big components (frame, fork, wheels) and forget about things like headset spacers, cable housing, or shock hardware. These small items can add up, sometimes costing $100–$200 extra. For example, even tiny parts like brake adapters and tubeless valve stems are needed to finish your bike, but are easy to overlook.
It’s smart to make a checklist of every part before you start buying. Missing just one small piece can delay your build for days.
Choosing The Frame: Heart Of Your Bike
The frame is the most important part. It determines how your bike feels and how well it handles. For a full suspension mountain bike, you need a frame with both front and rear suspension mounts. The frame also decides what type and size of components you can use, so it’s best to choose this first.
Material Choices
- Aluminum: Affordable, strong, and lightweight. Good for most riders. Modern aluminum frames can be almost as light as carbon, but usually cost less.
- Carbon fiber: Lighter and stiffer, but more expensive. Preferred for racing and high-end builds. Carbon also reduces trail vibrations, making the ride smoother.
- Steel: Durable and comfortable, but heavier. Some riders love the feel of steel, especially for custom, small-brand frames.
- Titanium: Light, strong, and corrosion-resistant, but very expensive. Titanium frames last for many years with little maintenance.
Example: Frame Material Comparison
| Material | Weight (avg.) | Price Range | Durability |
|---|---|---|---|
| Aluminum | ~6 lbs | $500–$2,000 | Good |
| Carbon Fiber | ~4 lbs | $1,500–$5,000 | Very Good |
| Steel | ~7 lbs | $600–$1,500 | Excellent |
| Titanium | ~5 lbs | $2,000–$6,000 | Excellent |
If you plan to ride in wet or muddy conditions, aluminum and titanium are less likely to rust. Carbon fiber is not affected by corrosion, but can crack if hit hard.
Suspension Design
There are several designs: single pivot, Horst link, VPP, DW-link, and more. Each affects how the bike pedals and absorbs bumps. For most riders, a well-known design like Horst link or VPP gives a good balance between pedaling efficiency and comfort.
Single pivot frames are simple and affordable, but may not be as smooth over rough terrain. Advanced designs like DW-link or VPP cost more, but give better control and less pedal “bob. ” Always check if the rear shock you want fits the frame’s mounting style.
Non-obvious Insight
Don’t just pick the lightest frame. For technical trails, durability and good suspension kinematics matter more than weight. Test ride similar bikes if you can, or read rider reviews to see how the frame performs on your local trails.
Also, pay attention to the frame’s maximum fork travel—using a fork with more travel than the frame is designed for can damage the bike and void warranties.
Selecting Suspension Components
Suspension is what makes your bike smooth and comfortable over rocks, roots, and drops. You need a fork for the front and a shock for the rear. These two must match your frame’s travel and intended use.
Front Fork
- Travel: Match with your frame’s design and intended riding. Too much travel on a cross-country frame can cause handling issues. For example, putting a 160mm fork on a frame designed for 120mm will raise the front too much and change the geometry.
- Axle type: Most modern forks use thru-axles (15mm or 20mm) for stiffness. This improves handling on rough trails.
- Damping: Look for adjustable rebound and compression for tuning. Higher-end forks offer more adjustments, letting you fine-tune for weight and style.
Rear Shock
- Air shocks: Lightweight, easy to adjust. Good for most riders. Air shocks can be set up quickly with a shock pump.
- Coil shocks: Better for downhill and aggressive riding. Heavier, but smoother. Coil shocks need the correct spring rate for your weight.
Suspension Setup Example
Suppose you’re building a trail bike. You might choose a 140mm travel fork and a matching air shock. For enduro, you may use a 160mm fork and a coil shock for durability.
When buying, make sure the rear shock’s eye-to-eye length and stroke fit your frame’s requirements. Some frames only work with certain types of shocks (trunnion or standard mount).
Practical Tip
Suspension setup is more than just picking parts. You must set sag (how much the suspension compresses under your weight), adjust rebound, and tweak compression. Always check the manufacturer’s recommendations for your weight and riding style.
Some riders carry a small notebook to record their favorite settings for different trails. Even a few psi can make a big difference in ride quality.
Wheelset: Size, Material, And Hubs
Wheels affect speed, grip, and comfort. The main choices are 27.5” and 29”. Most riders use tubeless setups, which reduce flats and improve grip. Setting up tubeless also lets you run lower tire pressure for more traction.
Rim Material
- Aluminum: Affordable, strong, slightly heavier. Good for most riders, and easier to repair if dented.
- Carbon fiber: Lighter and stiffer, but expensive. Gives a more responsive feel, but can be costly to replace if cracked.
Hub Choices
- Boost spacing (110mm front, 148mm rear) is standard for modern bikes. It increases wheel strength. Always check your frame and fork for compatibility.
- Sealed bearings last longer and need less maintenance. They roll smoother in wet and muddy conditions.
Example: Wheel Comparison
| Wheel Size | Best For | Weight (avg.) | Cost (avg.) |
|---|---|---|---|
| 27.5″ | Agility | 1,700g | $300–$1,500 |
| 29″ | Speed/Rolling | 1,800g | $350–$2,000 |
Choosing the right rim width is also important: wider rims (30–35mm internal width) support wider tires, which can improve grip on loose trails.
Tires
Choose tires based on terrain. For loose, rocky trails, use wider tires (2. 4–2. 6”). For hardpack, narrower tires (2. 2–2. 3”) roll faster. Soft compound rubber grips better but wears out faster.
Some riders use a more aggressive tread on the front for grip, and a faster rolling tire on the rear for speed.
Drivetrain: Gears, Crankset, And Chain
Modern mountain bikes use 1x drivetrains (one chainring in front, multiple gears in back). This setup is lighter and easier to maintain. Fewer parts mean less chance of mechanical problems on the trail.
Main Components
- Shifter and derailleur: Choose from brands like Shimano or SRAM. Higher-end models shift smoother and last longer. Electronic shifting (like SRAM AXS or Shimano Di2) is an option, but costs more.
- Cassette: Modern cassettes have 10–12 gears. Look for a wide gear range (like 10-51T or 10-52T) for easier climbing.
- Crankset: Match crank arm length to your height (170mm–175mm is common). Shorter cranks can give more ground clearance on rocky trails.
- Chain: Use a compatible chain for your cassette and crankset. Always use a new chain when installing a new drivetrain to avoid premature wear.
Non-obvious Insight
Many beginners forget about chainline. If the crankset and cassette don’t align properly, shifting will be rough and the chain may drop. Always check your frame’s specifications for the correct bottom bracket and crank spindle type.
Another overlooked detail: the clutch on the rear derailleur. This device keeps the chain tight over rough terrain and prevents chain slap. Make sure it’s switched on before riding.
Brakes: Stopping Power And Control
For mountain bikes, disc brakes are standard. Hydraulic disc brakes give more power and better control than mechanical ones. On steep descents, good brakes can make the difference between a fun ride and a dangerous one.
Rotor Size
- 160mm: Light, for cross-country.
- 180mm: Common for trail.
- 200mm: Needed for enduro/downhill.
Bigger rotors remove heat better, which is important on long descents. If you’re a heavier rider or ride steep terrain, use the largest size your frame allows.
Brands
Popular options are Shimano, SRAM, and Magura. Look for models with tool-free pad adjustment and easy bleeding. Shimano brakes are known for reliability and easy maintenance, while SRAM offers smooth lever feel and easy customization.
Practical Tip
Always use the largest rotors your frame and fork allow if you ride steep trails. Bigger rotors mean more stopping power. Check that your brake calipers are centered—misaligned calipers cause noise and uneven pad wear.
Don’t forget to bed-in new brake pads before your first real ride. This process ensures maximum stopping power and extends pad life.
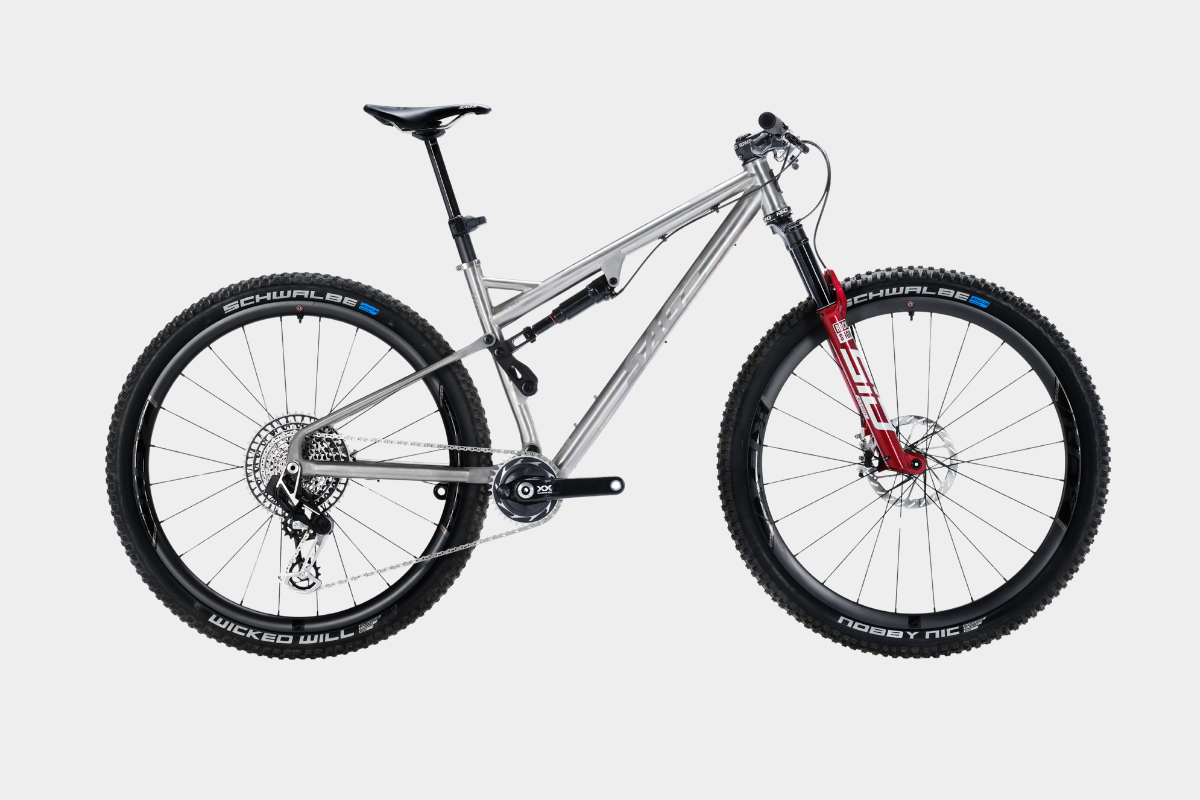
Credit: www.singletracks.com
Cockpit: Handlebar, Stem, And Controls
The cockpit is where you control your bike. Handlebar width, rise, and stem length affect comfort and handling. Even small changes here can make your bike feel very different.
Handlebar
- Width: Wider bars (760–800mm) offer more control, but may feel awkward for smaller riders. Narrow bars (700–740mm) are good for tight trails or smaller riders.
- Material: Aluminum is strong; carbon is lighter but more expensive. Carbon bars can reduce hand fatigue by absorbing vibrations.
Stem
- Length: Short stems (35–60mm) improve handling on technical trails. Longer stems make the steering slower but can help with climbing.
- Angle: A higher angle can make the riding position more comfortable. Flat stems give a more aggressive feel, while higher rise gives a more upright position.
Grips
Choose grips with good texture and cushioning. Lock-on grips are easy to install and don’t twist during rides. Some riders prefer ergonomic shapes for long rides.
Controls
- Dropper post lever: Allows you to change seat height quickly.
- Remote lockout: Lets you stiffen suspension for climbing. Place controls where you can reach them without moving your hand too far from the grips.
Cable routing can be internal (hidden in the frame) or external (outside the frame). Internal looks cleaner, but takes more time to install.
Seatpost And Saddle
A dropper seatpost lets you lower your saddle with a lever, making it easier to descend steep trails. Standard seatposts are lighter but don’t offer this flexibility. Most modern trail and enduro bikes use droppers.
Saddle
Choose a saddle based on your anatomy and riding style. Wider saddles are more comfortable for longer rides; narrow saddles are lighter. Some brands offer demo programs so you can try different models before buying.
Practical Tip
Many riders overlook saddle position. Adjust fore-aft and tilt for comfort, and try different saddles if you experience pain. Small adjustments (just a few millimeters) can make a big difference on long rides.
Don’t forget to check seatpost insertion. Most frames have a minimum insertion mark—never ride with the post extended past it, as this can crack your frame.
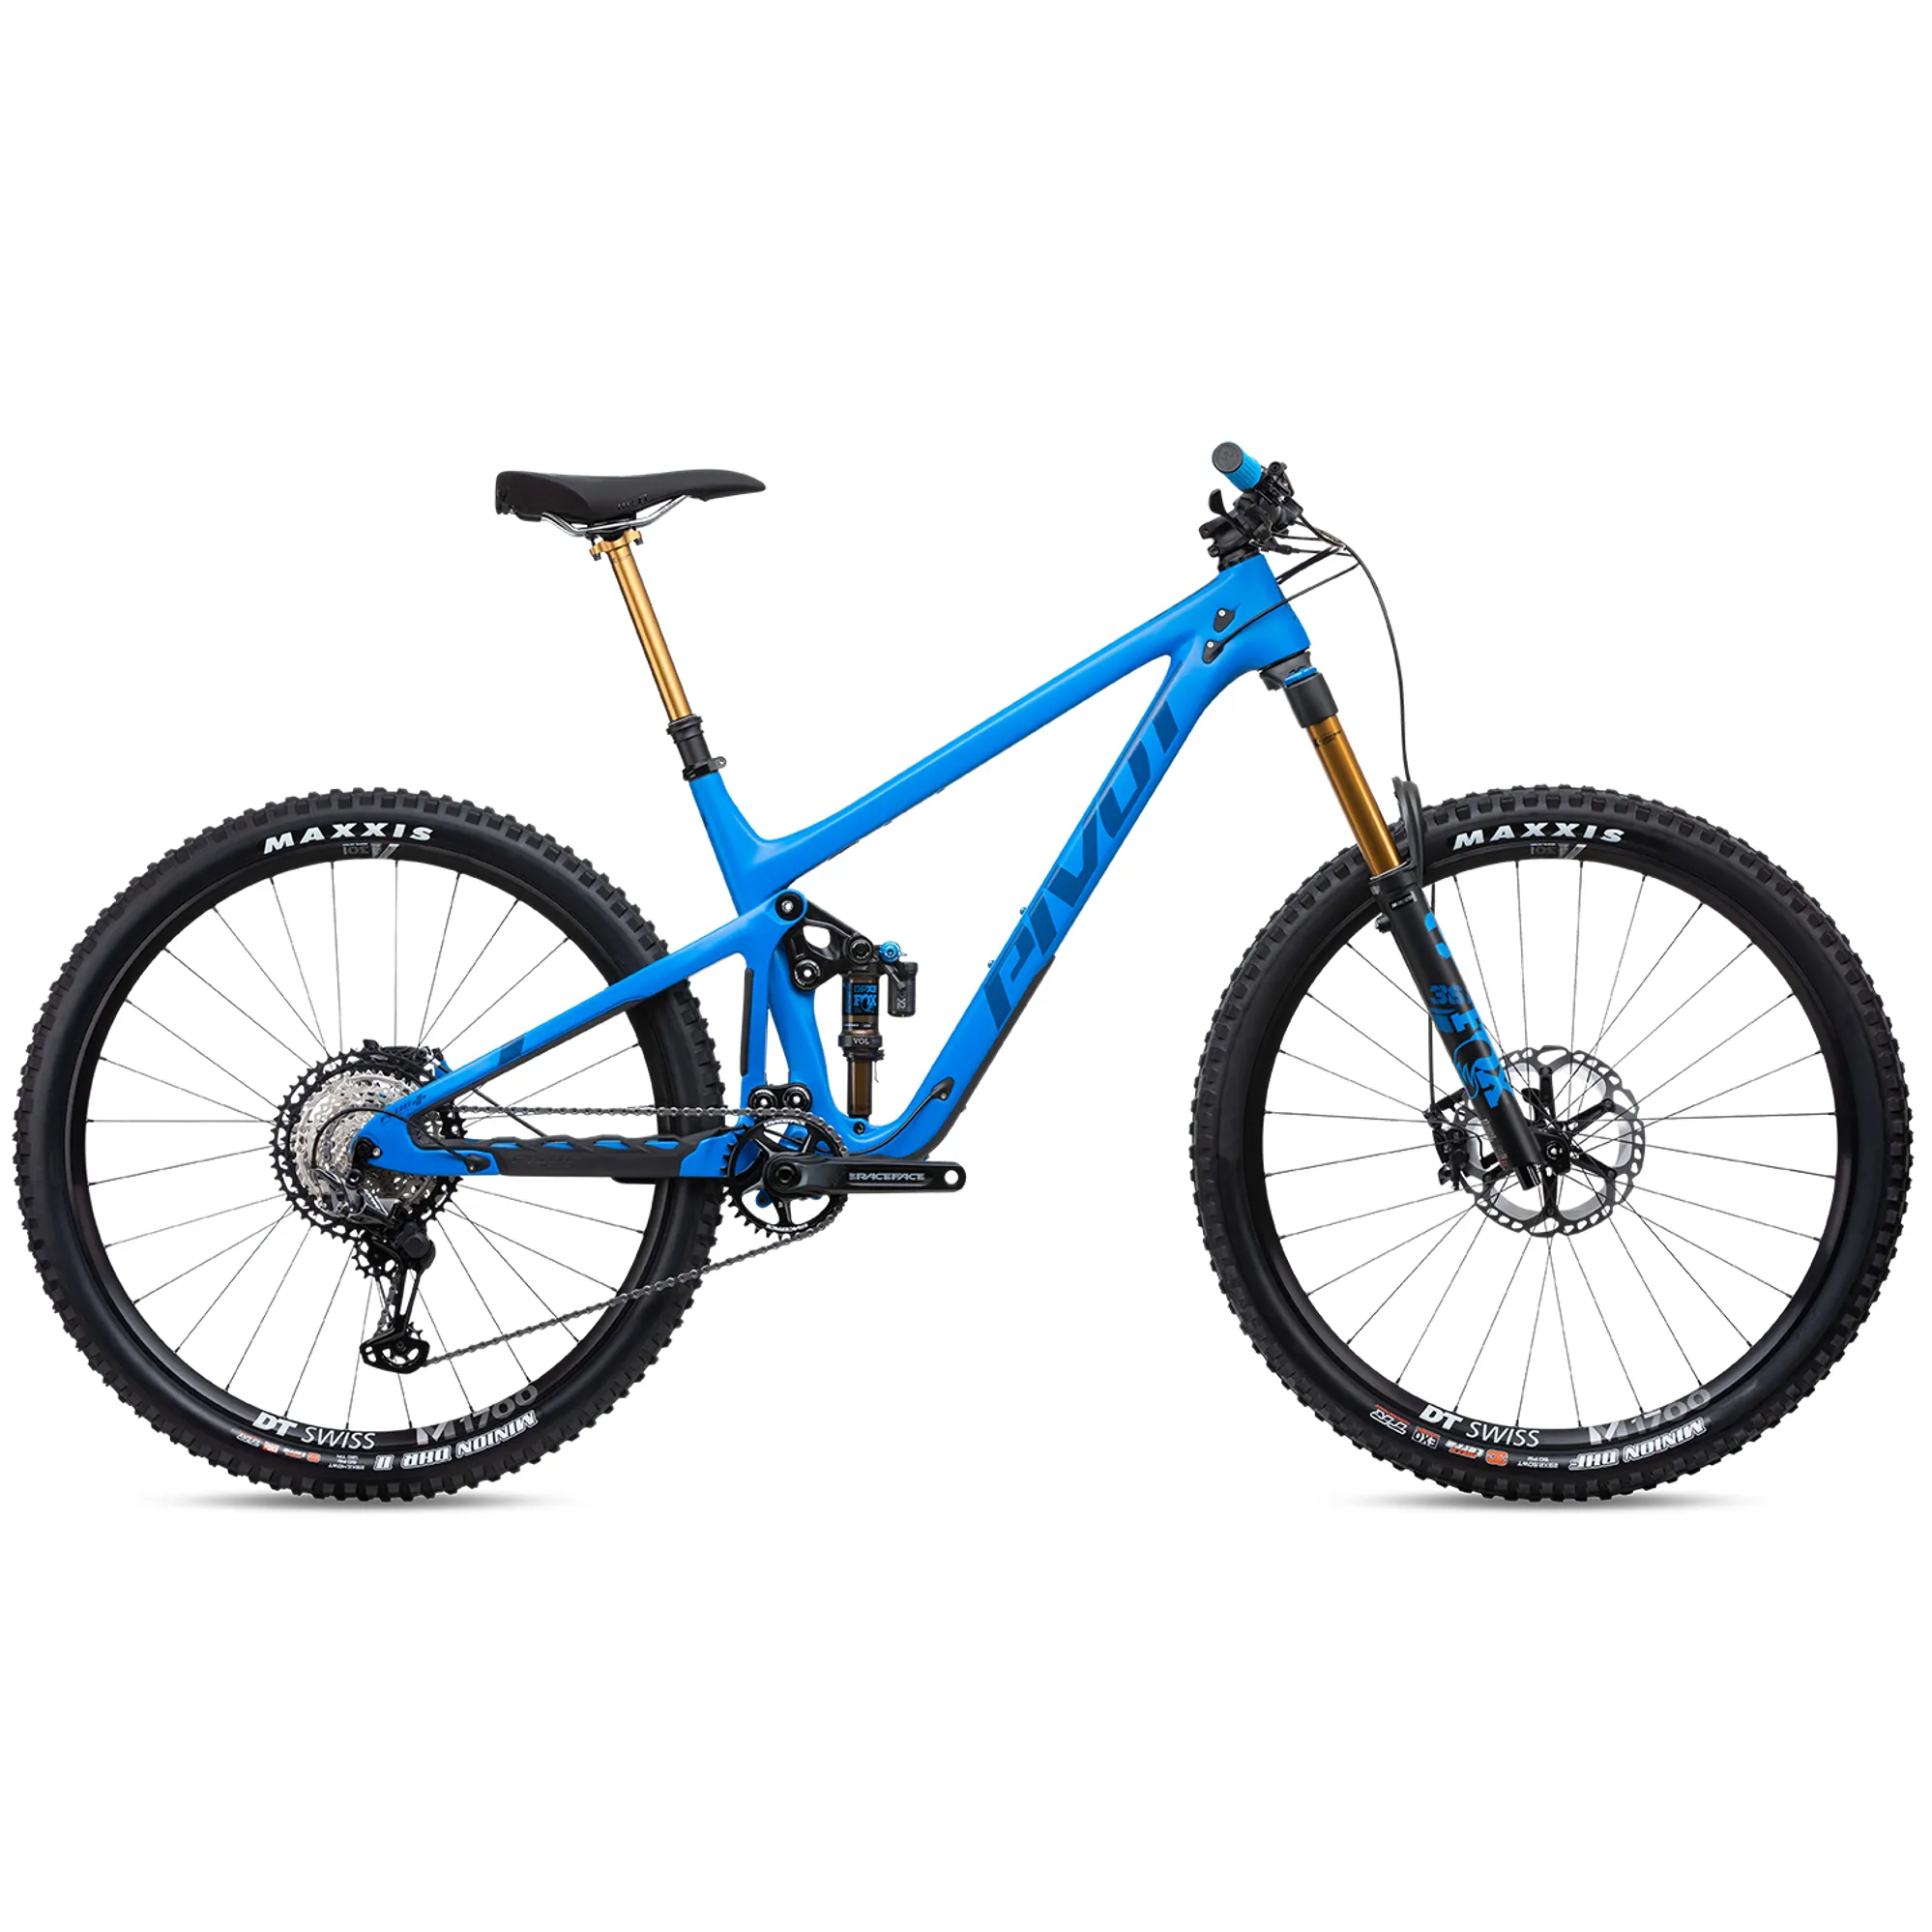
Credit: www.bike-bros.co.uk
Assembling The Bike: Step-by-step Process
When you have all the parts, it’s time to assemble your bike. This is where patience and attention to detail matter most. Working slowly and methodically prevents mistakes and damage.
Required Tools
- Allen (hex) wrenches (2–8mm)
- Torque wrench (for precise tightening)
- Bottom bracket tool
- Cassette tool
- Cable cutters
- Shock pump
- Grease and assembly paste (for specific parts)
- Tire levers
If you’re new to bike building, watch detailed assembly videos for extra guidance. Having a clean, well-lit workspace makes things easier.
Step 1: Frame Preparation
Check for any defects, clean the frame, and install headset and bottom bracket. Use grease on threads to prevent corrosion. If your frame has internal cable routing, thread cables now before installing the fork.
Step 2: Install Suspension
Mount the fork into the headset. Tighten to the recommended torque. Install the rear shock, ensuring correct hardware and bushings. Lubricate shock bolts lightly to avoid creaks.
Step 3: Wheels And Tires
Install wheels, making sure they are true (straight). Fit tires and set up tubeless if possible. Inflate tires to recommended pressure. Add sealant to prevent flats and improve grip.
Step 4: Drivetrain Assembly
Fit crankset and chainring. Install cassette on rear wheel. Attach derailleur and shifter, and route cables or housing. Adjust chain length and test shifting. Use a quick link or pin to join the chain.
Step 5: Brakes Installation
Mount brake calipers and rotors. Attach levers to the handlebar. Bleed hydraulic brakes if needed. Align calipers so pads don’t rub. Spin the wheel and squeeze the lever to check alignment.
Step 6: Cockpit And Controls
Install handlebar and stem. Fit grips, shifters, brake levers, and dropper post lever. Adjust angles and positions for comfort. Make sure controls don’t hit each other and are easy to reach.
Step 7: Seatpost And Saddle
Insert seatpost and saddle, adjust height and tilt. Connect dropper post cable if using. Check that the post moves smoothly and the saddle is level.
Step 8: Final Adjustments
Check all bolts with a torque wrench. Tune suspension sag and rebound. Test ride and adjust shifting, braking, and seat position. Listen for any creaks or clicks.
Common Mistakes
- Overtightening bolts can damage components.
- Incorrect cable routing can cause shifting problems.
- Forgetting to check tire pressure before riding.
- Skipping grease or assembly paste, leading to creaks and stuck parts later.
- Rushing through the process—take your time and double-check each step.
Tuning And Customizing Your Bike
Once built, you can fine-tune your bike for maximum performance. Even small changes make a noticeable difference.
Suspension Tuning
Adjust air pressure and sag according to your weight. Experiment with rebound and compression for your preferred feel. Don’t be afraid to try different settings on different trails.
Cockpit Adjustments
Try different handlebar widths and stem lengths. Adjust brake lever position for comfort. Rotate bars slightly to change wrist angle and reduce hand fatigue.
Tire Pressure
Lower pressure improves grip; higher pressure rolls faster. Start with manufacturer recommendations, then adjust based on trail conditions. If you weigh more or carry a backpack, increase pressure slightly to avoid rim strikes.
Non-obvious Insight
Many riders ignore shock hardware wear. Check bushings and mounting bolts regularly—worn hardware can cause noisy suspension and poor performance. Replacing these small parts is cheap and makes your bike feel new again.
Customizing with colored grips, decals, or frame protection tape also adds personality and protects your investment.
Safety Checks And First Ride
Before your first ride, do a full safety check:
- Make sure all bolts are tight.
- Check brake function.
- Inspect tire pressure and tubeless seal.
- Test shifting and suspension.
- Look for any loose parts.
- Spin the wheels to check for rubbing or wobbles.
Take your first ride on familiar trails. Listen for unusual noises, and stop to check any issues. Bring basic tools, a pump, and a spare tube on your first ride—just in case.
Cost Breakdown Example
If you’re wondering how the price adds up, here’s a sample breakdown for a mid-range build:
| Component | Average Cost (USD) |
|---|---|
| Frame | $1,500 |
| Fork | $600 |
| Rear Shock | $300 |
| Wheelset | $500 |
| Drivetrain | $350 |
| Brakes | $250 |
| Handlebar/Stem | $100 |
| Seatpost/Saddle | $120 |
| Misc/Small Parts | $150 |
| Total | $3,870 |
This doesn’t include tools ($100–$300) or labor if you need help. Some riders spread costs over months by buying parts on sale or used.
Real-world Example: Custom Trail Bike Build
Let’s say you want a trail bike for both climbing and descending. You choose:
- Aluminum Horst-link frame (140mm travel)
- RockShox 140mm fork
- Fox Float DPS rear shock
- DT Swiss 29” wheelset
- SRAM GX Eagle 1×12 drivetrain
- Shimano SLX hydraulic brakes (180mm rotors)
- Race Face 760mm handlebar, 50mm stem
- OneUp dropper post
- WTB Volt saddle
This setup offers balanced performance for most trails, good climbing, and reliable descending. It’s not the lightest or cheapest, but it’s flexible and durable.
In practice, you might swap tires for winter or summer, or upgrade wheels later for weight savings. Riders often start with a solid base and improve components over time as skills and needs change.
Expert Tips For A Successful Build
- Measure everything: Double-check frame size, bottom bracket type, and headset specs before buying parts.
- Buy compatible parts: Mixing brands and standards can cause issues (e.g., SRAM shifter with Shimano derailleur).
- Use a torque wrench: Never guess tightness—over-tightening can crack carbon, under-tightening causes parts to loosen.
- Don’t rush: Take time to assemble, especially with cables and hydraulic lines.
- Keep receipts: Warranty claims require proof of purchase.
- Lay out all parts before starting: This prevents missing small but critical items.
- Photograph cable and hose routing on similar bikes: This helps during assembly, especially with internal routing.
- Test fit parts before final assembly: For example, check that cranks spin freely and wheels fit the frame before tightening everything down.
Maintenance Essentials
Building your bike is just the start. Regular maintenance keeps it running smoothly.
- Clean after every ride: Dirt can damage suspension and drivetrain.
- Lubricate chain: Use a bike-specific lube, not household oil.
- Inspect suspension seals: Replace if leaking.
- Check bolts: Vibrations can loosen parts over time.
- Monitor brake pad wear: Replace before pads are fully worn to avoid damaging rotors.
- Check tire sealant: Top up every few months to keep tubeless tires sealed.
A well-maintained bike feels better and lasts longer. Learn basic repairs to fix common problems on the trail.
Where To Find More Information
If you want deeper details or manufacturer specs, sites like Pinkbike offer community advice, reviews, and detailed guides. You can also find video tutorials for specific components or maintenance tasks.

Credit: www.youtube.com
Frequently Asked Questions
What Tools Do I Need To Build A Full Suspension Mountain Bike?
You’ll need Allen wrenches, a torque wrench, bottom bracket tool, cassette tool, cable cutters, and a shock pump. Some parts may need special tools, like a headset press. It’s best to buy a quality bike tool kit. If you plan to do your own maintenance long-term, the investment pays off.
How Long Does It Take To Build A Mountain Bike?
Most builds take 6–12 hours, spread over a few days. Beginners may need longer, especially for tuning suspension and setting up brakes. Rushing increases mistakes, so take your time. If you get stuck, ask for help from experienced friends or a local bike shop.
Can I Use Old Parts From Another Bike?
Sometimes, yes. But check compatibility—frame standards, wheel size, and drivetrain can change. Using mismatched parts can cause problems or safety issues. For example, older wheels may not fit boost frames, and old brakes may not mount on new forks without adapters.
How Do I Know If My Suspension Is Set Up Correctly?
Check sag using the manufacturer’s guide. Adjust air pressure or spring rate for your weight. Fine-tune rebound and compression until the bike feels controlled but not harsh. Test on trails and adjust as needed. Many riders improve their setup over several rides.
Is It Cheaper To Build Or Buy A Mountain Bike?
Buying a complete bike is often cheaper, especially entry-level models. Building lets you customize every part, but you pay more for individual components and tools. For high-end bikes, building can sometimes save money by avoiding unwanted parts. Building also teaches you how everything works, making future repairs easier.
Building your own full suspension mountain bike is challenging, but rewarding. You gain a deep understanding of your bike, can customize every detail, and enjoy the satisfaction of riding something you built. If you plan carefully, choose compatible parts, and take your time, you’ll end up with a bike that fits your style, performs well, and lasts for years.
The process teaches patience and problem-solving, and you’ll be proud every time you hit the trails.

Hello Guys! I am John Reese, a professional biker and my hobby is biking! I have been biking for last 12 years and I love using bikes while outing as well. Based on my experiences with the different type of bikes (mountain bikes, road bikes and hybrid bikes); I am sharing my opinion about various bikes so that a beginner can get started right away. Happy reading!