Mounting a tubeless mountain bike tire can feel intimidating if you’ve never done it before. Many riders worry about air leaks, messy sealant, or stubborn tire beads. But once you understand the process, it’s not much harder than changing a regular tube tire. Plus, the benefits are clear: fewer flats, lower rolling resistance, and better grip on rough trails.
Whether you’re switching to tubeless for the first time or just need a refresher, this guide will walk you through every step. You’ll learn what tools you need, how to prepare your wheel and tire, and how to avoid common pitfalls that frustrate beginners.
Along the way, you’ll find practical tips and a couple of expert tricks that make the job faster and less messy.
Let’s dive in and get your mountain bike set up for a smoother, more reliable ride.
Why Go Tubeless?
Many riders ask, “Is going tubeless really worth it? ” The answer depends on how and where you ride, but for most mountain bikers, the benefits are hard to ignore.
Tubeless tires seal directly to the rim without an inner tube. This setup allows you to ride at lower pressures, which means a larger contact patch for better grip—especially on rocks and roots. Lower pressure also improves comfort by absorbing bumps. The lack of a tube reduces pinch flats, which are common when hitting sharp edges.
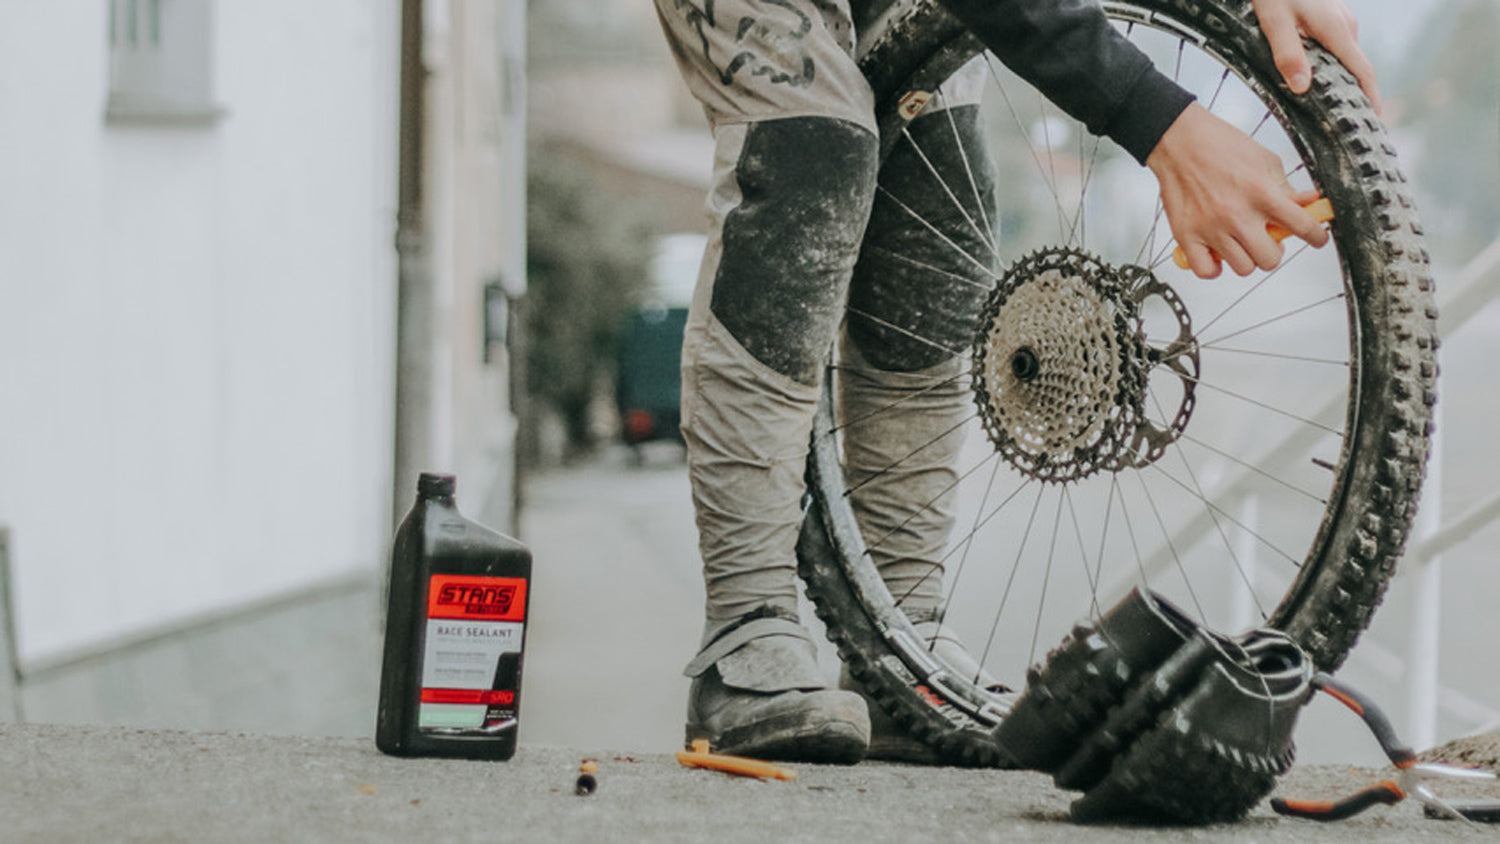
Another big plus is the use of sealant inside the tire. Sealant quickly closes small punctures, often before you even notice a problem. Many riders report going an entire season without fixing a flat.
According to a study by Schwalbe, nearly 80% of mountain bike racers now use tubeless setups. The technology is proven, even at the highest levels of the sport.
What You’ll Need: Tools And Materials
Before you start, make sure you have everything ready. Missing a small item can stop the process or cause leaks.
Essential items:
- Tubeless-ready rim (or a rim that can be converted)
- Tubeless-ready tire
- Tubeless rim tape (usually 1-2 layers)
- Tubeless valve
- Tubeless sealant
- Tire levers (plastic, not metal)
- Floor pump or air compressor
- Soapy water (for easier bead seating)
- Rag or paper towel (for cleaning spills)
- Sharp scissors or utility knife (for tape)
Optional but helpful:
- Valve core remover tool
- Sealant injector or syringe
- Gloves (sealant can get messy)
- CO2 inflator (for stubborn tires)
Tubeless-ready Vs. Standard Rims And Tires
Not all rims and tires are created equal. Tubeless-ready rims have a smooth inner wall and bead lock to help the tire seal. Some older wheels can be converted, but results vary. Using a tire that’s not designed for tubeless can cause leaks or blow-offs.
Here’s a quick comparison:
| Feature | Tubeless-Ready | Standard |
|---|---|---|
| Rim Wall | Sealed, smooth | May have spoke holes |
| Tire Bead | Strong, fits tight | Looser, not always airtight |
| Reliability | High | Variable |
If you’re not sure, check for labels like “Tubeless Ready” or “TLR” on your wheel and tire.
Step 1: Prepare The Rim
A clean, well-prepared rim is the foundation for a leak-free tubeless setup. Dirt, old tape, or burrs can cause frustrating leaks.
- Remove the old tire and tube. Clean the rim with isopropyl alcohol or soapy water. Let it dry.
- Inspect the rim bed. Look for sharp edges, dents, or leftover adhesive.
- Install tubeless rim tape. Start about 2 inches before the valve hole. Stretch the tape tightly as you go, pressing it into the rim bed. Overlap the end by 2 inches and cut. Smooth out any air bubbles.
- Poke a small hole in the tape at the valve hole using a sharp point.
- Insert the tubeless valve. Push it through the hole. Tighten the retaining nut on the outside, but don’t overtighten.
Expert tip: Double-layer your rim tape for wide rims or if your first attempt leaks. A small air gap in the tape can cause slow leaks that are hard to find.
Step 2: Mount The Tire
This is where many riders get stuck. The key is patience and technique.
- Check tire direction. Most mountain bike tires have a rotation arrow. Make sure it points the right way.
- Mount one side of the tire. Push the bead into the rim channel. Work your way around with your hands.
- Mount the second bead. Start at the opposite side of the valve. Work both sides toward the valve. Leave the section above the valve for last.
- Use tire levers only if needed. Plastic levers protect your rim tape.
Common mistake: Letting the bead sit on top of the rim wall instead of inside the center channel. Push the bead down into the channel for easier mounting.

Credit: www.youtube.com
Step 3: Seat The Beads
The tire bead must “pop” into place against the rim to make an airtight seal. This step can be tricky.
- Remove the valve core with a valve tool. This increases airflow and helps with stubborn tires.
- Spray soapy water around both beads. This lubricates and helps seal.
- Inflate quickly with a floor pump or compressor. Air should rush in and push the beads outward. Listen for “pops.”
- Inflate to max pressure (often 35–40 psi for mountain bike tires) for initial seating. Don’t exceed the tire’s limit.
- Check for even bead seat. The bead should be evenly spaced from the rim all the way around.
If the bead won’t seat:
- Try more soapy water
- Bounce the wheel gently on the ground
- Use a CO2 inflator for a quick air blast
Non-obvious insight: Sometimes the tire and rim tolerances are tight. Letting the tire sit in the sun for 10–15 minutes can soften the rubber, making it easier to seat.
Step 4: Add Sealant
Once the bead is seated, you need to add sealant. This step is messy but crucial.
- Deflate the tire and remove the valve core if you haven’t already.
- Shake the sealant bottle. The particles settle at the bottom.
- Inject sealant through the valve using a syringe, or pour it directly into the tire if you prefer. Most 29” mountain bike tires need 2–4 oz (60–120 ml).
- Reinstall the valve core and tighten with a tool.
- Inflate again to seating pressure.
Tip: Spin and shake the wheel in all directions for 2–3 minutes. This spreads the sealant, covering tiny gaps.
How Much Sealant Is Enough?
Too little sealant means poor sealing and higher risk of flats. Too much can cause imbalance and mess.
| Tire Size | Recommended Sealant (oz/ml) |
|---|---|
| 26"/27.5" x 2.0–2.4" | 2–3 oz / 60–90 ml |
| 29" x 2.0–2.4" | 3–4 oz / 90–120 ml |
| Plus/Enduro Tires | 4–5 oz / 120–150 ml |
If your climate is hot and dry, check sealant levels every month. It can dry out faster than you expect.
Step 5: Final Checks And Adjustments
You’re almost done, but don’t skip these last steps.
- Inspect for leaks. Listen for hissing or look for bubbles. If you see small leaks, spin and shake the wheel more.
- Re-inflate to your preferred riding pressure (usually 25–30 psi for most trail riders).
- Wipe off excess sealant. It can be slippery and attract dirt.
- Let the wheel sit horizontally for 30 minutes, then flip and repeat. This helps sealant cover the sidewalls and bead.
- Test ride at low speed to check for air loss or wobbles.
Non-obvious insight: New tubeless setups sometimes lose a little air overnight. Top up the pressure for your first few rides. The sealant will finish plugging tiny gaps as you ride.
Common Problems And How To Fix Them
Tubeless setups can be fussy. Here’s how to handle the most common issues.
Tire Won’t Seat
- Try more air volume (compressor or CO2)
- Check rim tape for wrinkles or gaps
- Warm the tire in the sun
Persistent Leaks
- Check valve area. Tighten the nut and check for a good seal.
- Re-tape the rim if tape is damaged.
- Add more sealant if it’s dried out.
Tire Burping (losing Air On Hard Impacts)
- Increase tire pressure
- Check for rim dents
- Use a tire insert for aggressive riding
Messy Sealant Everywhere
- Use less on next attempt
- Wipe rim and tire with a rag
- Wear gloves

Credit: www.youtube.com
How Often Should You Top Up Sealant?
Sealant isn’t permanent. Over time, it dries out or gets used up sealing punctures.
- Every 2–3 months: Open the valve and check. Add more if needed.
- After a puncture: Add extra if you used a lot fixing a hole.
- Signs you need more: Tire loses air fast, or you can hear dried lumps inside.
Most riders need to top up sealant 3–4 times per year, depending on climate and riding frequency.
Upgrades And Pro Tips
After you’ve mastered the basics, consider these upgrades for an even better tubeless experience.
- Tubeless-specific floor pump: These have a chamber to blast air quickly, making seating beads easier.
- Tubeless tire inserts: Foam or rubber inserts protect rims and improve ride feel at lower pressures.
- High-quality sealant: Not all sealants are equal. Some seal larger holes, others last longer in hot climates.
- Valve with removable core: Makes adding sealant much easier.
- Tire plugs: For large cuts, a “bacon strip” plug can get you home without a tube.
| Upgrade | Benefit | Estimated Cost |
|---|---|---|
| Tubeless Floor Pump | Faster, easier seating | $50–$150 |
| Tire Inserts | Rim protection, run lower pressure | $50–$100 per wheel |
| Premium Sealant | Better puncture sealing | $10–$20 per bottle |
Mistakes Beginners Often Make
Even careful riders can run into trouble. Here are some traps to avoid:
- Using the wrong rim tape width: Too narrow leaves spoke holes exposed; too wide makes mounting harder.
- Forgetting to check valve tightness: Loose valves leak slowly.
- Skipping bead lubrication: Dry beads are much harder to seat.
- Mounting tire backwards: Check rotation arrows.
- Not cleaning old glue or tape: Dirt and old adhesive create leaks.
A little extra time during setup saves hours of frustration later.
When Should You Use A Tube?
Tubeless isn’t perfect for every ride. Carry a spare tube for emergencies, especially on remote trails. If you slice a tire or damage a rim, sometimes a tube is the only way to get home.
Tip: If you must install a tube, remove the tubeless valve and clean out as much sealant as possible. Sealant can make it slippery and hard to patch later.
Credit: bicyclewarehouse.com
Environmental And Safety Considerations
Some tubeless sealants contain latex or chemicals that can irritate skin and eyes. Wear gloves and wash hands after handling. Dispose of used sealant and tires properly—never pour sealant down the drain.
If you ride in a group, let others know you’re using tubeless. In rare cases, a blow-off at high pressure can be dangerous if someone’s standing close.
How Tubeless Tires Perform On The Trail
After mounting your tubeless tires, you’ll probably notice:
- Better grip on loose and rocky surfaces
- Fewer flats (especially pinch flats)
- Smoother ride at lower pressures
- More confidence on technical descents
A 2021 study in Mountain Bike Action magazine found that riders using tubeless setups averaged 60% fewer flat tires over a season compared to those using tubes.
For most mountain bikers, the difference is clear after a few rides. If you race, ride technical trails, or just want fewer hassles, tubeless is the way to go.
Frequently Asked Questions
How Do I Know If My Rim And Tire Are Tubeless Compatible?
Look for markings like “Tubeless Ready” or “TLR” on your rim and tire. Most modern mountain bikes (2016 and newer) have tubeless-ready rims. If you’re unsure, check your bike’s specifications or visit a shop for advice. For more details, see the Sheldon Brown Tubeless Guide.
Can I Convert Any Rim To Tubeless?
You can convert many rims with tubeless tape and valves, but not all. Older or very narrow rims may not seal well. Rims with large spoke holes or sharp edges should be avoided—they can cut the tape or cause leaks.
For best results, use a true tubeless-ready rim.
How Long Does Tubeless Sealant Last?
Most sealants last 2–6 months depending on temperature and humidity. Check every 2–3 months by removing the valve core and inserting a small stick or zip tie. If it comes out dry, add more sealant.
What Pressure Should I Run In My Tubeless Mountain Bike Tires?
It depends on your weight, tire width, and trail conditions. Most trail riders use 22–30 psi. Heavier riders or rocky trails may need more. Start at 28 psi and lower by 1–2 psi until you find the right balance of grip and protection.
What Should I Do If My Tubeless Tire Won’t Hold Air Overnight?
First, check for leaks around the bead, valve, and rim tape. Try adding more sealant and spinning the wheel. If leaks continue, re-tape the rim and check for punctures. As a last resort, remove the tire and start the process over, looking for hidden damage.
Switching to tubeless tires can transform your mountain bike experience. The first setup takes a little patience, but the payoff is huge: fewer flats, better grip, and more fun on the trail. With the right tools, attention to detail, and a few pro tips, you’ll be riding tubeless with confidence in no time.

Hello Guys! I am John Reese, a professional biker and my hobby is biking! I have been biking for last 12 years and I love using bikes while outing as well. Based on my experiences with the different type of bikes (mountain bikes, road bikes and hybrid bikes); I am sharing my opinion about various bikes so that a beginner can get started right away. Happy reading!