Mountain biking is all about adventure and exploring rough terrains. But if your bike’s front suspension isn’t working well, every ride feels tougher, less fun, and sometimes unsafe. Changing the front suspension is one of the most rewarding upgrades you can do.
It can make your bike handle better, absorb shocks, and give you more control. If you’re new to bike maintenance, this guide will walk you through everything you need to know to change the front suspension on your mountain bike, step by step.
Many riders are nervous about this job, thinking it’s only for experts. Actually, with some basic tools, patience, and attention to detail, you can do it yourself. Along the way, you’ll learn more about your bike and get the satisfaction of improving it with your own hands.
We’ll cover how to choose the right fork, remove your old suspension, install the new one, and fine-tune it for your riding style. You’ll also see common mistakes and how to avoid them, plus practical tips for smoother results.
Understanding Mountain Bike Front Suspension
Before you start, it’s important to understand what front suspension does and why it matters. The front suspension is usually a fork with shock absorbers. It helps your bike absorb bumps, roots, and rocks, keeping your hands comfortable and your wheels gripping the ground.
There are two main types of front suspension:
- Suspension forks – These use springs, air, or oil to absorb shocks. Most modern mountain bikes have these.
- Rigid forks – No suspension. Common on some older or city bikes.
For mountain biking, suspension forks are the standard. They come in different designs based on travel (how much they move up and down), stanchion diameter (the thickness of the fork tubes), and axle type (how the wheel attaches).
Why Change Front Suspension?
You might want to change your front suspension fork if:
- The old fork is damaged or worn out
- You want better performance (more travel, lighter weight, smoother feel)
- You’re upgrading to match your riding style (for example, going from cross-country to downhill)
- You need a fork compatible with a new wheel or brake system
Changing your fork isn’t just about comfort. It can improve handling, safety, and even speed. But choosing the right fork is key.
Choosing The Right Suspension Fork
Picking the right front suspension fork is the most important step. If you get the wrong one, it won’t fit, or your bike might handle poorly. Here’s what you need to know:
Key Factors To Consider
- Travel
- Most mountain bikes use forks with 80–180 mm travel. Cross-country bikes use 80–120 mm; trail bikes use 120–150 mm; downhill bikes use 160–180 mm.
- More travel means the fork absorbs bigger bumps but can feel heavier or less precise.
- Wheel Size
- Forks are made for specific wheel sizes: 26”, 27.5”, or 29”. Match your fork to your bike’s wheel size.
- Steerer Tube Diameter and Length
- Most modern bikes use 1 1/8” straight or tapered steerer tubes.
- Measure your old fork’s steerer tube to make sure the new one fits.
- Axle Type
- Older bikes use quick-release axles (9 mm).
- Newer bikes use thru-axle (15 mm or 20 mm) for more strength.
- Brake Compatibility
- Check if your fork supports disc brakes or rim brakes.
- Most mountain bikes today use disc brakes.
- Stanchion Diameter
- Thicker stanchions (32–36 mm) are stiffer and better for aggressive riding.
- Weight
- Lighter forks are easier to handle but may not be as strong.
- Budget
- Forks range from $100 (basic) to $1,200+ (high-end). Choose what fits your needs and wallet.
Comparing Fork Types
Here’s a quick comparison of fork types by intended use:
| Fork Type | Travel (mm) | Weight (lbs) | Best For |
|---|---|---|---|
| XC (Cross-country) | 80–120 | 3.5–4.5 | Speed, light trails |
| Trail | 120–150 | 4–5 | Mixed terrain |
| Enduro/All-Mountain | 150–170 | 4.5–6 | Rough trails, big drops |
| Downhill | 180–200 | 6–8 | Extreme descents |
Common Mistakes When Choosing
- Picking a fork with the wrong travel for your frame. Too much can make handling awkward.
- Forgetting to check steerer tube size.
- Choosing the wrong axle type for your wheel.
- Ignoring brake compatibility.
If you’re unsure, check your bike’s manual or ask at a local shop. Many fork makers also have online guides to help you match the right fork.
Tools And Supplies Needed
Changing your front suspension fork needs some basic tools. Gather these before you start:
- Allen wrenches (usually 4, 5, and 6 mm)
- Torque wrench (for precise tightening)
- Bike grease
- Crown race setting tool (optional but helpful)
- Rubber mallet
- Steerer tube cutting tool (if your new fork is too long)
- Star nut setter
- Zip ties or cable guides
- Bike stand (optional but makes work easier)
- Measuring tape
- Clean rag
- New suspension fork
- Replacement headset parts (if needed)
- Safety glasses
Many beginners forget the torque wrench. This tool is important because overtightening or undertightening bolts can damage parts or make your bike unsafe.
Preparing Your Bike
Preparation is the key to a smooth fork change. Follow these steps:
- Clean Your Bike – Dirt can hide cracks or damage. Clean the frame and fork area well.
- Remove Front Wheel – Use the correct method for your axle type.
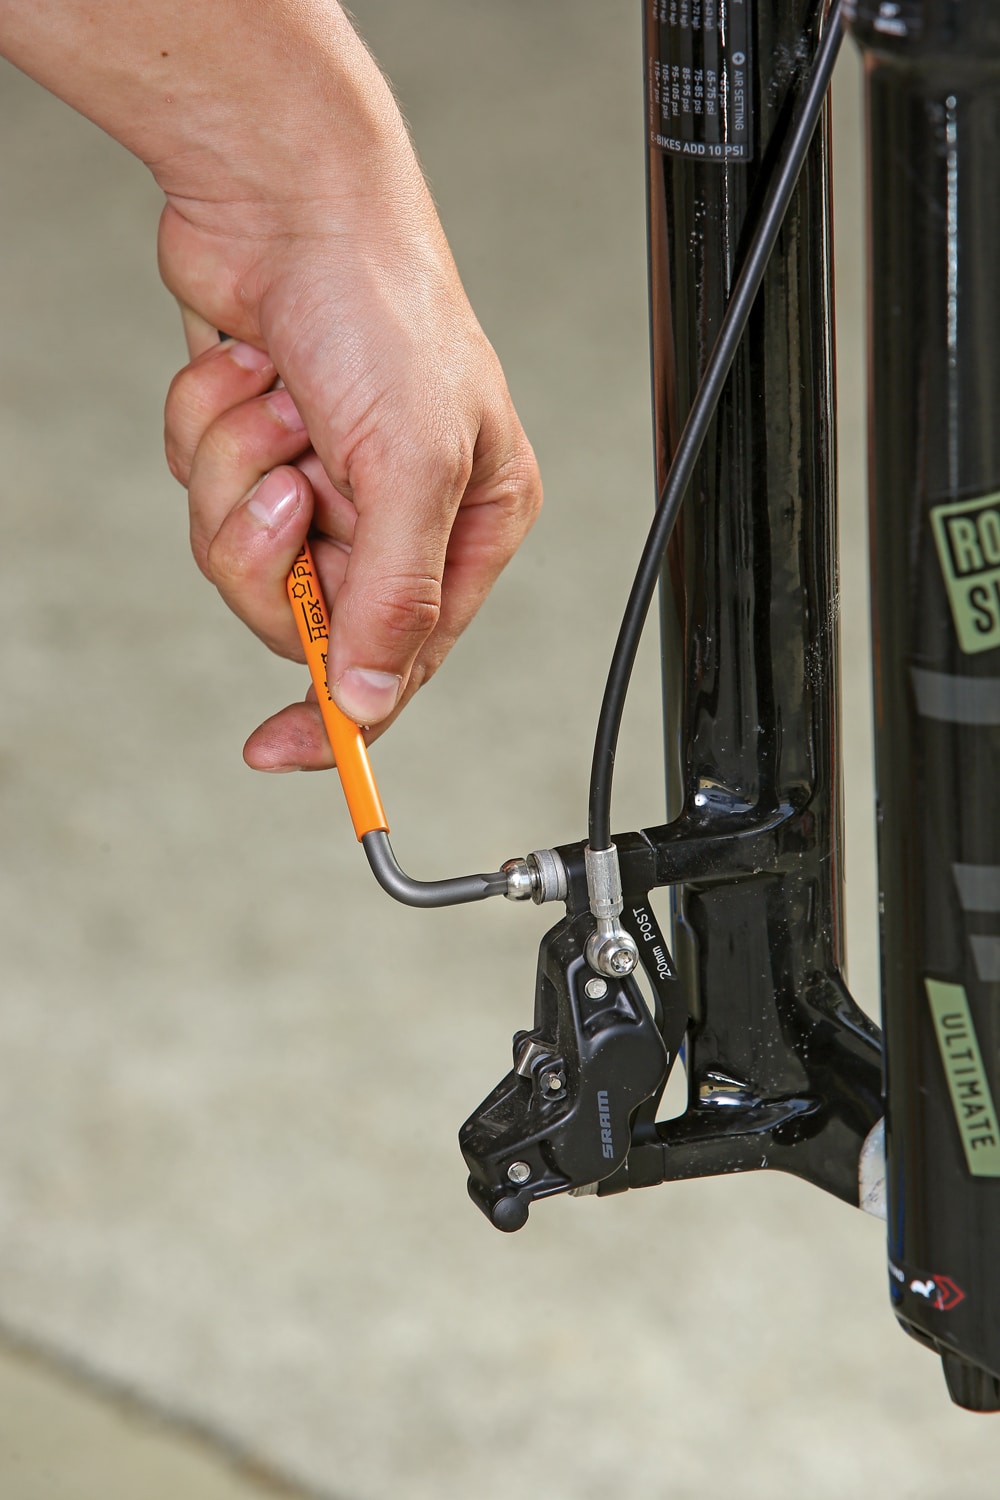
- Remove Brake Caliper – If you have disc brakes, unbolt the caliper and move it aside. Don’t let it hang by the hose or cable.
- Take Photos – Snap a few pictures of your setup. It helps if you forget where cables go.
Example: A Clean Workspace
A rider once tried changing his fork on a cluttered floor. Parts got lost, and he spent hours searching. A clean workspace saves time and reduces stress.
Removing The Old Suspension Fork
Now you’re ready to remove the old fork. This step needs care, so go slowly and check your work.
Step-by-step Removal
- Loosen Stem Bolts
- Use your Allen wrench to loosen the bolts on the stem. Don’t remove them yet.
- Remove Top Cap
- Unscrew the top cap. This releases pressure from the headset.
- Slide Off Stem
- Gently slide the stem off the steerer tube. If it’s stuck, tap lightly with a rubber mallet.
- Remove Spacers
- Take off any spacers above or below the stem. Keep track of their order.
- Slide Out Fork
- Hold the fork and carefully slide it down and out of the frame. Don’t let it drop.
- Inspect Headset Bearings
- Check the bearings for wear or dirt. Clean or replace if needed.
- Remove Crown Race
- The crown race sits at the base of the fork steerer tube. Use a crown race remover or flat screwdriver to pry it off.
Practical Tips
- Lay out removed parts in order. It’s easy to forget spacer placement.
- Take a photo of the headset stack before removing.
- If the fork is stuck, don’t force it. Check for hidden bolts.
Measuring And Preparing The New Fork
Before installing your new fork, you need to make sure it’s the right length and ready to fit your bike.
Measuring Steerer Tube Length
- Measure your old fork’s steerer tube from the base to the tip.
- Mark the same length on your new fork’s steerer tube.
- Add a few millimeters (about 5 mm) if you want to use extra spacers.
Cutting The Steerer Tube
If your new fork’s tube is too long:
- Mark the cut line with tape.
- Use a steerer tube cutting guide and saw. Cut slowly for a clean edge.
- File the cut edge to remove sharp burrs.
Installing The Star Nut
- Place the star nut at the top of the steerer tube.
- Use a star nut setter to tap it down about 15–20 mm.
- If you have a threadless headset, this nut is needed to hold the top cap.
Reinstalling The Crown Race
- Clean the base of the new fork’s steerer tube.
- Slide the crown race onto the fork.
- Use a crown race setter or a pipe to tap it down gently.
Example: Steerer Tube Mistake
A common beginner error is cutting the steerer tube too short. This means you can’t use spacers, and the stem won’t fit well. Always double-check your measurements.
Installing The New Suspension Fork
With your new fork ready, it’s time to install. Follow these steps:
- Insert Fork Into Frame
- Gently slide the fork up into the head tube.
- Replace Bearings and Headset Parts
- Put cleaned bearings and headset cups back in place.
- Add Spacers
- Place spacers as needed. Use the same order as before.
- Slide On Stem
- Slide the stem back onto the steerer tube.
- Install Top Cap and Bolt
- Screw the top cap bolt in. This sets headset preload.
- Tighten Stem Bolts
- Use a torque wrench to tighten the stem bolts to the recommended setting (usually 5–6 Nm).
- Check Alignment
- Make sure the stem is straight with the front wheel. Tighten bolts once aligned.
- Reattach Brake Caliper
- Bolt the brake caliper back onto the fork. Check alignment.
- Reinstall Front Wheel
- Put the wheel back in. Tighten axle bolts or quick-release.
Safety Check
Spin the wheel and squeeze the brakes. Make sure everything is tight and moves smoothly. If you feel play or hear noises, stop and check your work.
Fine-tuning Suspension Settings
Your new fork has settings you can adjust for a better ride. These include:
- Air Pressure (for air forks)
- Use a shock pump to set pressure for your weight. Most forks have a chart for this.
- Rebound
- Controls how fast the fork returns after compressing. Too fast feels bouncy; too slow feels sluggish.
- Compression
- Adjusts how much force is needed to compress the fork. Useful for rough terrain.
- Lockout
- Some forks have a lockout switch. Use it for flat, smooth trails.
Example: Setting Air Pressure
A 170-pound rider might set 70–80 psi in an air fork. Always check the fork manual for recommended settings.
Common Mistakes
- Ignoring the rebound setting. If it’s too fast, your bike can feel unstable.
- Setting air pressure too high. This makes the fork stiff and uncomfortable.
Credit: mbaction.com
Comparing Different Suspension Fork Brands
There are many suspension fork brands. Here’s a comparison of three popular ones:
| Brand | Model | Travel (mm) | Weight (lbs) | Price (USD) | Notable Feature |
|---|---|---|---|---|---|
| RockShox | Reba RL | 120 | 3.8 | 350 | Solo Air, adjustable rebound |
| Fox | Float 34 | 140 | 4.2 | 800 | Kashima coating, 3-position adjustment |
| SR Suntour | XCR32 | 100 | 4.5 | 150 | Budget-friendly, easy setup |
Non-obvious Insights
- Mid-range forks often deliver 90% of the performance of high-end models for half the price.
- Fork upgrades can change the bike’s geometry. Make sure your frame can handle the new fork’s travel.
Practical Tips For A Smooth Fork Change
- Lubricate headset bearings after cleaning. This prevents creaks and extends life.
- Check torque settings twice. Manufacturers list recommended values.
- Test ride in a safe area before hitting rough trails.
- Record fork settings in a notebook. Helpful for future tweaks.
Example: Real-life Upgrade
A rider upgraded from a basic SR Suntour fork to a RockShox Reba. The new fork made the bike smoother on rocky trails, reduced wrist fatigue, and improved control. The process took about two hours, including setup and testing.
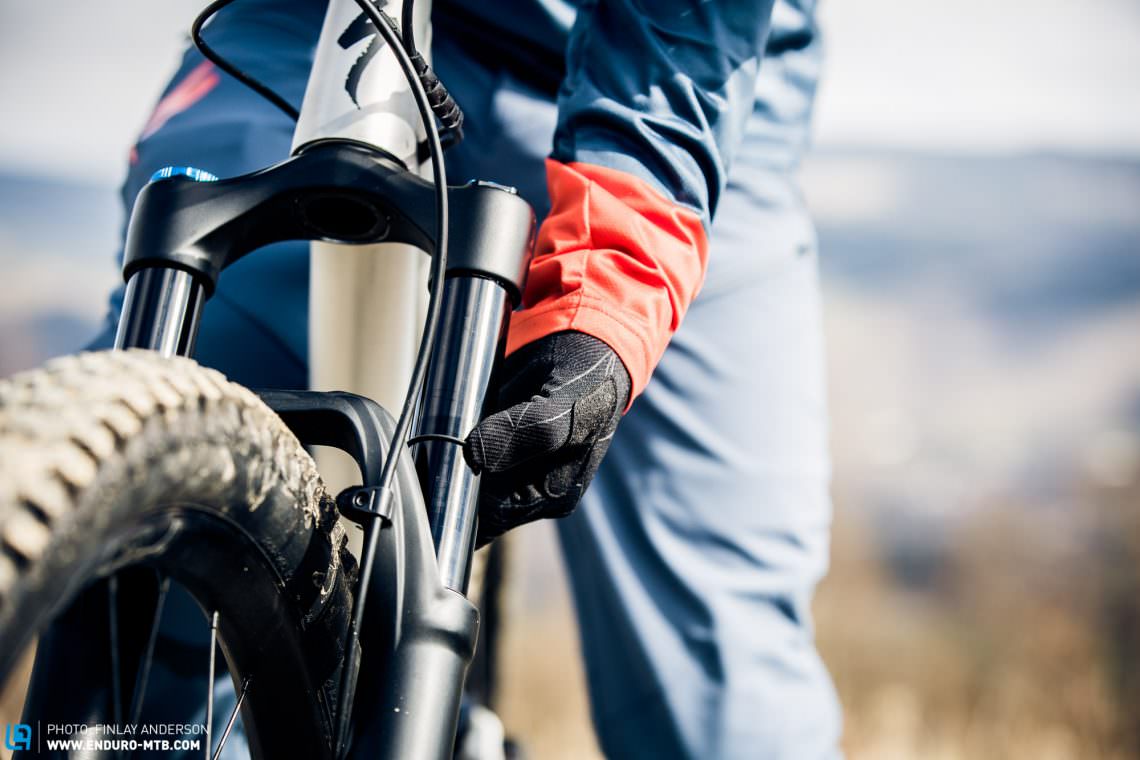
Credit: enduro-mtb.com
Troubleshooting Common Problems
Even with careful work, problems can happen. Here’s how to solve them:
Fork Doesn’t Fit
- Check steerer tube diameter and length.
- If the fork is too long, cut it (see earlier steps).
- If the diameter is wrong, you may need a new headset.
Brakes Won’t Line Up
- Make sure your fork supports your brake type.
- Adjust caliper position or add spacers.
Headset Feels Loose Or Tight
- Adjust top cap preload.
- Check for missing or misaligned spacers.
Front Wheel Rubs
- Check axle alignment.
- Reinstall wheel and tighten properly.
Suspension Feels Odd
- Check air pressure and rebound settings.
- Make sure fork is installed straight.
Safety And Maintenance Tips
Once your new fork is on, regular maintenance keeps it working well:
- Clean after muddy rides. Dirt causes wear.
- Check bolts monthly. Loose bolts can cause accidents.
- Inspect for leaks or damage. Suspension forks use seals; leaks mean service is needed.
- Service fork annually. Even if it feels fine, regular service keeps performance high.
Example: Maintenance Data
Suspension forks last longer with regular care. Studies show forks serviced every year last up to 30% longer and perform better.

Credit: www.inveks.nl
When To Seek Professional Help
If you run into problems or don’t feel confident, a professional bike mechanic can help. Shops have special tools and experience. It’s smart to ask for help if:
- The fork doesn’t fit after careful measurement
- You see cracks or damage on your frame
- Brakes don’t work after install
- You can’t get the suspension settings right
Many shops will install a fork for about $40–$80. Sometimes it’s worth paying for peace of mind.
Environmental Impact And Recycling
Changing forks means dealing with old parts. Don’t just throw them away. Many bike shops recycle old metal parts. Some fork makers offer recycling programs. Keeping old forks out of landfills helps protect the environment.
To learn more about bike part recycling, visit Earth911.
Frequently Asked Questions
How Long Does It Take To Change A Mountain Bike Front Suspension Fork?
For most people, changing a fork takes 1–2 hours. Beginners may need more time, especially when measuring and cutting the steerer tube. Having all tools ready and a clean workspace helps speed up the process.
Can I Use A Fork With More Travel Than My Bike’s Original Fork?
You can, but it’s important to check your bike’s frame specs. Too much travel changes the bike’s geometry and may stress the frame. It can make handling feel odd. Always consult your bike manual or manufacturer.
Do I Need Special Tools To Change The Fork?
Basic tools like Allen wrenches and a torque wrench are enough for most jobs. If you need to cut the steerer tube or install a star nut, specialized tools help. Bike shops often rent out these tools if you don’t want to buy them.
How Do I Set Up The New Suspension Fork For My Weight?
Use a shock pump to set air pressure if your fork is air-based. Check the fork manual for recommended settings by rider weight. Adjust rebound and compression to match your riding style. Write down your settings for future reference.
What Should I Do With My Old Fork?
Recycle it if possible. Many bike shops and recycling centers accept old metal parts. Some riders keep old forks as backups or sell them online. Don’t throw forks in regular trash; they contain valuable materials.
Changing your mountain bike’s front suspension fork is a big upgrade. It’s a job that requires attention, the right tools, and patience, but the rewards are clear. You’ll enjoy a smoother, safer, and more responsive ride. By understanding your bike’s needs, choosing the right fork, and following careful steps, you can make this upgrade confidently.
Remember to test your work, fine-tune your settings, and maintain your fork for best performance. If you ever feel unsure, professional help is always available. Enjoy your new ride and the adventure ahead!

Hello Guys! I am John Reese, a professional biker and my hobby is biking! I have been biking for last 12 years and I love using bikes while outing as well. Based on my experiences with the different type of bikes (mountain bikes, road bikes and hybrid bikes); I am sharing my opinion about various bikes so that a beginner can get started right away. Happy reading!