Washing your mountain bike is not just about making it look good. Dirt, mud, and grit can damage your bike’s moving parts and shorten its life. Regular cleaning keeps your ride smooth, prevents expensive repairs, and helps you spot any issues early.
Whether you’re a beginner or you’ve been riding for years, learning how to wash a mountain bike properly is essential. This guide will walk you through every step, from tools to drying, and share some insider tips that even experienced riders sometimes miss.
Why Washing Your Mountain Bike Matters
Mountain bikes are made for rough terrain. After every ride, mud, dust, and grime can stick to the frame, chain, and gears. If not removed, these particles cause wear and tear on your bike. Dirt can corrode metal, clog bearings, and make shifting harder. A clean bike not only performs better but also lets you check for cracks, rust, or loose bolts. Surprisingly, regular cleaning can extend your bike’s lifespan by up to 20%, according to industry estimates.
Essential Tools And Supplies
Before you start, gather the right tools. Using proper equipment makes cleaning easier and safer for your bike.
- Bucket of water – Warm water works best for loosening mud.
- Bike-specific cleaner – Avoid dish soap; bike cleaners protect paint and parts.
- Soft-bristle brush – For frame and wheels.
- Stiff-bristle brush – For drivetrain and tires.
- Chain cleaning tool – Keeps your chain spotless.
- Degreaser – Removes oil and grease from moving parts.
- Microfiber cloths – For drying and wiping.
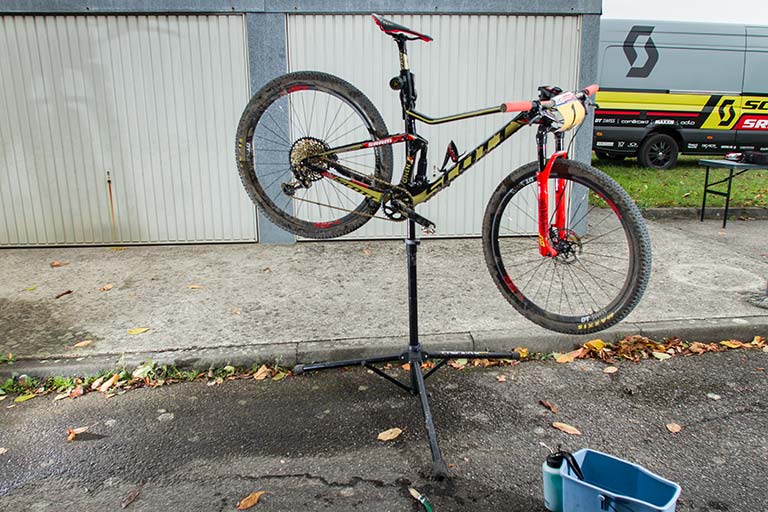
- Bike stand – Optional, but makes cleaning easier.
- Lubricant – For chain and moving parts after cleaning.
- Gloves – Protects your hands from chemicals.
Having these items ready will save you time and prevent damage from using the wrong tools.

Credit: mbaction.com
Preparing Your Bike For Washing
You don’t need to strip your bike completely. However, a few simple steps before washing can make the process smoother and safer.
- Shift gears to the smallest chainring and cog. This exposes the dirtiest parts and makes cleaning easier.
- Remove any electronics (like bike computers or lights) to avoid water damage.
- If you have a dropper seatpost, lower it to protect the seal.
- Plug the frame holes (if your bike has them) with tape or rubber plugs to stop water from entering.
These steps help protect sensitive parts and avoid electrical issues.
Where To Wash Your Bike
Location matters. Washing your bike in the wrong place can cause problems for you and the environment.
- Choose a spot with good drainage—like a driveway or garden.
- Avoid areas where water runoff can carry soap or degreaser into streams or plants.
- Never wash your bike inside unless you use minimal water.
If you live in an apartment, use a portable bike stand and clean over a tarp to catch water and dirt.
Step-by-step Guide: How To Wash A Mountain Bike
Washing a mountain bike is more than hosing it down. Follow these steps for the best results.
Step 1: Rinse Off Loose Dirt
Use a gentle stream of water to remove mud and dust. Avoid high-pressure sprays, as they can force water into bearings and seals. Start from the top and work down.
Step 2: Apply Bike Cleaner
Spray a bike-specific cleaner on the frame, wheels, and components. Let it sit for 2-3 minutes to break down grime. Do not let it dry—this can leave stains.
Step 3: Scrub The Frame And Wheels
Use a soft-bristle brush for the frame and wheels. Work in small sections, moving from top to bottom. Don’t scrub too hard, as this can scratch paint.
Step 4: Clean The Drivetrain
The drivetrain (chain, cassette, derailleur) is usually the dirtiest part.
- Apply degreaser to the chain, cassette, and derailleur.
- Use a stiff-bristle brush or a chain cleaning tool for the chain.
- Rotate pedals to move the chain through the tool.
This removes old oil, mud, and grit that can cause shifting problems.
Step 5: Rinse Again
Once scrubbing is done, rinse everything with a gentle stream. Make sure all cleaner and degreaser are washed off.
Step 6: Dry Your Bike
Use microfiber cloths to dry the frame, wheels, and components. Pay attention to hidden spots where water can sit, like around the bottom bracket and headset. Let your bike air dry for 10–15 minutes.
Step 7: Lubricate Moving Parts
After drying, apply bike lubricant to the chain and other moving parts. Wipe off any excess with a clean cloth. Lubrication prevents rust and keeps your bike running smoothly.
Step 8: Reinstall Accessories
Put back any electronics or accessories you removed before washing. Check that everything is working properly.
Comparing Bike Cleaning Products
Not all cleaning products are equal. Some protect your bike’s finish, while others can cause damage. Here is a comparison of popular bike cleaners:
| Product Name | Type | Safe for Paint | Price (USD) | Eco-Friendly |
|---|---|---|---|---|
| Muc-Off Bike Cleaner | Liquid Spray | Yes | $15 | Yes |
| Finish Line Bike Wash | Liquid Spray | Yes | $12 | Yes |
| Simple Green | Concentrate | No | $10 | No |
| Purple Slice Cleaner | Liquid Spray | Yes | $18 | Yes |
Using a bike-specific cleaner is worth the extra cost. Some household cleaners can damage paint or seals.
Tips For Cleaning Mountain Bike Tires And Suspension
Mountain bike tires and suspension need special care. Mud and debris can hide in the tread and around suspension seals.
- Use a stiff-bristle brush for tires. Scrub the tread to remove rocks and mud.
- For suspension forks and shocks, avoid spraying water directly onto seals. Wipe gently with a damp cloth.
- Never use degreaser on suspension components—it can damage seals.
A common mistake is forgetting to clean under the fork arch or around the rear suspension pivot. Dirt in these areas can cause creaking and affect performance.
Mistakes To Avoid When Washing Your Mountain Bike
Many riders make mistakes that can harm their bike. Here are some of the most common:
- Using high-pressure water – Forces water into bearings, causing rust.
- Scrubbing with rough brushes – Scratches paint and carbon fiber.
- Using household cleaners – Can damage seals and remove protective coatings.
- Over-lubricating the chain – Excess oil attracts dirt and causes buildup.
- Not drying thoroughly – Water left in hidden areas can cause corrosion.
Avoiding these mistakes will keep your bike in top shape and save money on repairs.
How Often Should You Wash Your Mountain Bike?
How often you wash your bike depends on where and how often you ride.
- After muddy rides: Always wash after riding in mud or wet conditions.
- After dry, dusty rides: Wipe down the frame and clean the chain every few rides.
- Regular maintenance: Deep clean every 2–3 weeks if you ride often.
A study by the International Mountain Biking Association found that bikes cleaned weekly had 30% fewer mechanical issues compared to those cleaned monthly.
Drying And Storing Your Mountain Bike
After cleaning, proper drying and storage are key.
- Let your bike air dry for at least 15 minutes.
- Store your bike indoors or under shelter to avoid moisture and sun damage.
- Hang your bike if possible—this prevents tire flat spots.
If you store your bike outside, use a bike cover to protect it from rain and dust.

Credit: www.youtube.com
Cleaning The Chain: A Deeper Look
The chain is the heart of your bike’s drivetrain. Keeping it clean boosts efficiency and prevents wear.
- Use a chain cleaning tool for best results.
- Apply degreaser, run the chain through the tool, then rinse.
- Dry the chain completely before applying lubricant.
Many riders forget to wipe the chain after lubing. This leaves excess oil, which attracts dirt.
Comparing Lubricants For Mountain Bikes
There are different types of chain lubricants. Choosing the right one depends on your riding conditions.
| Lube Type | Best For | Durability (Rides) | Price (USD) | Easy to Apply |
|---|---|---|---|---|
| Wet Lube | Muddy/Wet Conditions | 50 | $8 | Yes |
| Dry Lube | Dry/Dusty Conditions | 30 | $7 | Yes |
| Ceramic Lube | All Conditions | 70 | $15 | No |
Wet lube is sticky and lasts longer in rain, but attracts dirt. Dry lube is cleaner but needs frequent reapplication. Ceramic lube is expensive but offers the best protection.
Advanced Tips For A Professional-level Wash
Want your bike to look and feel new? Try these tips:
- Use compressed air to blow out water from tight spaces.
- Apply frame polish after washing for extra shine and protection.
- Check bolts and quick releases while cleaning—loose bolts are easier to spot on a clean bike.
- Clean brake rotors with isopropyl alcohol—avoid oily cleaners.
Many pro mechanics recommend rotating the pedals and wheels during cleaning to reach hidden spots.
Mountain Bike Cleaning Myths
There are some myths about washing mountain bikes. Here are the facts:
- Myth: “Washing your bike too often is bad.”
Fact: Regular cleaning prevents damage. It’s only harmful if you use bad techniques or products.
- Myth: “High-pressure water cleans better.”
Fact: It can push dirt into bearings and cause damage.
- Myth: “Lubricant on the brakes is good.”
Fact: Never get lube on the brakes—it ruins stopping power.
Knowing the facts will help you avoid problems and keep your bike running smoothly.
How Cleaning Helps You Spot Problems Early
Washing your bike is a chance to check for hidden issues.
- Look for cracks in the frame.
- Check for rust on bolts and chain.
- Inspect tires for cuts or embedded glass.
- Feel for loose spokes or wobbly wheels.
Finding problems early means safer rides and cheaper fixes. Many riders only discover issues after washing, when dirt no longer hides the damage.
Eco-friendly Mountain Bike Cleaning
You can clean your bike without harming the environment.
- Use biodegradable cleaners.
- Dispose of dirty water and degreaser safely—never pour down drains.
- Clean over a tarp to catch runoff.
According to IMBA, using eco-friendly products helps protect trails and local wildlife.
Credit: www.scott-sports.com
Frequently Asked Questions
How Long Does It Take To Wash A Mountain Bike?
Washing a mountain bike usually takes 30–45 minutes. If your bike is very muddy or you do a deep clean, it can take up to an hour. Drying and lubricating add another 10–15 minutes.
Can I Use A Pressure Washer On My Mountain Bike?
It’s best to avoid pressure washers. They can force water into bearings, seals, and suspension, causing rust and damage. Use a gentle hose or bucket of water instead.
What’s The Best Way To Clean The Chain?
The chain cleaning tool is the best option. Combine it with a bike-specific degreaser, run the chain through, rinse, dry, and apply lubricant. Wipe off excess lube to prevent dirt buildup.
How Often Should I Lubricate The Chain After Washing?
Lubricate the chain after every wash. If you ride often, check the chain every 2–3 rides and add lube as needed. Too much lube attracts dirt, so wipe off any excess.
Can I Use Household Cleaners To Wash My Mountain Bike?
It’s not recommended. Many household cleaners are too harsh and can damage paint or seals. Use a bike-specific cleaner for best results and to protect your bike’s finish.
Keeping your mountain bike clean is more than just a chore—it’s smart maintenance. With the right tools, products, and techniques, you protect your investment and enjoy safer, smoother rides. Even small details, like drying hidden spots and checking for loose parts, make a big difference.
If you follow these steps and avoid common mistakes, your mountain bike will last longer and perform better, whether you ride for fun or competition.

Hello Guys! I am John Reese, a professional biker and my hobby is biking! I have been biking for last 12 years and I love using bikes while outing as well. Based on my experiences with the different type of bikes (mountain bikes, road bikes and hybrid bikes); I am sharing my opinion about various bikes so that a beginner can get started right away. Happy reading!