Changing a tubeless mountain bike tire can seem like a big job, especially if you’re new to tubeless systems. But with the right steps, tools, and a bit of patience, you can handle this task at home and save both time and money.
Tubeless tires are popular because they lower the risk of flats, let you run lower pressures, and improve grip on tough trails. If you ride often, knowing how to change a tubeless tire is a must-have skill.
This guide will walk you through everything you need to know—from removing the old tire to installing the new one, handling sealant, and common mistakes to avoid. You’ll also find data, tips, and comparisons to help you make the best choices for your bike.
Whether you’re upgrading your tire for better traction or just fixing a puncture, you’ll have clear instructions for every step. Let’s get started.
Understanding Tubeless Mountain Bike Tires
Tubeless mountain bike tires are designed to work without an inner tube. Instead, the tire, rim, and valve create a tight seal, and a liquid sealant inside the tire helps prevent air leaks and seals small punctures automatically.
Benefits Of Tubeless Tires
- Fewer flats: The sealant fills small holes as they happen.
- Lower pressure: You can use less air, improving grip and comfort.
- Less weight: No tube means a lighter wheel.
- Better performance: Traction and handling are improved on rough terrain.
Key Differences: Tubeless Vs. Tube-type
Here’s a quick comparison to show how tubeless tires stand out:
| Feature | Tubeless | Tube-Type |
|---|---|---|
| Flat Protection | High (self-sealing) | Low (punctures common) |
| Pressure Range | Lower (16–25 psi) | Higher (22–35 psi) |
| Weight | Lighter (no tube) | Heavier (tube adds weight) |
| Maintenance | Moderate (sealant needs checking) | Low (simple tube swap) |
| Cost | Higher upfront | Lower upfront |
Most modern mountain bike wheels are tubeless-ready, but not all are compatible. Always check your rim and tire labels before starting the change.
Preparing To Change A Tubeless Tire
Before you get your hands dirty, preparation is key. Missing a step or using the wrong tool can turn a simple job into a headache.
Essential Tools And Supplies
You’ll need these items:
- Tire levers (preferably plastic to avoid rim damage)
- Tubeless sealant (2–4 oz per tire)
- Tubeless-compatible tire (make sure it fits your rim)
- Tubeless valve (Presta or Schrader, depending on rim)
- Air compressor or tubeless pump (for a strong burst of air)
- Rag and gloves (sealant can be messy)
- Soapy water (helps with tire seating)
- Floor pump (for pressure adjustment)
- Valve core remover (optional but helpful)
- Bucket or tray (to catch old sealant)
Safety And Cleanliness
Sealant contains chemicals that can irritate skin and eyes. Always wear gloves, and work in a well-ventilated area. Keep a rag handy for spills.
Checking Rim And Tire Compatibility
Not all rims work with tubeless tires. Look for these signs:
- Tubeless-ready label: Printed on rim or tire sidewall.
- Smooth rim bed: No sharp edges or spoke holes exposed.
- Pre-installed tubeless tape: Seals the spoke holes (yellow or blue tape is common).
If your rim isn’t tubeless-ready, don’t attempt a tubeless setup—air leaks will be constant and unsafe.
Credit: www.rei.com
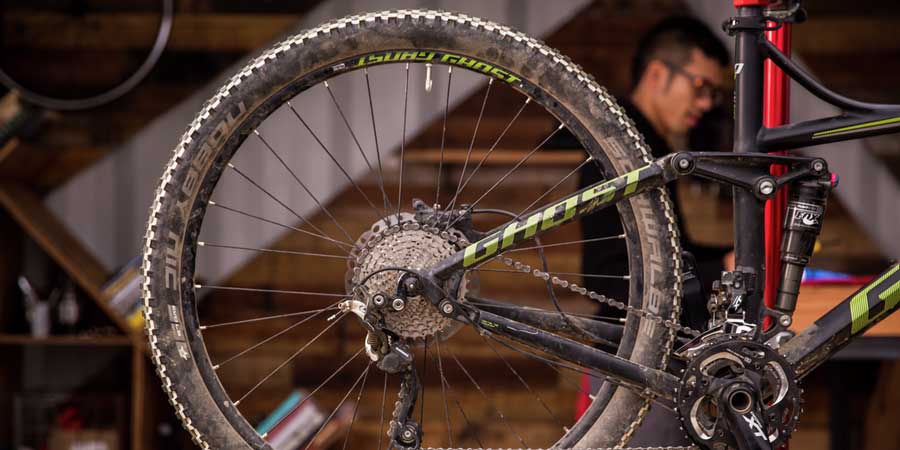
Removing The Old Tubeless Tire
This step is a bit different from removing a regular tire. Tubeless tires often stick tightly to the rim, and old sealant can make things slippery.
Step-by-step Removal
1. Deflate The Tire Completely
Unscrew the valve cap, press the valve, and let all air out. Remove the valve core with a tool if you have one.
2. Break The Tire Bead
Push the tire sidewall away from the rim. Work your fingers around the wheel. If it’s stuck, use tire levers gently.
3. Lift One Side Of The Tire Off The Rim
Insert a tire lever under the bead and lever it up. Slide the lever along the rim, lifting the bead as you go.
4. Remove The Second Bead
Once one side is off, pull the other bead over the rim edge. The tire will come free.
5. Clean Out Old Sealant
Pour remaining sealant into your tray. Wipe the rim and tire with a rag. Check for sticky spots—these can cause problems when seating the new tire.
Practical Tips
- Stubborn beads: Warm the tire with a hairdryer or leave it in the sun for 10 minutes.
- Avoid metal levers: They can scratch rims and damage tubeless tape.
Inspecting Rim And Valve
Before installing the new tire, check the rim and valve for wear, damage, or leaks. Many beginners skip this, but it’s crucial for a strong seal.
Rim Tape
Tubeless tape seals spoke holes and keeps air inside. Look for:
- Wrinkles or gaps: Air leaks easily here.
- Damage: Replace tape if it’s torn or peeling.
If needed, apply new tape. Start at the valve hole, overlap by about 10 cm, and press firmly with your thumb as you go.
Valve Check
Remove and inspect the valve:
- Cracks or bends: Replace with a new valve.
- Rubber grommet: Should be soft and uncracked.
- Clogged valve: Rinse with water or replace.
A clean, well-seated valve is essential for holding air.
Installing The New Tubeless Tire
Here’s where careful technique matters. The biggest mistake is rushing—take your time for the best results.
Step-by-step Installation
1. Install One Bead Of The Tire
Place the tire on the rim, starting at the valve. Push one side (bead) onto the rim with your hands.
2. Add Tubeless Sealant
With one bead on, pour 2–4 oz of sealant into the tire. Rotate the tire so the sealant spreads evenly.
3. Install The Second Bead
Push the other bead onto the rim. Use your hands for most of it, tire levers only for the last section.
4. Check Tire Position
The tire should sit evenly on the rim. If not, go back and adjust.
5. Inflate The Tire Quickly
Use an air compressor or tubeless pump for a strong air burst. The bead should “pop” into place. If you hear a loud snap, that’s normal.
6. Inspect For Leaks
Spray soapy water around the bead and valve. Look for bubbles—these show air escaping.
7. Adjust Air Pressure
Pump to your desired pressure (usually 16–25 psi for mountain biking).
Common Pitfalls
- Sealant spills: Pour slowly and rotate the tire immediately.
- Bead won’t seat: Try more air or reposition the tire. Use soapy water for lubrication.
- Persistent leaks: Check rim tape and valve. Reseal if needed.
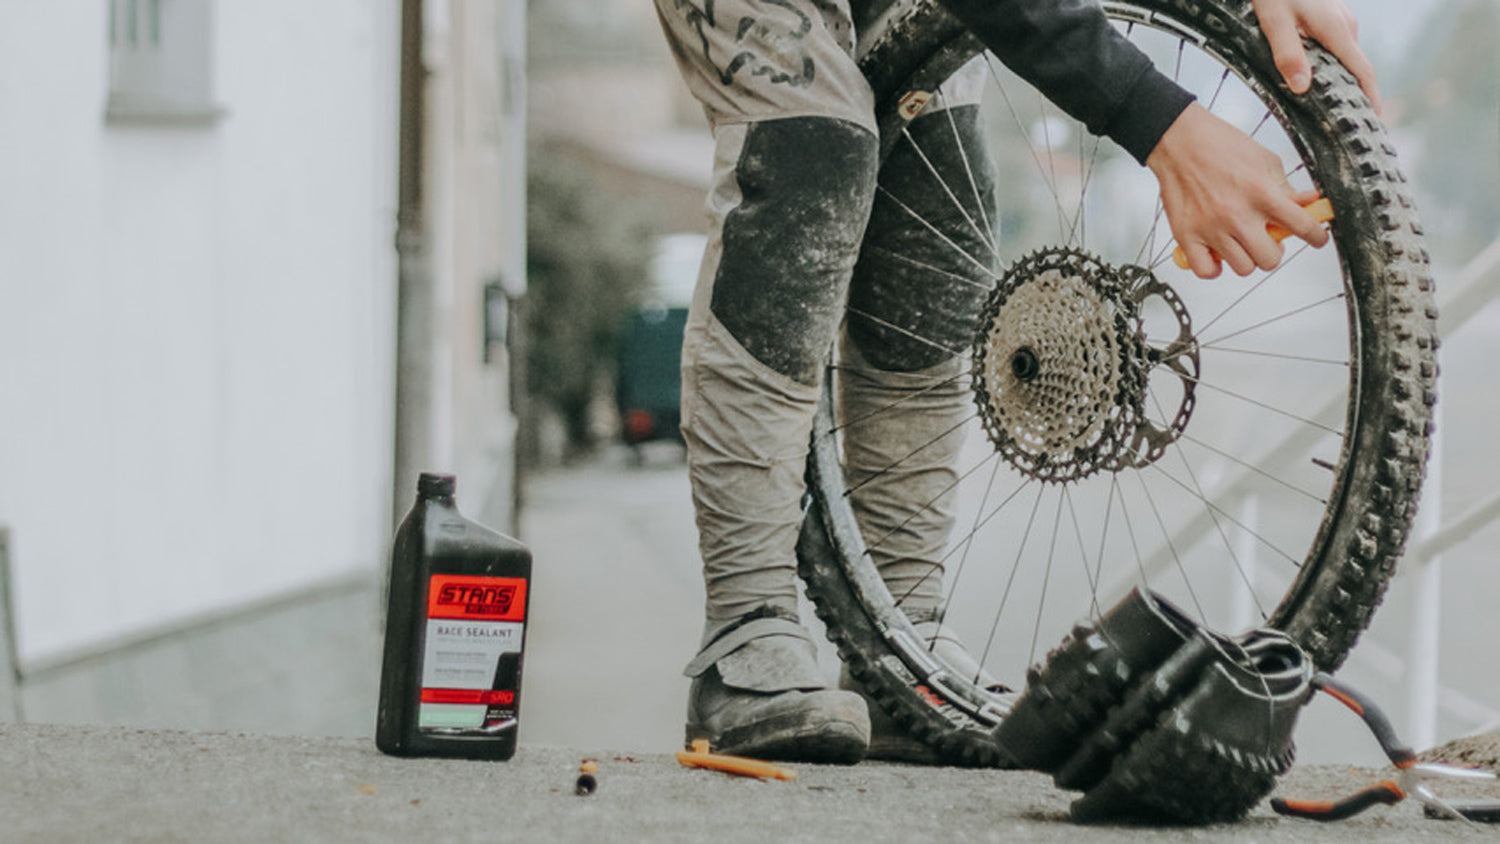
Tubeless Tire Sealant: What You Need To Know
Sealant is the magic inside tubeless tires. It prevents flats, seals punctures, and keeps air in. But not all sealants are equal.
Types Of Tubeless Sealant
Most sealants use either latex or synthetic formulas. Here’s a comparison:
| Sealant Type | Performance | Longevity | Common Brands |
|---|---|---|---|
| Latex-based | Fast sealing | 2–6 months | Stan’s, Orange Seal |
| Synthetic | Slower, but less clumping | 4–8 months | Finish Line, Caffelatex |
How Much Sealant?
Most mountain bike tires need 2–4 oz (60–120 ml) per tire. Wider tires or rough riding may require more.
Checking And Replacing Sealant
Sealant dries out over time, especially in hot climates. Check every 3–6 months by:
- Removing the valve core and dipping a zip tie inside.
- If it comes out dry, add more sealant.
Neglecting sealant is a common beginner mistake—don’t skip this step.
Seating The Tire Bead: Getting It Right
Seating the bead is the trickiest part for many riders. The bead must snap into the rim’s edge for an airtight seal.
Tools That Help
- Air compressor: Delivers a quick, strong air burst.
- Tubeless pump: Has a chamber for high-pressure air release.
- Soapy water: Lubricates the tire bead.
Step-by-step Bead Seating
1. Inflate Rapidly
Pump air in quickly—slow pumps may not work.
2. Listen For Pops
Each “pop” means part of the bead has seated.
3. Inspect Bead Line
Look for an even line around the rim. If it’s uneven, deflate, reposition, and try again.
Troubleshooting
- Stubborn beads: Use more soapy water or try a different pump.
- Leaking air: Check rim tape, valve, and bead for gaps.
Most tires seat easily with the right pump. If you struggle, a local bike shop can help.
Adjusting Tire Pressure And Testing
Tubeless tires allow lower air pressures for better grip. But too low can cause “burping” (air escaping) or rim damage.
Pressure Guidelines
Use these ranges as a starting point:
| Tire Width | Rider Weight | Recommended Pressure |
|---|---|---|
| 2.1–2.3 inches | 120–160 lbs | 18–22 psi |
| 2.4–2.7 inches | 160–200 lbs | 20–25 psi |
| 2.8–3.0 inches (plus) | 200+ lbs | 22–28 psi |
Testing For Leaks
Spin the wheel and listen for hissing. Spray soapy water around the bead and valve. If bubbles appear, fix the leak before riding.
Fine-tuning
Ride around your yard or street. Check for:
- Burping: Lower pressure too much? Increase by 2 psi.
- Squirm: Tire feels loose? Increase pressure.
- Harsh ride: Pressure too high? Lower slightly.
Credit: bicyclewarehouse.com
Cleaning Up And Maintenance
Changing a tubeless tire is messy, but proper cleanup keeps your bike running smoothly.
Disposal
- Old sealant: Pour into a sealed container—never down the drain.
- Used tire: Recycle if possible, or keep as a backup.
Maintenance Tips
- Check sealant every 3–6 months.
- Inspect tire sidewalls for cuts.
- Keep rim tape clean and flat.
Many riders forget to check sealant until a flat happens. Set a reminder to avoid unwanted surprises.
Common Mistakes To Avoid
Even experienced riders can slip up. Here are mistakes beginners often make:
1. Skipping Rim Tape Check
Always inspect for gaps or damage.
2. Not Using Enough Sealant
Under-filled tires lose air and don’t self-seal punctures.
3. Inflating Too Slowly
Quick air bursts are needed for bead seating.
4. Using Wrong Tire Size
Double-check width and diameter for your rim.
5. Ignoring Valve Maintenance
Dirty or damaged valves cause leaks.
6. Over-tightening Valve Nut
Can crack the rim or damage the valve.
7. Letting Sealant Dry Out
Replace it regularly to keep your tires working.
Advanced Tips For Smooth Tubeless Tire Changes
Once you master the basics, these advanced tips help you work faster and get better results.
- Pre-stretch new tires: Mount the tire on the rim without sealant, inflate, and leave for 24 hours. This makes the final install easier.
- Use a tire booster: Devices like the Airshot deliver a powerful air burst for stubborn beads.
- Rotate sealant regularly: Spin the wheel every week to keep sealant coating the inside.
- Carry a tubeless repair kit: For fixing larger punctures on the trail.
- Keep valve cores clean: Remove and rinse after every tire change.
These steps help avoid headaches and keep your tires performing at their best.
Real-world Example
Imagine you’re on the trail and your tubeless tire punctures. With a tubeless repair kit, you can plug the hole, spin the wheel, and continue riding—no tube needed. In a survey by Singletracks, 67% of mountain bikers said tubeless tires saved them from at least two flats per season.
This shows why learning the change process matters.

Credit: www.youtube.com
Frequently Asked Questions
How Often Should I Replace Tubeless Tire Sealant?
Most brands recommend replacing sealant every 3–6 months. Check more often in hot or dry climates, as sealant dries faster.
Can I Use A Regular Floor Pump For Seating The Bead?
Sometimes, yes. But for tough tires, a tubeless pump or air compressor is much more effective. The strong burst of air helps snap the bead into place.
Is It Possible To Use A Tube In A Tubeless Tire?
Yes. If you have a major puncture, you can put a tube in a tubeless tire. Remove the tubeless valve first. This is a good backup plan.
What Are Signs Of A Bad Rim Tape Job?
If you see bubbles while testing with soapy water, or your tire loses air quickly, rim tape might be the issue. Wrinkles, gaps, or torn tape are common problems.
Where Can I Learn More About Tubeless Tire Technology?
The Wikipedia bicycle tire page offers detailed information on tire types, history, and technology.
Changing a tubeless mountain bike tire is a skill worth learning. With careful preparation, the right tools, and regular maintenance, you’ll enjoy fewer flats, better ride quality, and more confidence on the trails. Remember these steps, and you’ll be ready for any tire trouble—on or off the mountain.

Hello Guys! I am John Reese, a professional biker and my hobby is biking! I have been biking for last 12 years and I love using bikes while outing as well. Based on my experiences with the different type of bikes (mountain bikes, road bikes and hybrid bikes); I am sharing my opinion about various bikes so that a beginner can get started right away. Happy reading!