Mountain biking is more than just riding trails—it’s about freedom, adventure, and sometimes, a little bit of problem solving. One of the biggest upgrades for mountain bikers is switching to tubeless tires. Tubeless setups offer better grip, fewer flats, and smoother rides. But to keep your tubeless tires working well, you need to add sealant regularly. Sealant is what keeps your tires airtight and helps seal small punctures as you ride. If you’re new to this, adding sealant might feel tricky, but with clear steps, anyone can do it at home.
Let’s break down how to add sealant to tubeless mountain bike tires—from what you’ll need, to step-by-step instructions, and tips you won’t find in most guides. Whether you’re topping up sealant or starting fresh, this guide will help you get it right.
Why Tubeless Sealant Matters
Tubeless tires rely on sealant inside the tire. The sealant coats the inside and fills tiny holes or punctures. Without it, air escapes, and your tires won’t stay inflated. Here’s why sealant is essential:
- Prevents punctures from thorns, nails, and sharp rocks
- Maintains air pressure over time
- Helps you ride longer without flat tires
Most riders use between 60–120 ml (2–4 oz) of sealant per tire, depending on tire size. It’s best to check and refill sealant every 3–6 months.
What You Need Before Adding Sealant
Before you start, gather the right tools and supplies. Having everything ready will make the job smoother.
- Tubeless sealant (like Stan’s NoTubes, Orange Seal, or others)
- Valve core remover tool
- Syringe or sealant injector (optional, but helpful)
- Air pump (hand pump or compressor)
- Rags or paper towels
- Gloves (sealant can be messy)
- Tire lever (if you need to remove the tire)
- Tubeless-ready tires and wheels
If you’re just topping up sealant, you won’t need to remove the tire. For a full replacement, you may need to unseat the tire from the rim.
Credit: enduro-mtb.com
Types Of Tubeless Sealant
Not all sealants are the same. The right choice depends on your climate, riding style, and tire size. Here’s a quick comparison:
| Sealant Brand | Best For | Seal Time | Longevity |
|---|---|---|---|
| Stan’s NoTubes | All-around, dry climates | Fast | 3–6 months |
| Orange Seal | Cold weather, high puncture areas | Medium | 4–6 months |
| Slime | Budget, occasional riders | Slow | 2–4 months |
| Effetto Mariposa | Race, performance | Fast | 2–4 months |
For most mountain bikers, Stan’s NoTubes or Orange Seal are great choices. They seal quickly and last longer.
How Much Sealant Should You Use?
The amount depends on tire size and how often you ride. Too little, and you risk leaks. Too much, and it can get messy or heavy.
| Tire Size | Recommended Sealant | Top-Up Frequency |
|---|---|---|
| 26” x 2.1–2.4” | 60–80 ml (2–2.7 oz) | Every 4 months |
| 27.5” x 2.2–2.6” | 80–100 ml (2.7–3.4 oz) | Every 3–5 months |
| 29” x 2.3–2.6” | 100–120 ml (3.4–4 oz) | Every 3–6 months |
| Plus/ Fat Bike Tires | 120–150 ml (4–5 oz) | Every 2–4 months |
If you ride in hot climates, sealant dries out faster—check it more often.
Credit: us.muc-off.com
Step-by-step: Adding Sealant To Tubeless Mountain Bike Tires
Let’s go through the process in detail. There are two main ways: through the valve stem or by removing part of the tire.
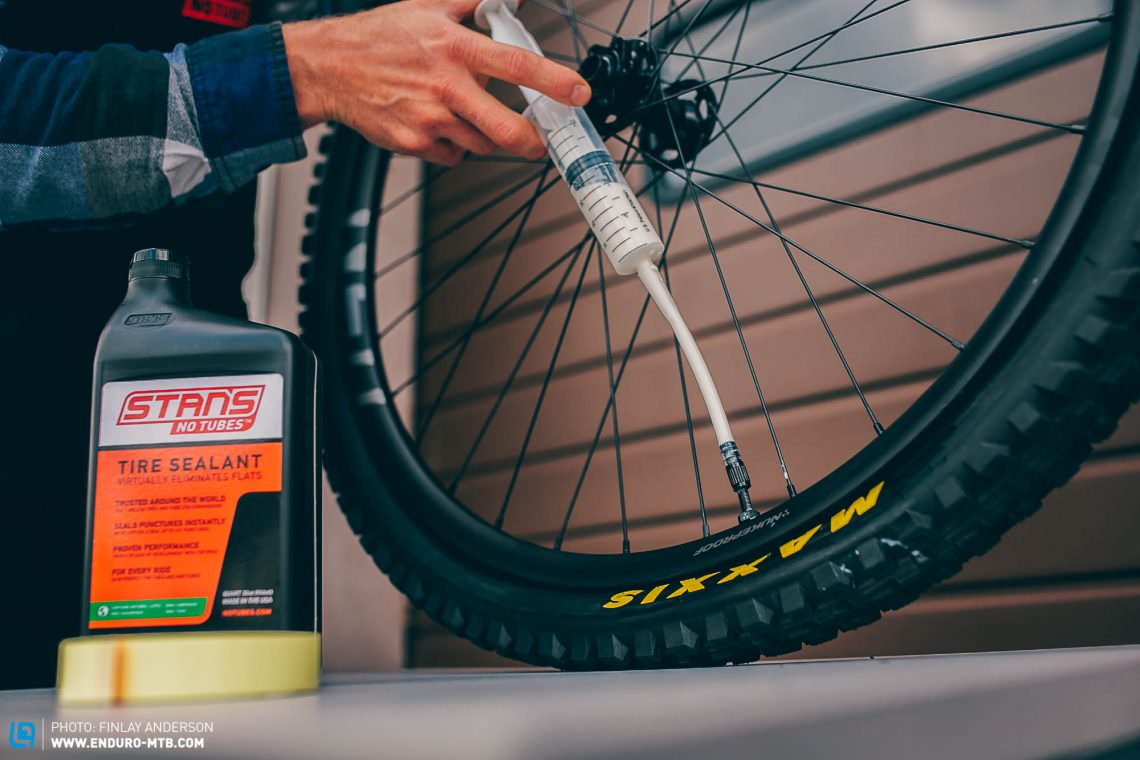
Adding Sealant Through The Valve Stem
This is the easiest method for topping up sealant.
- Rotate the wheel so the valve is at the bottom.
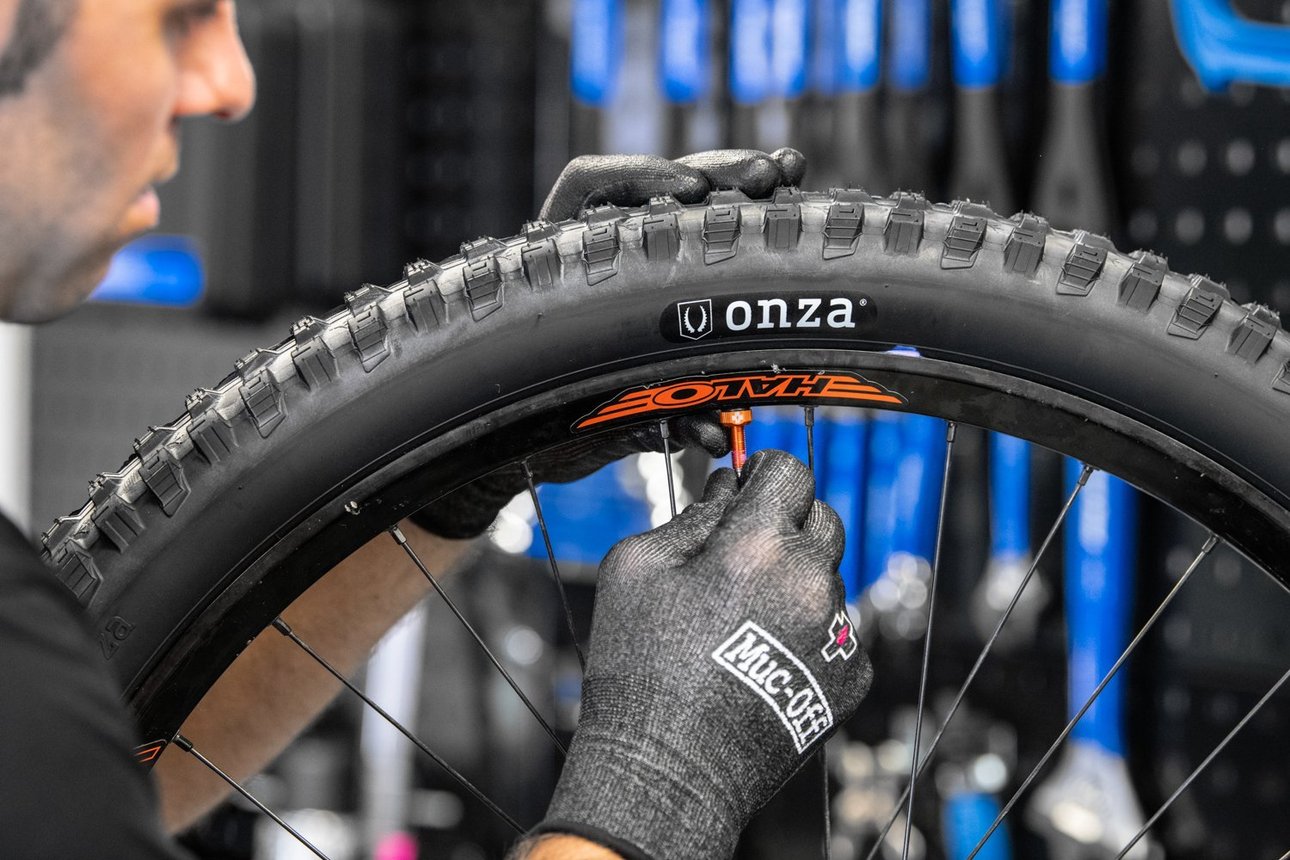
- Remove the valve cap and use the valve core remover to unscrew the valve core.
- Attach the syringe or injector filled with the correct amount of sealant.
- Slowly inject sealant into the valve stem. If the valve clogs, use a thin wire to clear it.
- Reinstall the valve core tightly.
- Inflate the tire to your normal riding pressure.
- Spin and shake the wheel to spread sealant inside.
This method avoids removing the tire and makes less mess.
Adding Sealant By Removing The Tire
If you’re starting fresh or need to replace old sealant, this method works best.
- Deflate the tire completely.
- Use tire levers to unseat one side of the tire from the rim.
- Clean out old sealant with a rag. If it’s dried, scrape it gently.
- Pour new sealant directly into the tire. Use the recommended amount for your tire size.
- Re-seat the tire onto the rim.
- Inflate the tire using a pump or compressor. Sometimes, a quick burst of air helps seat the tire.
- Spin and shake the wheel to spread sealant.
Some tires are hard to re-seat. Using a compressor or a CO2 cartridge can help.
Tips For First-time Tubeless Users
- Always wear gloves—sealant can stain skin and clothes.
- Work in a clean area. Sealant spills are sticky and tough to clean.
- If the tire won’t seat, check if the rim tape is damaged or loose.
- Don’t overfill. Too much sealant can clog the valve or add weight.
- After adding sealant, ride for a few minutes to help it spread and seal.
Common Mistakes And How To Avoid Them
Even experienced riders make mistakes. Here are some issues to watch for:
- Adding too little sealant: Tires lose air and won’t seal punctures.
- Using old sealant: Sealant dries and loses power over time.
- Ignoring valve maintenance: Clogged valves make topping up hard.
- Rim tape issues: Damaged rim tape causes leaks.
- Wrong tire pressure: Too low, and tires burp air; too high, and you lose grip.
A non-obvious insight: Don’t mix different brands of sealant. Some formulas react badly and can create clumps that block valves or fail to seal. Always remove old sealant before switching brands.
Another tip: If your tire won’t seal after adding fresh sealant, check for tiny holes in the rim tape. Even a small hole can cause slow leaks.
How Often Should You Add Sealant?
Sealant needs regular checks. For most mountain bikers, every 3–6 months is enough. However, if you ride in hot, dry places or race often, check every 2–3 months.
Signs you need to add sealant:
- Tires lose air overnight
- You see dried sealant inside the tire
- The tire won’t seal small punctures
A quick way to check: Spin the wheel, then listen for sloshing inside. If you don’t hear fluid, it’s time to add more.
Troubleshooting Tubeless Sealant Problems
Sometimes, adding sealant doesn’t fix the issue. Here’s how to solve common problems:
Tire Won’t Hold Air
- Check rim tape for holes or tears.
- Inspect valve for clogs or leaks.
- Add extra sealant and spin the wheel.
Valve Keeps Clogging
- Clean out old sealant with a small wire.
- Use a syringe with a wide nozzle.
- Replace the valve core if it’s damaged.
Sealant Dries Too Fast
- Store your bike indoors, away from heat.
- Use sealant brands designed for hot climates.
Tire Won’t Seat
- Use a compressor or CO2 for a quick air burst.
- Lubricate the bead with soapy water for easier seating.
If you still have issues, visit a local bike shop for help.

Credit: www.cyclingabout.com
Comparing Tubeless Sealant Brands
Choosing the right sealant can make a big difference in performance. Here’s a side-by-side comparison of popular brands:
| Brand | Price (per 16 oz) | Puncture Sealing | Drying Speed | Best Climate |
|---|---|---|---|---|
| Stan’s NoTubes | $20 | Up to 6 mm | Medium | Dry, mild |
| Orange Seal | $22 | Up to 8 mm | Slow | Cold, variable |
| Slime | $18 | Up to 4 mm | Fast | Warm |
| Effetto Mariposa | $30 | Up to 7 mm | Medium | Race, performance |
Orange Seal is known for sealing bigger holes and lasting longer. Stan’s NoTubes is affordable and reliable for most riders.
Practical Tips For Adding Sealant
- Always measure sealant. Guessing can lead to too much or too little.
- Keep a spare valve core and remover in your tool kit.
- If your tire gets a big cut, add extra sealant and use a tire plug.
- Store sealant bottles upright. If they leak, the sealant dries out.
- If you ride often, mark your calendar for regular sealant checks.
A practical insight: After adding sealant, ride for at least 10 minutes. This helps the sealant spread and find tiny leaks. It’s more effective than just spinning the wheel.
When To Replace Tubeless Sealant
Sealant doesn’t last forever. Over time, it dries and becomes less effective. Replace sealant if:
- You see lumps or dried “balls” inside the tire
- The tire is losing air quickly
- The sealant is more than 6 months old
To remove old sealant, unseat the tire and wipe out the residue. If it’s really stuck, use a plastic scraper—not metal—to avoid damaging the tire.
Using Tire Plugs With Tubeless Sealant
Sometimes, a puncture is too big for sealant alone. In these cases, a tire plug is helpful. Here’s how to use it:
- Find the hole in the tire.
- Insert the plug using a plug tool.
- Add extra sealant to help seal the area.
- Spin the wheel and inflate.
Tire plugs and sealant together make your setup stronger against big punctures.
How Sealant Works: The Science
Sealant contains latex and small particles. When air escapes through a hole, the latex and particles rush to the spot. They form a plug, closing the hole quickly.
Some brands add fibers or crystals for extra sealing power. This is why different sealants perform better in some climates or conditions.
A science-based tip: If you use a sealant with large particles, shake the bottle before adding. The particles settle at the bottom, so mixing ensures you get the full sealing power.
Safety And Environmental Considerations
Most tubeless sealants are safe, but some contain chemicals that can irritate skin or eyes. Always wear gloves and avoid inhaling fumes.
Dispose of old sealant responsibly. Don’t pour it down drains or onto soil. Many bike shops will take old sealant for proper disposal.
Eco-friendly options are available. Some brands use biodegradable formulas. If you care about the environment, look for biodegradable sealant.
Real-world Examples
Let’s look at how riders use sealant in practice.
- Case 1: Sarah rides rocky trails in Arizona. She uses Stan’s NoTubes, checks sealant every 3 months, and has only had one flat in a year.
- Case 2: Mike races in cold, wet climates. He prefers Orange Seal, tops up every 2 months, and uses tire plugs for big cuts.
- Case 3: Emma commutes daily and rides on old tires. She uses Slime, but finds she needs to replace sealant every 2 months.
These examples show how climate and riding style affect sealant choice and maintenance.
Where To Get Reliable Sealant Information
For detailed info, visit official sealant brand websites or cycling forums. For scientific research on tire sealants, check Wikipedia. These sources offer tested data and user reviews.
Frequently Asked Questions
How Often Should I Check And Add Sealant?
You should check sealant every 3–6 months. If you ride often or in hot climates, check every 2–3 months. Listen for sloshing in the tire or inspect for dried sealant.
Can I Mix Different Brands Of Sealant?
It’s not recommended. Mixing brands can cause clumping or reduce sealing power. Always remove old sealant before switching to a new brand.
How Do I Know If My Tire Has Enough Sealant?
Spin the tire and listen for liquid movement inside. If you don’t hear anything, or your tire loses air quickly, add more sealant according to your tire size.
What If My Tubeless Tire Won’t Hold Air After Adding Sealant?
Check rim tape, valve, and tire bead for leaks. Add extra sealant, spin the wheel, and inflate again. If problems persist, visit a bike shop.
Is Tubeless Sealant Harmful To The Environment?
Some sealants are biodegradable, but others contain chemicals. Always dispose of old sealant properly and choose eco-friendly options if possible.
Adding sealant to tubeless mountain bike tires is simple once you know how. Keeping sealant fresh is key to avoiding flats and enjoying smooth rides. With the right tools, clear steps, and regular checks, you’ll get the most out of your tubeless setup. Remember, maintenance is part of mountain biking—take care of your tires, and they’ll take care of you on every trail.

Hello Guys! I am John Reese, a professional biker and my hobby is biking! I have been biking for last 12 years and I love using bikes while outing as well. Based on my experiences with the different type of bikes (mountain bikes, road bikes and hybrid bikes); I am sharing my opinion about various bikes so that a beginner can get started right away. Happy reading!