If you love mountain biking, you may have heard riders talk about dropper posts. These devices have changed how people ride, making trails more enjoyable and safer. But what exactly is a dropper post, and how does it work on a mountain bike? If you are new to this topic, or just curious, you’re in the right place. This article explains everything about dropper posts: their function, mechanics, usage, and benefits. You’ll see why so many mountain bikers consider them essential, and how they can improve your riding experience.
What Is A Dropper Post?
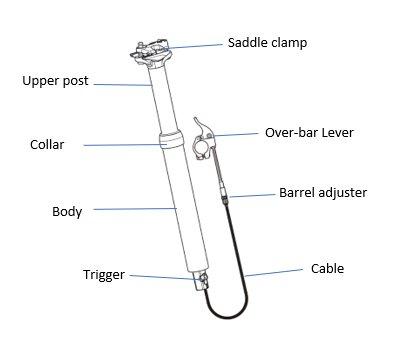
A dropper post is a type of adjustable seatpost for mountain bikes. It lets riders change the height of their saddle (seat) while riding. With a simple push of a lever, you can lower or raise your seat—no need to stop or use tools.
The main reason for a dropper post is to help riders quickly switch between climbing and descending. High saddle position is best for pedaling uphill, while a low saddle lets you move freely over rough terrain and steep downhills.
Dropper posts were first popular among mountain bikers who tackled technical trails. Now, they are used in cross-country, enduro, trail riding, and even some road bikes.
Common Dropper Post Designs
Most dropper posts look similar to standard seatposts, but have extra features:
- Remote lever: Usually mounted on the handlebars, lets you control the seat height.
- Internal mechanism: Uses air, hydraulic fluid, or mechanical parts to adjust height.
- Travel length: The distance the post can move up or down, usually 100–200mm.
Some dropper posts have external cables, while others hide the cable inside the bike frame for a cleaner look.
How Does A Dropper Post Work?
The dropper post system is clever but simple. It combines a moving tube (the seatpost) with a locking mechanism and a remote control. Here’s how it works:
- Press the remote lever: When you push the lever, it releases the lock inside the dropper post.
- Apply weight: If you sit on the saddle, the seatpost slides down. If you lift your weight, the post rises.
- Release the lever: The mechanism locks again, keeping the seat at the new height.
Internally, dropper posts use either air pressure, hydraulic cartridges, or mechanical springs to move the seatpost. Most modern posts use air and hydraulic systems for smooth movement.
Internal Vs. External Routing
Cable routing is how the remote lever connects to the dropper post. There are two types:
- Internal routing: The cable runs inside the bike frame. This looks tidy and protects the cable.
- External routing: The cable is outside the frame. It’s easier to install but can catch mud or branches.
Many newer mountain bikes are designed for internal routing, but external models are still common for older bikes or easier maintenance.
Types Of Dropper Post Mechanisms
Not all dropper posts are built the same. The mechanism inside determines how reliable, smooth, and adjustable the post is.
Hydraulic Dropper Posts
These use hydraulic fluid to control the movement. They are smooth and reliable, but can be more expensive and harder to fix. Most high-end dropper posts are hydraulic.
Mechanical Dropper Posts
Mechanical posts use springs and simple locks. They are cheaper and easier to repair, but may feel less smooth than hydraulic types.
Air-sprung Dropper Posts
Some dropper posts use air pressure to move the seat. They are lightweight and can be adjusted for rider weight, but need regular maintenance to keep air seals tight.
Comparison Of Dropper Post Mechanisms
Here’s a quick look at the differences between main types:
| Type | Smoothness | Maintenance | Price | Reliability |
|---|---|---|---|---|
| Hydraulic | Very smooth | Medium to high | High | High |
| Mechanical | Average | Low | Low | Medium |
| Air-Sprung | Smooth | Medium | Medium | Medium |
Why Use A Dropper Post?
Many riders wonder if a dropper post is really necessary. Let’s look at the main reasons:
- Control and confidence: Lowering the saddle for downhill lets you move your body easily, making it less likely to crash.
- Speed: You can transition between climbing and descending without stopping. This saves time and keeps your flow on the trail.
- Safety: Being able to drop your seat quickly makes it easier to handle steep sections and obstacles.
- Comfort: Adjusting saddle height helps you ride longer without discomfort.
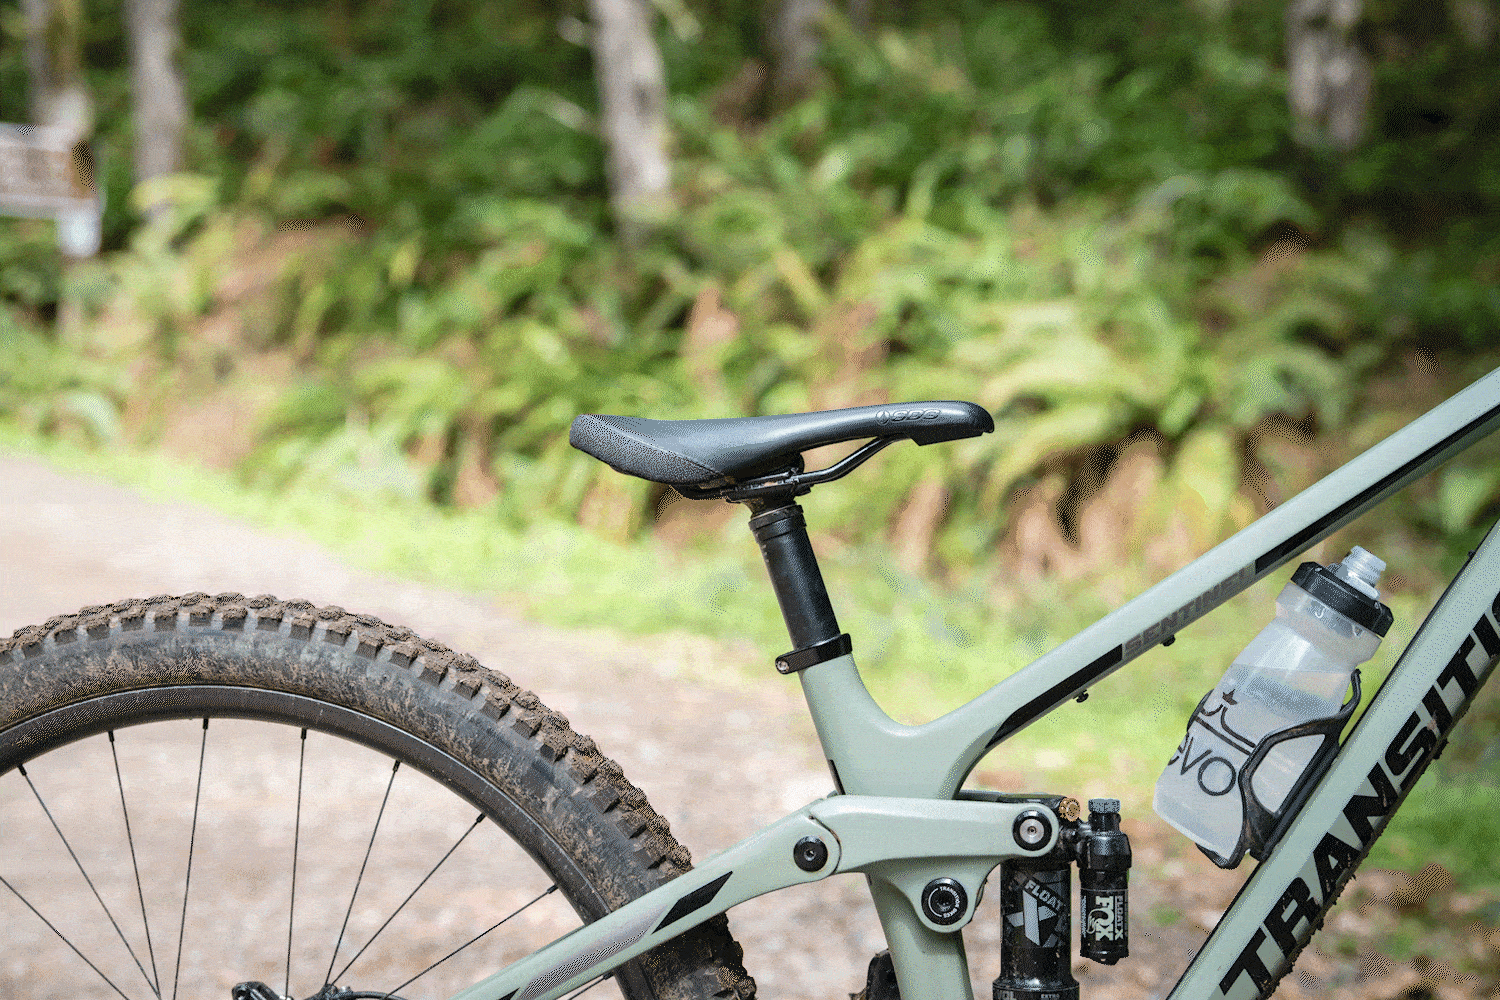
A study from Singletracks found that riders who use dropper posts reported up to 30% fewer crashes on technical trails. That’s a major benefit for anyone who wants to ride safely and confidently.
Credit: isigny-sur-mer.fr
How To Use A Dropper Post On The Trail
Using a dropper post is simple, but knowing when and how to use it makes a big difference.
Climbing
When you climb, keep your saddle high. This helps your legs pedal efficiently and supports your body. Only lower the seat if you need extra balance on tricky uphill sections.
Descending
Before a descent, push the remote lever and drop your saddle. This gives you room to move your hips and legs, improving balance. Keep the saddle low until the trail levels out or you need to pedal hard again.
Technical Sections
If you see rocks, roots, or tight corners, lower your seat. This allows you to shift your weight and maneuver your bike more easily. Raise the seat again for smoother sections.
Quick Transitions
Experienced riders often use the dropper post multiple times per ride. Practice using the remote lever until it feels natural—you’ll be able to adjust your seat without thinking.
Dropper Post Travel: How Much Is Enough?
Dropper posts come in different travel lengths, which is the distance the seat can move up or down. Choosing the right travel depends on your riding style and bike size.
Typical Travel Lengths
- Cross-country: 80–120mm
- Trail/Enduro: 120–170mm
- Downhill: 170–200mm
More travel means you can drop the seat farther, which is good for aggressive riding. Less travel is lighter and may suit smoother trails.
Choosing The Right Travel
Think about:
- Your height: Tall riders may want more travel.
- Bike frame: Some frames only fit certain dropper posts.
- Riding style: If you ride steep trails, choose more travel.
Some dropper posts are adjustable, letting you set the travel to match your needs. This flexibility is helpful for riders who switch bikes or try different trails.
Credit: www.evo.com
Installing A Dropper Post: Step-by-step Guide
Installing a dropper post is not difficult, but it requires careful steps. Here’s a basic guide:
- Remove old seatpost: Loosen the seat clamp and take out your standard seatpost.
- Install dropper post: Slide the dropper post into the frame. Make sure it fits snugly.
- Attach saddle: Secure your saddle to the new post.
- Connect remote lever: If your dropper uses internal routing, thread the cable through the frame. For external routing, attach it along the outside.
- Test movement: Push the lever and check if the seat goes up and down smoothly.
- Adjust cable tension: Make sure the remote lever feels responsive.
Some bikes require special adapters or tools. If you are unsure, ask a local bike shop for help.
Internal Vs. External Routing Table
Here’s a comparison of internal and external cable routing:
| Routing Type | Appearance | Ease of Installation | Maintenance | Protection |
|---|---|---|---|---|
| Internal | Clean, hidden | Harder | Medium | High |
| External | Visible, exposed | Easier | Easy | Low |
Common Dropper Post Problems And Solutions
Like any bike part, dropper posts can have issues. Knowing these problems helps you keep your post working smoothly.
Slow Movement
If your dropper post rises or drops slowly, it may have dirt in the mechanism or low air pressure. Clean the post and check air levels if needed.
Sticking Or Not Locking
Sometimes, the post won’t lock at the right height. This is usually caused by a loose cable or worn parts. Tighten cables and check for damage.
Remote Lever Issues
If the lever feels stiff or doesn’t work, inspect the cable. Lubricate or replace it if needed. Internal cables can be harder to access.
Table: Common Dropper Post Issues
| Problem | Possible Cause | Solution |
|---|---|---|
| Slow movement | Dirt, low air | Clean, check air |
| Sticking | Loose cable | Tighten cable |
| Remote lever stiff | Dirty cable | Lubricate/replace |
| No lock | Worn mechanism | Replace parts |
Maintenance Tips For Dropper Posts
Keeping your dropper post in good shape is easy if you follow some basic steps:
- Clean regularly: Wipe dirt from the post and saddle after each ride. Mud can cause wear.
- Lubricate: Use a light bike lubricant on moving parts and cables.
- Check air pressure: If your post uses air, check pressure every month.
- Inspect cables: Replace frayed or stiff cables before they fail.
- Service cartridge: Some dropper posts have cartridges that need professional servicing.
A well-maintained dropper post lasts longer and works smoothly. Make maintenance a habit, especially if you ride in muddy or wet conditions.
Dropper Posts Vs. Standard Seatposts
If you’re still wondering whether a dropper post is worth it, let’s compare it to a regular seatpost.
Standard Seatpost
- Fixed height
- Lighter weight
- Cheaper
- No moving parts
Dropper Post
- Adjustable height
- Slightly heavier
- More expensive
- Requires maintenance
The main advantage of a dropper post is flexibility. If you ride technical trails or want to improve your skills, a dropper post can make a huge difference.

Credit: www.youtube.com
How Dropper Posts Change Mountain Biking
Since their introduction, dropper posts have changed how people ride mountain bikes. Riders now tackle steeper and rougher trails with confidence. The ability to lower the saddle makes learning new skills easier and safer.
Professional racers and casual riders both use dropper posts. In the Enduro World Series, almost every top rider has a dropper post. Even cross-country races are seeing more dropper posts for technical sections.
Non-obvious Insights
- Dropper posts improve cornering: Lowering the saddle lets you lean the bike more in turns, making tight corners easier.
- They help with jumps: With a low seat, you can move your legs freely when landing jumps or drops, reducing risk of injury.
Most beginners focus on climbing and descending, but don’t realize how a dropper post helps on flat or rolling terrain. Anytime you need to shift your weight quickly, a dropper post is useful.
How To Choose A Dropper Post
If you want to buy a dropper post, consider these factors:
- Post diameter: Measure your bike’s seat tube. Most posts are 30.9mm or 31.6mm.
- Travel length: Pick based on your riding style.
- Remote type: Some remotes work better with certain handlebars.
- Cable routing: Check if your bike supports internal or external cables.
- Budget: Prices range from $100 to $500+.
Also, look for reviews and ask local riders for advice. Not all dropper posts are equal, and some brands have better reliability.
Dropper Post Brands And Models
Many companies make dropper posts. Here are some popular brands:
- RockShox Reverb: Known for smooth hydraulic action.
- Fox Transfer: Reliable and easy to maintain.
- OneUp Components: Offers adjustable travel and fits many bikes.
- KS Lev: Lightweight and affordable.
Each brand has different models, so check which fits your bike and budget.
The Future Of Dropper Posts
The technology behind dropper posts keeps improving. New models are lighter, easier to install, and more reliable. Some dropper posts even use wireless controls—no cables needed.
As mountain biking grows, dropper posts will likely become standard equipment. More riders will discover how much they help, not just on steep trails but everywhere.
To see more about the history and technology of dropper posts, you can read this Wikipedia article.
Frequently Asked Questions
What Is A Dropper Post Used For?
A dropper post lets you quickly change your saddle height while riding. Lowering the seat helps you move your body for better control on descents. Raising it helps you pedal efficiently on climbs.
How Do I Know If My Bike Can Use A Dropper Post?
Check your bike’s seat tube diameter and cable routing options. Most modern mountain bikes support dropper posts, but older frames may need adapters or special posts.
Are Dropper Posts Worth The Money?
For most mountain bikers, yes. They improve safety, speed, and confidence. If you ride technical trails or want to learn new skills, a dropper post is a smart investment.
How Often Should I Service My Dropper Post?
Clean your dropper post after every ride, and lubricate cables monthly. Full servicing depends on the model—some posts need professional service every 12–24 months.
Can I Install A Dropper Post Myself?
Yes, many riders install their own dropper posts. Make sure you have the right tools and follow instructions. Internal routing is harder, so ask a bike shop for help if needed.
Mountain biking is about enjoying the outdoors and pushing your limits. With a dropper post, you can ride more confidently and safely. Whether you’re a beginner or expert, knowing how a dropper post works can help you get the most from your bike and the trails.

Hello Guys! I am John Reese, a professional biker and my hobby is biking! I have been biking for last 12 years and I love using bikes while outing as well. Based on my experiences with the different type of bikes (mountain bikes, road bikes and hybrid bikes); I am sharing my opinion about various bikes so that a beginner can get started right away. Happy reading!