Keeping your mountain bike in top shape isn’t just about cleaning and adjusting the gears. One important job often overlooked by beginners is adding brake fluid. This task is vital for bikes with hydraulic disc brakes. If your brakes feel soft, slow to respond, or you notice your stopping power dropping, it’s time to check your brake fluid. Don’t worry if you’ve never done it before. Adding brake fluid is easy with the right steps and a little patience. This guide shows you exactly how to add brake fluid to your mountain bike, what tools you need, and tips to avoid common mistakes. Even if you’re new to bike maintenance, you’ll get clear instructions and practical advice.
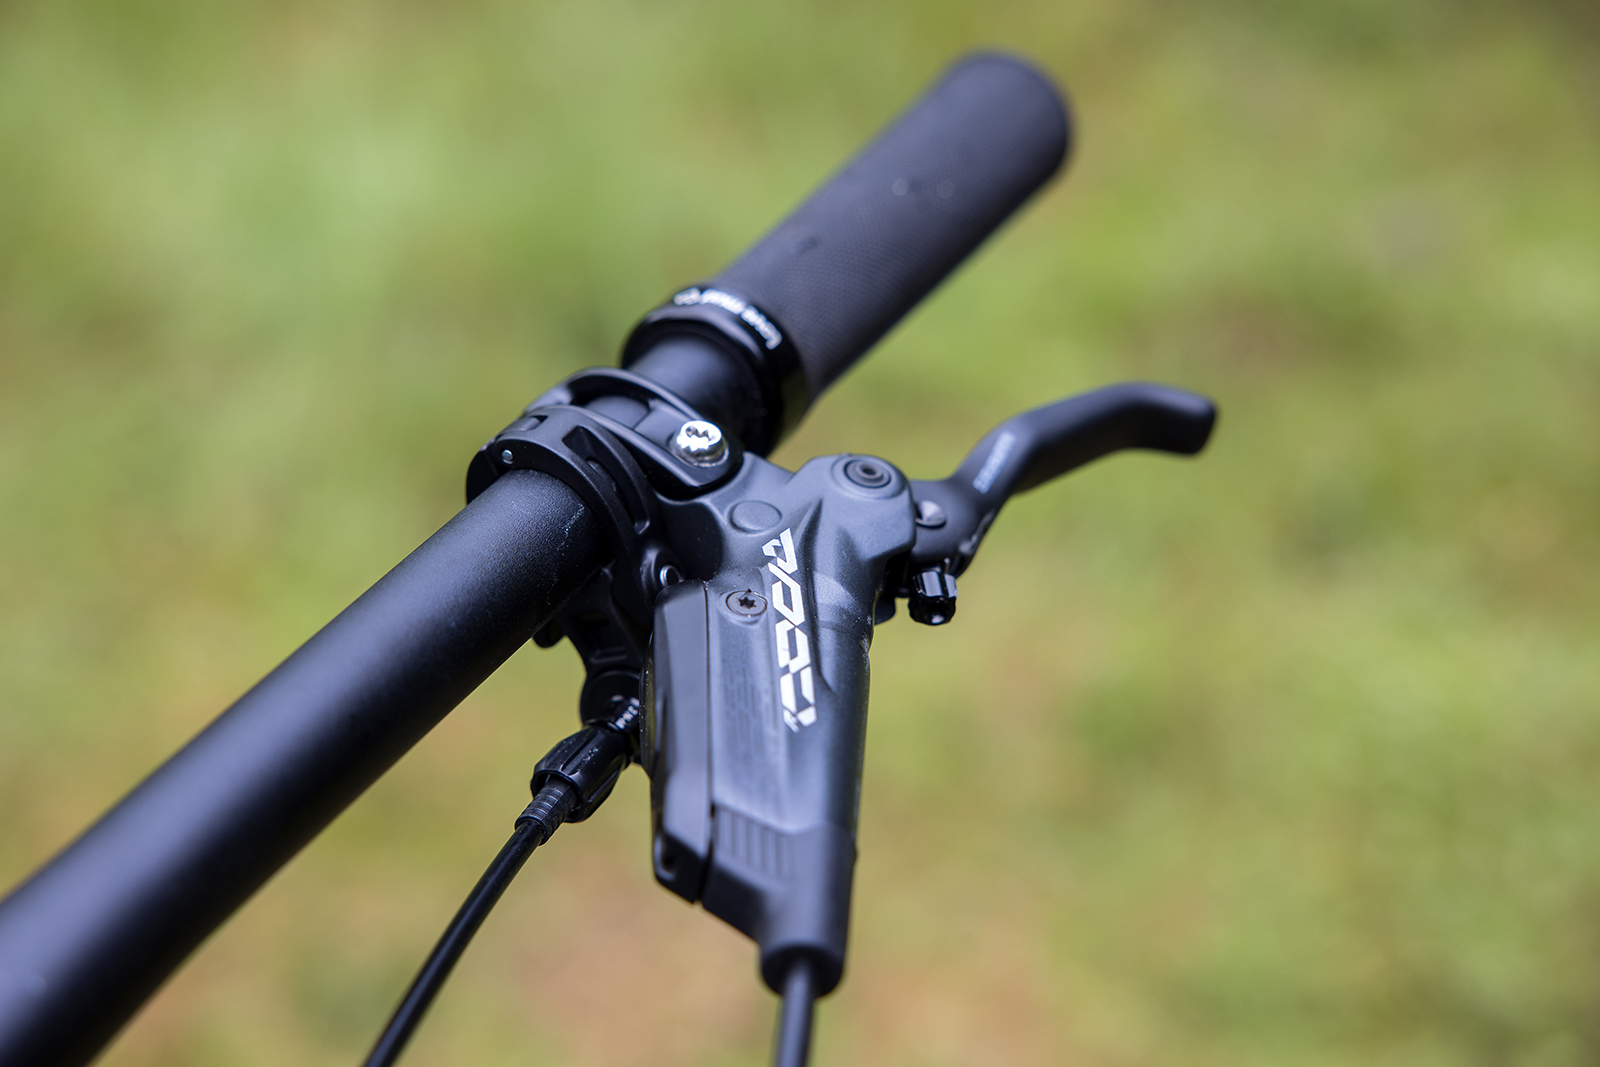
Understanding Hydraulic Brake Fluid
Hydraulic disc brakes use brake fluid to transfer force from your hand to the brake caliper. When you squeeze the lever, the fluid pushes the brake pads against the rotor, stopping your bike. There are two main types of brake fluid: DOT fluid and mineral oil. Each type has its own properties and uses, and you must use the fluid recommended by your bike’s manufacturer.
| Fluid Type | Main Brands | Boiling Point | Compatibility |
|---|---|---|---|
| DOT Fluid | Sram, Avid | ~230°C (DOT 4) | Not compatible with mineral oil systems |
| Mineral Oil | Shimano, Magura | ~200°C | Not compatible with DOT systems |
DOT fluid absorbs moisture over time, which lowers its boiling point, so it needs more frequent changes. Mineral oil is less prone to moisture absorption but can break down chemically in hot conditions. Using the wrong fluid can damage seals and other parts, so always double-check your brake system.
Why And When You Need To Add Brake Fluid
If your brakes feel weak or you notice the lever pulls farther than before, your bike probably needs more brake fluid. This can happen after a crash, when the bike is stored upside down, or simply over time as small leaks develop. Adding brake fluid restores power and makes your ride safer.
Signs you need to add brake fluid:
- Brake lever feels soft or spongy
- Brakes do not engage quickly
- Fluid level in the reservoir is low
- Fluid leaks near the caliper or lever
- Brake pads not moving properly
Most riders need to add fluid once every 6–12 months, but heavy riders or those who ride in wet, muddy conditions might need to do it more often.
Tools And Supplies You’ll Need
Before starting, gather these tools and supplies. Using the right gear makes the job easier and prevents damage.
- Brake fluid (DOT or mineral oil, as required)
- Bleed kit (usually includes syringes, tubing, and fittings)
- Hex/Allen wrenches (for opening reservoir and caliper)
- Clean rags (for spills)
- Gloves (protect your hands from fluid)
- Safety glasses (protect your eyes)
- Small funnel (optional, for pouring fluid)
- Alcohol wipes (cleaning surfaces)
- Bike stand (makes the job easier)
Some brands provide a full bleed kit with their bikes. If not, you can buy one online or at a bike shop. Never try to substitute household fluids—always use proper brake fluid.
Preparing Your Mountain Bike
Set up your workspace before you begin. This step helps avoid mistakes and keeps your bike safe.
- Place your bike on a stable stand
- Remove wheels if needed for better access
- Clean the brake caliper and lever with alcohol wipes
- Lay clean rags beneath the brake area to catch spills
- Wear gloves and safety glasses
If your bike has a dropper post or other accessories near the brake system, move them out of the way.
Step-by-step Guide: Adding Brake Fluid
Follow these steps to add brake fluid to your mountain bike. The process is similar for most hydraulic brakes, but check your manufacturer’s manual for special instructions.
1. Check The Fluid Type
Look at your brake lever or caliper for markings. Shimano and Magura use mineral oil; Sram and Avid use DOT fluid. Never mix fluids. Using the wrong fluid can ruin seals and cause total brake failure.
2. Open The Reservoir
Find the reservoir (usually near the brake lever). Use a hex wrench to unscrew the cap. Be careful—fluid may drip out. Wipe any dirt or dust away before opening.
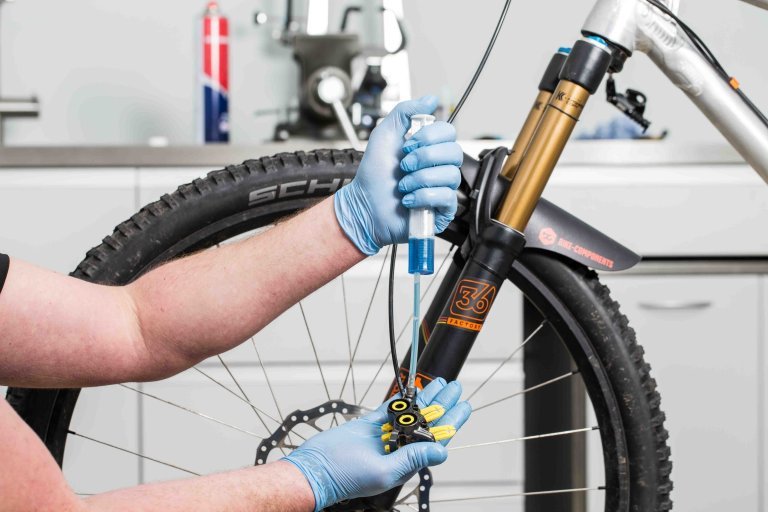
3. Attach The Bleed Kit
Connect the syringe or tube from your bleed kit to the reservoir. Some systems need a second syringe at the caliper for pushing and pulling fluid.
4. Remove Old Fluid
If the fluid is dirty or discolored, pull it out with the syringe. This step is not always needed if you’re simply topping off, but it’s smart for older bikes.
5. Add New Brake Fluid
Slowly inject new fluid into the reservoir. Watch for bubbles and leaks. If bubbles appear, gently tap the lever to release air. Fill until the reservoir is just below the top.
6. Cycle The Brake Lever
Pump the brake lever several times. This helps fluid flow through the system and removes any trapped air. Repeat until the lever feels firm and responsive.
7. Close The System
Remove the syringe and wipe away excess fluid. Screw the reservoir cap back on tightly. Clean up any spills with a rag.
8. Test Your Brakes
Spin the wheel and squeeze the lever. The brakes should engage quickly and feel solid. If not, repeat the process.
9. Reinstall Wheels And Accessories
Put wheels and accessories back in place. Double-check everything is tight and secure.
Practical Tips For A Smooth Job
Adding brake fluid isn’t difficult, but a few smart moves make it easier and safer.
- Use new, unopened fluid for best results
- Avoid overfilling the reservoir
- Tap the brake lever gently to release air bubbles
- Clean all parts before and after adding fluid
- Dispose of old fluid safely—never pour it down the drain
Beginners often forget to check for leaks after adding fluid. A small leak can ruin your ride or cause a crash. Always inspect the caliper and lever for drips.

Credit: www.youtube.com
Common Mistakes To Avoid
Even experienced riders can make mistakes with brake fluid. Here are the most frequent errors:
- Using the wrong fluid: Always check your bike’s manual.
- Not cleaning the system: Dirt in the reservoir can cause problems.
- Overfilling: Too much fluid can cause leaks or damage seals.
- Ignoring air bubbles: Air in the system makes brakes soft.
- Not checking for leaks: Small leaks can lead to big problems.
- Mixing old and new fluid: Can reduce performance and cause chemical reactions.
- Forgetting safety gear: Brake fluid is toxic; use gloves and glasses.
Many beginners also skip the step of cycling the brake lever, which leaves air in the system.
Differences Between Dot Fluid And Mineral Oil
Choosing the right brake fluid is important for safety and performance. Here’s how DOT fluid and mineral oil compare:
| Feature | DOT Fluid | Mineral Oil |
|---|---|---|
| Boiling Point | Higher (up to 260°C) | Lower (up to 200°C) |
| Moisture Absorption | Yes (needs regular changes) | No (lasts longer) |
| Compatibility | Sram, Avid | Shimano, Magura |
| Corrosiveness | Corrosive to paint and skin | Less corrosive |
| Availability | Widely available | Widely available |
DOT fluid works well in hot conditions but needs frequent maintenance. Mineral oil is easier for beginners, but may fade under heavy use.
Credit: epsoluciones.es
How Often Should You Add Or Change Brake Fluid?
How often you add or change brake fluid depends on riding style and conditions:
- Light riders: Every 12–18 months
- Heavy riders or racers: Every 6–9 months
- Wet, muddy conditions: Every 6 months
- After a crash: Immediately
It’s smart to check your fluid level every few months, especially after tough rides. If you ride in extreme heat or rain, check more often.
Safety Precautions When Adding Brake Fluid
Brake fluid is toxic and can damage your skin or eyes. Always follow these safety steps:
- Wear gloves and safety glasses
- Keep fluid away from children and pets
- Wipe spills immediately
- Wash hands after the job
- Store fluid in a cool, dry place
Never reuse old fluid or store it in open containers. DOT fluid is especially dangerous—handle with care.
What To Do If You Make A Mistake
Mistakes happen. If you use the wrong fluid, immediately flush the system with the correct fluid. If you overfill, remove excess with a syringe. If you notice leaks, stop riding and fix the problem before your next trip.
If your brakes still feel soft after adding fluid, there may be air trapped inside. Repeat the bleed process, making sure to tap the lever and watch for bubbles.
Troubleshooting Brake Problems
Sometimes, adding brake fluid doesn’t solve your issue. Here are common problems and solutions:
- Soft lever: Air still trapped; repeat bleed process.
- No stopping power: Check for worn pads; replace if needed.
- Fluid leaks: Tighten connections or replace seals.
- Discolored fluid: Flush system and add new fluid.
If you’re unsure, visit a bike shop. Brake problems can be dangerous, so get expert help if you need it.
Real-world Example: Adding Brake Fluid To Shimano Brakes
Let’s look at a practical example using a Shimano hydraulic brake system.
- Use Shimano mineral oil.
- Remove wheel for access.
- Clean caliper and lever.
- Open reservoir with a 2mm hex wrench.
- Attach Shimano bleed kit (syringe and tube).
- Pull out old fluid.
- Add fresh mineral oil with syringe.
- Cycle lever 10–15 times.
- Close reservoir and clean up.
- Reinstall wheel and test brakes.
Shimano brakes are popular for their reliability. Many riders find mineral oil easier to work with than DOT fluid. For more details, check the official Shimano website or guides.
Comparison: Diy Vs Professional Service
Should you add brake fluid yourself or visit a shop? Here’s a quick comparison:
| Factor | DIY | Professional Service |
|---|---|---|
| Cost | $15–$40 (tools and fluid) | $50–$100 per service |
| Time | 30–60 minutes | 1–2 days (with appointment) |
| Quality | Varies (depends on skill) | High (experienced mechanics) |
| Learning Experience | Gain valuable skills | None (but less hassle) |
| Risk | Possible mistakes | Low risk |
DIY saves money and builds skills, but mistakes can be costly. Shops have experience and tools, but cost more.
Credit: www.bike-components.de
Expert Tips For Beginners
If you’re new to adding brake fluid, these expert tips will help:
- Practice on an old bike or spare brake set
- Watch videos or read guides before starting
- Always use the correct fluid
- Keep your workspace clean and organized
- Don’t rush—take your time
- Check for leaks after every job
A non-obvious tip: Many beginners forget to check the bleed port for dirt. Cleaning this area prevents contamination.
Another insight: If you ride in cold weather, check your fluid more often. Low temperatures can change fluid properties and affect brake performance.
Where To Buy Brake Fluid And Bleed Kits
You can buy brake fluid and bleed kits at local bike shops, online retailers, or directly from manufacturers. Look for reputable brands like Shimano, Sram, Magura, and Avid.
A good resource for finding parts and tools is BikeRadar. They offer reviews and advice on brake systems and maintenance.
Frequently Asked Questions
How Do I Know Which Brake Fluid My Mountain Bike Needs?
Check your brake lever or caliper for brand markings. Shimano and Magura use mineral oil; Sram and Avid use DOT fluid. Never mix fluids. If unsure, look up your bike’s manual or ask at a bike shop.
Can I Add Brake Fluid Without A Bleed Kit?
It’s possible, but not recommended. A bleed kit helps remove air and keeps the job clean. Without it, you risk air bubbles and poor brake performance.
What Happens If I Use The Wrong Brake Fluid?
Using the wrong fluid can damage seals, cause leaks, and reduce braking power. Always use the fluid recommended by your manufacturer. If you make a mistake, flush the system with the correct fluid immediately.
How Long Does Adding Brake Fluid Take?
For most bikes, the process takes 30–60 minutes. If you’re new, allow extra time to read instructions and set up your workspace.
Is Brake Fluid Dangerous?
Yes, especially DOT fluid. It’s toxic and can harm skin or eyes. Always wear gloves and safety glasses, and clean up spills right away. Store fluid safely, away from kids and pets.
Adding brake fluid to your mountain bike is a smart skill for every rider. It improves safety, saves money, and gives you confidence on tough trails. With the right tools and careful steps, anyone can do it. Remember to check your fluid regularly, use the correct type, and follow safety rules.
If you have doubts, ask a pro or visit a bike shop. With practice, you’ll handle brake maintenance like an expert.

Hello Guys! I am John Reese, a professional biker and my hobby is biking! I have been biking for last 12 years and I love using bikes while outing as well. Based on my experiences with the different type of bikes (mountain bikes, road bikes and hybrid bikes); I am sharing my opinion about various bikes so that a beginner can get started right away. Happy reading!