Mountain biking is thrilling, but nothing spoils a ride faster than brakes that don’t work right. If your hydraulic disc brakes feel weak, noisy, or aren’t stopping you smoothly, adjusting them is a skill worth learning. It’s not just about safety—well-tuned brakes give you more control and confidence on tricky trails.
Even if you’re new to bike maintenance, you can adjust hydraulic disc brakes with patience and the right method. In this guide, you’ll learn step-by-step how to make your mountain bike’s brakes feel crisp, powerful, and reliable, plus some tips that many beginners overlook.
Understanding Hydraulic Disc Brakes
Hydraulic disc brakes use fluid pressure to move brake pads against a rotor. Unlike mechanical disc brakes, which use cables, hydraulic systems rely on sealed tubes filled with special brake fluid. When you squeeze the lever, fluid pressure pushes pistons inside the caliper, moving the pads to grip the rotor.
Hydraulic brakes are common on modern mountain bikes because they give you more control with less force. When working properly, they feel smooth and powerful, and you can easily control how much you slow down. That’s why they’re the top choice for downhill and technical riding.
Key Parts Of Hydraulic Disc Brakes
- Brake lever: The part you squeeze with your hand.
- Brake hose: Tube carrying brake fluid.
- Caliper: The mechanism holding the brake pads.
- Brake pads: Material that presses against the rotor to slow down the bike.
- Rotor: The metal disc attached to your wheel.
Each part has a specific role. For example, the caliper holds the pads and pistons. When you pull the lever, the pistons push the pads outwards, pressing them onto the rotor. If any part isn’t working well—like a sticky piston or a bent rotor—it affects your braking.
Why Choose Hydraulic?
Hydraulic systems are popular because they offer:
- Stronger stopping power
- Better modulation (control how hard you brake)
- Self-adjusting pad wear (in most models)
- Less maintenance compared to mechanical brakes
But they also require careful setup. If something feels off—like rubbing, spongy levers, or poor braking—you’ll need to adjust them.
One thing many riders don’t realize is that hydraulic brakes also perform better in wet and muddy conditions. The system is sealed, so grit and water can’t easily enter and cause problems, unlike with cables that can rust or get sticky.
Signs Your Hydraulic Brakes Need Adjustment
Before grabbing tools, check for these common symptoms:
- Brake lever feels loose or too tight
- Pads rub on the rotor, causing noise
- Poor stopping power
- Lever pulls almost to the handlebar
- Uneven wear on brake pads
- Vibration or pulsing when braking
If you notice any of these, it’s time for an adjustment.
Sometimes, the signs are subtle. For example, you might feel a slight resistance when spinning the wheel, or hear a faint rubbing noise that comes and goes. This can signal a very minor misalignment that, over time, will cause more serious problems like pad glazing or rotor warping.
Another overlooked sign is a change in the feel of the lever after a crash or transporting your bike. If your bike tips over or you remove the wheels for a car ride, the calipers can get bumped out of alignment.
Always check your brakes after any impact or transport.
Credit: magazine.joovy.com
Essential Tools And Materials
You don’t need a full bike shop to adjust hydraulic disc brakes, but having the right tools makes everything easier:
- Allen keys (usually 4mm and 5mm)
- Torx wrench (for some rotors)
- Isopropyl alcohol (cleaning)
- Clean rag
- Bike stand (optional but helpful)
- Brake pad spreader or plastic tire lever
- Hydraulic brake fluid (for bleeding, if needed)
- Bleed kit (if you need to bleed the brakes)
- Cotton gloves (to avoid contaminating pads)
Beginners often forget gloves. Oil from your hands can ruin brake pads, so wear gloves when handling them.
A few extra items can help: zip ties for securing loose hoses, a small flashlight for checking pad alignment, and a ziplock bag for storing removed pads (keeps them clean). Having a second rag for wiping your hands is also smart—brake dust can be sticky.
Step-by-step Guide To Adjusting Hydraulic Disc Brakes
1. Prepare Your Bike
Put your bike on a stable surface or bike stand. Remove wheels if needed, but most adjustments can be done with wheels installed.
A bike stand helps you work at eye level and keeps the bike stable. If you don’t have one, lean your bike against a wall, making sure it won’t tip. Shift the chain to the smallest cog so it doesn’t get in the way.
Remove any accessories from the handlebars for easy access to the brake levers.
2. Inspect The Brake Pads And Rotors
Check pad thickness—if pads are less than 1mm thick, replace them. Inspect the rotor for warping, dirt, or oil.
- Clean the rotor with isopropyl alcohol.
- If you see shiny spots or grooves, it’s time to replace the rotor.
Hold the wheel up and spin it slowly. Look closely at the gap between the rotor and pads. There should be a tiny gap on each side, and the rotor should not wobble as it spins. If it does, the rotor may be bent or the wheel isn’t seated correctly in the frame.
Also, check for pad glazing—a shiny, glassy look on the pads. Glazed pads don’t grip well and can cause squealing. You can lightly sand them with fine sandpaper, but if the glaze is severe, replace the pads.
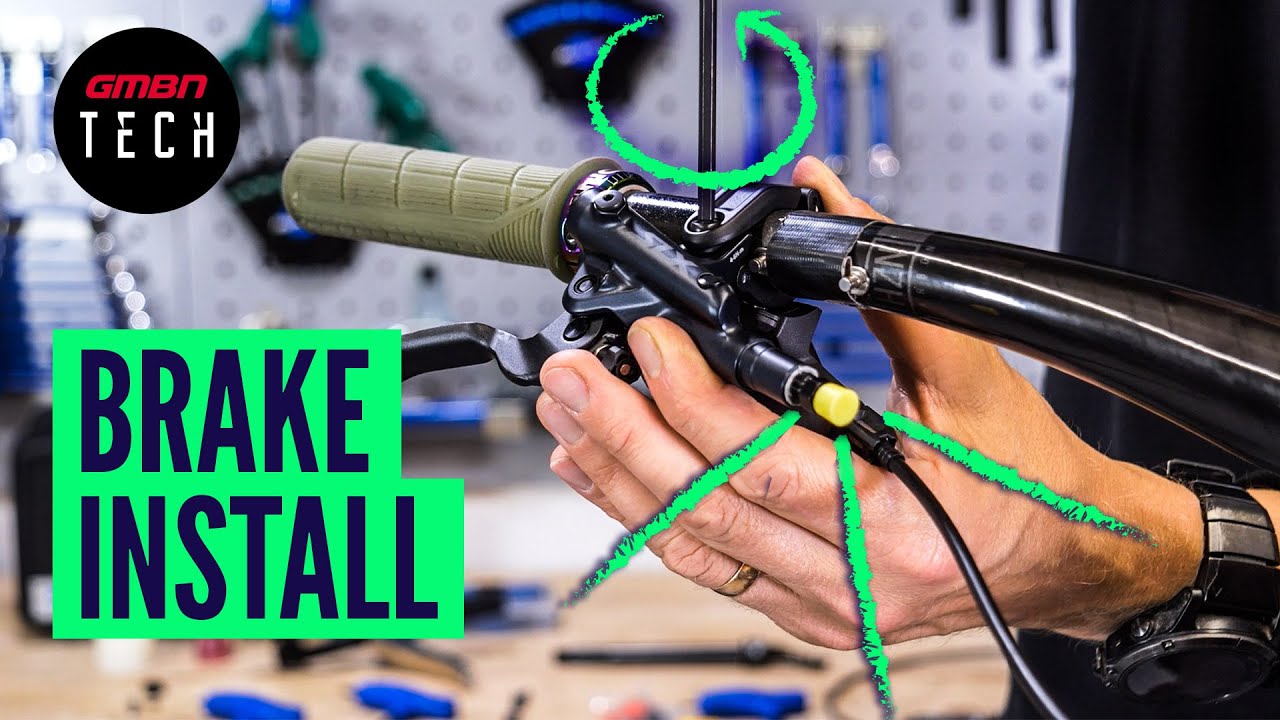
3. Check Caliper Alignment
Misaligned calipers cause rubbing and noise. To center the caliper:
- Loosen the two caliper mounting bolts slightly so the caliper can move.
- Squeeze the brake lever hard and hold it.
- While holding the lever, tighten the bolts evenly.
- Release the lever and spin the wheel to check for rubbing.
This method uses the brake’s own force to align itself—a trick many beginners miss.
If rubbing persists, try centering the caliper by eye. Look down through the caliper and adjust so the gap between each pad and the rotor is even. Sometimes, slight frame or fork imperfections mean you need to fine-tune by feel.
Don’t overtighten bolts—follow the torque ratings on your brake system, usually 6–8 Nm.
4. Adjust The Lever Reach
Lever reach means how far the lever sits from the handlebar. Most hydraulic brakes have a small knob or screw near the lever. Adjust it so you can comfortably reach the lever with one or two fingers, without stretching.
- Turn clockwise to bring the lever closer.
- Turn counter-clockwise to move it farther away.
This is important for both comfort and control. If your hands are small or you ride with gloves, you’ll want the lever closer. If you have long fingers or ride without gloves, you might prefer it farther away. Test by placing your fingers on the lever as if you’re braking hard.
You should have a strong grip without your knuckles straining.
Some brakes also have a “bite point” adjustment, which changes where in the lever’s travel the pads contact the rotor. This is more advanced but can help you fine-tune feel.
5. Check Pad Clearance
If pads rub the rotor, use a pad spreader or clean tire lever to gently push the pads back. Never use metal tools—they can damage the pads.
A common mistake: People push pads unevenly, causing one pad to stick. Make sure both pads move back equally.
For best results, remove the wheel and insert the spreader straight between the pads. Push gently but firmly until you feel both pads move back into place. Reinstall the wheel and check the gap again. If you don’t have a pad spreader, a plastic tire lever works—just clean it first.
If the pistons are dirty or sticky, they may not retract evenly. You can clean pistons by gently pushing them out (without popping them out) and wiping with a cotton swab and isopropyl alcohol. Be careful not to damage the seals.
6. Test Braking Power
Spin the wheel and squeeze the lever. The wheel should stop quickly, and the lever should feel firm—not spongy. If it’s soft, there may be air in the system.
Repeat the test a few times. Listen for any rubbing or scraping sounds. If the lever feels different on each pull, you might have sticky pistons or air bubbles. If the wheel doesn’t spin freely after release, double-check pad clearance and alignment.
Testing braking power isn’t just about stopping the wheel while the bike is stationary. Ride slowly in a safe area and do some gentle stops. The brakes should feel consistent and powerful.
7. Bleed The Brakes (if Needed)
If your lever still feels soft or pulls too close to the bar, you may need to bleed the brakes. This means removing air bubbles from the hydraulic fluid.
- Attach the bleed kit to the caliper and lever according to your brake brand (Shimano, SRAM, etc. ).
- Squeeze the lever and follow the kit instructions to push fluid through the system.
- Close everything up, clean excess fluid, and test the lever.
Bleeding is a bit advanced, but it’s essential for strong, consistent braking.
For best results, follow a video or your brake manual closely. Each brand has different steps. Use only the correct fluid—mineral oil for Shimano, DOT fluid for SRAM. Never reuse old fluid or mix brands. Dispose of waste fluid safely, and keep it off your skin and bike parts.
8. Final Checks
- Spin the wheels and check for any rubbing.
- Squeeze the levers and check for firmness.
- Test your brakes outside before hitting tough trails.
If you made major adjustments, ride gently at first. Bed in new pads by braking firmly several times from moderate speed. This helps transfer material from pad to rotor, improving power and reducing noise.
Common Problems And Solutions
Hydraulic disc brakes are reliable, but you might run into these issues:
Brake Rub
If pads rub, check caliper alignment again. Sometimes, rotors are slightly bent. Gently true the rotor with a rotor straightening tool.
You can check rotor trueness by spinning the wheel and watching the gap between the rotor and pads. If you see a wobble, use a rotor tool to gently bend the rotor back. Make small adjustments—don’t force it.
Squealing Or Noise
This usually means dirty pads or rotors. Clean both with alcohol. If noise persists, replace pads.
Squealing can also come from new pads that aren’t bedded in. To bed them in, make about 10 hard stops from moderate speed, letting the brakes cool between each stop. This helps transfer pad material to the rotor for better grip.
Weak Braking
Try bleeding the brakes. Also, check for contaminated pads—if they’re oily, replace them.
Weak braking can also result from using the wrong pads for your conditions. For example, organic pads fade quickly on long descents or in mud. Switch to metallic pads if needed.
Lever Pulls Too Far
Air in the system is the main cause. Bleed the brakes.
If bleeding doesn’t help, check for leaks around the caliper or lever. A slow fluid leak can cause the same problem and will need a new seal or hose.
Pro Tips For Perfect Brake Adjustment
- Use a flashlight: Helps you see pad alignment inside the caliper.
- Mark bolt positions: Before loosening caliper bolts, mark their original position to avoid confusion.
- Check both wheels: Sometimes only one brake needs adjustment, but check front and rear for best results.
- Avoid touching pads: Oil from your skin ruins braking power.
- Test under load: After adjustments, brake hard while riding (in a safe spot) to verify power.
Many riders ignore the importance of clean rotors and pads. Even tiny bits of oil can reduce performance by up to 50%, according to tests from bike forums.
Another useful tip: Keep a small bottle of isopropyl alcohol in your toolkit for trail-side cleaning. Even a quick wipe can restore power if you hit a muddy section or splash through a stream.
Don’t forget to regularly check your hose connections and look for any signs of leaks or cracks, especially if your bike is a few years old. These issues are often missed during quick inspections.

Credit: magazine.joovy.com
Comparing Hydraulic Vs Mechanical Disc Brakes
To help understand why hydraulic brakes are favored, here’s a quick comparison:
| Feature | Hydraulic Disc Brakes | Mechanical Disc Brakes |
|---|---|---|
| Stopping Power | Strong, consistent | Moderate, depends on cable tension |
| Maintenance | Less frequent, but more complex | Frequent, but easier |
| Modulation | Excellent control | Good, but not as smooth |
| Adjustment | Mostly automatic, some manual | Manual adjustment needed |
| Weight | Lighter | Heavier (with cables) |
Hydraulic brakes are ideal for mountain bikers who need reliable power and control on rough terrain.
One thing to note: Mechanical brakes can be fixed with simple tools almost anywhere, but hydraulics need specific parts and fluids. If you ride in remote areas, consider carrying a spare hose or bleed kit.
How Often Should You Adjust Hydraulic Disc Brakes?
Most riders check their brakes every 2-3 months, but heavy riders or those riding in mud and rain should check monthly. Replace pads when they are less than 1mm thick and bleed brakes once a year, or if you notice fading power.
Frequent checks help catch problems early. If you race or do long downhill rides, check your brakes before every ride. Wet and muddy conditions wear pads much faster, sometimes in just a few rides.
If you hear new noises or feel a change in performance, don’t wait—inspect your brakes right away. Regular attention can prevent bigger, more expensive problems.
Brake Pad Types: Which Should You Use?
There are two main pad types for hydraulic disc brakes:
| Pad Type | Best Use | Pros | Cons |
|---|---|---|---|
| Organic (Resin) | Dry trails, light use | Quiet, good modulation | Wear faster, less power in wet |
| Metallic (Sintered) | Muddy, wet, heavy use | Strong power, long-lasting | Noisier, harsher on rotors |
Organic pads are quieter and easier on rotors, while metallic pads last longer and perform better in tough conditions.
There are also semi-metallic pads, which blend features of both. They offer a balance of durability and quiet performance. If you ride in changing conditions or want “one pad for everything,” semi-metallic is a good choice.
Pad choice can affect how your brakes feel. If you switch pad types, give yourself time to adjust to the new feel and re-bed the pads for best performance.
Troubleshooting Air In Hydraulic Lines
Air in the lines is a hidden enemy. Sometimes, you can’t see leaks, but your lever feels soft. Here’s how to spot and fix air issues:
- Lever feels spongy or inconsistent
- Braking power fades after a few hard stops
- Visible bubbles during bleeding
Bleed the brakes using the correct kit and fluid for your brake model. Always use the recommended fluid—mixing brands can damage seals.
If you continue to have problems after bleeding, check for loose connections, worn hoses, or tiny cracks in the lever or caliper. Even a small air leak can ruin performance. Replace damaged parts right away.
A useful trick: When bleeding, tap the brake hose gently with a plastic tool to help move air bubbles toward the bleed port. This small step can help get a firmer lever feel.
Advanced Adjustments: Rotor Upgrades And Caliper Swaps
If you want even more braking power, you can upgrade rotors (larger diameter = more power) or swap calipers. But make sure your frame and fork support larger rotors. Here’s a quick guide:
| Rotor Size | Stopping Power | Typical Use |
|---|---|---|
| 160mm | Standard | Cross-country, light trail |
| 180mm | High | Trail, all-mountain |
| 203mm | Very high | Downhill, enduro |
Upgrading rotors is an effective way to boost braking power, but larger rotors are heavier.
Before upgrading, check your wheel and frame clearance. Some forks and frames don’t allow larger rotors. You may also need new caliper adapters. Always follow the manufacturer’s instructions to avoid damaging your bike.
If you want even more precise control, some riders swap stock calipers for higher-end models with more pistons. More pistons can mean smoother power and better modulation, but also more weight and cost.
Real-world Example: Adjusting Shimano Hydraulic Brakes
Let’s look at a common setup—Shimano hydraulic brakes, popular for reliability.
- Put the bike in a stand.
- Loosen caliper bolts.
- Squeeze lever and tighten bolts.
- Adjust lever reach with the small screw.
- Use a plastic lever to push pads back if needed.
- Test brakes for power and noise.
- Bleed with Shimano mineral oil if lever feels soft.
Shimano brakes are known for easy adjustment. SRAM and Magura follow similar steps, but always check your manual.
A few tips for Shimano: Use only Shimano mineral oil. Don’t substitute car brake fluid—it will damage the system. Shimano’s one-way bleed system is user-friendly, but always clean up any spills right away. Mineral oil is less toxic than DOT fluid but still harms paint and rubber.
If you have “ice-tech” rotors or pads, you might notice less brake fade on long descents—these parts stay cooler and help with performance.

Credit: www.fondation-enovos.lu
Maintenance Mistakes Beginners Make
Many riders skip these steps:
- Not cleaning rotors and pads before adjustment
- Using metal tools on pads
- Forgetting gloves
- Not checking pad thickness regularly
- Ignoring soft levers
Skipping cleaning leads to poor braking. Metal tools can scratch pads and cause noise. Always use plastic levers and gloves.
Another common mistake is rushing. Take your time during each step. Small errors like overtightening bolts, not seating the wheel fully, or letting dirt get into the system can lead to bigger problems.
If you’re unsure about any step, consult your brake’s manual or watch an official video guide. It’s better to double-check than to risk your safety.
Safety Precautions
Never use bike degreaser or chain oil near brakes. These products destroy brake pads. If pads get contaminated, replace them. Always test brakes at low speed before riding fast.
Wear eye protection when bleeding brakes—fluid can spray out unexpectedly. Always keep brake fluid away from paint and rubber, as it can cause damage.
Dispose of old brake fluid responsibly. Don’t pour it down the drain. Take it to a recycling center or follow local disposal rules.
When To Seek Professional Help
If you notice leaking fluid, cracked calipers, or feel unsure during bleeding, visit a bike shop. Hydraulic systems are complex and mistakes can be costly. Shops have tools and expertise to fix tough problems.
Don’t try to fix a major leak or replace hoses at home unless you have experience. If your brake lever sinks to the bar or you see fluid dripping, stop riding and get help. Your safety is worth the cost of a professional repair.
Optimizing Brakes For Different Riding Styles
Mountain biking has many styles:
- Cross-country: Lighter brakes, smaller rotors
- Trail: Medium size rotors, strong pads
- Downhill: Large rotors, metallic pads, frequent checks
Adjust brakes for your style. Downhill riders need more power and frequent bleeding. Cross-country riders can use lighter setups.
If you do a mix of riding, choose a setup that balances power and weight. Trail riders often use 180mm rotors with semi-metallic pads for all-around performance. Downhill bikes need the most robust brakes, while XC racers focus on keeping weight low.
Environmental Factors Affecting Brakes
Mud, rain, and sand wear pads faster and can cause contamination. In wet conditions, metallic pads last longer. In dry climates, organic pads are often quieter.
Temperature also affects fluid. Cold weather can make fluid thicker, while heat can cause fading. Check brakes before every ride in extreme conditions.
If you ride in snow or freezing temperatures, check for ice buildup around the caliper and rotor. In hot climates, avoid dragging the brakes on long descents, as this can overheat the fluid and cause fade.
After riding in mud or rain, clean your brakes thoroughly. Mud can pack into the caliper and wear pads quickly. Carry a small brush or rag in your toolkit for quick cleanups.
Upgrading Brake Components
If your bike has entry-level brakes, upgrading calipers or rotors improves power. Brands like Shimano, SRAM, and Magura offer different models. Compare specs before buying.
When upgrading, consider compatibility. Not all calipers work with all levers. Check hose fittings, rotor sizes, and frame mounting options. Higher-end brakes may offer tool-free adjustments, better heat management, and lighter weight.
If you want to reduce maintenance, choose models with easy-bleed ports and replaceable hose fittings. Some new models use larger pistons or ceramic materials for better performance.
For more details, see Wikipedia’s bicycle brake page.
Frequently Asked Questions
How Do I Know If My Hydraulic Brakes Need Bleeding?
If your brake lever feels soft or pulls too close to the handlebar, or if braking power fades after a few hard stops, you likely need to bleed the brakes. Watch for visible air bubbles during bleeding as well.
Can I Use Any Brake Fluid In My Hydraulic Brakes?
No. Always use the fluid specified by your brake brand. Shimano uses mineral oil, while SRAM uses DOT fluid. Mixing fluids can damage seals and reduce braking power.
Why Are My Brakes Squealing After Adjustment?
Squealing often means dirty pads or rotors. Clean both with isopropyl alcohol. If noise continues, pads may be contaminated or worn out—replace them if needed.
How Often Should I Replace Brake Pads?
Replace pads when they are less than 1mm thick, or if you notice uneven wear or contamination. Heavy riders or those in muddy conditions should check pads monthly.
Is It Safe To Adjust Hydraulic Brakes Myself?
Yes, if you follow proper steps and use clean tools. For complex issues like leaking fluid or deep bleeding problems, visit a bike shop for help.
Adjusting hydraulic disc brakes can seem tricky at first, but with careful steps, you’ll have smooth, powerful braking for every ride. Remember to check and clean your brakes regularly, use the right tools, and test your adjustments before hitting the trails.
Well-tuned brakes mean safer, more confident mountain biking—so invest time in learning these skills.

Hello Guys! I am John Reese, a professional biker and my hobby is biking! I have been biking for last 12 years and I love using bikes while outing as well. Based on my experiences with the different type of bikes (mountain bikes, road bikes and hybrid bikes); I am sharing my opinion about various bikes so that a beginner can get started right away. Happy reading!