Adjusting mechanical disc brakes on a mountain bike can turn a frustrating ride into a smooth, confident adventure. Many riders, especially beginners, find this task confusing. But once you understand the basics and follow clear steps, you’ll gain better control, safer braking, and longer-lasting equipment.
This guide will help you adjust your mechanical disc brakes with practical advice, step-by-step instructions, and insights that most tutorials miss. Whether you’re fixing a noisy brake, improving stopping power, or preparing for a challenging trail, you’ll find everything you need right here.
Understanding Mechanical Disc Brakes
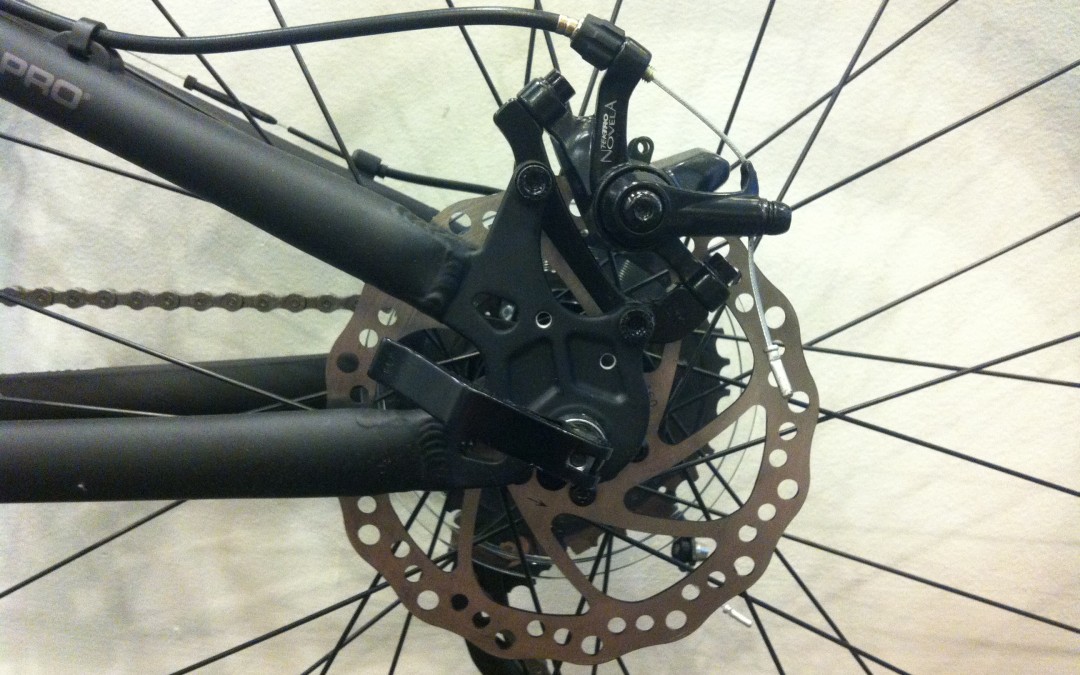
Mechanical disc brakes use cables to squeeze brake pads against a metal rotor. Unlike hydraulic brakes, they don’t use fluid. When you pull the brake lever, the cable moves an arm on the caliper, pressing the pads onto the rotor. This creates friction and stops the bike. Mechanical systems are popular because they’re easy to maintain, affordable, and work well in tough conditions.
Key Parts Of Mechanical Disc Brakes
- Brake lever: Attached to your handlebars, this pulls the cable.
- Brake cable: Connects the lever to the caliper.
- Caliper: Contains the brake pads and moves them onto the rotor.
- Rotor: The metal disc mounted to your wheel.
- Brake pads: Make contact with the rotor to slow the bike.
Many beginners miss how important cable tension and caliper alignment are. Even a small misalignment can cause noise, weak braking, or uneven pad wear.
For example, if the caliper isn’t centered, one pad might touch the rotor constantly, which wears the pad faster and creates annoying sounds. Or, if the cable is too loose, the lever could pull all the way without stopping the bike properly.
Mechanical Vs Hydraulic Disc Brakes
Mechanical brakes are easier for most riders to fix. Hydraulic systems offer smoother power but need special tools and skills. Here’s a quick comparison:
| Feature | Mechanical Disc Brakes | Hydraulic Disc Brakes |
|---|---|---|
| Maintenance | Easy, DIY friendly | Complex, needs tools |
| Cost | Affordable | Expensive |
| Adjustment | Manual, cable-based | Automatic, fluid-based |
| Stopping Power | Good for most trails | Excellent, strong |
Hydraulic brakes are often found on high-end bikes. They self-adjust as pads wear, which means less manual work. However, if you damage a hydraulic hose or need to replace fluid, the repair can be tricky and expensive.
Mechanical disc brakes let you quickly swap cables, pads, or adjust tension with basic tools. For riders who travel or ride in remote areas, mechanical brakes are often preferred because you can fix them without visiting a shop.
Signs Your Mechanical Disc Brakes Need Adjustment
Recognizing when your brakes need attention is the first step. Here are common signs:
- Squeaking or scraping sounds
- Weak braking power
- Brake lever feels too loose
- One pad touches rotor, other doesn’t
- Brake lever pulls all the way but bike doesn’t stop
These problems usually mean the caliper is misaligned, the cable is loose, or the pads are worn. Many riders ignore small noises, but they often signal bigger issues.
Sometimes, squeaking is just dust or water on the rotor, but persistent noise means something is misaligned or needs cleaning. If your lever feels soft or pulls too far, it can be dangerous. That’s a clear sign to check cable tension and pad position.
A common situation is when the bike stops poorly in wet weather. This can be caused by dirty pads or a cable that stretched over time. If you notice poor braking after washing your bike or riding in mud, check the brakes right away.
Tools And Preparation
Before adjusting your brakes, gather these tools:
- Allen wrenches (usually 5mm and 6mm)
- Cable cutters
- Phillips screwdriver
- Bike stand (optional, but helpful)
- Clean rag
- Isopropyl alcohol (for cleaning)
- Replacement brake pads (if needed)
Check your bike’s manual for exact tools. Some calipers need special wrenches. Always work in a clean, well-lit area.
Having a bike stand can make the process easier, but you can also turn your bike upside down or lean it against a stable surface. Make sure the wheel spins freely and you can reach both sides of the caliper.
Safety First
- Make sure your bike is stable.
- Keep hands clear of the rotor when spinning wheels.
- Wear gloves to protect from sharp parts.
Rotors can be very sharp and can cause cuts if you slip. Also, avoid touching the rotor with oily or dirty hands, as this can transfer grease and reduce braking power.
Many riders forget to check if the bike is stable before working. If your bike falls over during adjustment, you can damage components or hurt yourself. Always double-check stability before starting.
Step-by-step: Adjusting Mechanical Disc Brakes
Let’s walk through each step in detail. Follow these instructions carefully for best results.
1. Inspect The Brake System
Start by checking all parts:
- Look for worn or frayed cables.
- Check the rotor for warping or deep grooves.
- Inspect brake pads for thickness (should be at least 1.5mm).
If anything looks damaged, replace it before adjusting.
It’s common for cables to fray near the caliper or lever. If you see broken wires, replace the cable. Deep grooves or bends in the rotor mean you should consider a new rotor. Thin pads can cause metal-to-metal contact, which damages the rotor and reduces braking.
2. Clean The Rotor And Pads
Use isopropyl alcohol and a clean rag. Dirt, oil, and debris can cause noise and weak braking. Don’t use lubricants or household cleaners.
- Wipe the rotor thoroughly.
- Clean the pads gently (don’t sand unless you know how).
Cleaning removes invisible oil from your hands or the environment. If you ride in muddy or urban areas, cleaning is even more important. Don’t use WD-40 or similar sprays—these create a slippery surface and will ruin braking.
If you notice shiny or glazed pads, lightly sanding them with fine sandpaper can restore grip. But sanding pads is best for experienced riders; beginners should focus on cleaning.
3. Center The Caliper
Misaligned calipers are the most common cause of brake issues. Here’s how to center:
- Loosen the two caliper mounting bolts with your Allen wrench.
- Squeeze the brake lever hard. This centers the caliper over the rotor.
- While holding the lever, tighten the bolts.
- Release the lever and check the alignment.
If pads still rub, repeat. Sometimes, slight adjustments are needed.
A trick is to wiggle the caliper slightly as you tighten the bolts. This helps find the perfect center. If the caliper doesn’t move easily, loosen the bolts a little more. After tightening, spin the wheel and check for rubbing.
If you see gaps between pads and rotor, adjust again.
Some calipers have small alignment marks. Use these to help center the caliper if you’re unsure.
4. Adjust Pad Position
Most mechanical calipers have one fixed pad (inside) and one moving pad (outside). You need to adjust both.
- Turn the pad adjustment screw (usually a dial or Allen bolt) on the caliper.
- Move the fixed pad closer to the rotor (about 0.5mm away).
- Adjust the moving pad so it’s the same distance.
Pads should be close to the rotor but not touching. If they touch, you’ll hear scraping.
If your caliper has a dial, turn it slowly while watching the gap. If you feel resistance or the pad doesn’t move, check for dirt or damage. Many beginners forget to adjust both pads, leading to uneven wear.
Some calipers allow fine adjustments with a small Allen key. Move each pad a little at a time and check by spinning the wheel. If you hear a light scrape, back off the pad slightly.
5. Set Cable Tension
Cable tension controls how far the lever moves before the pads contact the rotor.
- Loosen the cable anchor bolt on the caliper.
- Pull the cable tight, but not overly tight.
- Retighten the anchor bolt.
- Test the lever. It should move about halfway before engaging.
Too loose and the lever feels floppy. Too tight and pads rub constantly.
To pull the cable tight, use pliers for a firm grip. Some calipers have a cable guide or slot—make sure the cable sits correctly. After tightening, test the lever several times to make sure the pads engage smoothly.
If you notice the lever is still loose, repeat the process. It’s better to adjust slowly than to overtighten.
6. Fine-tune The Lever Feel
If your lever is still too loose or too tight, use the barrel adjuster (usually near the lever or caliper):
- Turn the barrel adjuster out to tighten the cable (makes lever firmer).
- Turn it in to loosen the cable (makes lever softer).
A good lever feel is firm, with enough travel to avoid accidental braking.
Barrel adjusters are small but powerful tools. Turning them only one or two turns can make a big difference. If you ride with gloves, you might prefer a slightly firmer lever. If you have small hands, a softer feel can make braking easier.
Don’t forget to check the other lever if your bike has front and rear disc brakes. Adjust both for similar feel.
7. Test The Brakes
Spin the wheel and pull the lever. The wheel should stop quickly without noise. If you hear rubbing, adjust pad position again. Try braking hard while riding slowly to check power.
Testing on a flat surface first is safest. If you feel the bike doesn’t stop evenly, check both front and rear brakes. Try different speeds and brake pressures to make sure the adjustment is correct.
If you notice the wheel stops too suddenly or skids, pads may be too close. If it takes too long to stop, pads may be too far or cable too loose.
8. Check For Pad Rub
Sometimes, one pad touches the rotor when you aren’t braking. This can be caused by misalignment or a bent rotor.
- Spin the wheel and watch for pad contact.
- If needed, use a rotor truing tool to straighten a bent rotor.
Rotor truing tools are small metal wrenches with slots. Gently bend the rotor in small amounts. Too much force can crack the rotor, so go slow. If your rotor is badly bent, replace it.
If you don’t have a truing tool, you can use an adjustable wrench. Always protect the rotor with a cloth to avoid scratches.
9. Replace Worn Pads
If pads are less than 1.5mm thick, replace them. Follow your caliper’s instructions, but usually:
- Remove the retaining pin or clip.
- Pull out old pads.
- Insert new pads.
- Re-align caliper as above.
Pads can be tricky to remove if dirty or stuck. Use needle-nose pliers for a better grip. When installing new pads, make sure they face the rotor correctly—some pads are marked with “L” and “R” for left and right.
After replacing, always clean the rotor and adjust pad position.
10. Final Check
- Make sure all bolts are tight.
- Test brakes in a safe area.
- Listen for noise and check stopping power.
It’s easy to forget to tighten bolts after adjusting. Loose bolts cause calipers to shift during riding, which leads to poor braking or damage.
Test your brakes in a parking lot or driveway before heading out on trails. Listen for any unusual sounds and feel for smooth, powerful stopping.
Common Mistakes And How To Avoid Them
Even experienced riders make mistakes when adjusting mechanical disc brakes. Avoid these errors:
- Over-tightening the cable: This causes constant pad rub and quick pad wear.
- Ignoring rotor cleanliness: Oil or dirt reduces braking power.
- Not centering the caliper: Leads to uneven braking and pad wear.
- Skipping pad replacement: Worn pads damage rotors and reduce safety.
- Using the wrong tools: Stripped bolts and damaged parts are common if you use incorrect sizes.
Many beginners forget to check pad thickness before adjusting. Always inspect pads first.
Another mistake is forgetting to check both brakes. Adjusting only the front or rear can make your bike unbalanced, especially on tricky trails. Always adjust and test both brakes for consistent performance.
Lastly, some riders use household lubricants on cables, which can attract dirt and cause cables to stick. Always use bike-specific lubricants.
Troubleshooting Brake Problems
If your brakes still don’t work well after adjustment, try these solutions:
Weak Braking Power
- Check for glazed pads (shiny surface). Replace or lightly sand.
- Clean rotor and pads.
- Increase cable tension slightly.
Glazed pads can happen after long descents or if you brake hard repeatedly. Light sanding with fine paper can help. If pads are too old, replace them.
Squeaking Or Scraping
- Clean rotor and pads.
- Check for pad misalignment.
- Look for debris in the caliper.
Sometimes, squeaking means the pads are too close, or the rotor has a small bend. Remove the wheel and check for small rocks or dirt stuck in the caliper.
Lever Pulls Too Far
- Tighten cable.
- Adjust barrel adjuster.
- Check for worn pads.
If you tighten the cable and the lever is still loose, check the cable housing for damage. A stretched cable won’t work well.
One Pad Rubbing
- Re-center caliper.
- Adjust fixed pad position.
Pad rubbing can also be caused by a dirty or sticky caliper. Clean and lubricate the moving parts if needed.
Rotor Bent
- Use rotor truing tool carefully.
- Replace rotor if badly damaged.
If you ride in rocky terrain or crash, the rotor can bend. Small bends can be fixed, but cracks or severe warping mean a new rotor is needed.
Credit: www.montaguebikes.com
Comparing Brake Pad Materials
Choosing the right pad material affects braking feel, noise, and durability. Here’s a comparison:
| Pad Material | Noise | Durability | Braking Power | Best For |
|---|---|---|---|---|
| Organic/Resin | Low | Medium | Good | Dry conditions, quiet rides |
| Sintered/Metal | High | High | Excellent | Muddy, wet, downhill |
| Semi-metallic | Medium | Medium-High | Very good | Mixed conditions |
Many beginners buy pads only based on price. But material matters more for performance and longevity.
For example, organic pads are quieter and softer, making them ideal for city riding or dry trails. Sintered pads can handle heat and wet conditions but are noisier. Semi-metallic pads balance both.
If you ride steep, muddy trails, choose sintered pads for durability. For easy rides or commuting, organic pads are enough.
Maintenance Tips For Long-lasting Brakes
Keeping your brakes in top shape is easy if you follow these tips:
- Clean rotors and pads monthly.
- Check pad thickness every 2-3 weeks.
- Inspect cables for wear every month.
- Lubricate cable (with bike-specific lube) once per season.
- Keep bolts tight, but avoid over-tightening.
A simple routine prevents big problems and expensive repairs.
Also, avoid storing your bike in damp places. Moisture causes cables to rust and pads to degrade. If you ride in rain or mud, clean brakes after each ride.
Many riders forget to check cable housing. If the housing is cracked, water and dirt can enter, causing the cable to stick. Replace housing every year for best performance.
When To Seek Professional Help
Some brake problems need expert hands. Visit a bike shop if:
- Rotor is badly bent or cracked.
- Caliper won’t center even after multiple tries.
- Cable is frayed or damaged inside housing.
- Lever feels spongy even after adjustment.
Professionals have special tools and experience. Don’t risk your safety if you’re unsure.
If you’re planning a big trip or race, have a mechanic check your brakes for peace of mind. Shops can spot problems you might miss, like tiny cracks in the caliper or hidden cable damage.
Upgrading Mechanical Disc Brakes: Is It Worth It?
Many mountain bikers consider upgrading their brakes. Here’s what to think about:
Reasons To Upgrade
- Want stronger stopping power
- Ride steep or technical trails
- Brake levers feel uncomfortable
- Need lighter weight for racing
What To Upgrade
- Better quality pads (sintered for downhill, organic for quiet)
- Upgraded rotors (larger size for more power)
- Stronger cables and housing
Mechanical Vs Hydraulic Upgrade
Hydraulic brakes offer smoother, stronger stopping. But they cost more and need professional setup. Mechanical systems can be improved with quality pads, cables, and rotors.
| Upgrade | Cost | Difficulty | Performance Gain |
|---|---|---|---|
| Better Pads | Low | Easy | Moderate |
| Larger Rotor | Medium | Medium | High |
| Hydraulic System | High | Hard | Very High |
Upgrading pads is simple and cheap. Changing rotors requires more skill and tools but gives a big boost in power. Hydraulic upgrades are expensive and usually need a shop.
If you’re happy with your brakes but want a little more power, try larger rotors. If you want smoother feel and less maintenance, hydraulic brakes are the best—but only if you’re ready for complex repairs.

Credit: www.infinibandta.org
Real-world Examples
Let’s look at a few cases to illustrate:
- Trail Rider in Colorado: After noisy brakes and poor stopping, found the fixed pad was too far from rotor. Adjusted pad position and cable tension. Result: Quiet, powerful brakes.
- Urban Commuter: Noticed lever pulled too far. Used barrel adjuster to tighten cable. Improved control and safety.
- Beginner’s Mistake: Replaced pads but didn’t clean rotor. Brakes squeaked until rotor was cleaned with alcohol.
These examples show how small adjustments make big differences.
Another example: A rider on muddy UK trails switched from organic to sintered pads and noticed stronger braking, even when wet. This simple pad change made rides safer and more enjoyable.
Non-obvious Insights Most Riders Miss
- Pad alignment is more important than cable tension. Many focus on the cable, but if pads aren’t correctly positioned, brakes will never feel right.
- Rotor cleanliness affects braking power more than pad material. Dirty rotors reduce friction, even with expensive pads.
- Cable housing condition matters. Old or dirty housing creates resistance, making the lever feel stiff or slow.
- Temperature affects braking feel. On cold mornings, cable tension drops slightly, so check before big rides.
Another advanced insight: If you ride often in steep or technical areas, swap pads and rotors more frequently for best performance. Also, if you upgrade to larger rotors, remember to check if your frame and fork allow the size.

Credit: www.youtube.com
Frequently Asked Questions
How Often Should I Adjust Mechanical Disc Brakes?
Adjust them every time you notice poor braking, noise, or lever looseness. For regular maintenance, check brakes every 2-3 weeks, especially before long rides or tough trails.
If you ride daily, check brakes weekly. After big rides or crashes, inspect immediately.
What’s The Difference Between Adjusting And Replacing Pads?
Adjusting pads means changing their position for best contact with the rotor. Replacing pads is needed when they’re worn below 1. 5mm thick or are damaged. Always adjust after replacing.
If pads are contaminated by oil, replace them. Adjustment won’t fix contaminated pads.
Can I Use Any Brake Pad With My Caliper?
No, pads come in different shapes and materials. Check your caliper model and buy pads made for it. Using the wrong pads can cause poor braking or damage.
Some pads are designed for specific brands or caliper types. Double-check before buying.
Why Does My Brake Lever Feel Spongy?
Usually, this means the cable is loose or stretched. Tighten with the barrel adjuster or reset cable tension. If still spongy, check for worn pads or damaged cable housing.
If you have a new cable, it may stretch after a few rides. Re-adjust for best feel.
Should I Lubricate Mechanical Disc Brakes?
Never lubricate the rotor or pads. Only lubricate the cable, and use bike-specific lube. Oil on the rotor or pads can cause dangerous loss of braking power. Always clean parts with isopropyl alcohol.
If you accidentally get oil on the rotor, clean immediately and replace pads if needed.
Final Thoughts
Adjusting mechanical disc brakes on a mountain bike is a skill every rider should know. It keeps your bike safe, your rides smooth, and your gear lasting longer. With the right tools, careful steps, and regular checks, you’ll solve most brake problems on your own. If you’re ever unsure, ask a local bike shop for help or check guides from experts like Park Tool. Remember, good brakes mean more control, confidence, and fun on every ride.

Hello Guys! I am John Reese, a professional biker and my hobby is biking! I have been biking for last 12 years and I love using bikes while outing as well. Based on my experiences with the different type of bikes (mountain bikes, road bikes and hybrid bikes); I am sharing my opinion about various bikes so that a beginner can get started right away. Happy reading!